> ## Documentation Index
> Fetch the complete documentation index at: https://docs.requestly.com/llms.txt
> Use this file to discover all available pages before exploring further.
# Generate API Test Cases using the Test Authoring Agent
> Learn how to automatically author Post-response API test scripts using the Test Authoring Agent in Requestly. Use natural language instructions to create reliable, comprehensive API tests without manually writing JavaScript.
The Test Authoring Agent is a Requestly-integrated AI agent that authors executable Post-response test scripts directly from real API request and response data. It removes repetitive, error-prone manual work and helps engineers and QA teams validate API behavior faster with consistent coverage.
Simply describe what you want to validate in plain English. The agent analyzes your latest API response and produces ready-to-run test cases for your current request.
**Note**: The Test Authoring Agent is available only on **Pro plans and above**.
## Getting Started with AI Test Cases Generator
The Test Authoring Agent requires an actual API response to understand structure, values, and risk areas.
1. Open any request in the API Client
2. Click the **Send** button to execute the request
3. Wait for the response to be received
Once the response is available:
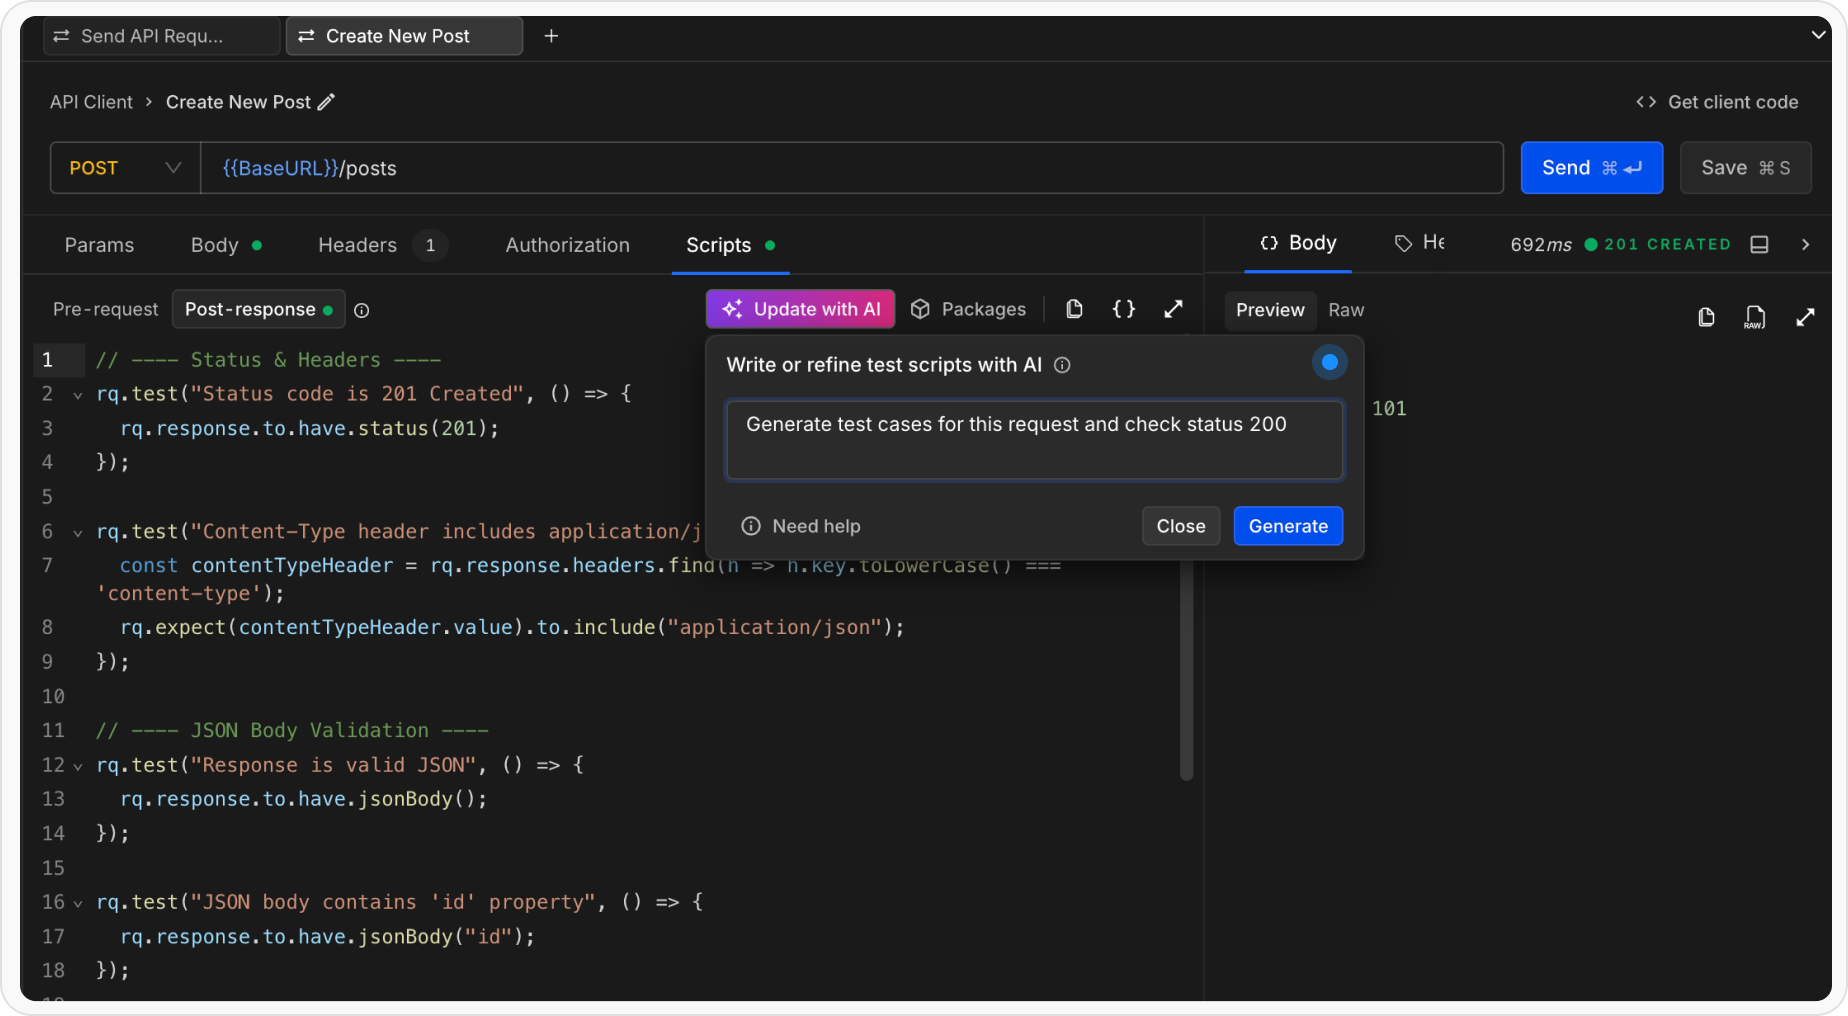
1. Navigate to the **Scripts** section
2. Open the **Post-response** tab
3. Click **Generate Tests**
This enables the Update with AI button.
Describe what the tests should validate using plain English. The agent understands API context, response payloads, and common testing patterns.
**Example instructions**
* "Generate test cases"
* "Test that status is 200 and success is true"
* "Ensure the response has id, name, and email fields"
* "Validate pagination fields like page, limit, and total"
* "Check that items array is not empty"
* "Verify all timestamps are valid ISO 8601 dates"
* "Add schema validation for the response"
* "Test missing required fields"
Click **Generate** to continue.
The Test Authoring Agent presents the generated output in a git-style diff view:
* Green lines show new tests that will be added
* Red lines show tests that will be removed
* Unchanged lines remain neutral
This human-in-the-loop review ensures full control before any script changes are applied.
After reviewing the diff, you can:
* **Accept** to replace the full Post-response script with the generated tests
* **Edit prompt** to refine your prompt and regenerate tests
* **Close** to discard all changes and keep the existing script
Accepted tests are saved immediately and are ready to run.
## What the Test Authoring Agent Creates
The agent authors structured, runnable API test cases using:
* rq.test blocks for clear test intent
* Chai-based assertions via rq.response and rq.expect
* Field-level, schema-level, and behavior-based validations
All generated tests are compatible with the Collection Runner and CI workflows.
## What the Test Authoring Agent Creates
The agent creates comprehensive test scripts using Requestly's [`rq.test`](/api-client/rq-api-reference/rq-test) and [`rq.expect`](/api-client/rq-api-reference/rq-expect) APIs with [Chai.js assertions](/api-client/tests#example-tests).
### Example Generated Tests
For a user API endpoint returning:
```json theme={null}
{
"status": 200,
"success": true,
"data": {
"id": 123,
"name": "John Doe",
"email": "john@example.com",
"role": "admin"
}
}
```
With instruction: **"Test that status is 200, success is true, and user object has required fields"**
The AI generates:
```javascript theme={null}
rq.test("Status code is 200", () => {
rq.response.to.have.status(200);
});
rq.test("Response is valid JSON", () => {
rq.response.to.have.jsonBody();
});
rq.test("Success field is true", () => {
rq.response.to.have.jsonBody("success", true);
});
rq.test("User data object has required fields (id, name, email, role)", () => {
rq.response.to.have.jsonBody("data.id");
rq.response.to.have.jsonBody("data.name");
rq.response.to.have.jsonBody("data.email");
rq.response.to.have.jsonBody("data.role");
});
```
## Advanced Test Scenarios
The AI Test Generator can handle complex scenarios:
### Schema Validation
Instruction: **"Validate the entire response structure against a schema"**
Generates schema validation tests that ensure the response conforms to the expected data structure.
```javascript theme={null}
rq.test("Response has valid schema", () => {
rq.response.to.have.jsonSchema({
type: "object",
required: ["status", "success", "data"],
properties: {
status: { type: "number" },
success: { type: "boolean" },
data: { type: "object" }
}
});
});
```
## Tips for Better AI-Generated Tests
1. **Be Specific**: Clearly state what you want to test. Instead of "test the response," say "test that status is 200 and email is a valid email address"
2. **Reference Field Names**: Mention specific fields you want validated. The AI understands JSON paths like "user.email" or "data.items\[0].status"
3. **Use Examples**: Phrases like "similar to POST requests" or "like production data" help the AI understand context
4. **Combine Multiple Concerns**: You can ask for multiple validations in one instruction: "Validate status is 200, success is true, and items array is not empty"
5. **Iterative Refinement**: Use the "Edit Instruction" feature to progressively enhance your tests
## Current Limitations
* AI Test Generator currently generates **Post-response scripts only**
* Requires an actual API response to analyze.
* Best results when the response has a well-structured JSON format
## Combining AI-Generated and Manual Tests
You don't need to rely entirely on AI-generated tests. You can:
1. **Start with AI**: Let the AI generate basic validation tests
2. **Add Custom Logic**: Manually add additional test cases or pre-request scripts
3. **Refine Iteratively**: Use the Edit Instruction feature to improve generated tests over time
4. **Mix Approaches**: Combine AI-generated assertions with custom JavaScript logic
## Running and Debugging Tests
After accepting the AI-generated tests, you can:
* **Run Tests**: Click the **Send** button again to execute the request and run all tests
* **View Results**: Check the test results in the **Test Results** panel
* **Debug**: Use `console.log()` in the script to debug test execution
* **Modify**: Edit the generated code directly if you need fine-grained control
See [Writing Tests](/api-client/tests) for more information about executing and debugging tests.
## Related Topics
* [Writing Tests](/api-client/tests) - Learn about manual test writing and all available assertion methods
* [Scripts](/api-client/scripts) - Understand Pre-request and Post-response scripts
* [Collection Runner](/api-client/collection-runner) - Run multiple requests and tests in sequence
* [RQ API Reference](/api-client/rq-api-reference) - Full documentation of the `rq` object and its methods
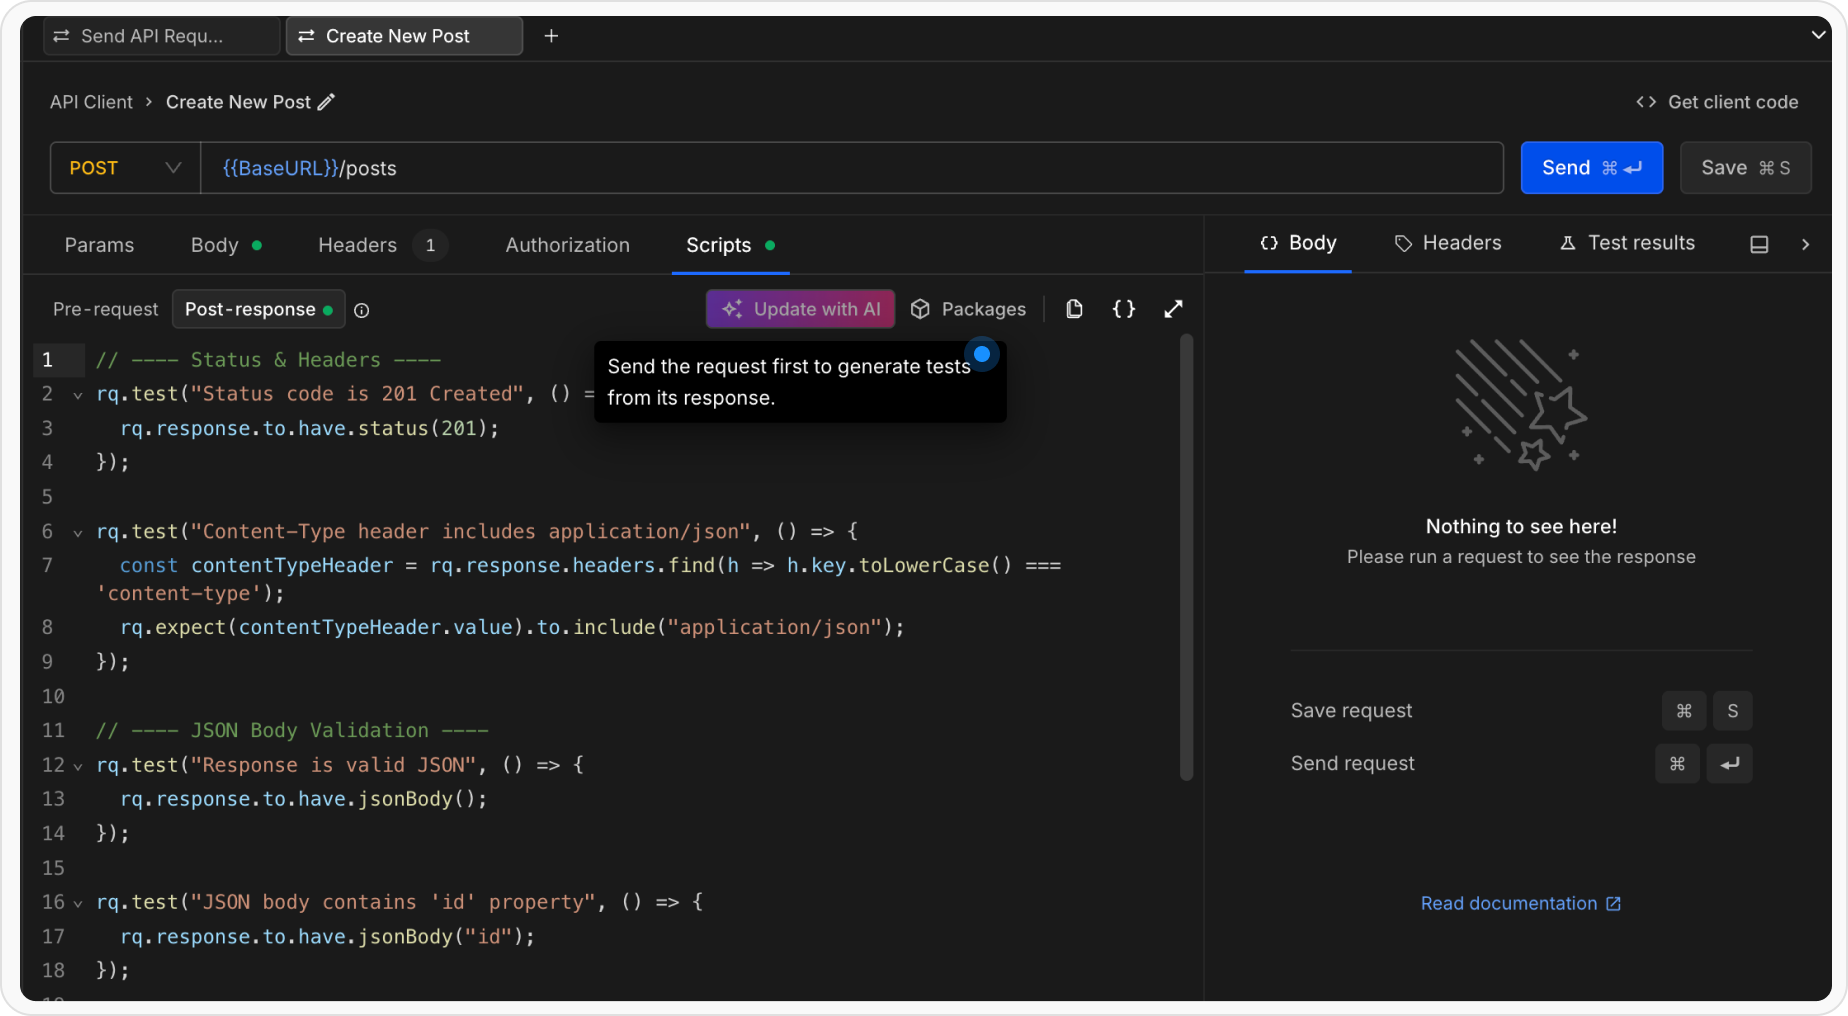 1. Open any request in the API Client
2. Click the **Send** button to execute the request
3. Wait for the response to be received
1. Open any request in the API Client
2. Click the **Send** button to execute the request
3. Wait for the response to be received
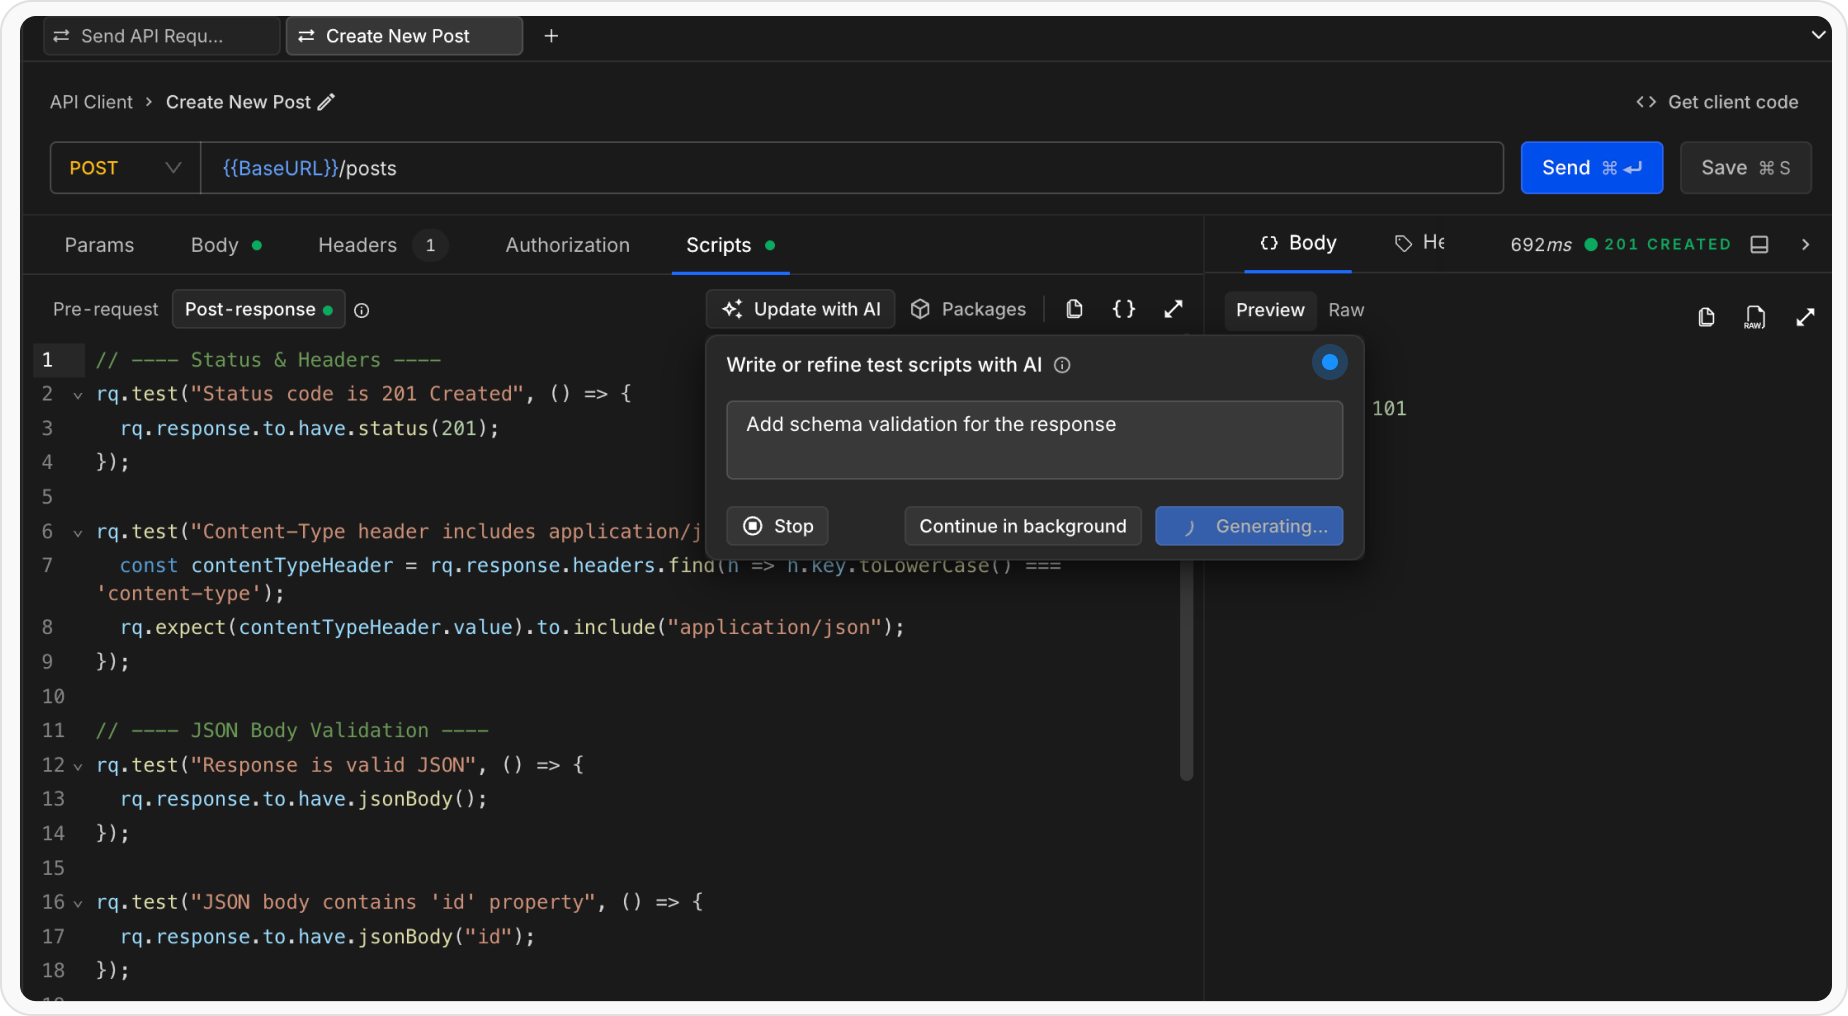 **Example instructions**
* "Generate test cases"
* "Test that status is 200 and success is true"
* "Ensure the response has id, name, and email fields"
* "Validate pagination fields like page, limit, and total"
* "Check that items array is not empty"
* "Verify all timestamps are valid ISO 8601 dates"
* "Add schema validation for the response"
* "Test missing required fields"
Click **Generate** to continue.
**Example instructions**
* "Generate test cases"
* "Test that status is 200 and success is true"
* "Ensure the response has id, name, and email fields"
* "Validate pagination fields like page, limit, and total"
* "Check that items array is not empty"
* "Verify all timestamps are valid ISO 8601 dates"
* "Add schema validation for the response"
* "Test missing required fields"
Click **Generate** to continue.
.png?fit=max&auto=format&n=O0nig7kakQWmexIp&q=85&s=9f7f4d8286e551cbf39b14e6ab1c9a7b)