> ## Documentation Index
> Fetch the complete documentation index at: https://docs.requestly.com/llms.txt
> Use this file to discover all available pages before exploring further.
# Authorization
> Learn how to set up and use various API Authorization methods in Requestly, including API Key, Bearer Token, Basic Auth, OAuth 1.0, and OAuth 2.0, for secure API interactions.
Requestly allows you to send authorization data along with your API requests. Authorization data confirms that the sender has permission to access the API.
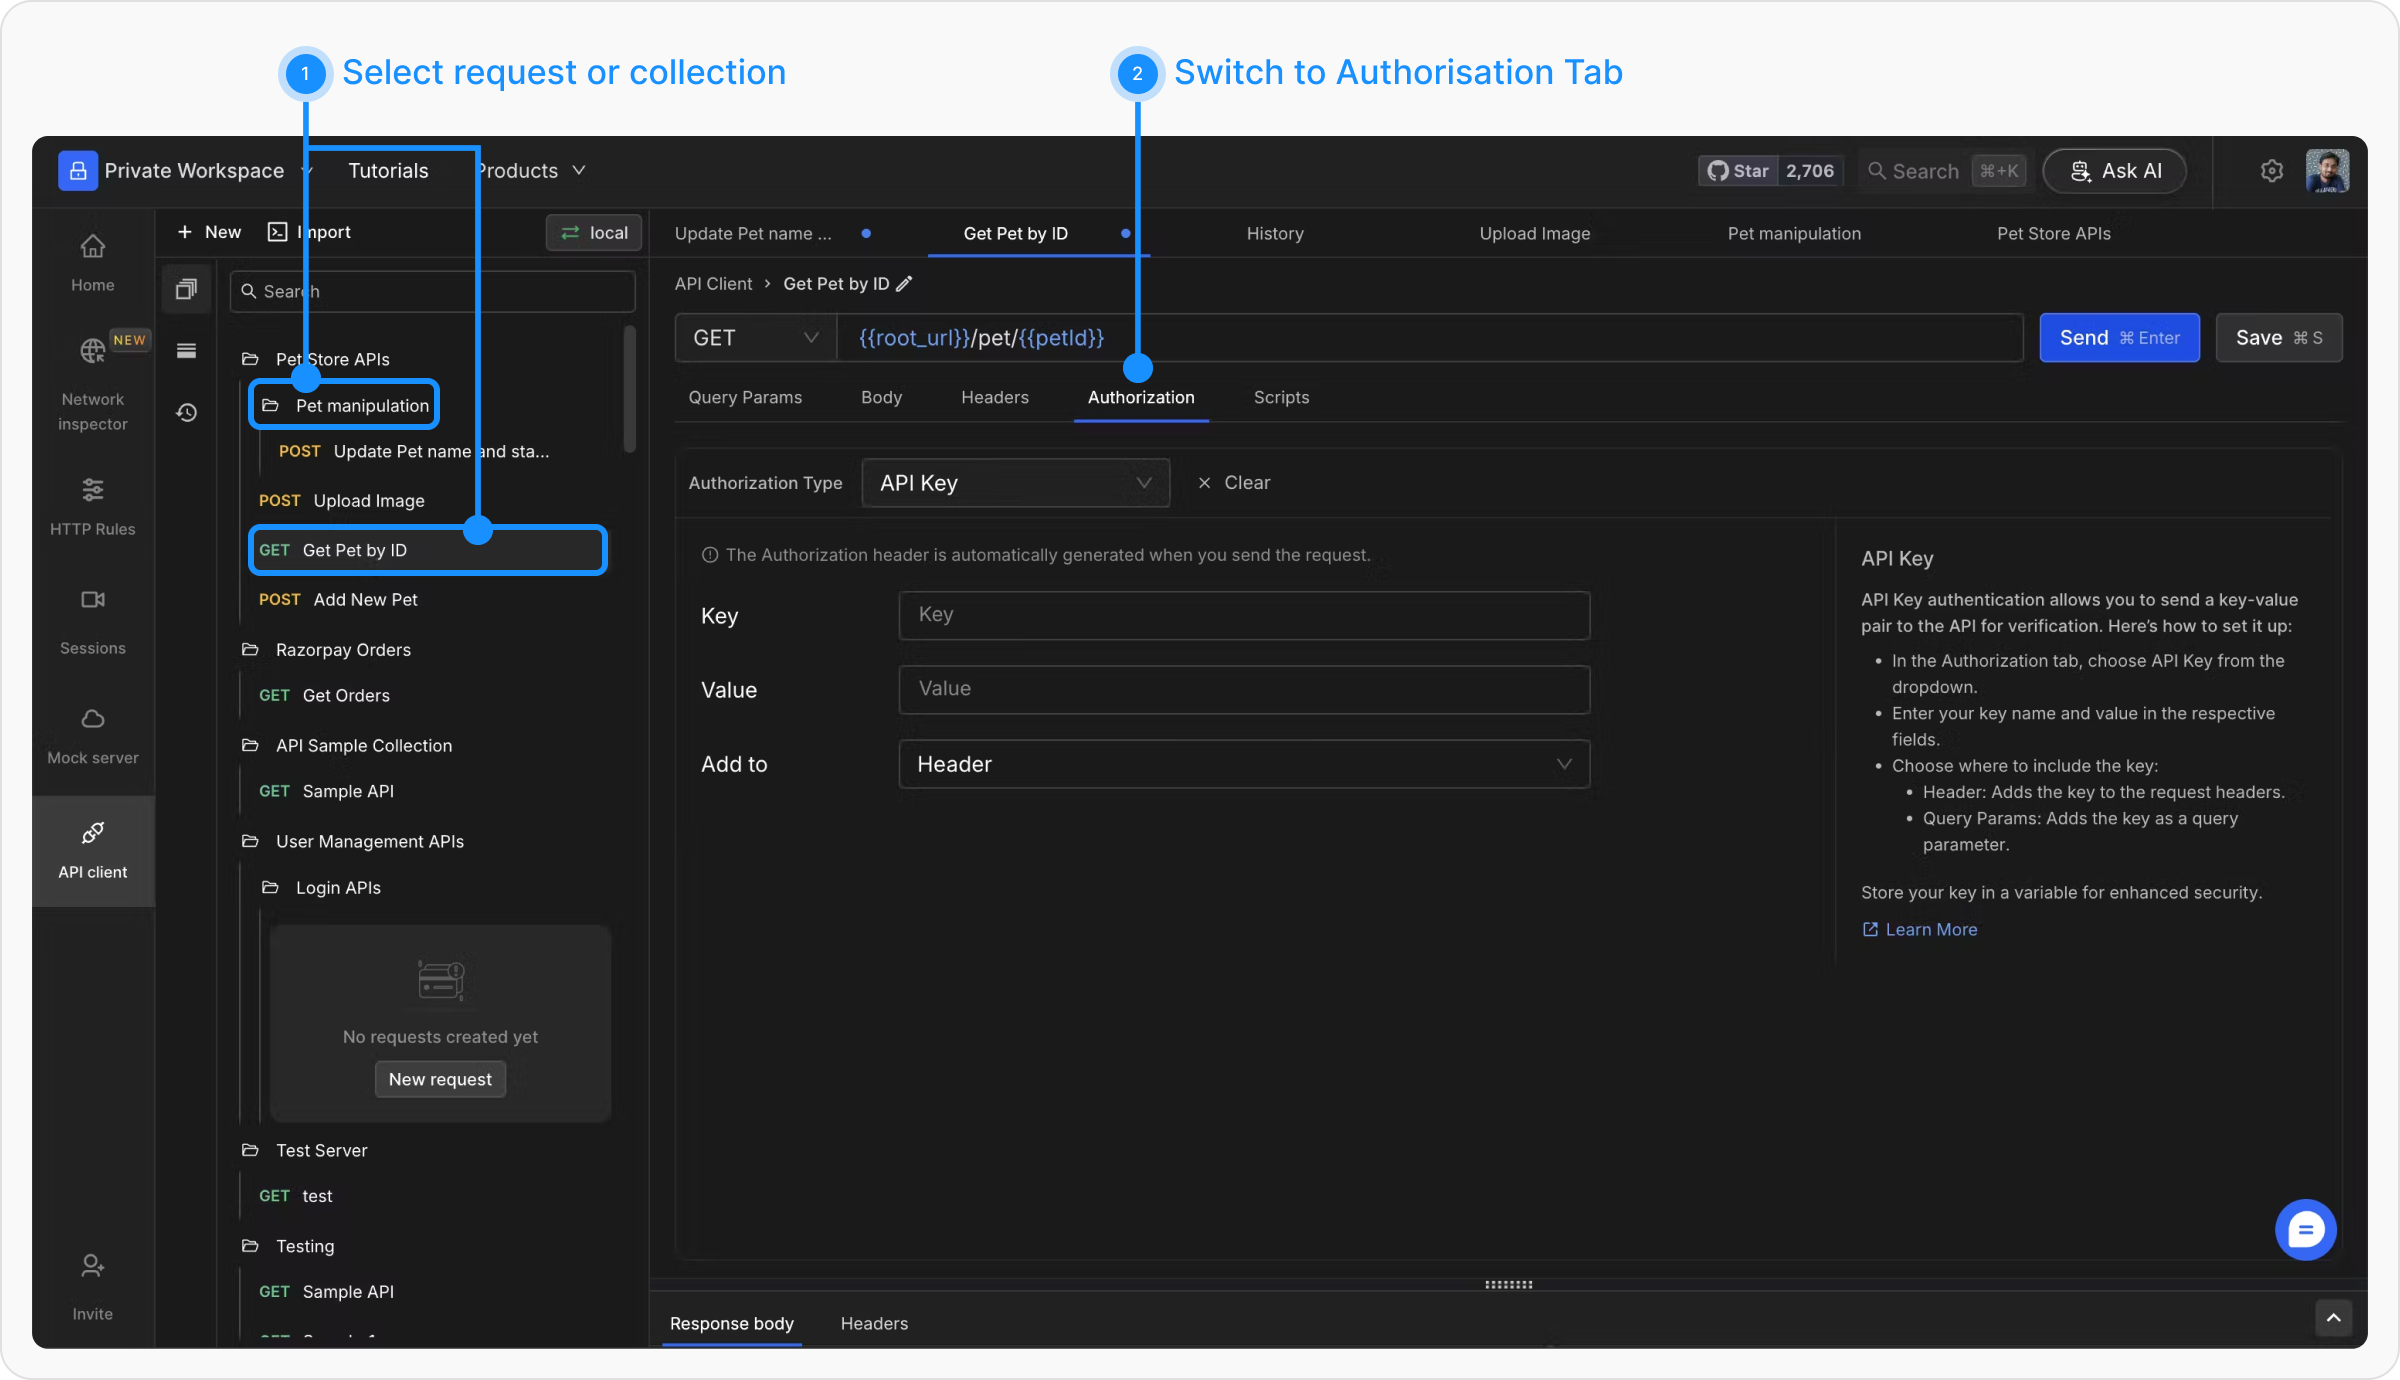
Authorization details can be configured in the Authorization tab at either the **collection level** or the **request level**. When authentication is set at the collection level, it applies to all APIs within that collection unless a specific request defines its own authorization settings or selects **NO-AUTH.** Requestly automatically inserts the appropriate authorization information into the necessary sections of the request based on the chosen authentication type.
## Steps to Add Authorization
Click on any request or collection to begin setting up authorization.
1. Go to the **Authorization** tab.
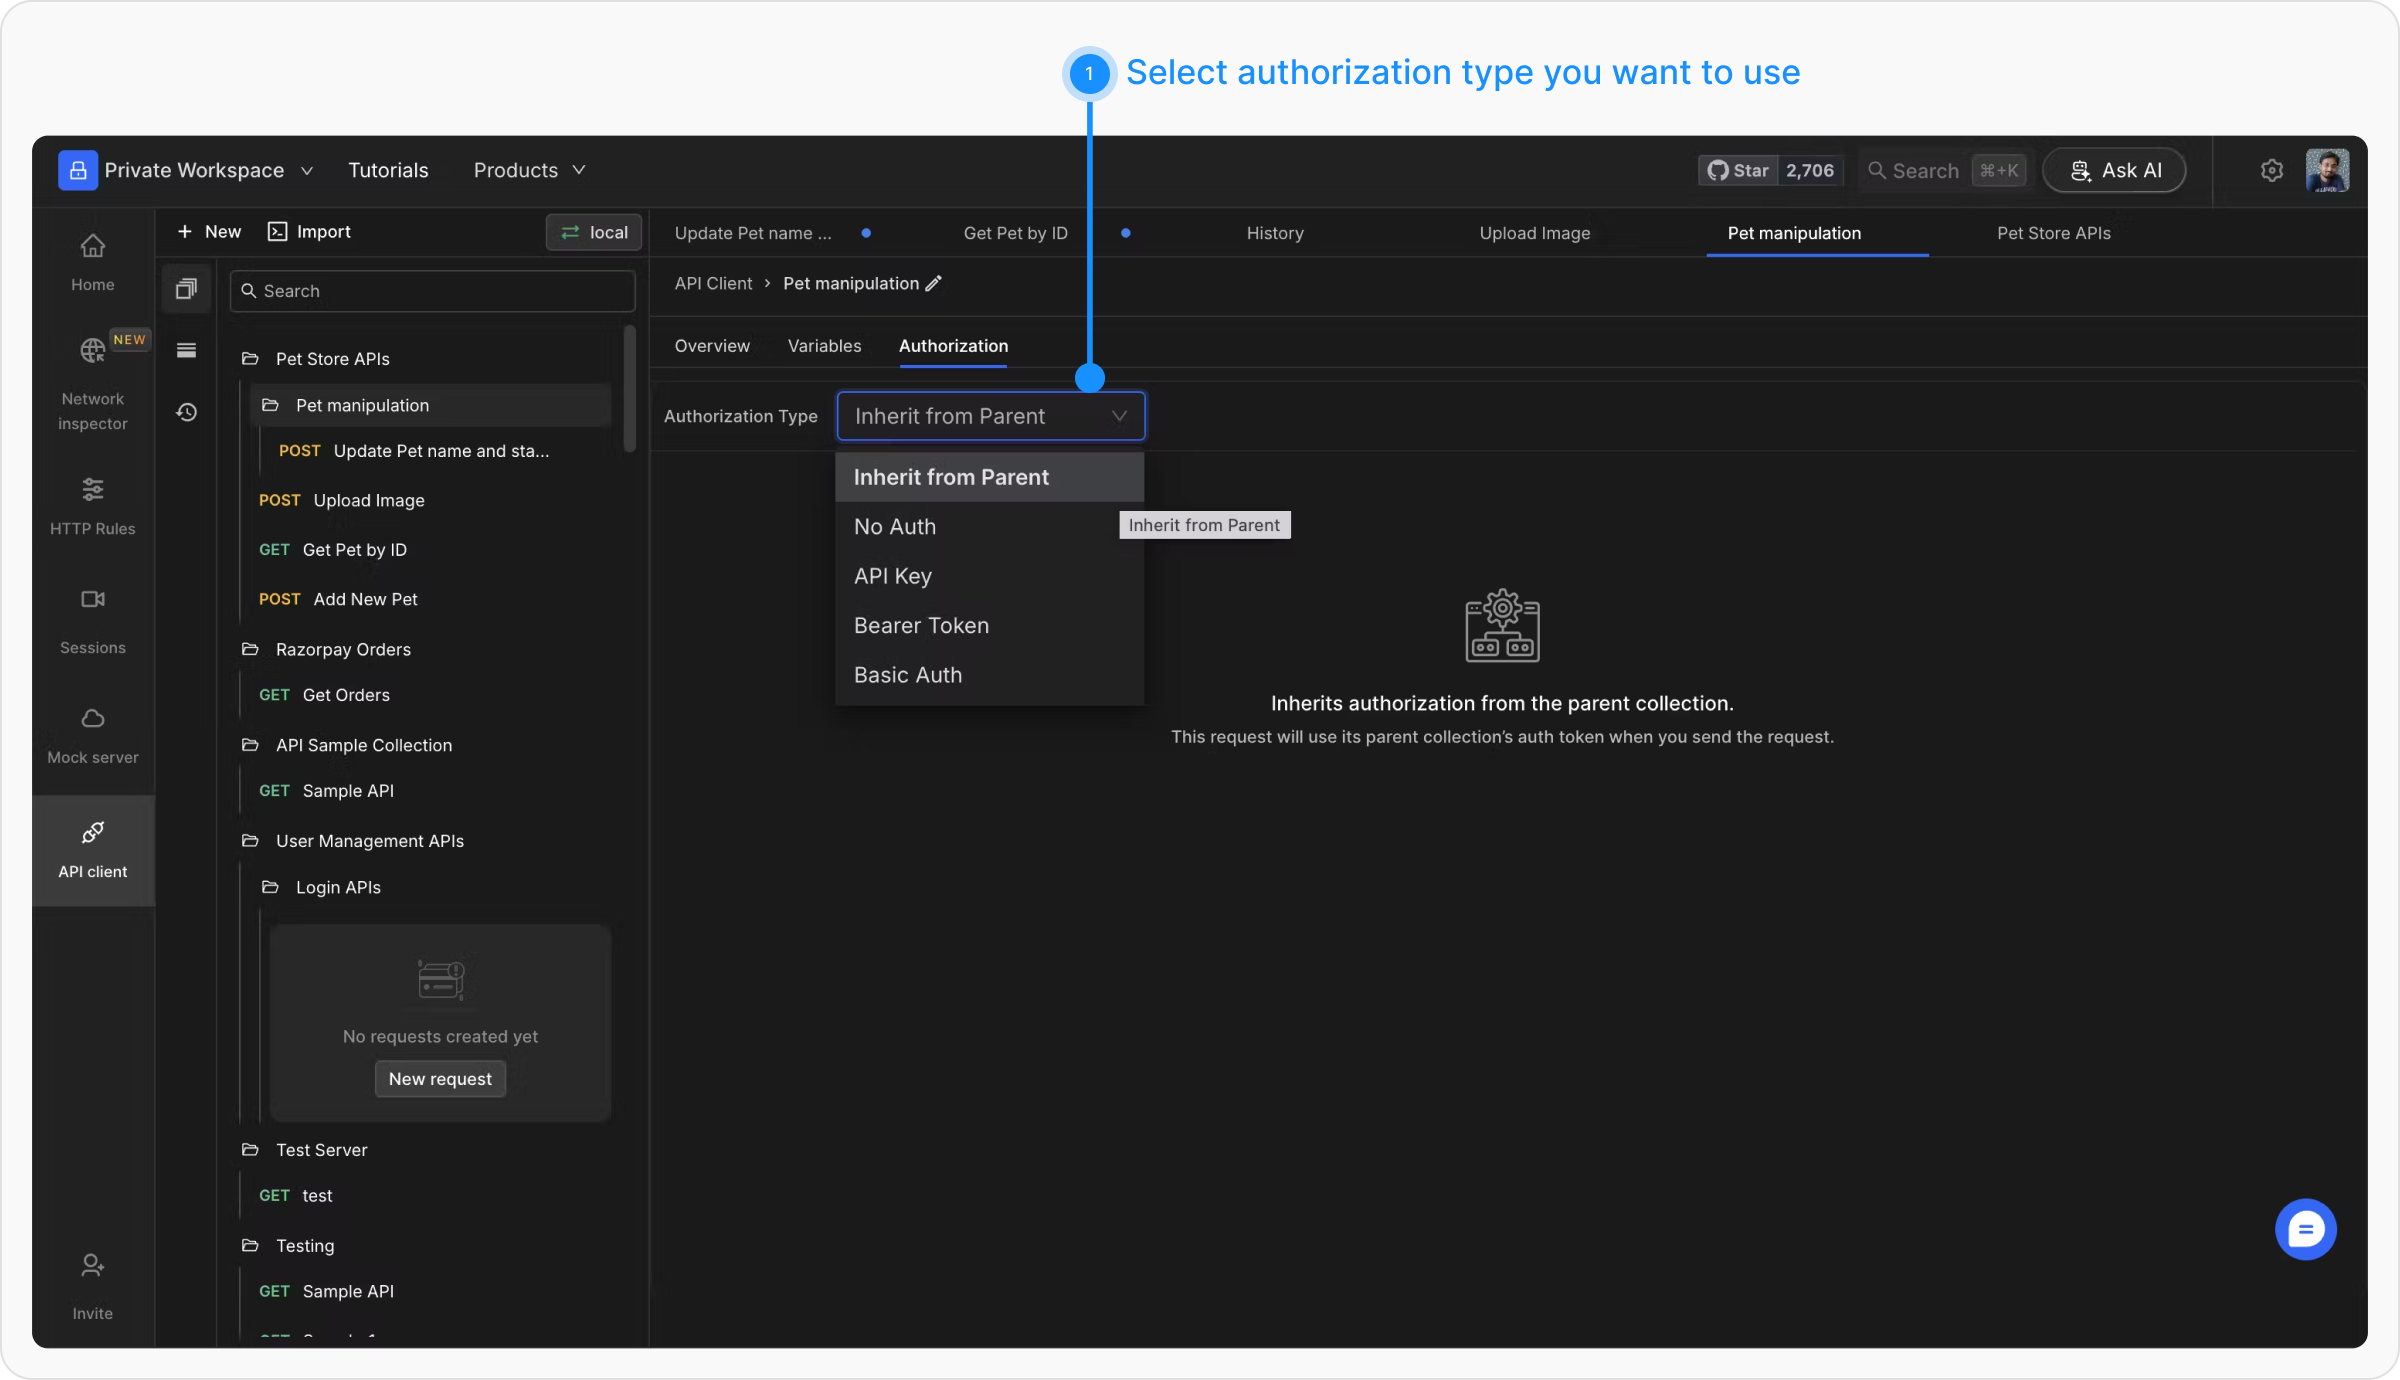
2. Choose the appropriate authorization type from the dropdown menu.
Each authorization type has specific fields that must be filled. Below are the details for each type:
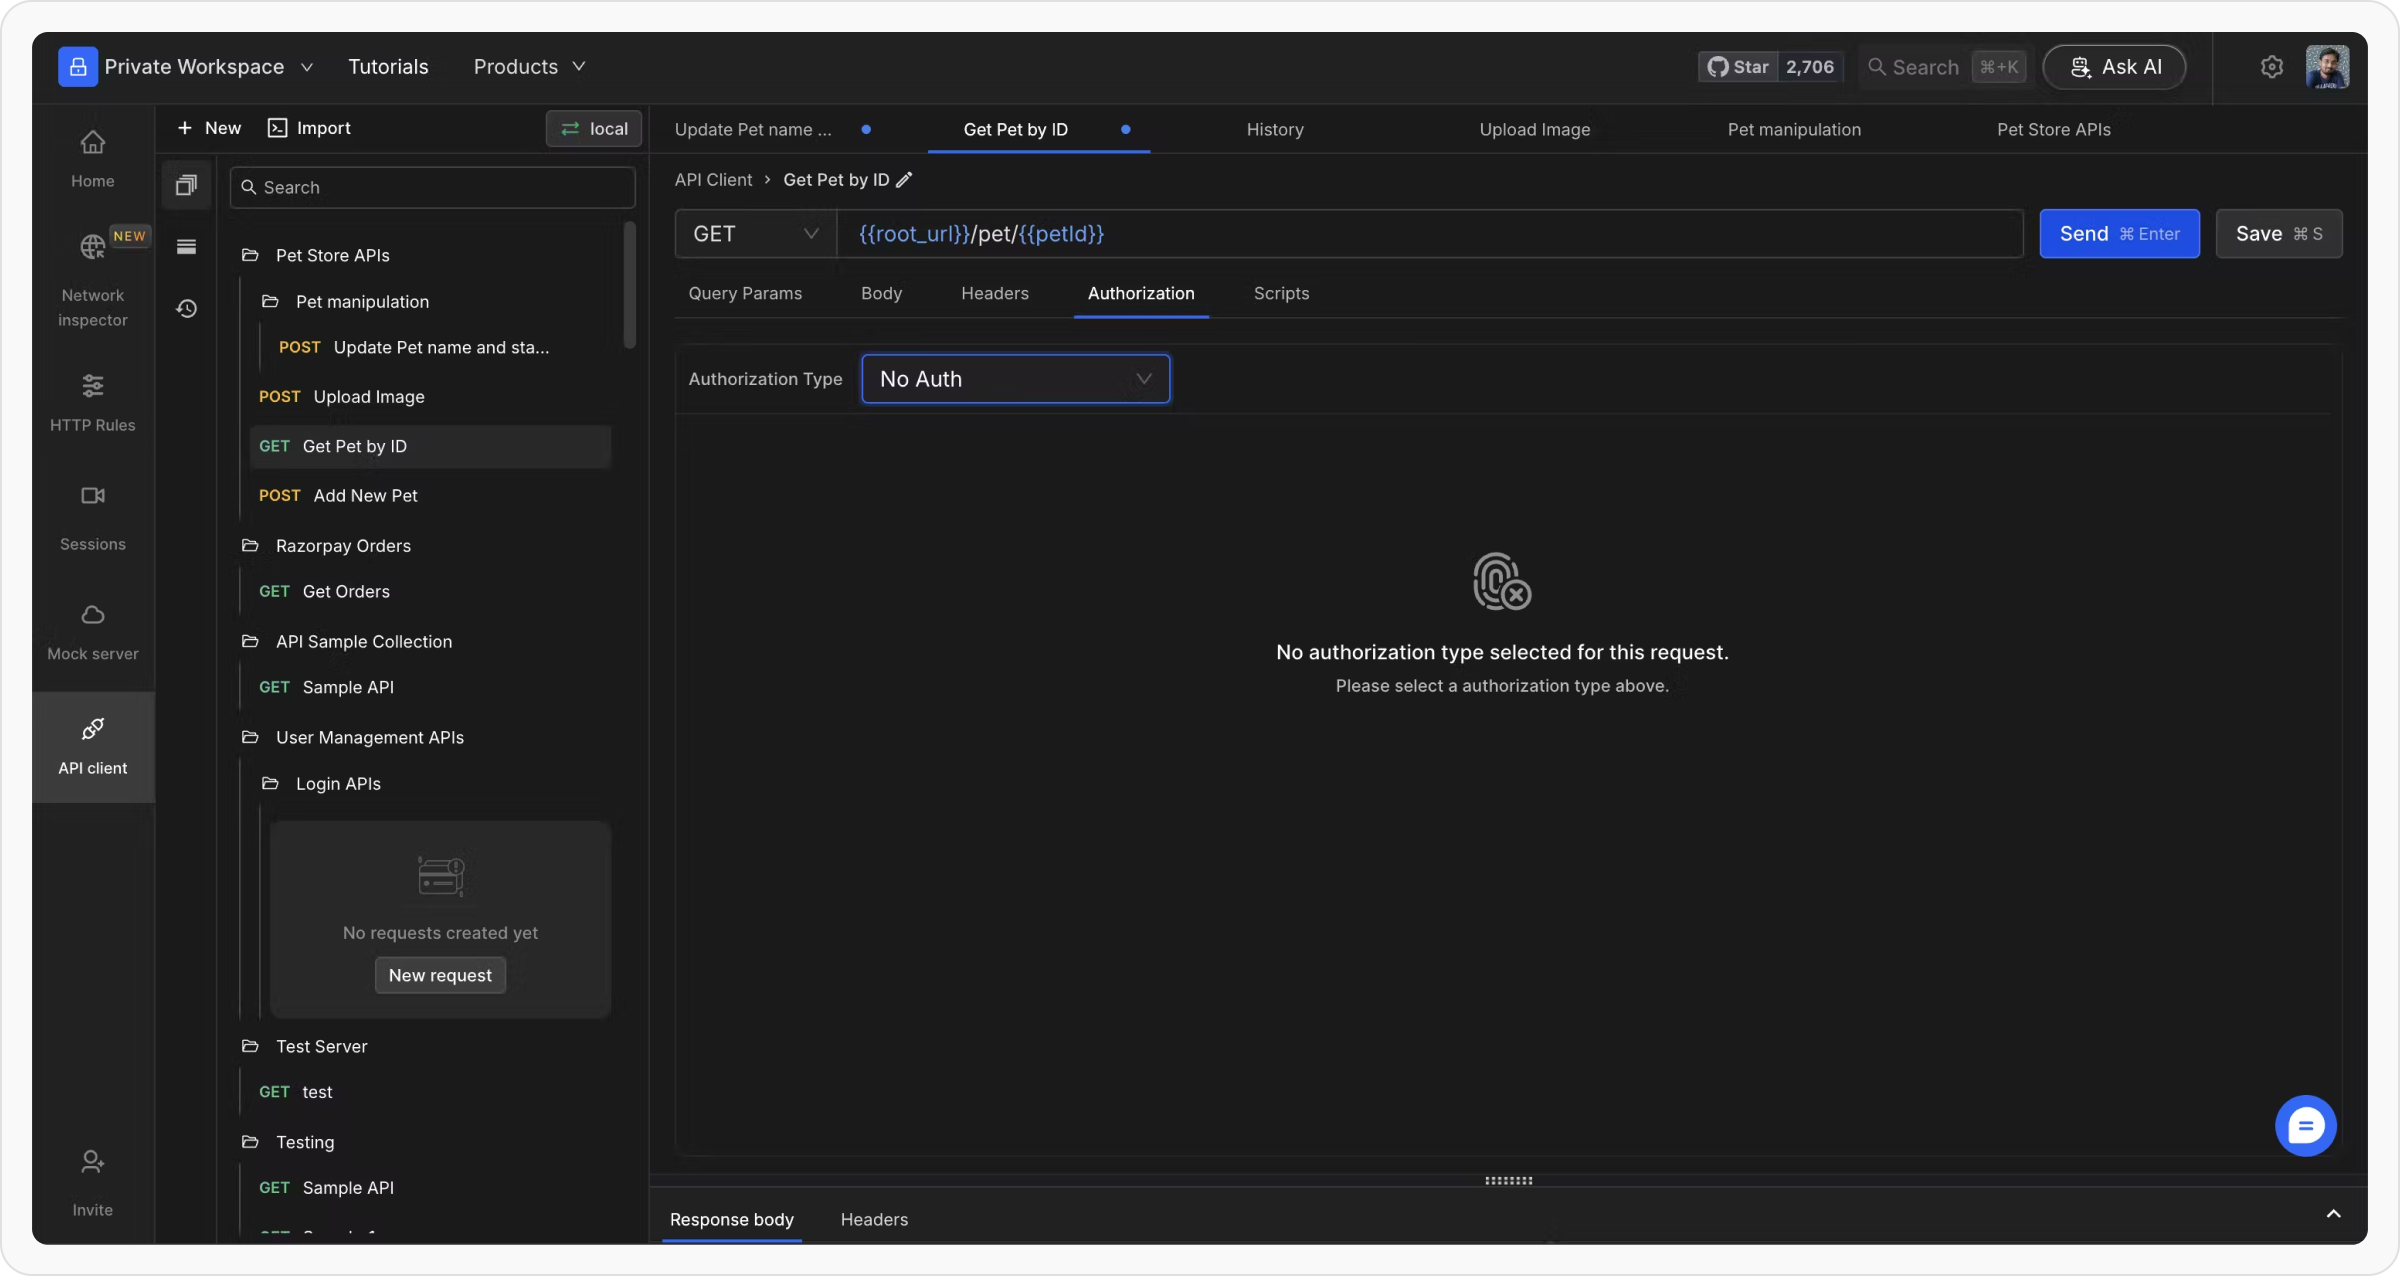
#### No Auth
Requestly won’t send authorization details with a request unless you specify an auth type. If your request doesn’t require authorization, select "No Auth" from the Auth Type dropdown list.
#### Inherit Auth from Parent
Requestly uses the auth applied at the parent level. The inherited properties are populated when the request is sent. This works for API requests and sub-collections.
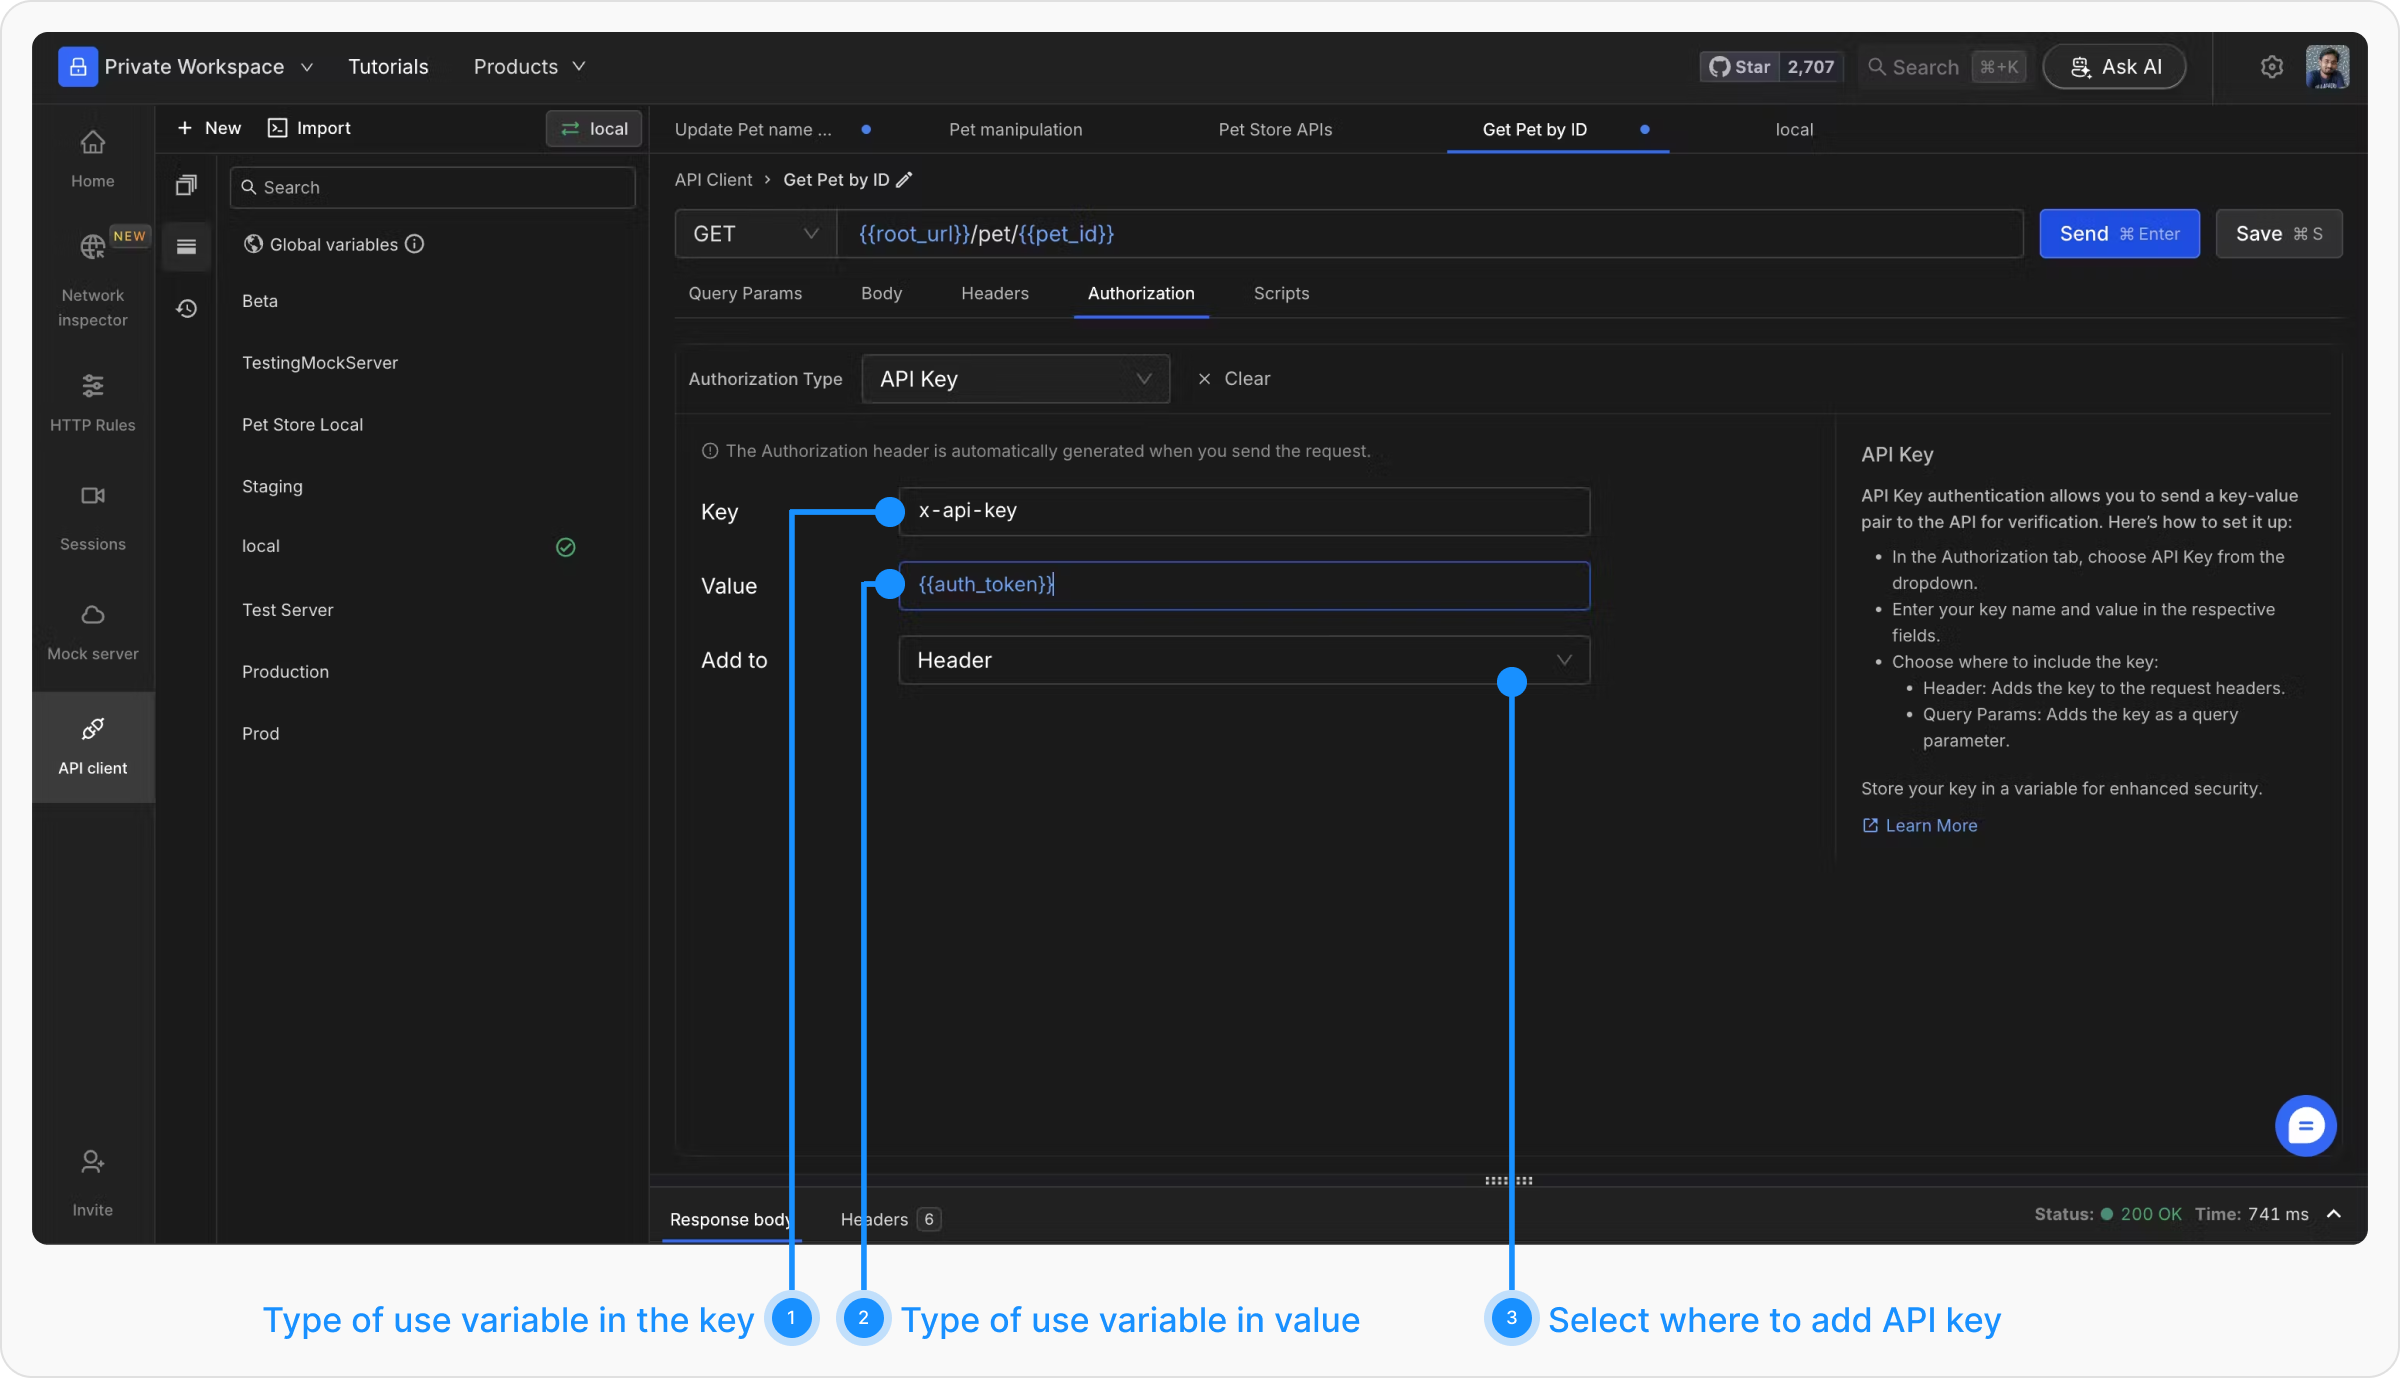
#### API Key
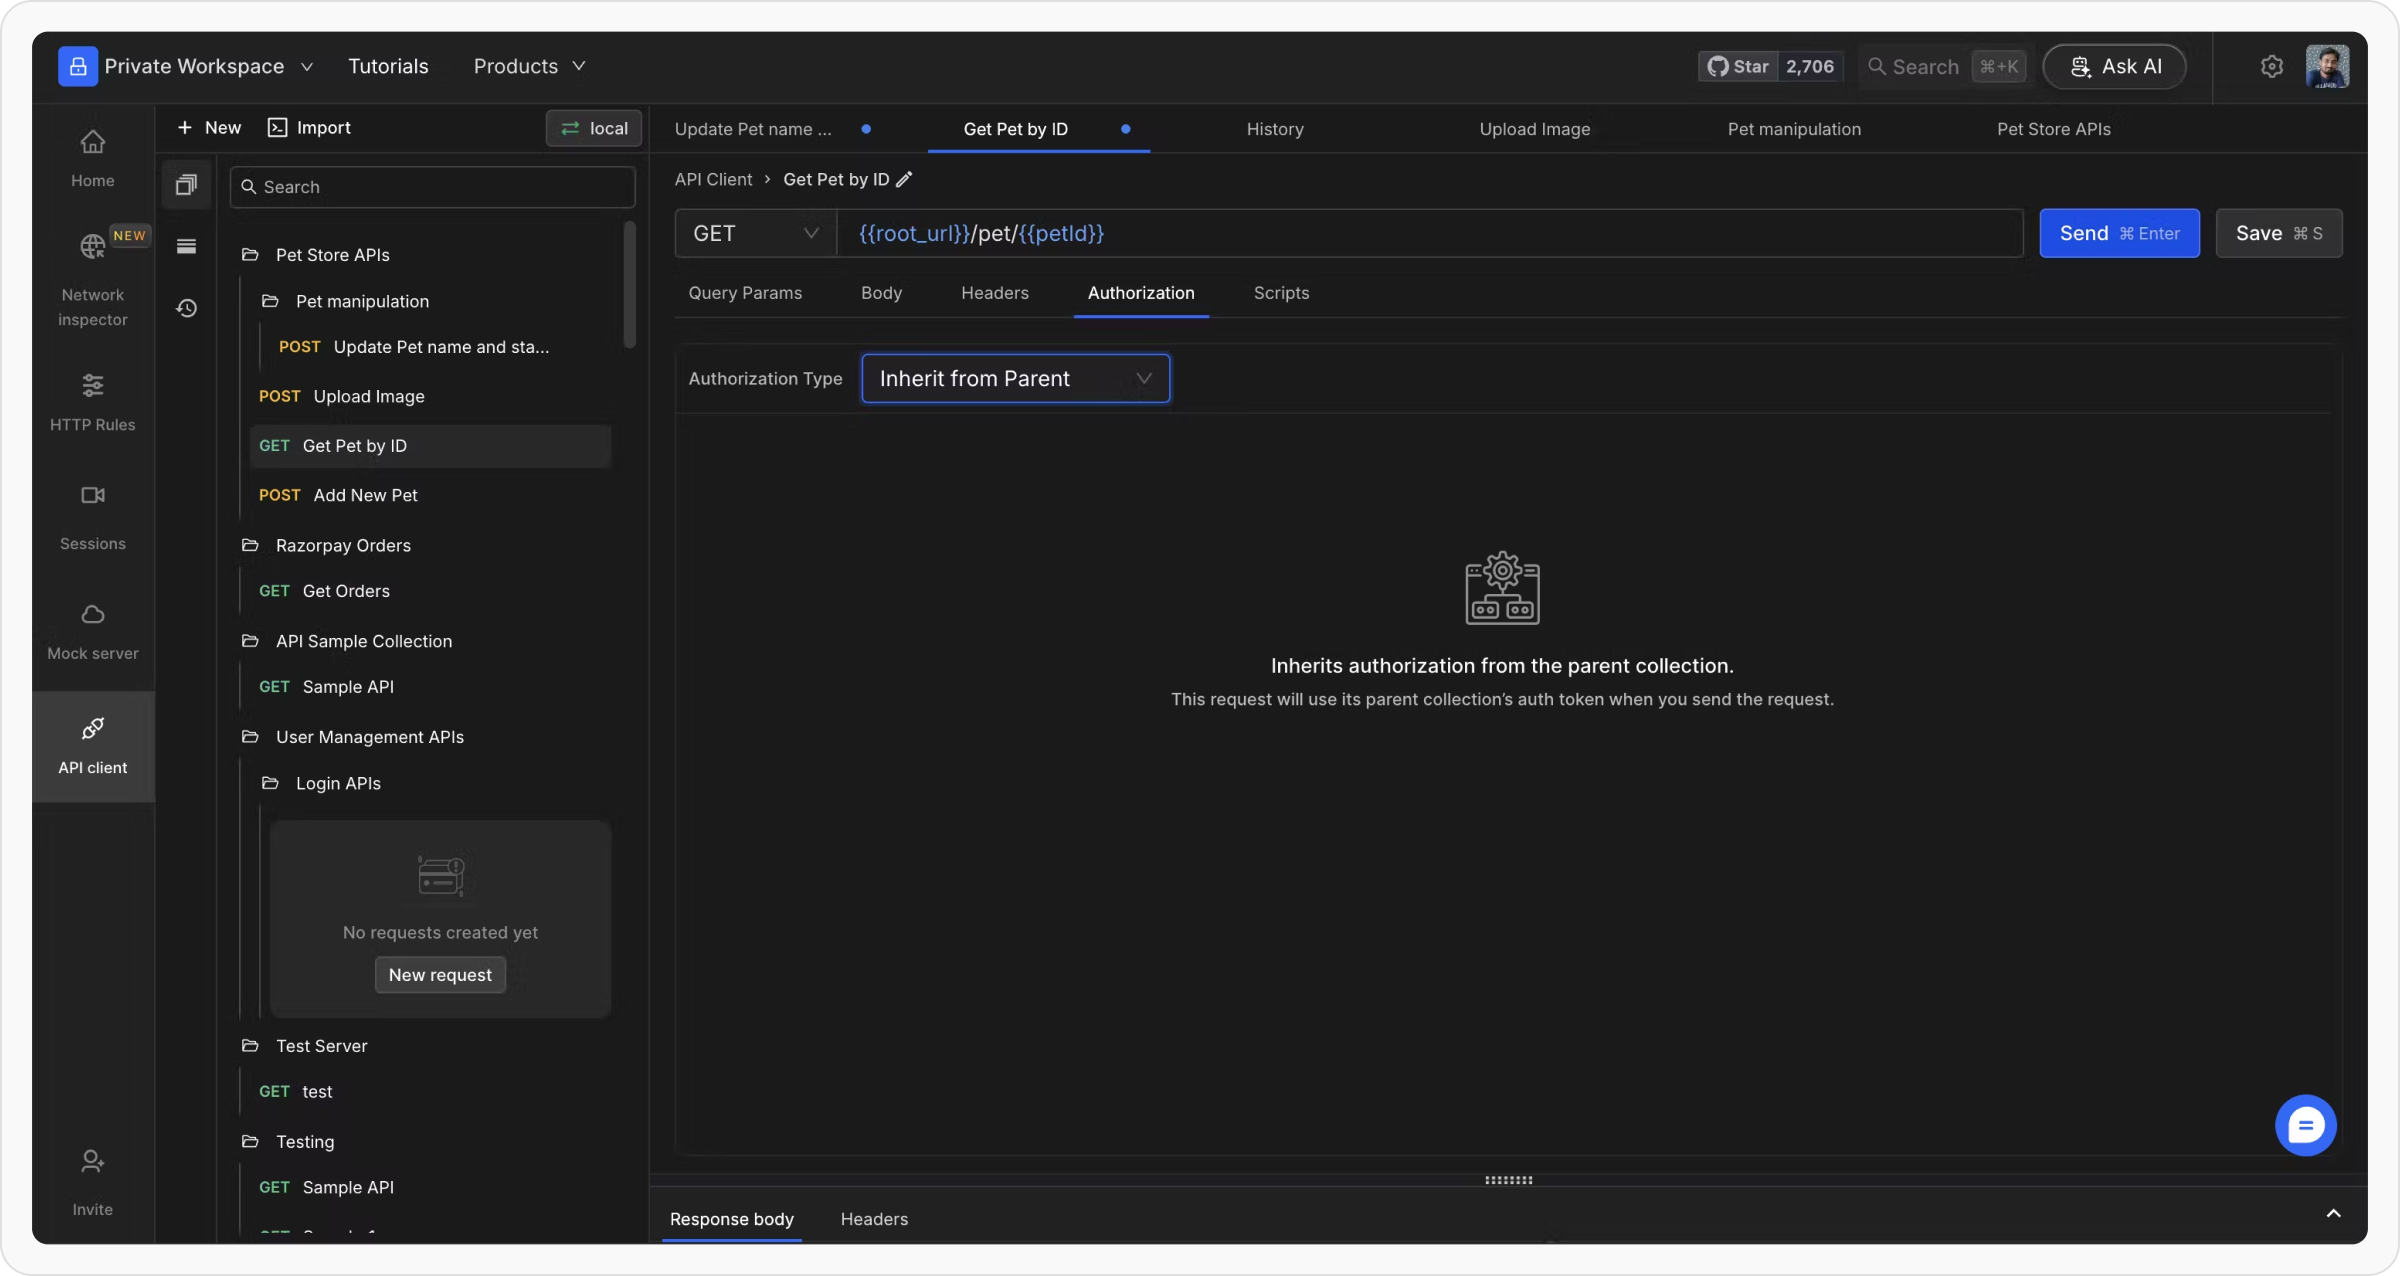
Requestly allows you to send key-value pairs along with the request data. These can be added to either Headers or Query Params. Select "API Key" from the Auth Type list, then enter your key name and value. Choose "Header" or "Query Params" from the "Add to" dropdown list for their inclusion. Variable storage enhances security.
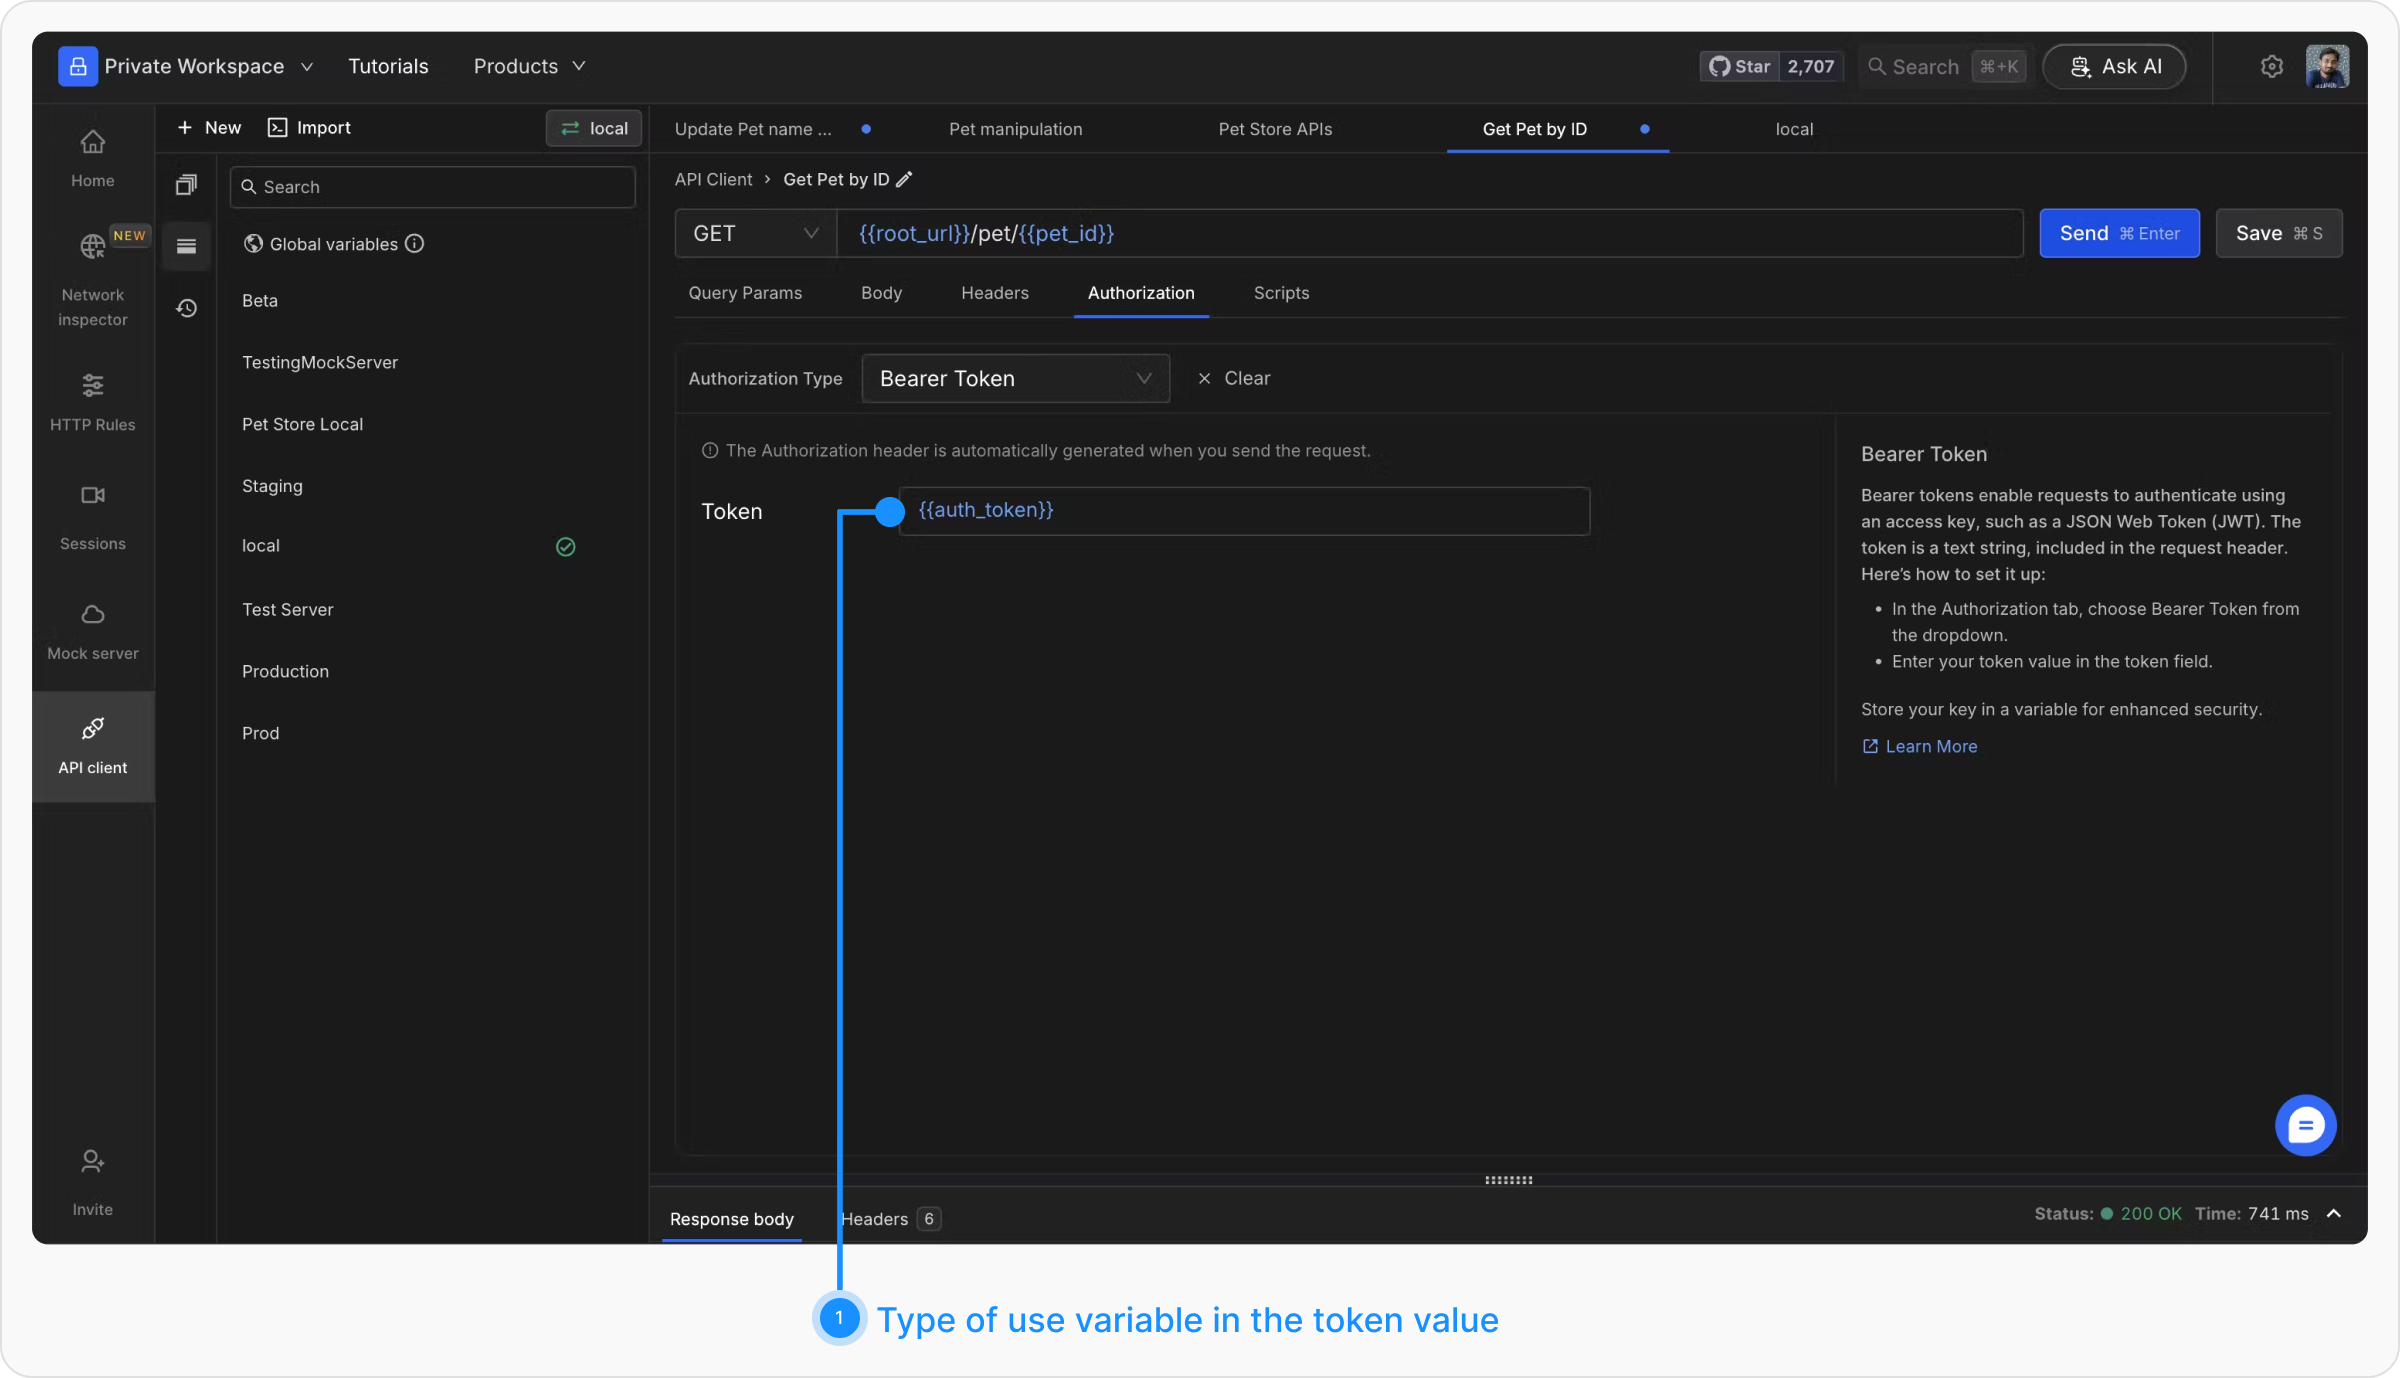
#### Bearer Tokens
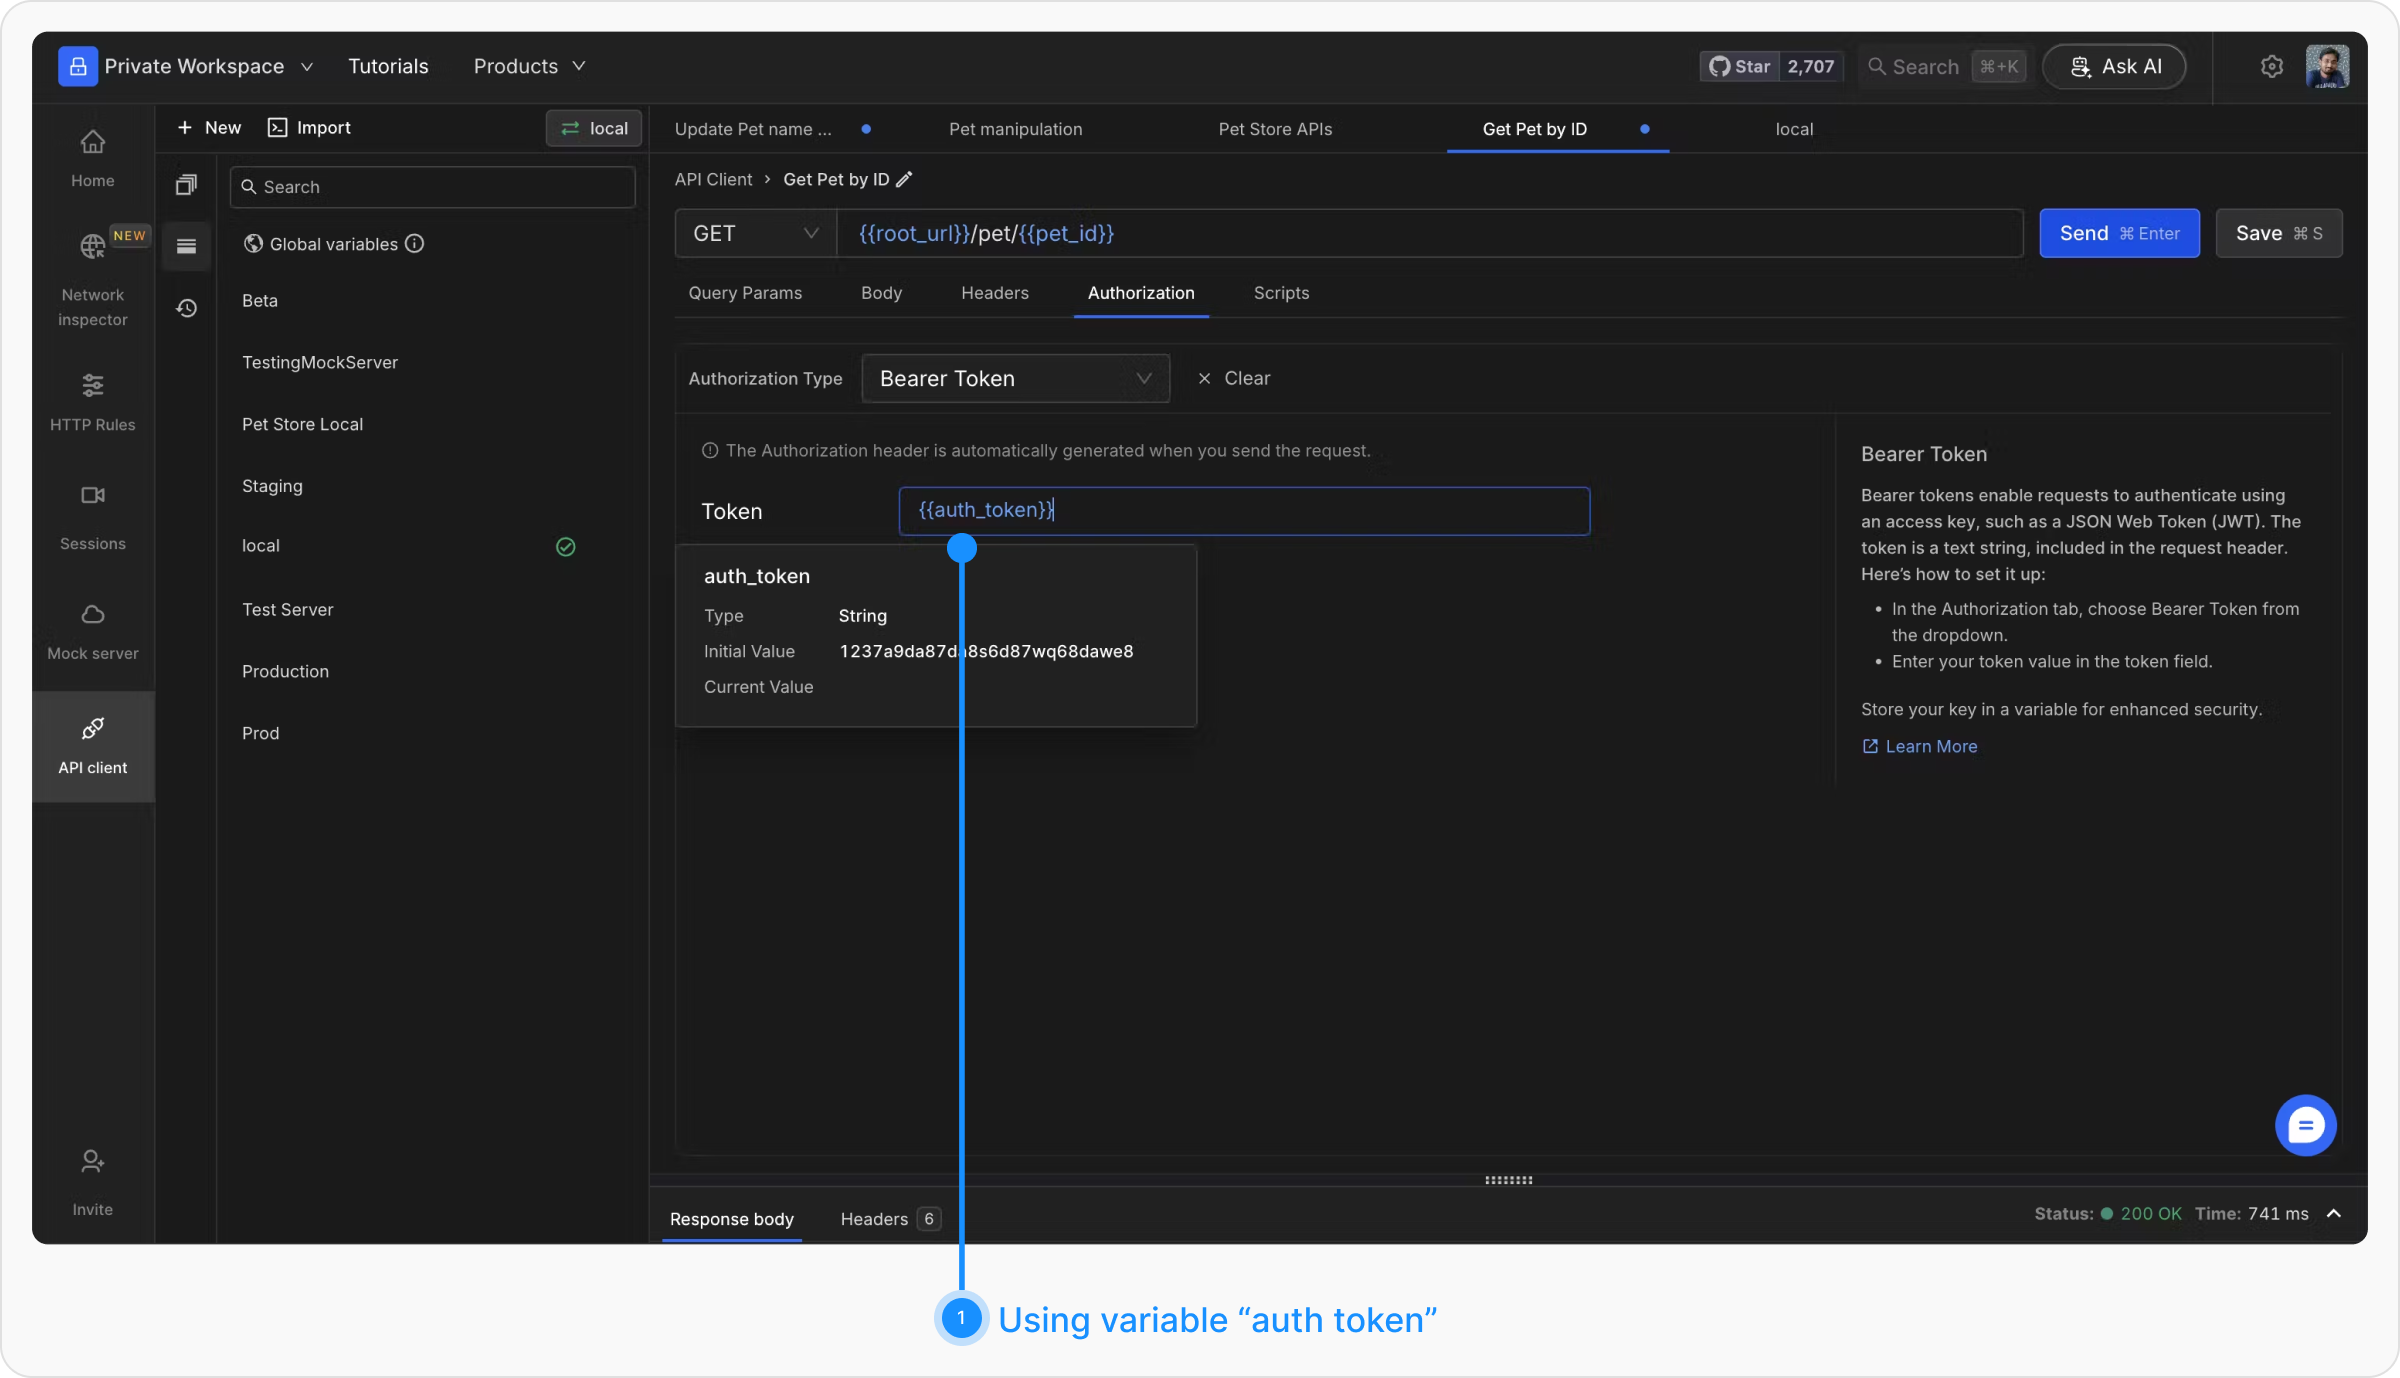
Bearer tokens enable requests to authenticate using an access key such as a JSON Web Token (JWT). Tokens are included in the request header. Select "Bearer Token" from the Auth Type dropdown and enter the token value. For additional security, store the token in a variable and reference it by name.
Requestly appends the token value to the text "Bearer" in the required format in the Authorization header.
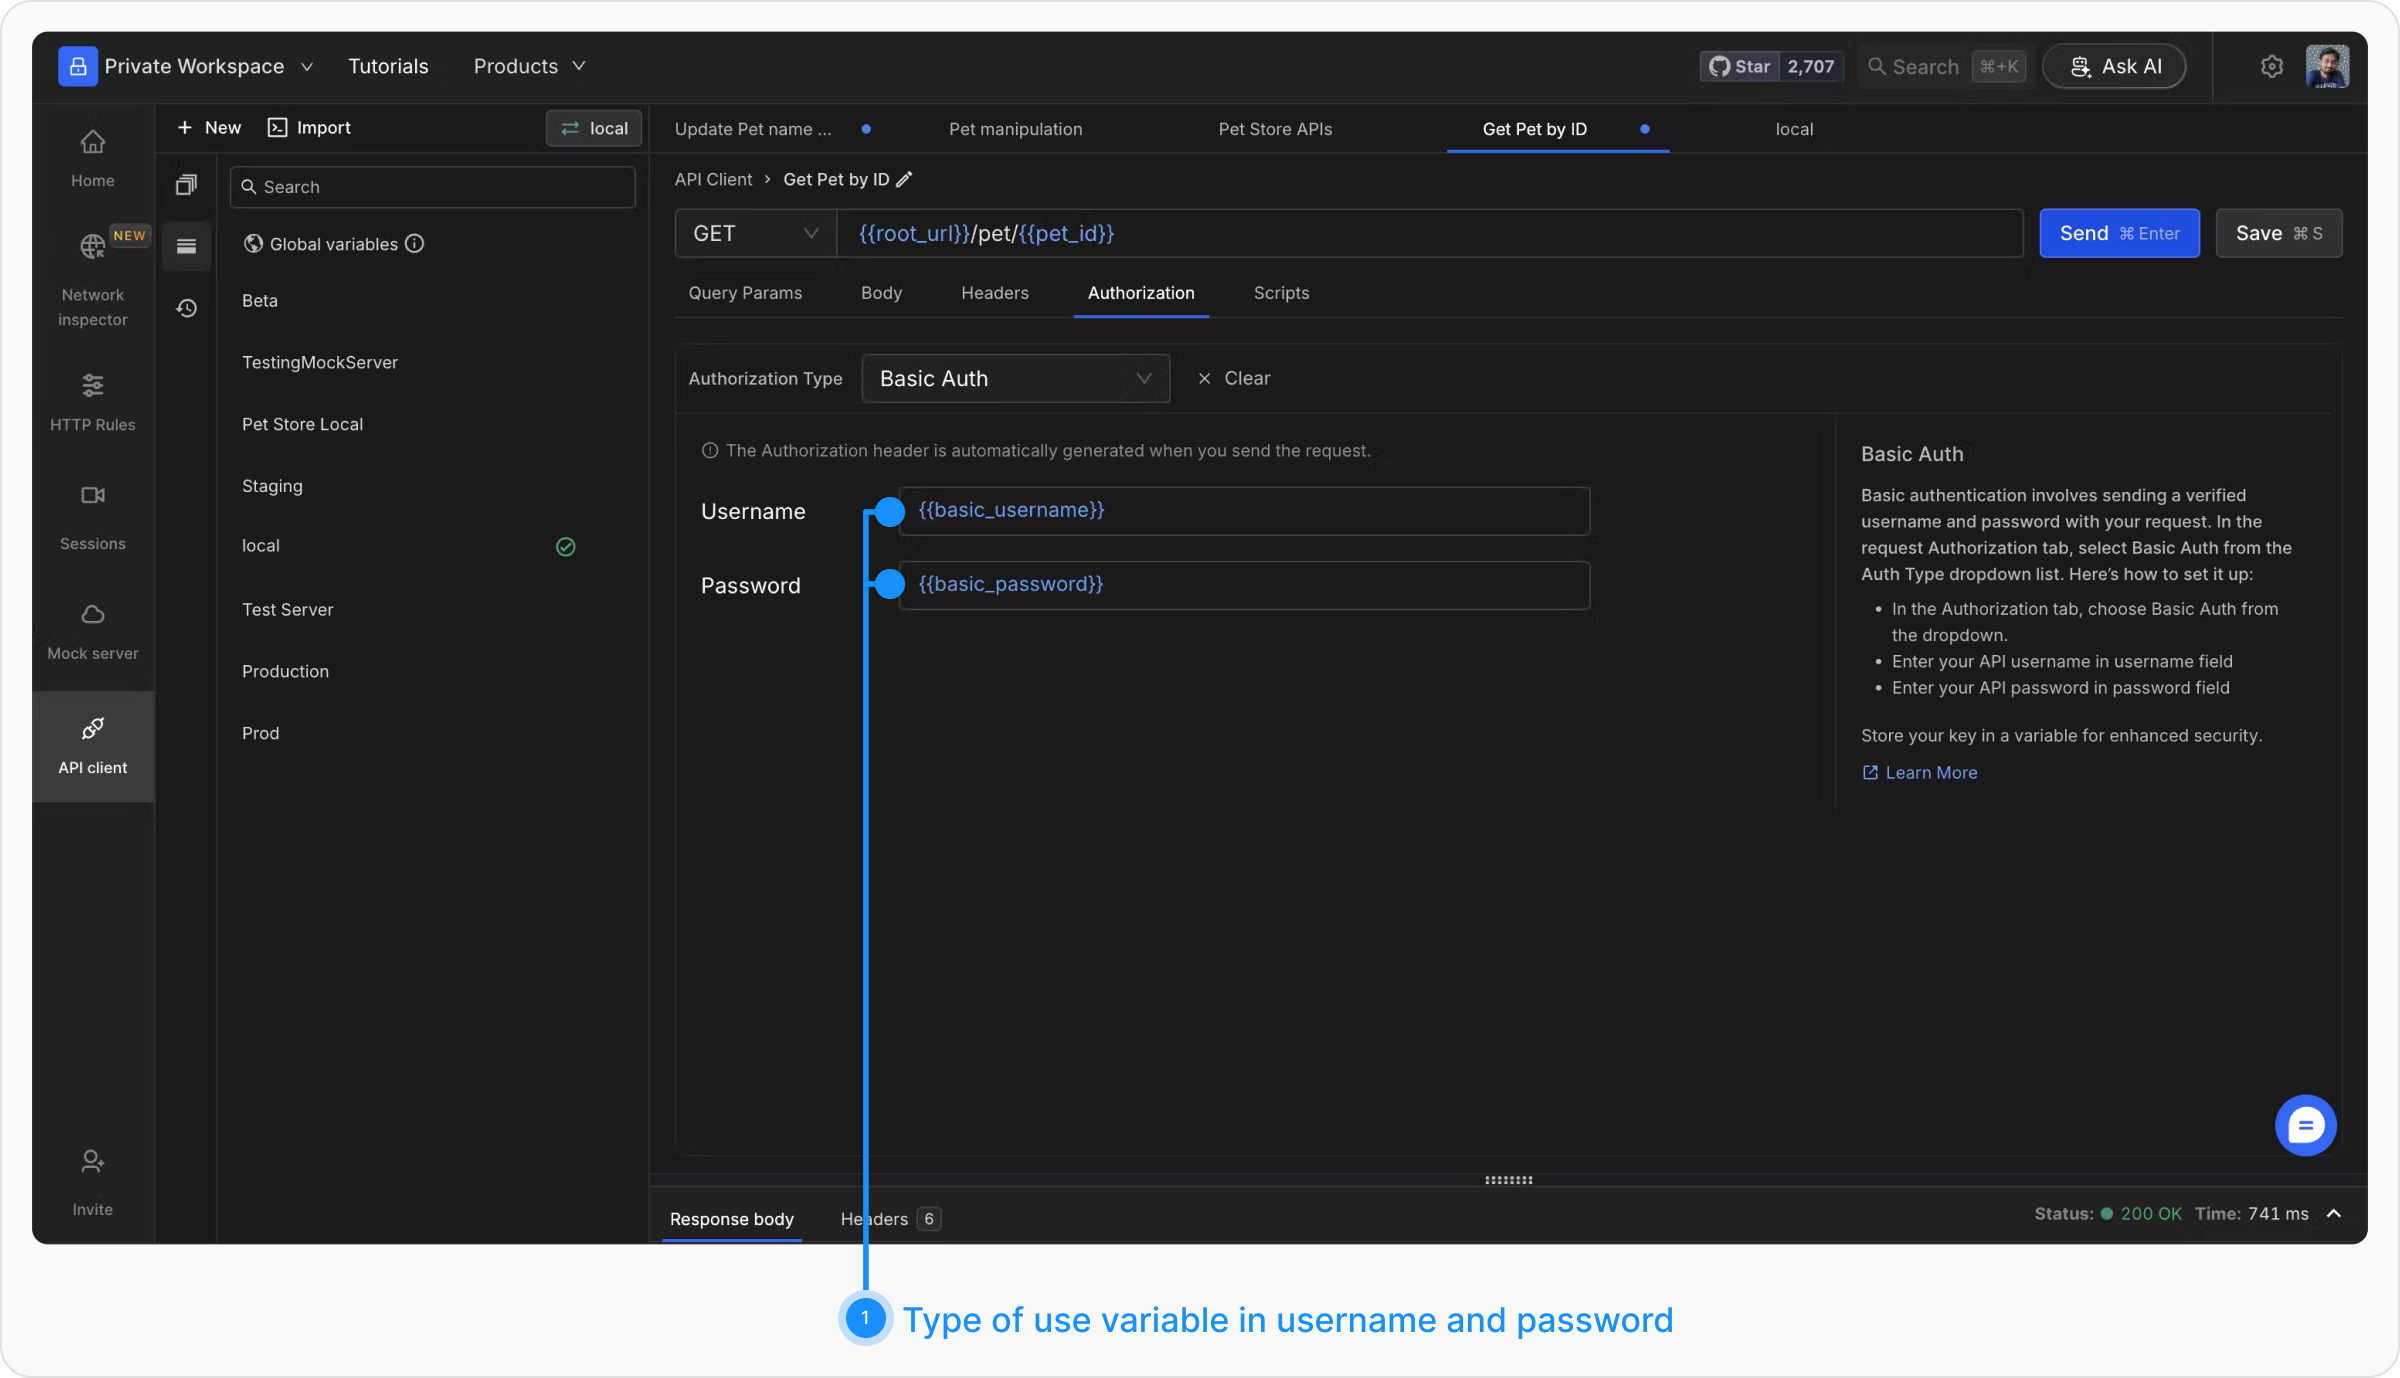
#### Basic Auth
Basic authentication involves sending a verified username and password with your request. Select "Basic Auth" from the Auth Type dropdown. Enter your API username and password in the respective fields. For extra security, store these in variables.
In the request headers, the Authorization header passes the API a Base64 encoded string representing the username and password, appended to the text "Basic."
#### OAuth 1.0
Sign requests using OAuth 1.0 with HMAC, RSA, or Plaintext signature methods. Pick **OAuth 1.0** from the Auth Type dropdown and fill in the consumer key, consumer secret, access token, and token secret. Requestly generates the nonce, timestamp, and signature on every send.
See the [OAuth 1.0 page](/api-client/send-api-request/authorization/oauth1) for the full field reference and signature method options.
#### OAuth 2.0
Use OAuth 2.0 for modern token-based flows. Pick **OAuth 2.0** from the Auth Type dropdown, then choose a grant type (Authorization Code, Authorization Code with PKCE, Client Credentials, Implicit, Password Credentials, or Manual). Requestly runs the flow, caches the access token, and refreshes it before it expires.
See the [OAuth 2.0 page](/api-client/send-api-request/authorization/oauth2) for each grant type, callback modes, and token lifecycle details.
Click "Send" to ensure that the authorization data is sent along with the API request.
## Variable Support and Export
Requestly supports the use of variables in Authorization Values, allowing flexibility and reuse across multiple requests or collections. Variables can store sensitive data securely and simplify updates when values change. For instance, you can define API tokens or credentials as variables and reference them in authorization fields.
While authorization data can be exported alongside requests or collections, note that variable values themselves are not exported. This ensures the security of sensitive data and prevents accidental sharing of confidential information. Users need to define variable values locally when importing shared requests or collections.
## What's Next?
Store and manage auth tokens securely with variables
Learn how authorization headers are added to requests
Apply authorization to multiple requests at once
 #### Inherit Auth from Parent
Requestly uses the auth applied at the parent level. The inherited properties are populated when the request is sent. This works for API requests and sub-collections.
#### Inherit Auth from Parent
Requestly uses the auth applied at the parent level. The inherited properties are populated when the request is sent. This works for API requests and sub-collections.
 #### API Key
Requestly allows you to send key-value pairs along with the request data. These can be added to either Headers or Query Params. Select "API Key" from the Auth Type list, then enter your key name and value. Choose "Header" or "Query Params" from the "Add to" dropdown list for their inclusion. Variable storage enhances security.
#### API Key
Requestly allows you to send key-value pairs along with the request data. These can be added to either Headers or Query Params. Select "API Key" from the Auth Type list, then enter your key name and value. Choose "Header" or "Query Params" from the "Add to" dropdown list for their inclusion. Variable storage enhances security.
 #### Bearer Tokens
Bearer tokens enable requests to authenticate using an access key such as a JSON Web Token (JWT). Tokens are included in the request header. Select "Bearer Token" from the Auth Type dropdown and enter the token value. For additional security, store the token in a variable and reference it by name.
#### Bearer Tokens
Bearer tokens enable requests to authenticate using an access key such as a JSON Web Token (JWT). Tokens are included in the request header. Select "Bearer Token" from the Auth Type dropdown and enter the token value. For additional security, store the token in a variable and reference it by name.
 Requestly appends the token value to the text "Bearer" in the required format in the Authorization header.
#### Basic Auth
Basic authentication involves sending a verified username and password with your request. Select "Basic Auth" from the Auth Type dropdown. Enter your API username and password in the respective fields. For extra security, store these in variables.
Requestly appends the token value to the text "Bearer" in the required format in the Authorization header.
#### Basic Auth
Basic authentication involves sending a verified username and password with your request. Select "Basic Auth" from the Auth Type dropdown. Enter your API username and password in the respective fields. For extra security, store these in variables.
 In the request headers, the Authorization header passes the API a Base64 encoded string representing the username and password, appended to the text "Basic."
#### OAuth 1.0
Sign requests using OAuth 1.0 with HMAC, RSA, or Plaintext signature methods. Pick **OAuth 1.0** from the Auth Type dropdown and fill in the consumer key, consumer secret, access token, and token secret. Requestly generates the nonce, timestamp, and signature on every send.
See the [OAuth 1.0 page](/api-client/send-api-request/authorization/oauth1) for the full field reference and signature method options.
#### OAuth 2.0
Use OAuth 2.0 for modern token-based flows. Pick **OAuth 2.0** from the Auth Type dropdown, then choose a grant type (Authorization Code, Authorization Code with PKCE, Client Credentials, Implicit, Password Credentials, or Manual). Requestly runs the flow, caches the access token, and refreshes it before it expires.
See the [OAuth 2.0 page](/api-client/send-api-request/authorization/oauth2) for each grant type, callback modes, and token lifecycle details.
In the request headers, the Authorization header passes the API a Base64 encoded string representing the username and password, appended to the text "Basic."
#### OAuth 1.0
Sign requests using OAuth 1.0 with HMAC, RSA, or Plaintext signature methods. Pick **OAuth 1.0** from the Auth Type dropdown and fill in the consumer key, consumer secret, access token, and token secret. Requestly generates the nonce, timestamp, and signature on every send.
See the [OAuth 1.0 page](/api-client/send-api-request/authorization/oauth1) for the full field reference and signature method options.
#### OAuth 2.0
Use OAuth 2.0 for modern token-based flows. Pick **OAuth 2.0** from the Auth Type dropdown, then choose a grant type (Authorization Code, Authorization Code with PKCE, Client Credentials, Implicit, Password Credentials, or Manual). Requestly runs the flow, caches the access token, and refreshes it before it expires.
See the [OAuth 2.0 page](/api-client/send-api-request/authorization/oauth2) for each grant type, callback modes, and token lifecycle details.
 While authorization data can be exported alongside requests or collections, note that variable values themselves are not exported. This ensures the security of sensitive data and prevents accidental sharing of confidential information. Users need to define variable values locally when importing shared requests or collections.
## What's Next?
While authorization data can be exported alongside requests or collections, note that variable values themselves are not exported. This ensures the security of sensitive data and prevents accidental sharing of confidential information. Users need to define variable values locally when importing shared requests or collections.
## What's Next?