> ## Documentation Index
> Fetch the complete documentation index at: https://docs.requestly.com/llms.txt
> Use this file to discover all available pages before exploring further.
# Configure Request
> Learn how to configure HTTP methods, URLs, and send API requests in Requestly.
This guide covers how to set up HTTP methods, URLs, and send requests effectively.
## HTTP Methods
Requestly supports all standard HTTP methods for API requests:
**GET** retrieves data from a server. It's the most common method for fetching resources.
**Use cases:**
* Fetch user data
* Get list of items
* Retrieve resource details
**POST** sends data to create a new resource on the server.
**Use cases:**
* Create new user
* Submit form data
* Upload content
**PUT** updates an existing resource by replacing it entirely.
**Use cases:**
* Update user profile
* Replace document
* Modify configuration
**PATCH** partially updates an existing resource.
**Use cases:**
* Update specific fields
* Modify user settings
* Change status
**DELETE** removes a resource from the server.
**Use cases:**
* Delete user account
* Remove item
* Clear cache
**HEAD** retrieves only the headers of a resource without the body. It's identical to GET but without the response body.
**Use cases:**
* Check if resource exists
* Get content length before downloading
* Verify last modified date
**OPTIONS** retrieves the communication options available for a resource or server.
**Use cases:**
* Check supported HTTP methods
* Verify CORS configuration
* Discover API capabilities
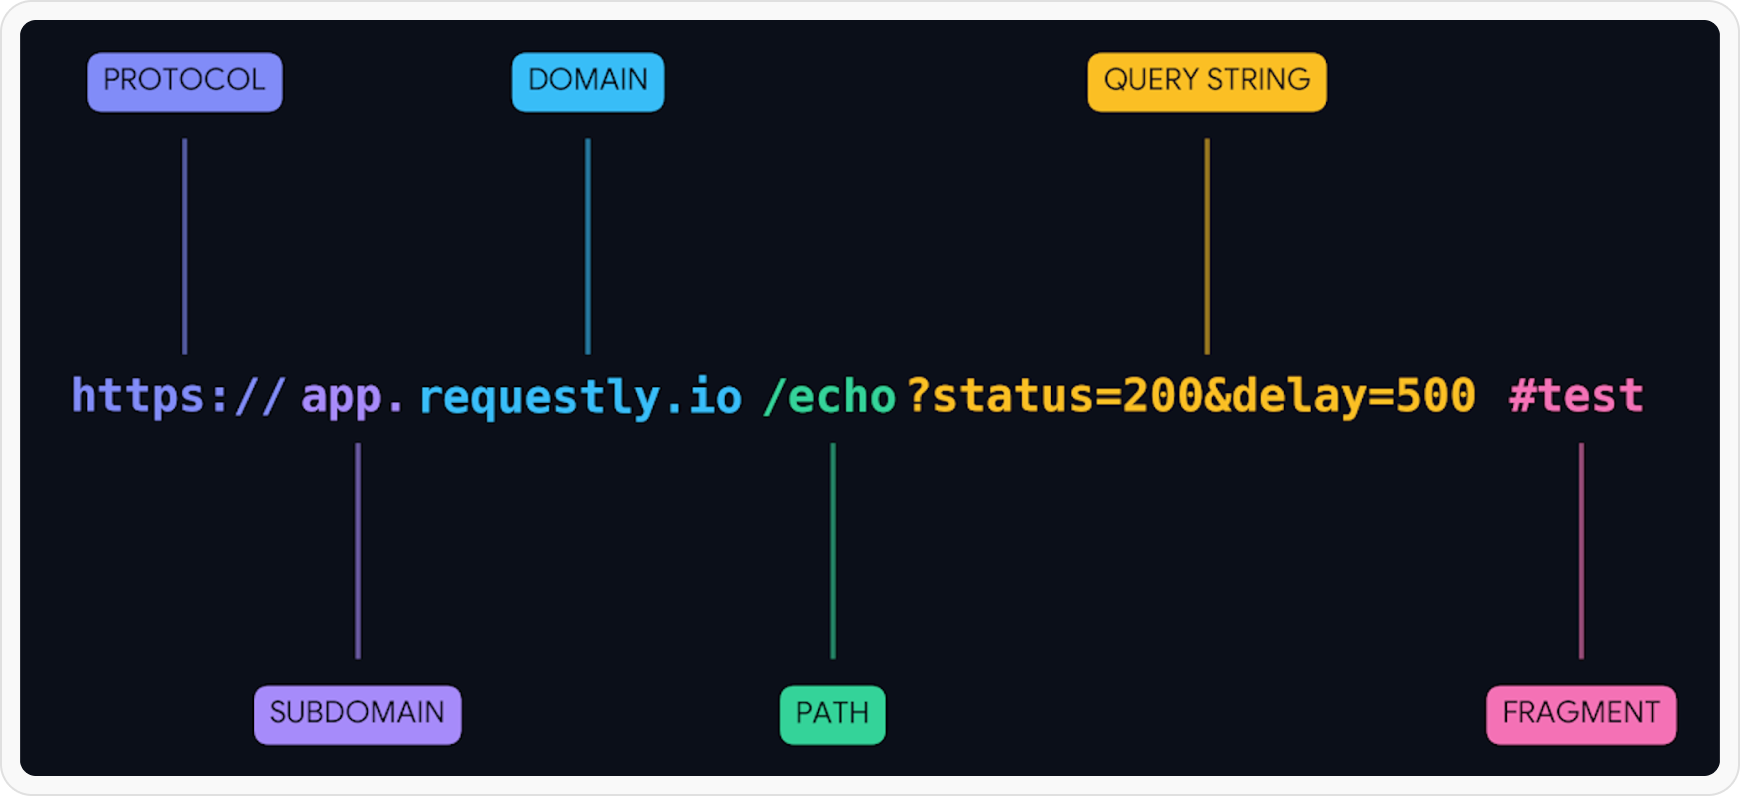
## Setting Up Your Request URL
The request URL specifies where your API request should be sent. It consists of several components:
 ## Naming Your Request
Give your request a clear, descriptive name to easily identify it later:
**Good naming examples:**
* `Get User Profile`
* `Create New Order`
* `Update Product Inventory`
* `Delete Customer Account`
**Avoid:**
* `Test`
* `Request 1`
* `API Call`
Use action verbs and specific resource names to make your requests self-documenting. This helps when sharing with team members or revisiting later.
## Sending Your Request
Once you've configured your request:
Click the **Save** button to preserve your request settings. This allows you to reuse it later without reconfiguring.
Press the **Send** button to execute the request. It will display the response in the panel below.
Check the response `status code`, `body`, and `headers` to verify the request was successful.
**Common status codes:**
* `200 OK` - Success
* `201 Created` - Resource created
* `400 Bad Request` - Invalid request
* `401 Unauthorized` - Authentication required
* `404 Not Found` - Resource doesn't exist
* `500 Server Error` - Server-side issue
## What's Next?
Learn how to add query params, path variables, and request body
Set up authentication and custom headers
## Naming Your Request
Give your request a clear, descriptive name to easily identify it later:
**Good naming examples:**
* `Get User Profile`
* `Create New Order`
* `Update Product Inventory`
* `Delete Customer Account`
**Avoid:**
* `Test`
* `Request 1`
* `API Call`
Use action verbs and specific resource names to make your requests self-documenting. This helps when sharing with team members or revisiting later.
## Sending Your Request
Once you've configured your request:
Click the **Save** button to preserve your request settings. This allows you to reuse it later without reconfiguring.
Press the **Send** button to execute the request. It will display the response in the panel below.
Check the response `status code`, `body`, and `headers` to verify the request was successful.
**Common status codes:**
* `200 OK` - Success
* `201 Created` - Resource created
* `400 Bad Request` - Invalid request
* `401 Unauthorized` - Authentication required
* `404 Not Found` - Resource doesn't exist
* `500 Server Error` - Server-side issue
## What's Next?
Learn how to add query params, path variables, and request body
Set up authentication and custom headers