> ## Documentation Index
> Fetch the complete documentation index at: https://docs.requestly.com/llms.txt
> Use this file to discover all available pages before exploring further.
# Overview
> Learn how to create and send API requests in Requestly. Test APIs, configure requests, and view responses without writing code.
Requestly allows you to easily send API requests, without the need for writing code or using a terminal. It lets you test APIs, retrieve data, and explore how they work by simply creating a request, clicking Send, and viewing the response.
This is useful for developers testing API endpoints during development, QA engineers validating API responses for edge cases, and support engineers debugging API issues in real-time.
## Quick Start
Follow these steps to send your first API request:
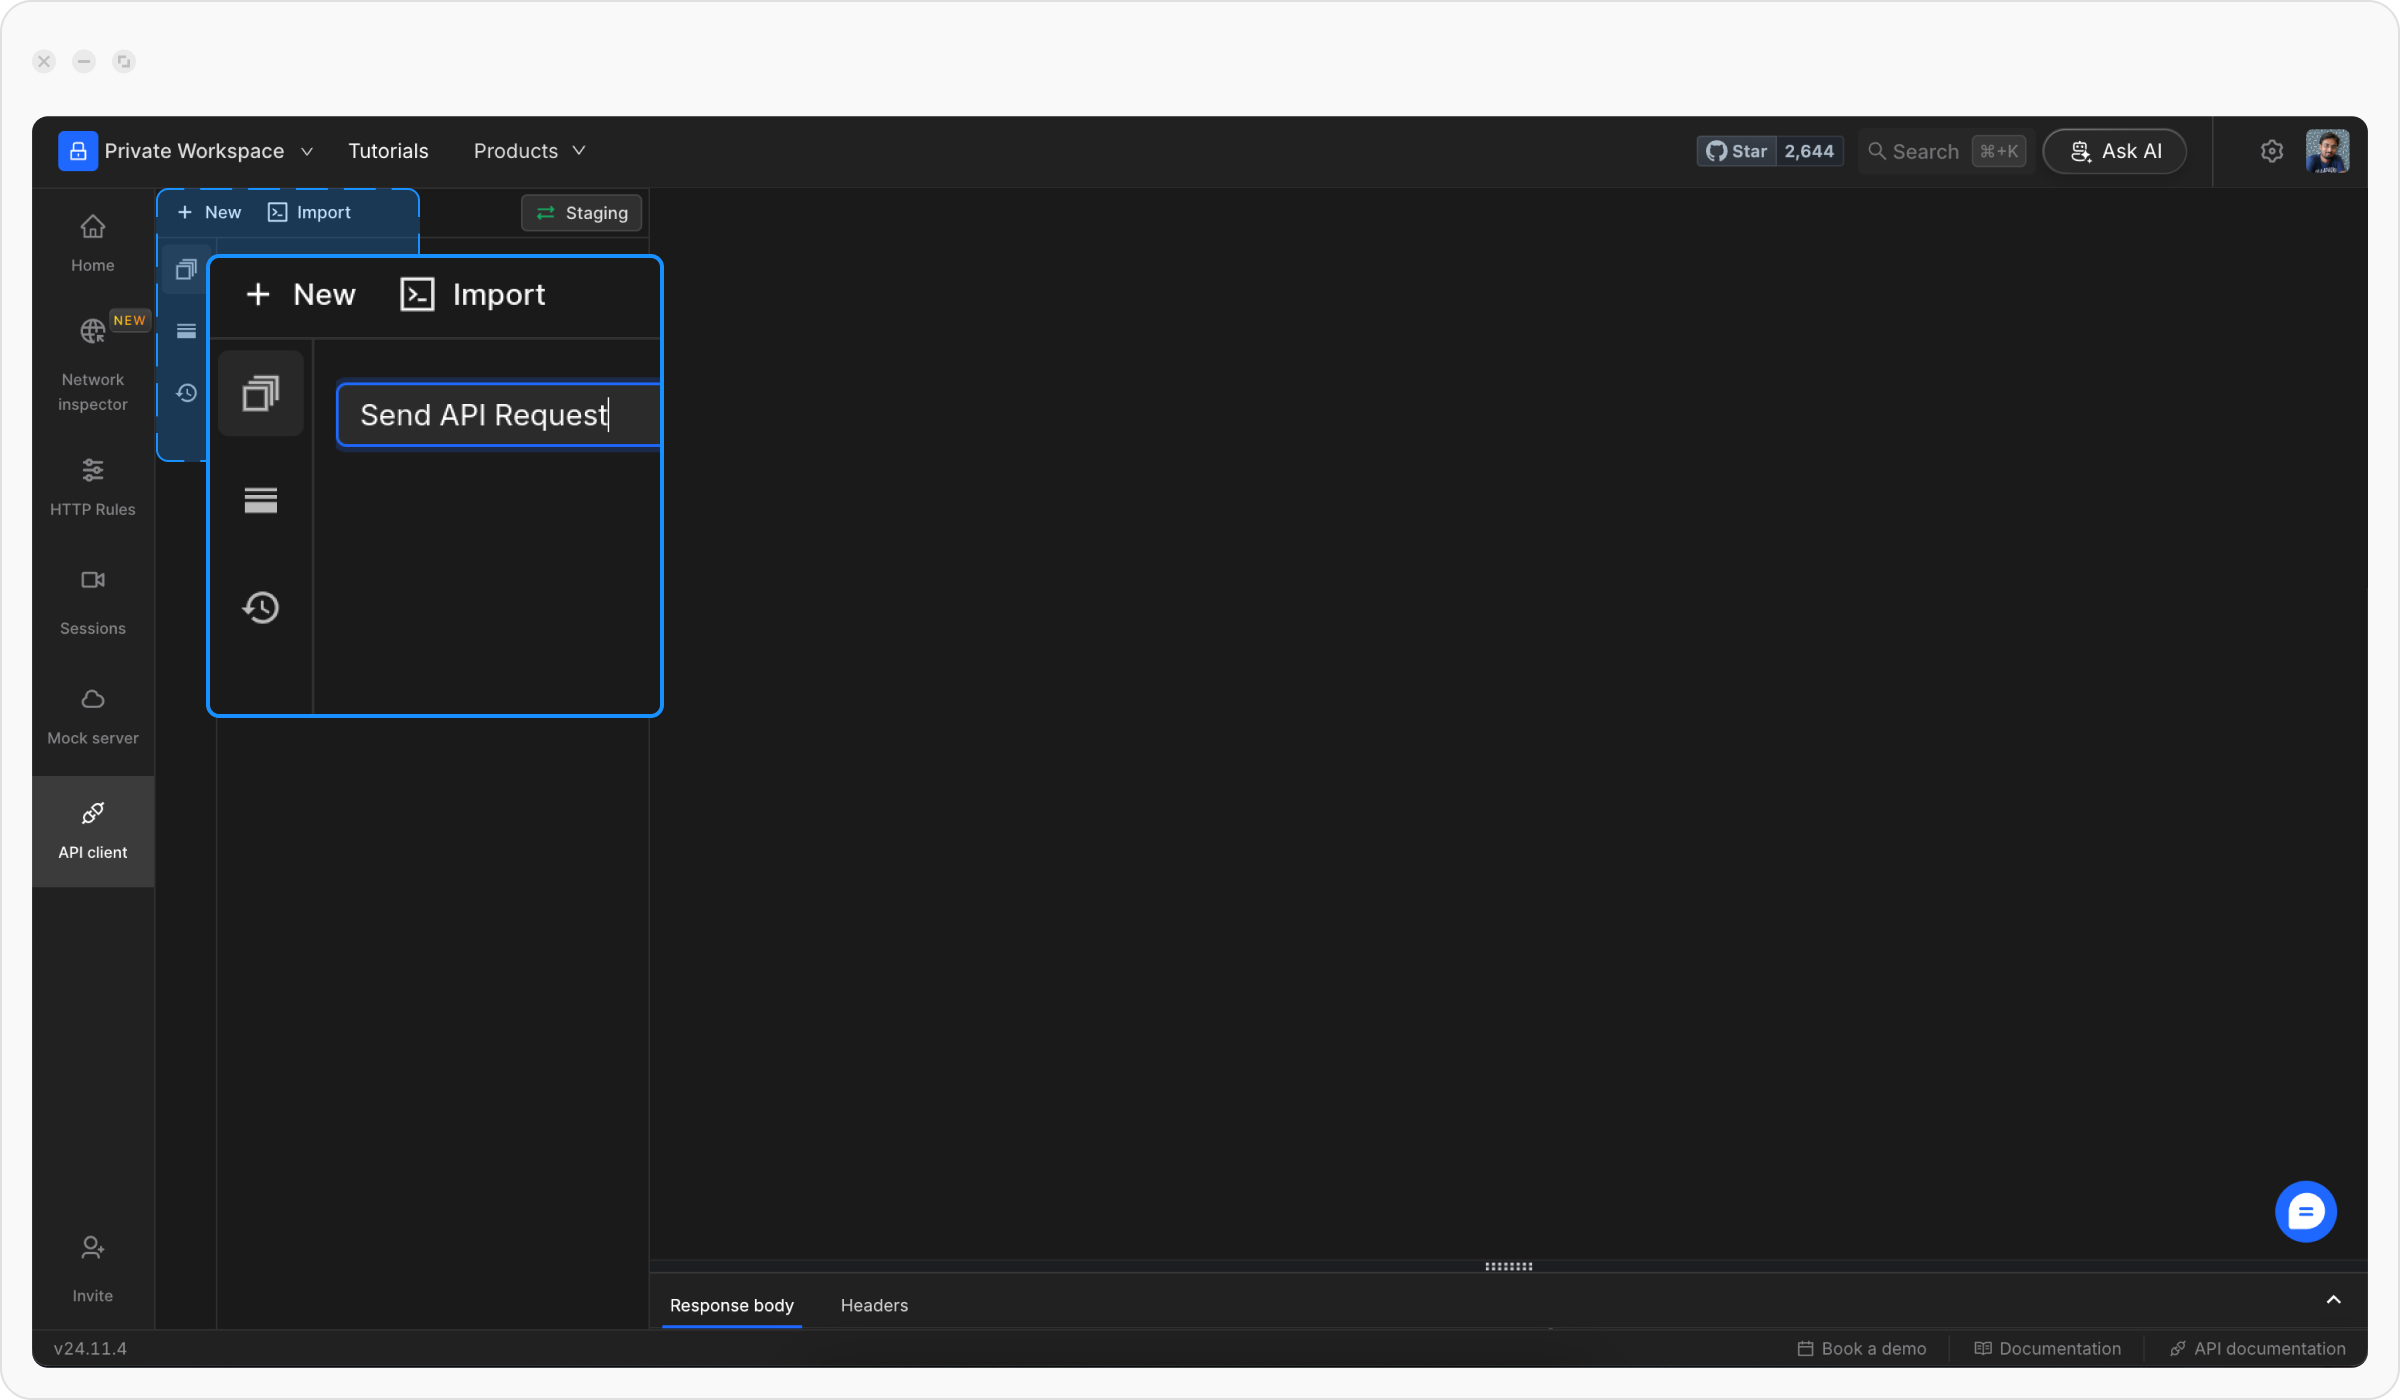
Open **Requestly Desktop App**, then click the `+ New` button to create a new request and select **Request** from the menu.
Choose a descriptive title for your request to make it easy to identify later.
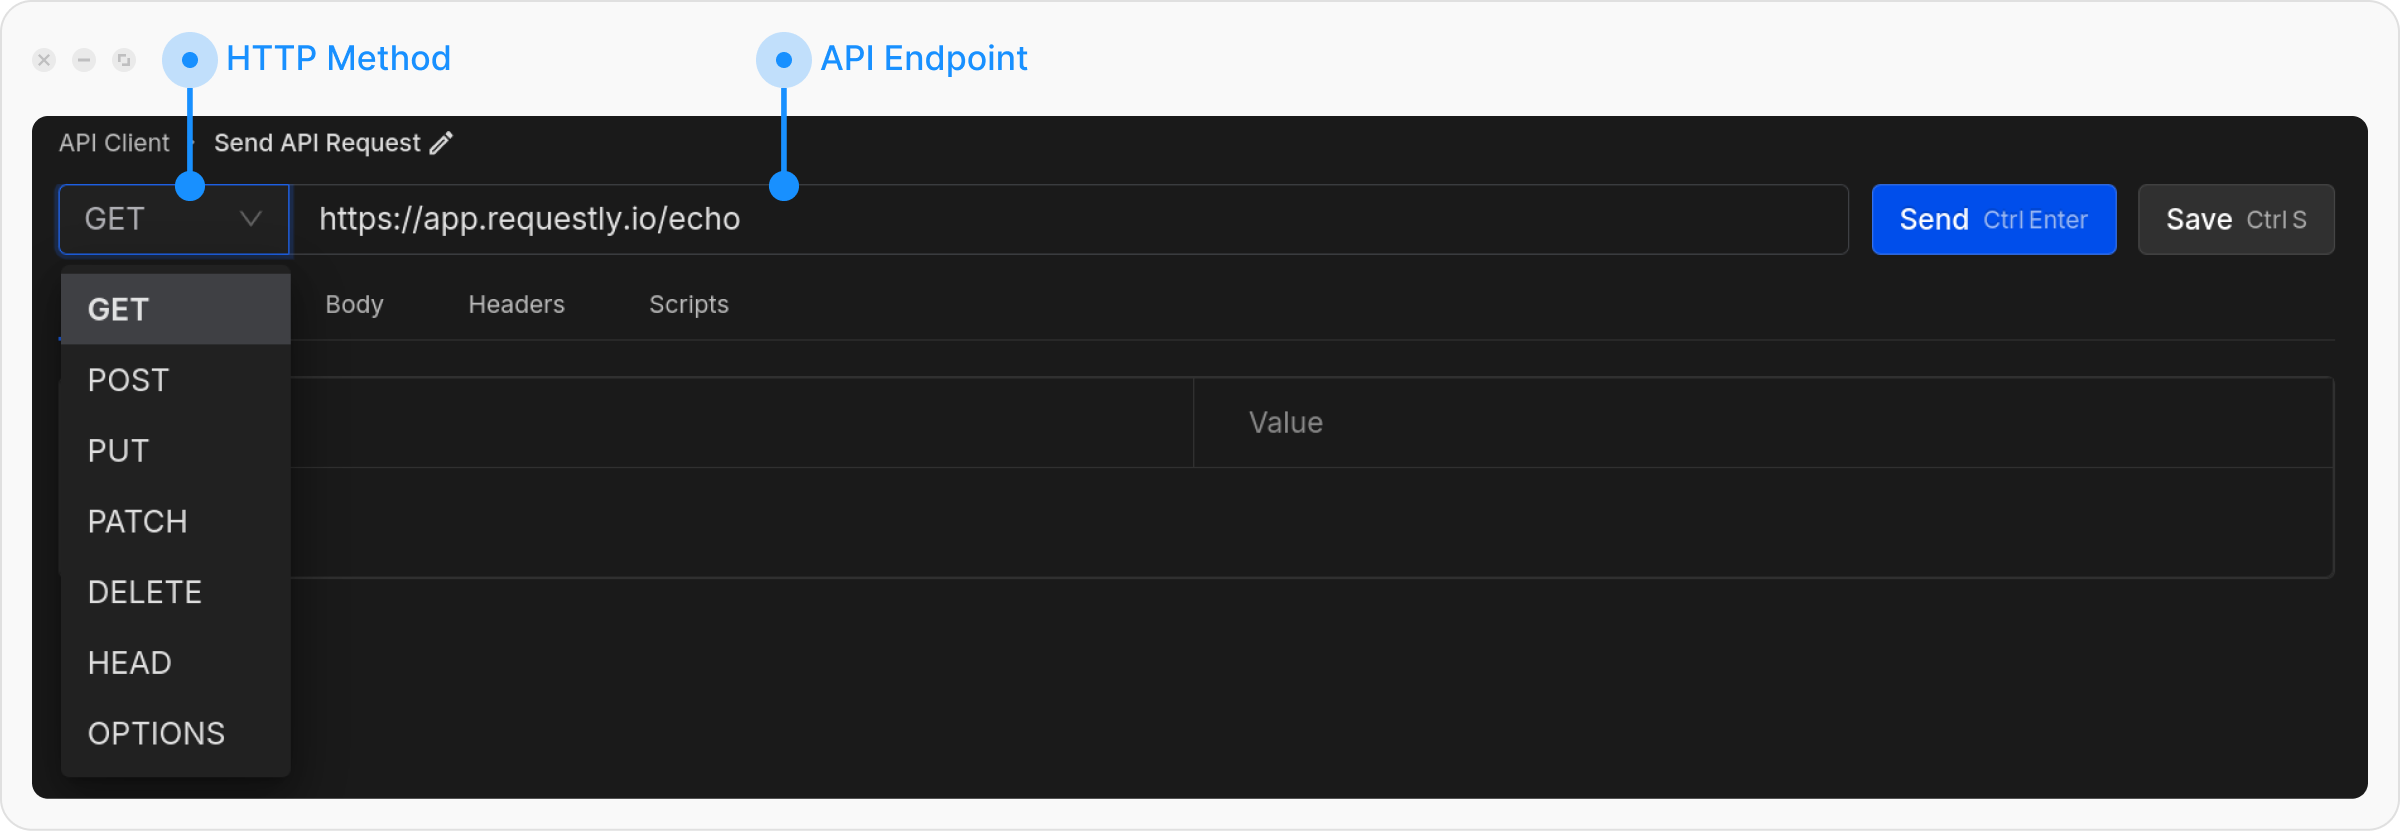
Pick the HTTP method (e.g., `GET`, `POST`) and type the URL of the API you want to test.
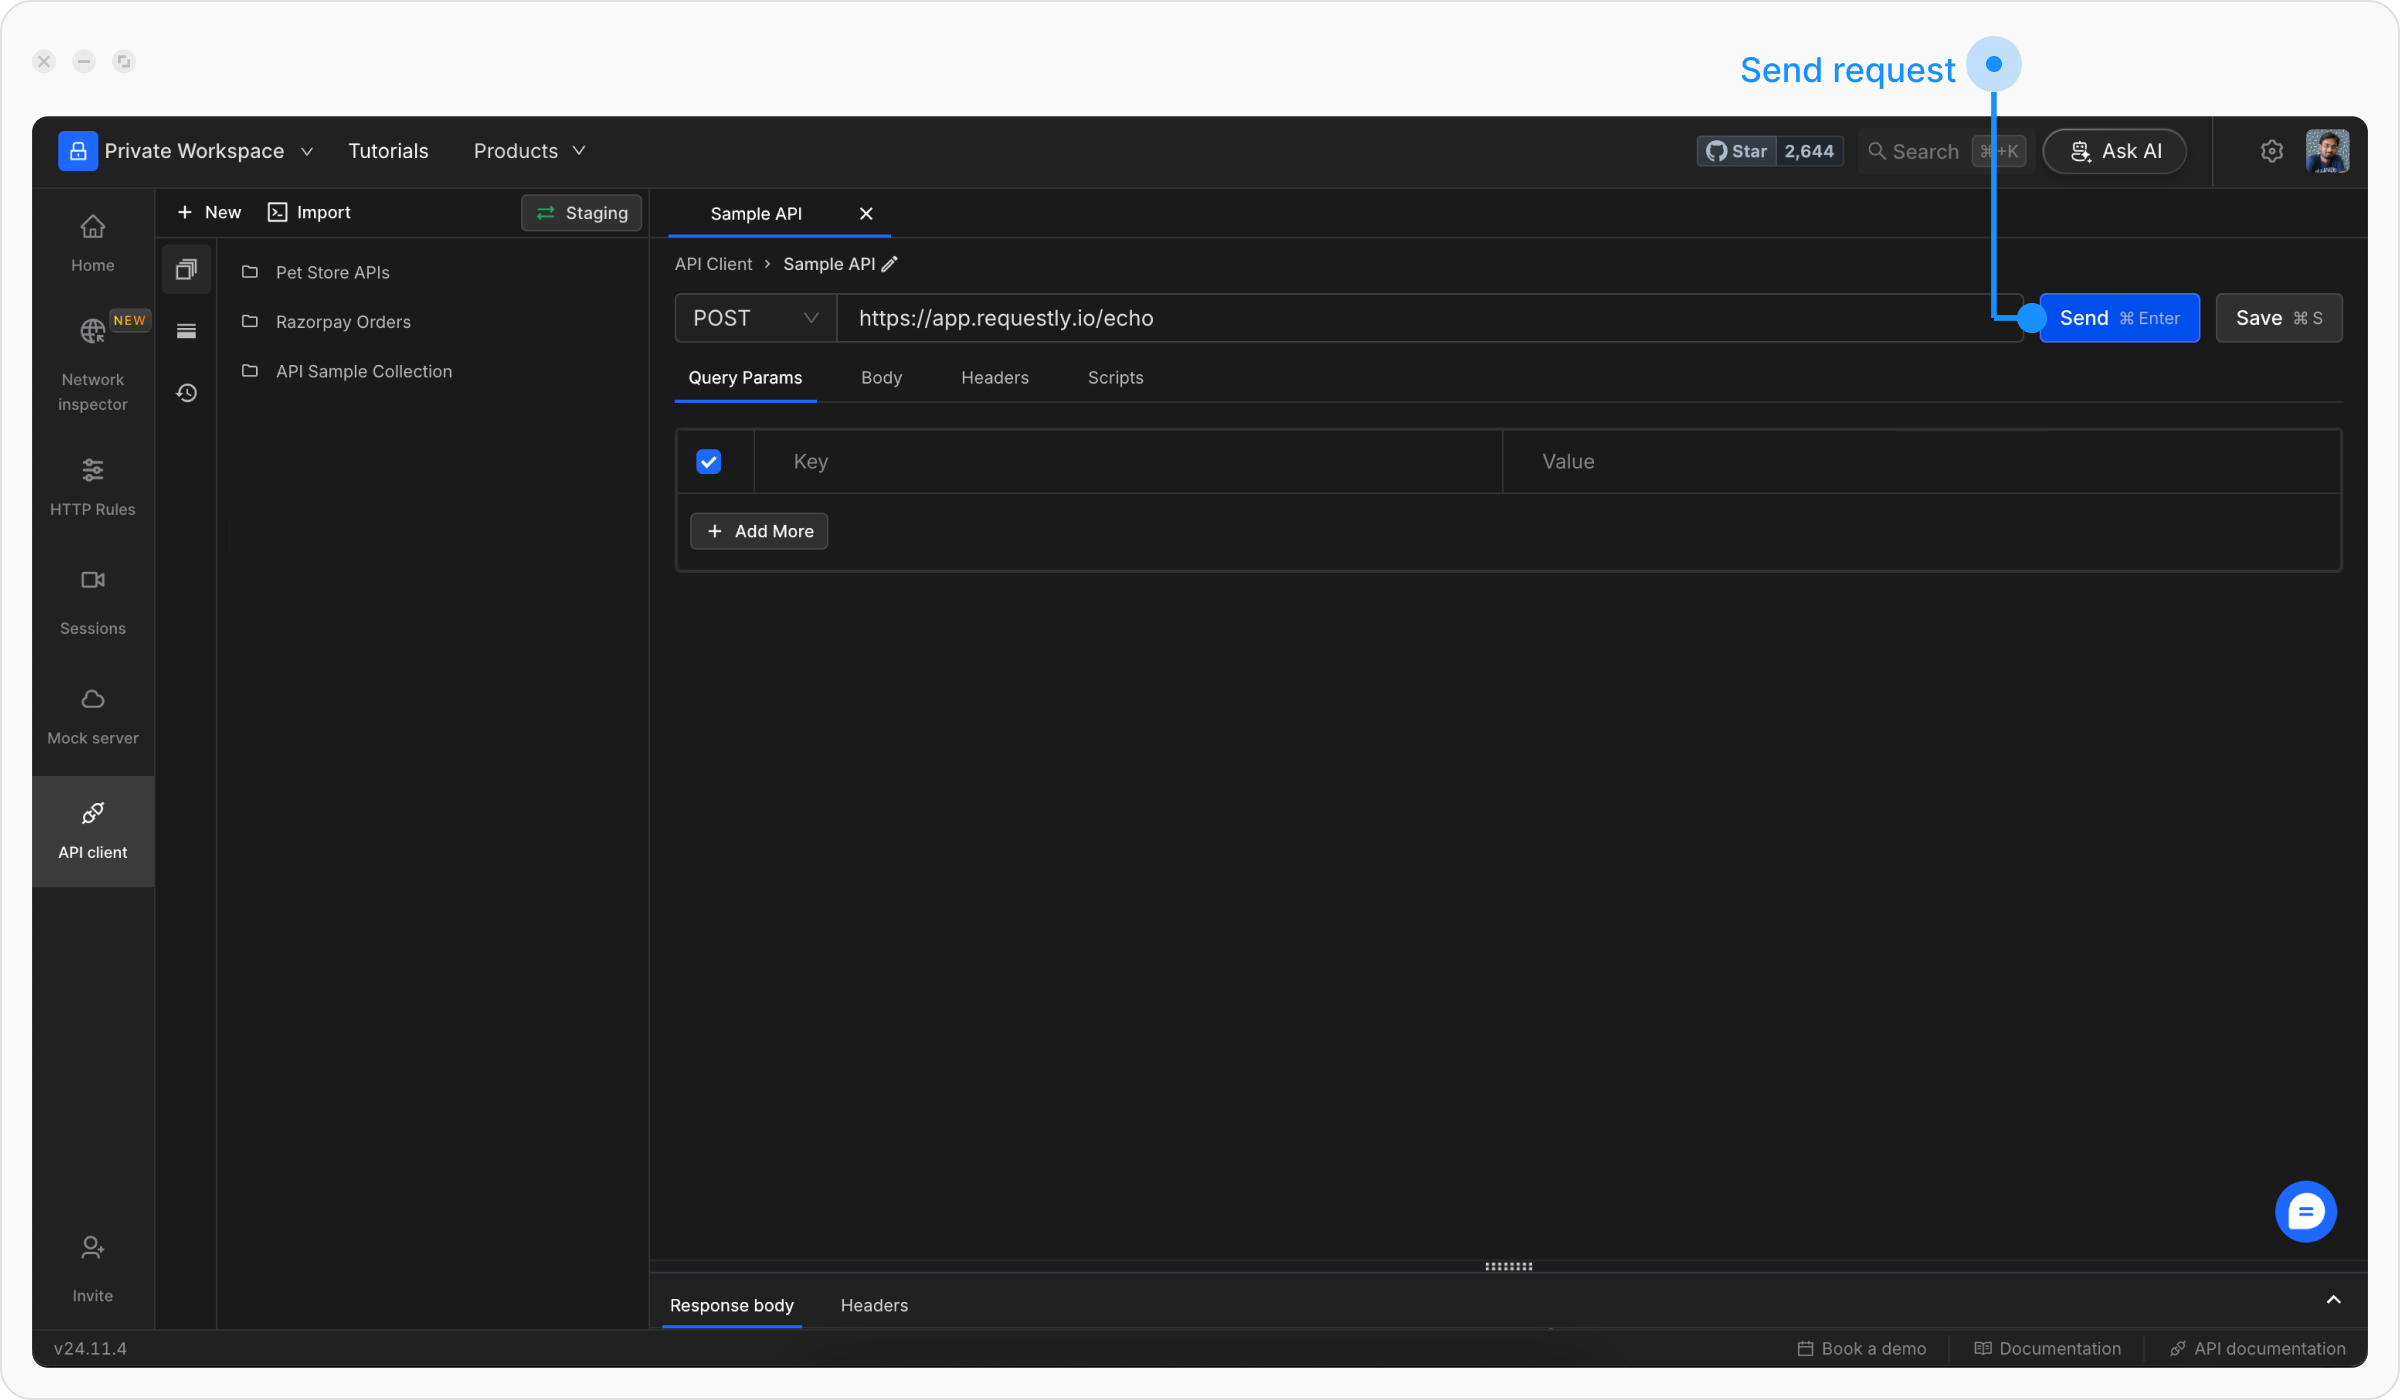
Click the **Save** & **Send** button to execute your request.
## Understanding the Response
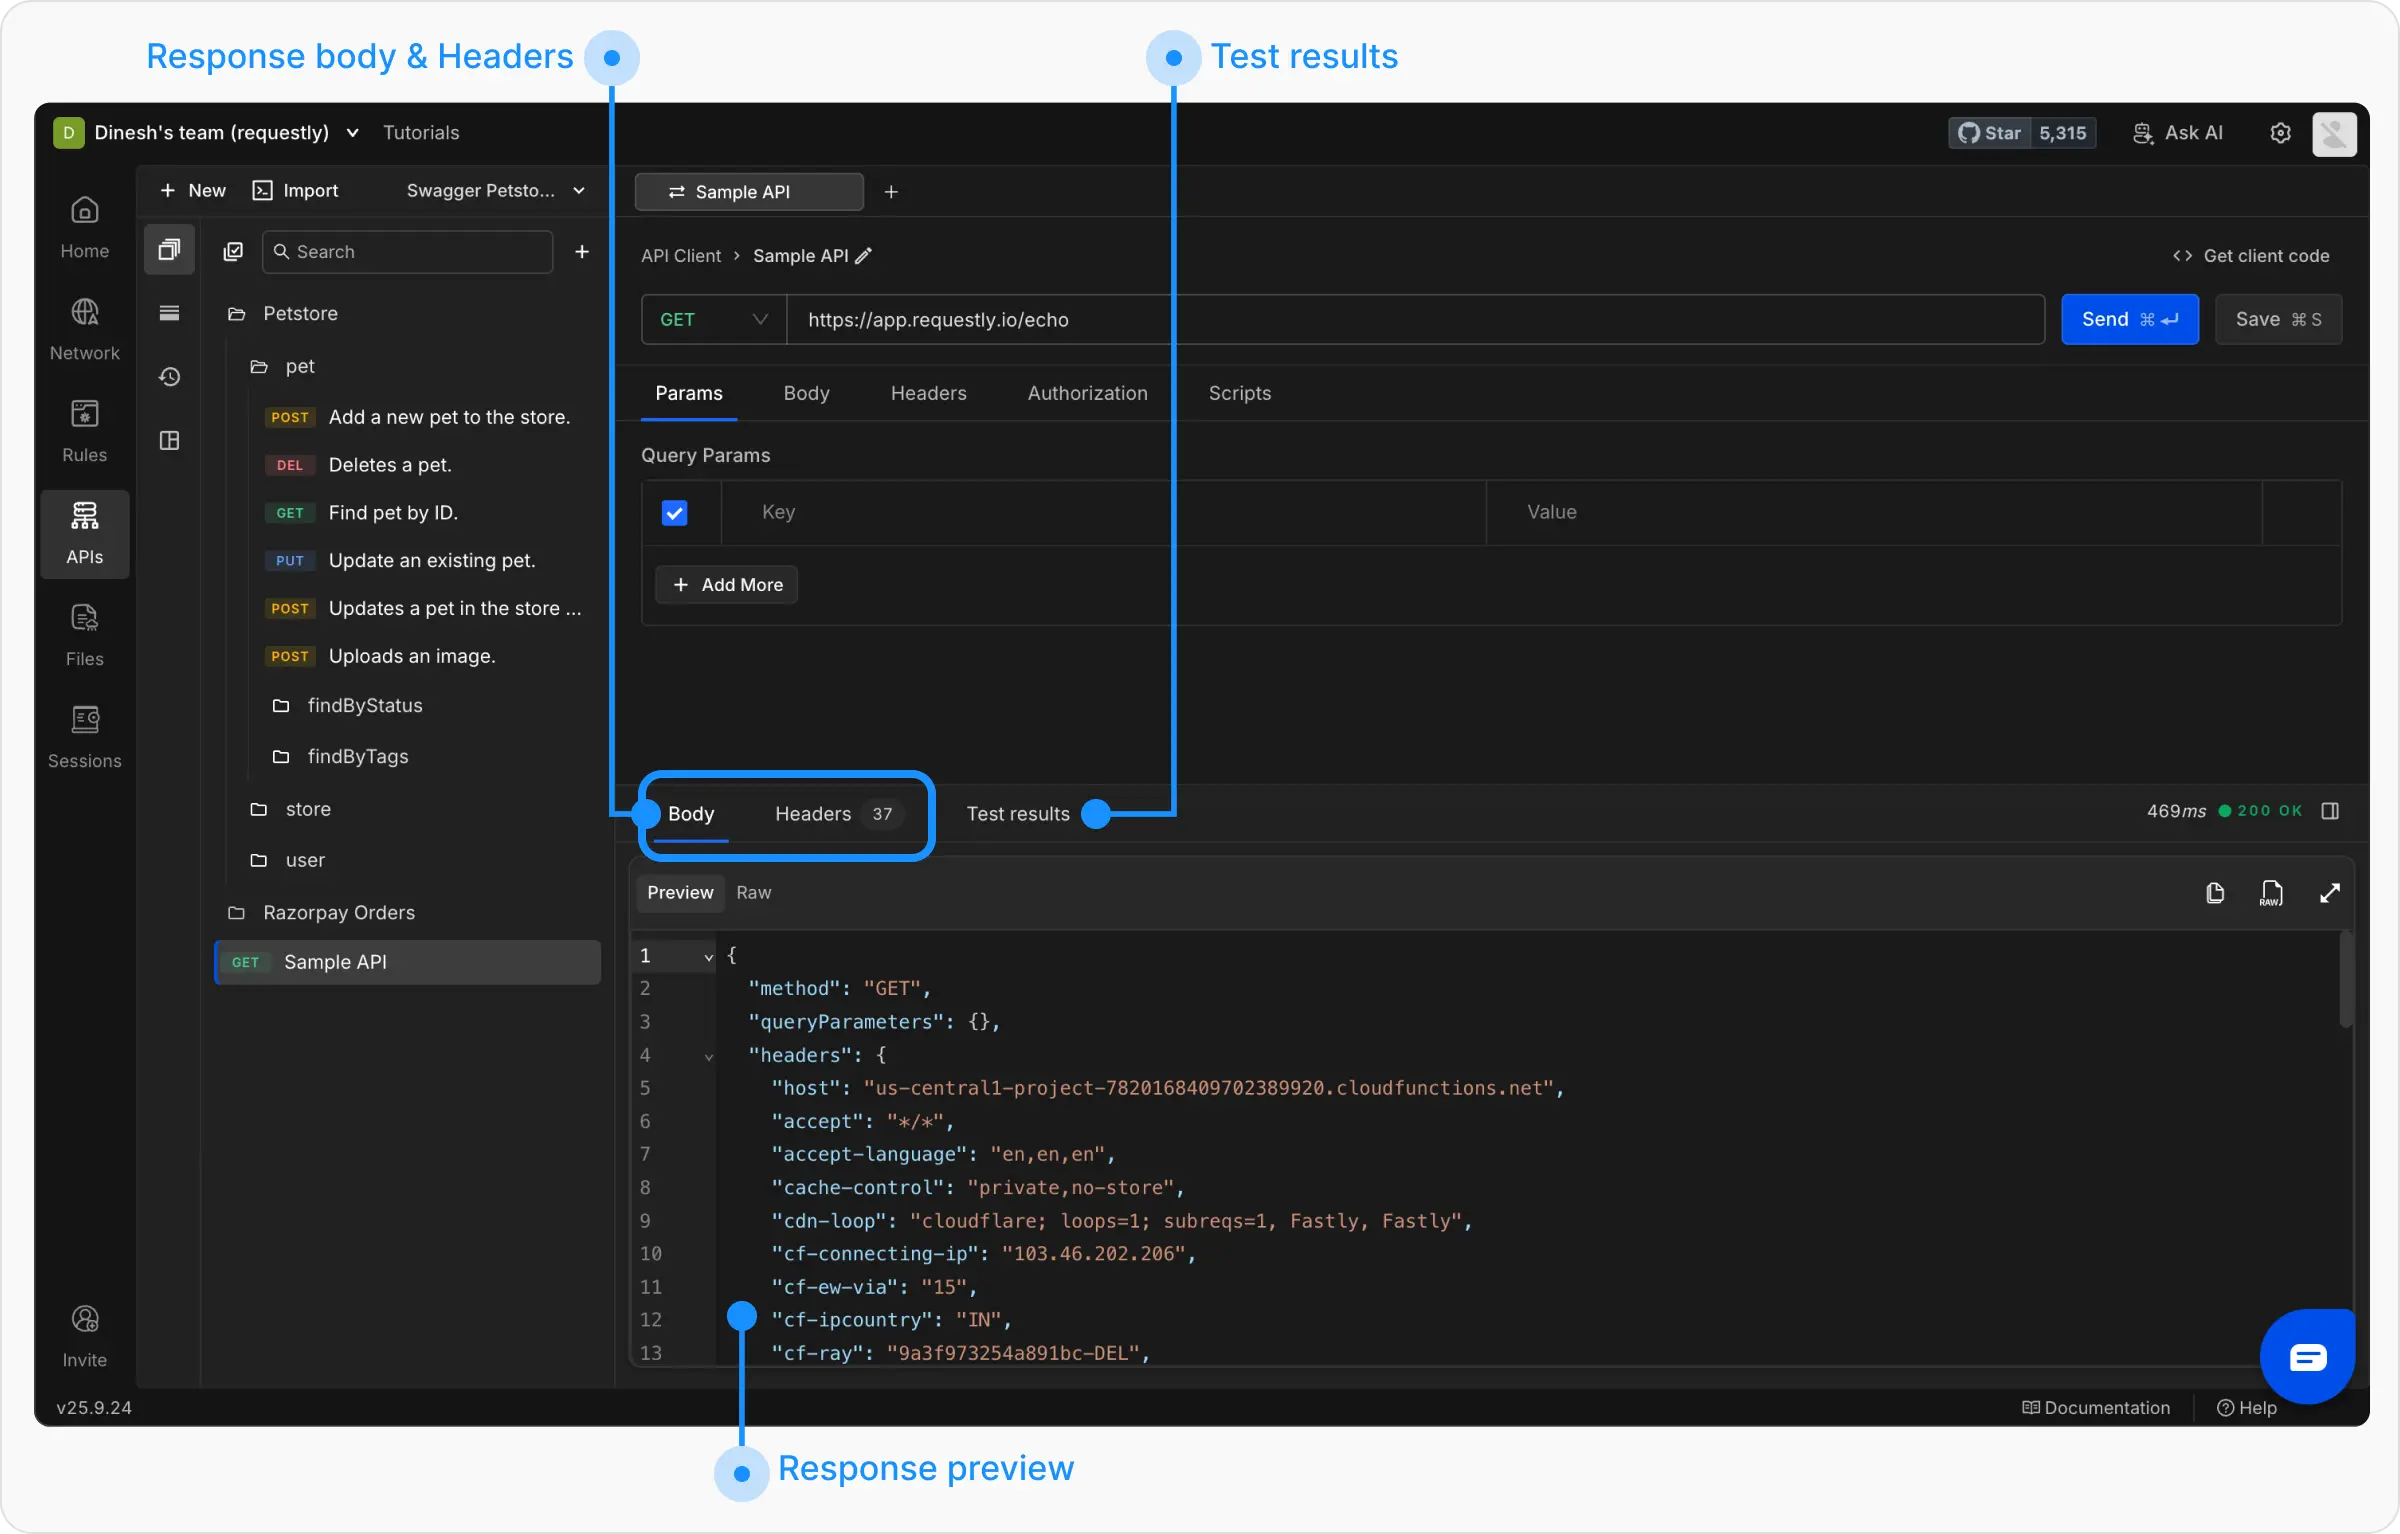
Once you send a request, you'll see the response displayed in the bottom panel with the following information:
### View the Response Body
Check the response body in the **Response Body** section. You can switch between formatted (pretty) and raw views.
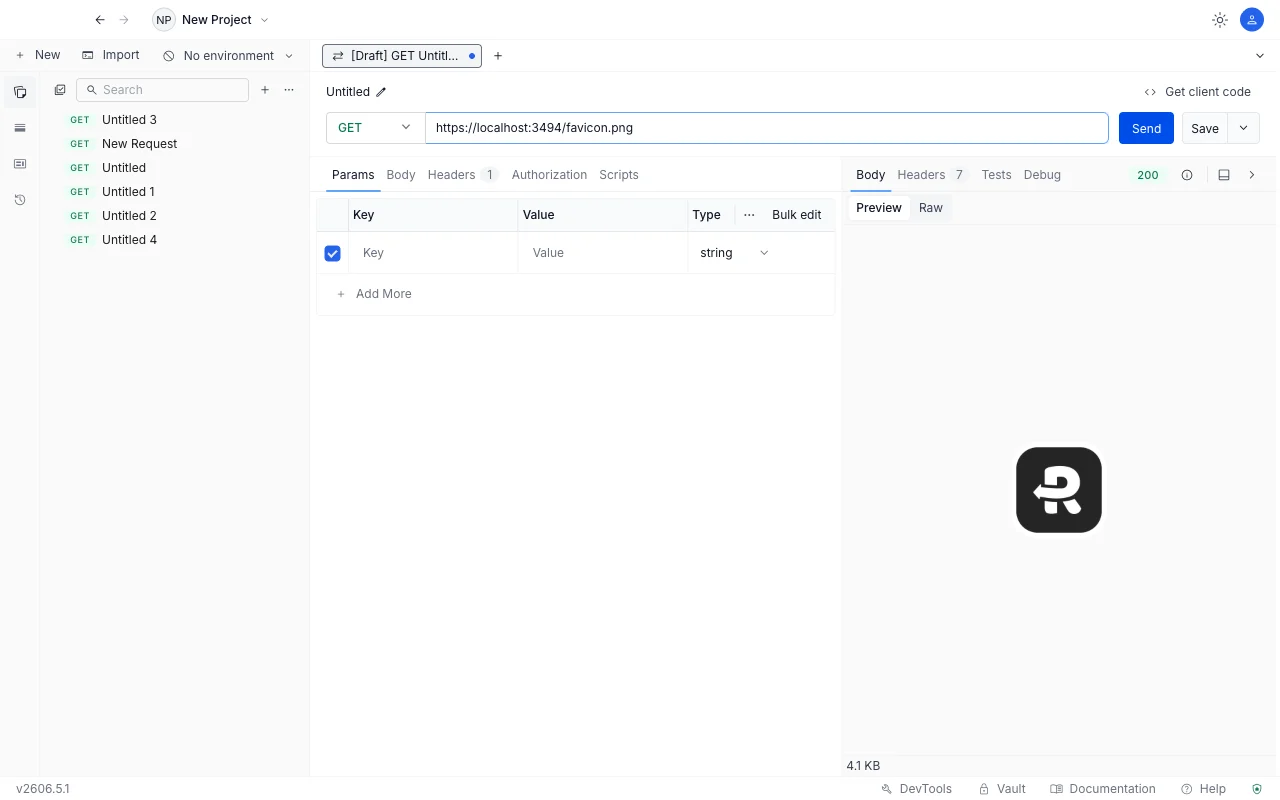
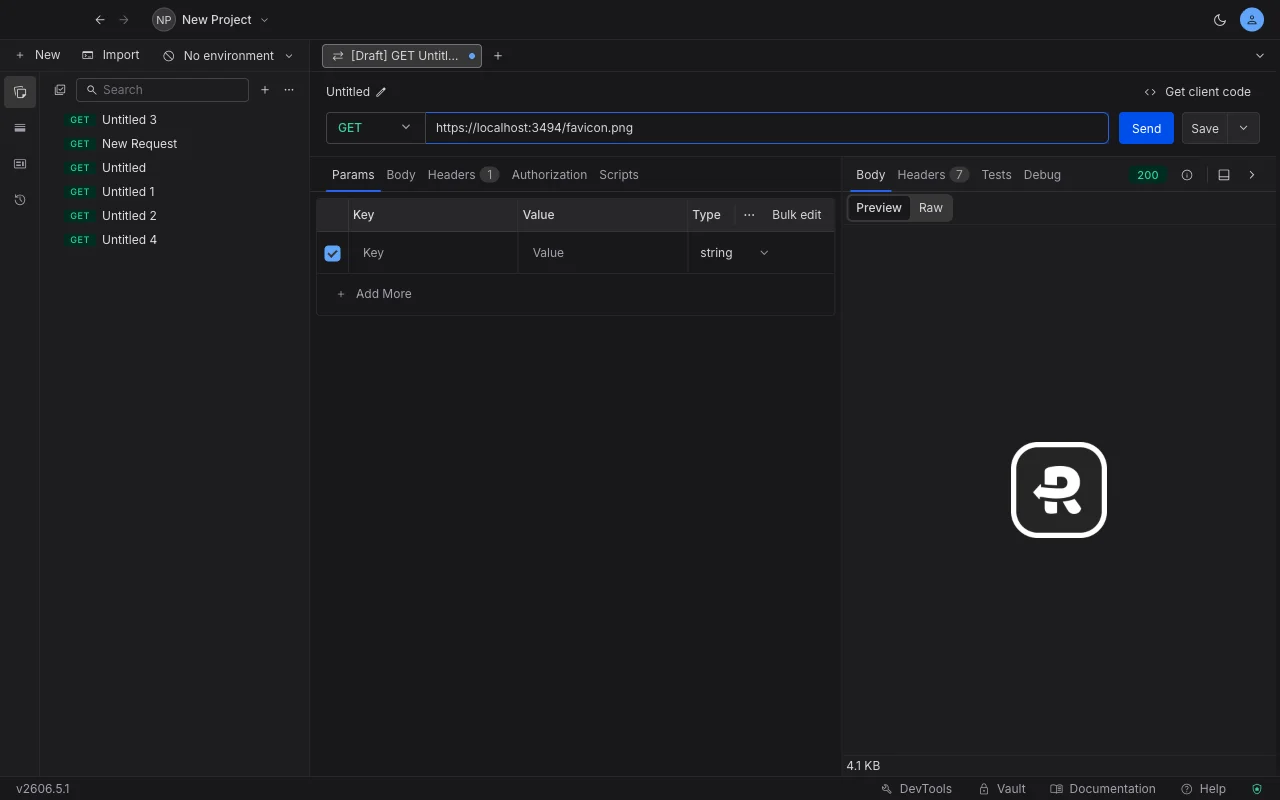
Requestly renders the response based on its content type:
* **Text and structured data** (JSON, XML, HTML, plain text) shows in the editor. JSON and XML are pretty-printed in Preview, and the **Raw** toggle shows the response exactly as it came off the wire. For JSON, you can also [filter the response](/api-client/send-api-request/filter-json-response) to just the values you need using a JSONPath expression.
* **Images** (PNG, JPEG, WebP, GIF, SVG) render as the actual picture in Preview. Switch to **Raw** to see the underlying transported text.
* **Other binary content** (PDF, ZIP, audio, video, fonts, and similar) shows a **Binary response** placeholder with the response size, rather than unreadable characters. Switch to **Raw** to view the Base64-encoded body.
The **Size** shown for the response reflects the true byte count of the body, so it stays accurate for images and other binary responses.
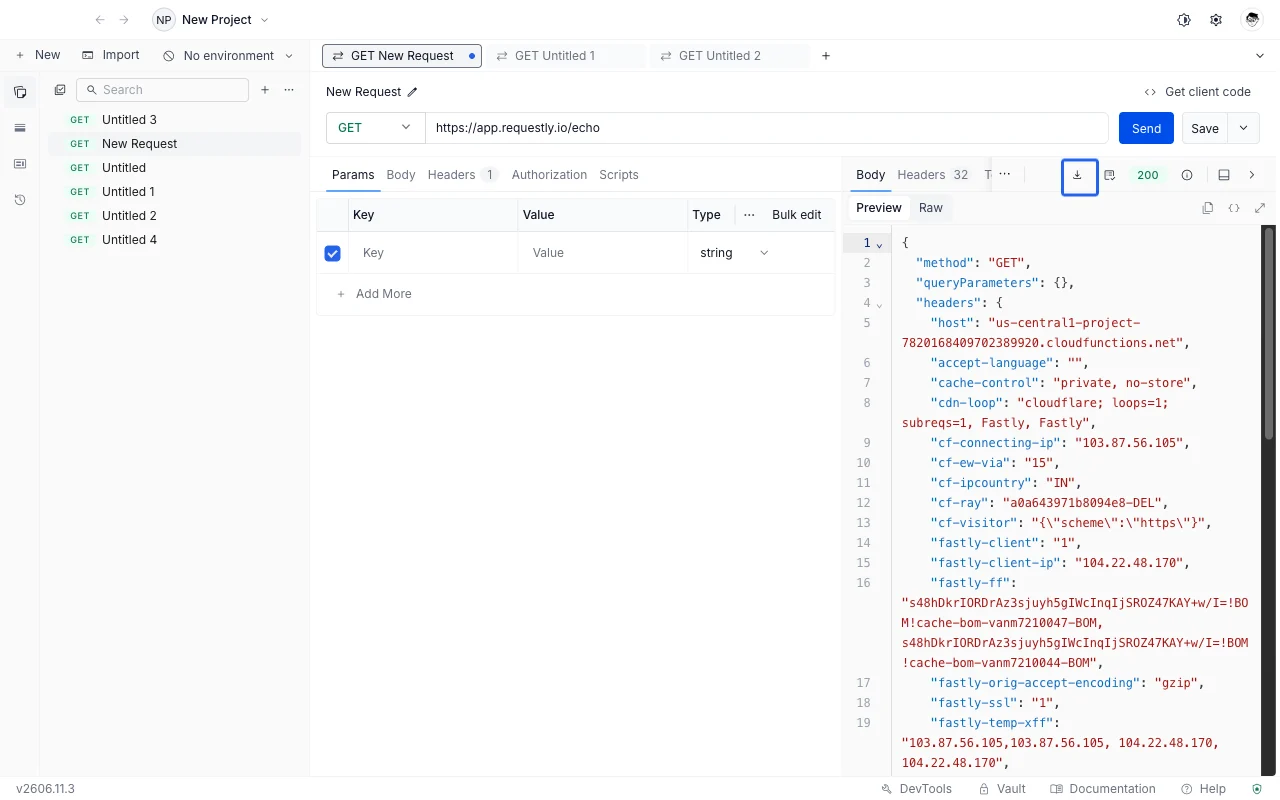
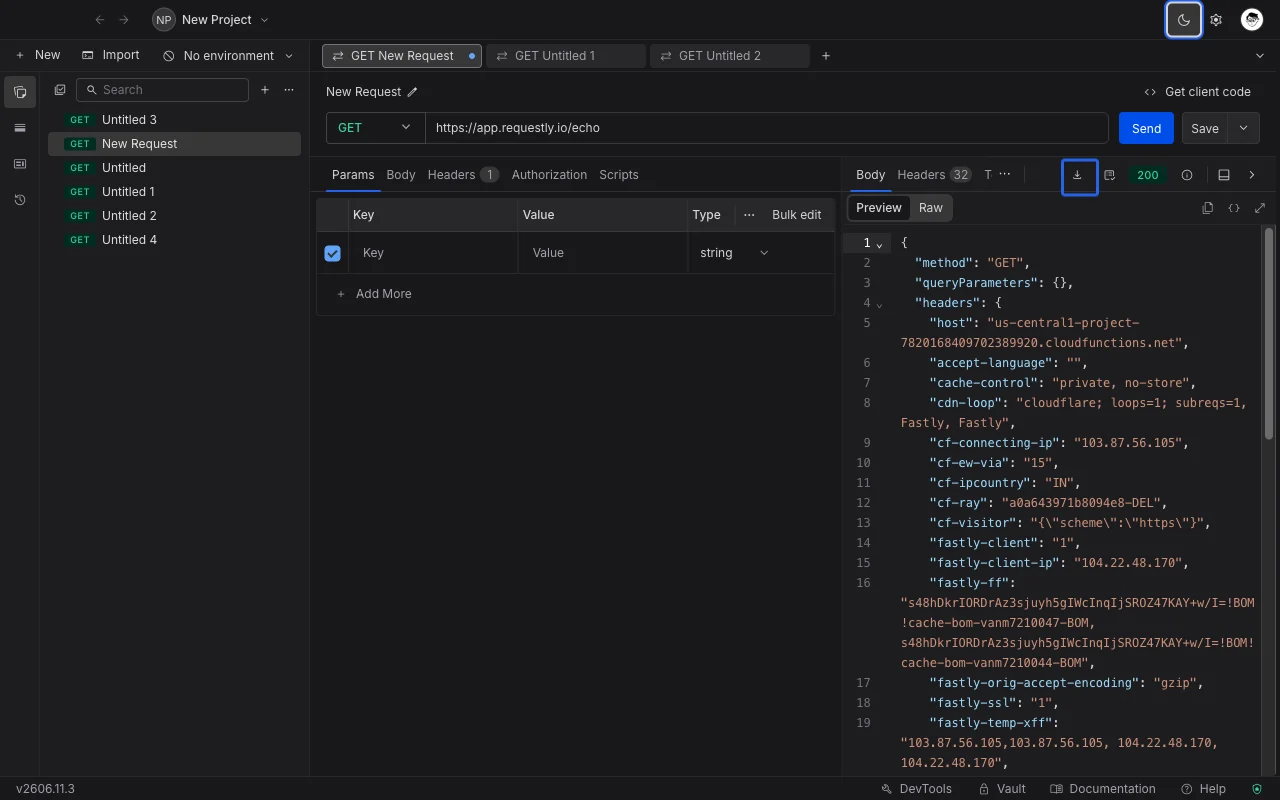
### Download the Response Body
To save a response to a file, click the **Download** button in the response pane header, next to **Save as example**.
Download works for both text and binary responses. Binary content (images, PDFs, fonts, and similar) is saved byte-for-byte, so the file you get is identical to what the server sent - the same response shown in the [preview above](#view-the-response-body).
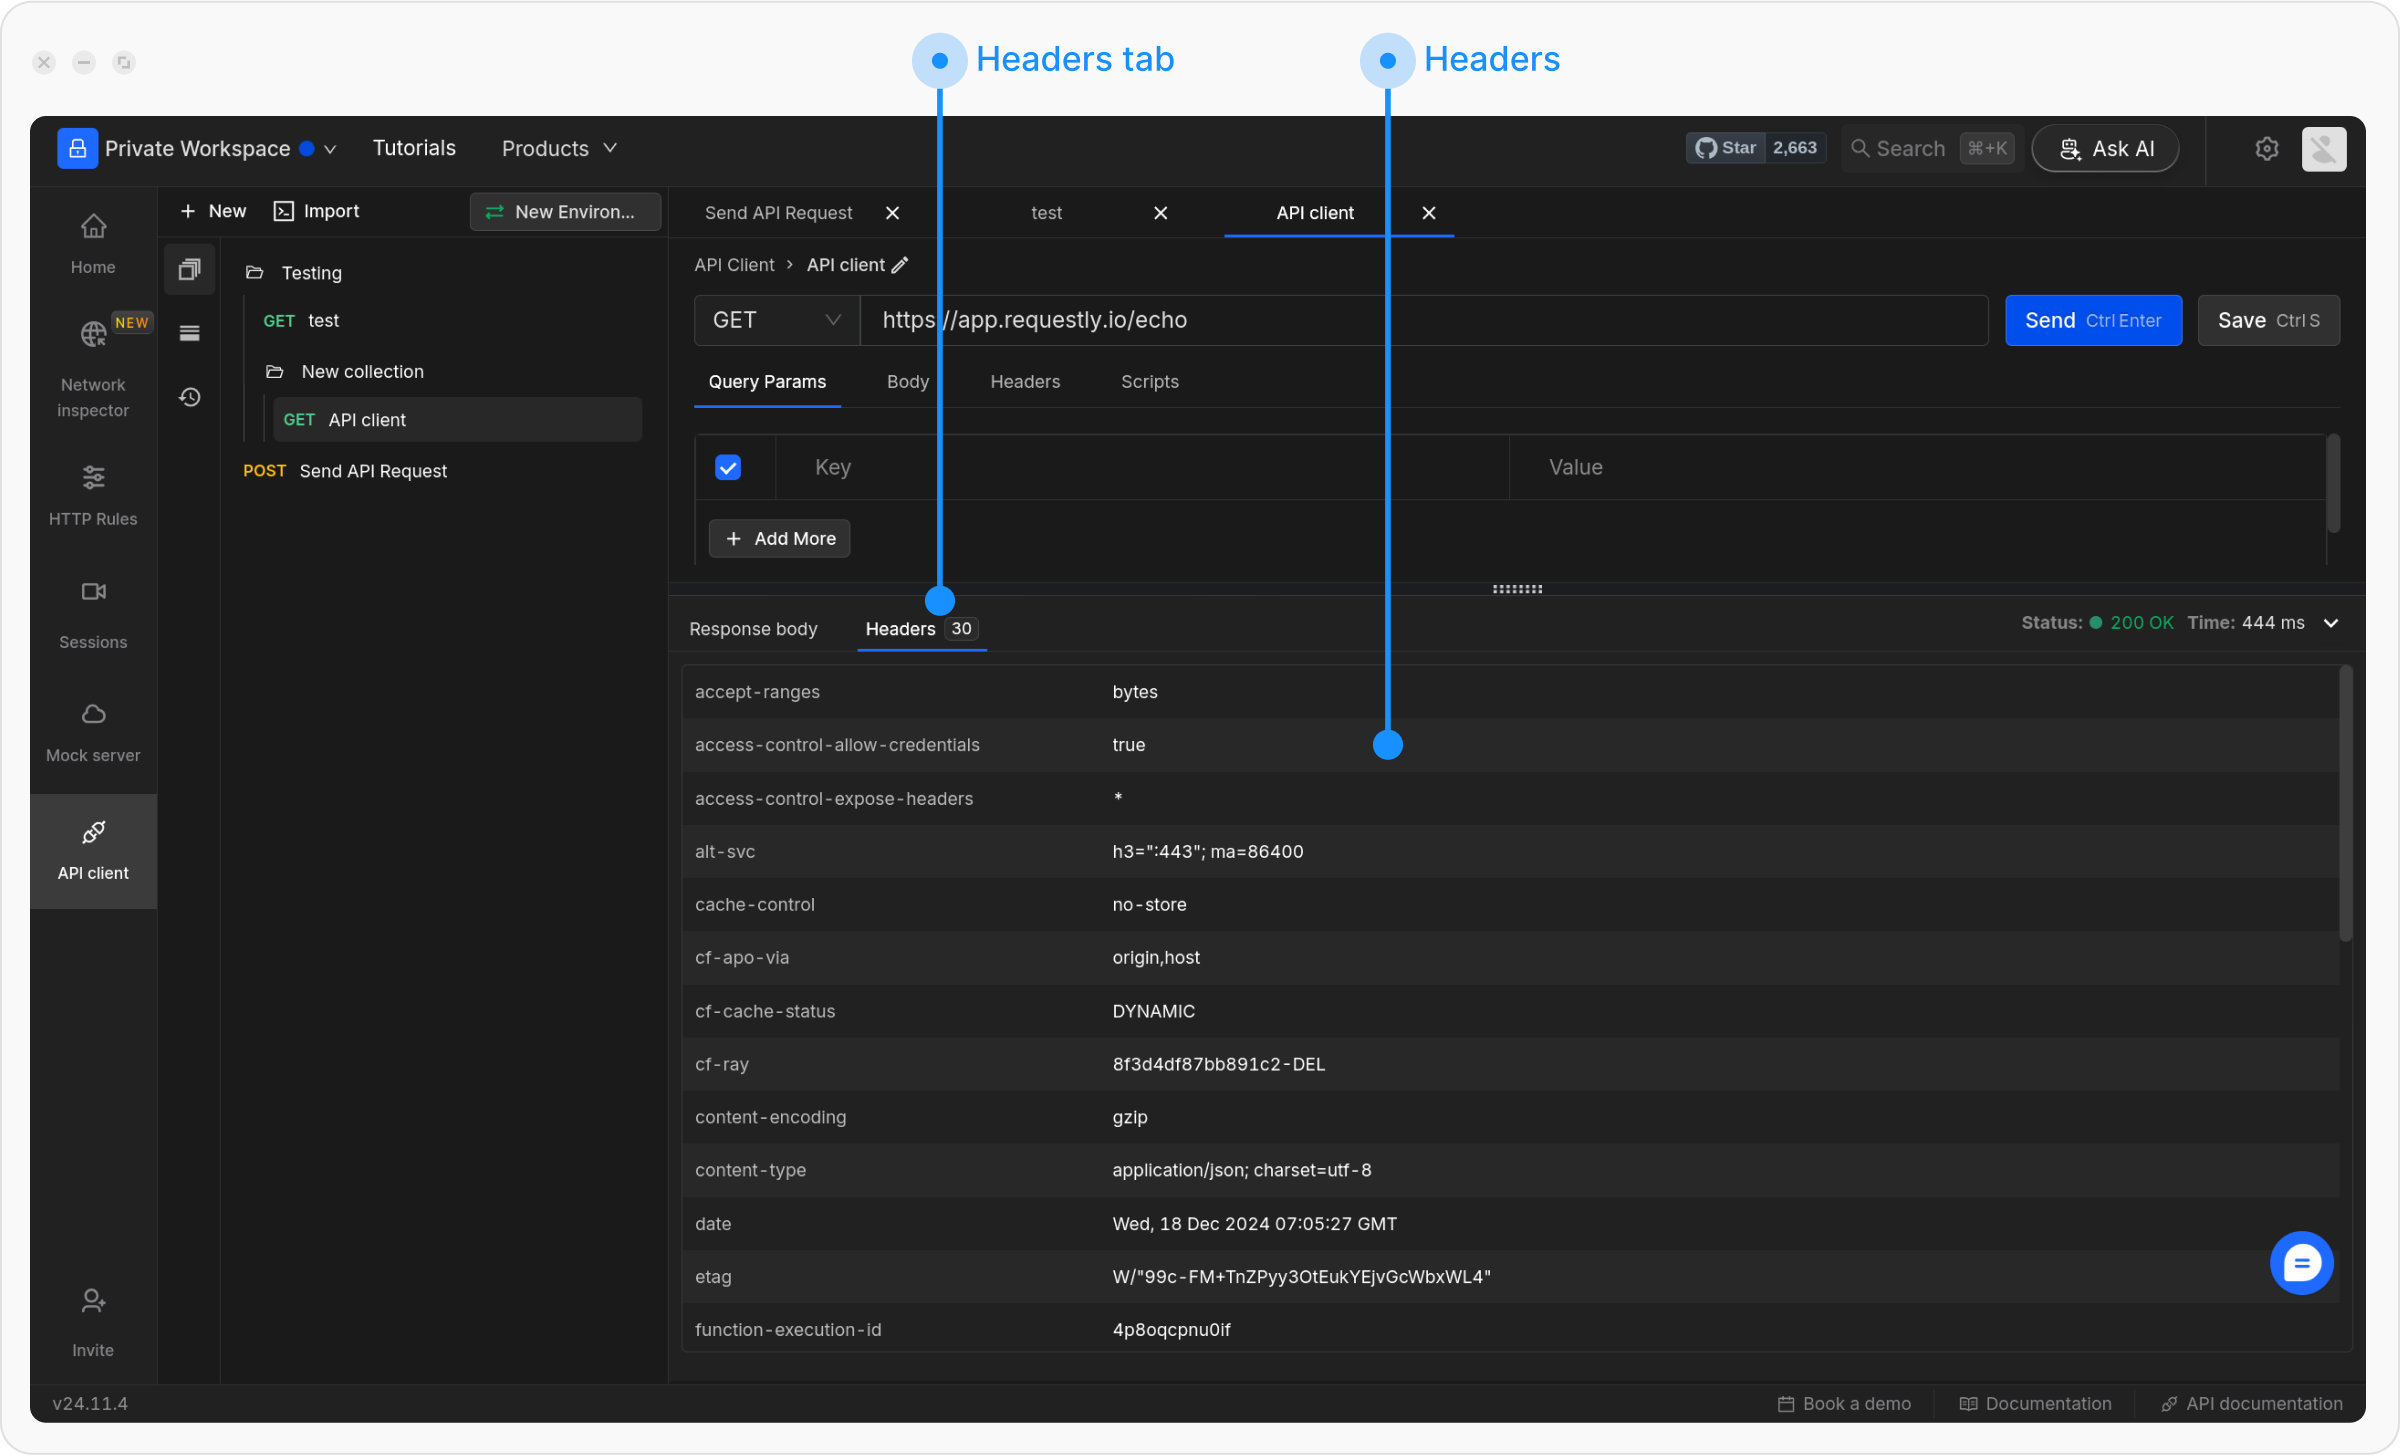
### Check the Response Headers
Review the headers sent back by the server in the **Headers** tab.
## Next Steps
Now that you understand the basics, explore these guides to master API request creation:
Set up HTTP methods, URLs, and send your first request
Add query parameters, path variables, and request body data
Configure headers for authentication and content types

 Requestly renders the response based on its content type:
* **Text and structured data** (JSON, XML, HTML, plain text) shows in the editor. JSON and XML are pretty-printed in Preview, and the **Raw** toggle shows the response exactly as it came off the wire. For JSON, you can also [filter the response](/api-client/send-api-request/filter-json-response) to just the values you need using a JSONPath expression.
* **Images** (PNG, JPEG, WebP, GIF, SVG) render as the actual picture in Preview. Switch to **Raw** to see the underlying transported text.
* **Other binary content** (PDF, ZIP, audio, video, fonts, and similar) shows a **Binary response** placeholder with the response size, rather than unreadable characters. Switch to **Raw** to view the Base64-encoded body.
The **Size** shown for the response reflects the true byte count of the body, so it stays accurate for images and other binary responses.
Requestly renders the response based on its content type:
* **Text and structured data** (JSON, XML, HTML, plain text) shows in the editor. JSON and XML are pretty-printed in Preview, and the **Raw** toggle shows the response exactly as it came off the wire. For JSON, you can also [filter the response](/api-client/send-api-request/filter-json-response) to just the values you need using a JSONPath expression.
* **Images** (PNG, JPEG, WebP, GIF, SVG) render as the actual picture in Preview. Switch to **Raw** to see the underlying transported text.
* **Other binary content** (PDF, ZIP, audio, video, fonts, and similar) shows a **Binary response** placeholder with the response size, rather than unreadable characters. Switch to **Raw** to view the Base64-encoded body.
The **Size** shown for the response reflects the true byte count of the body, so it stays accurate for images and other binary responses.
 ### Download the Response Body
To save a response to a file, click the **Download** button in the response pane header, next to **Save as example**.
### Download the Response Body
To save a response to a file, click the **Download** button in the response pane header, next to **Save as example**.
 Download works for both text and binary responses. Binary content (images, PDFs, fonts, and similar) is saved byte-for-byte, so the file you get is identical to what the server sent - the same response shown in the [preview above](#view-the-response-body).
### Check the Response Headers
Review the headers sent back by the server in the **Headers** tab.
Download works for both text and binary responses. Binary content (images, PDFs, fonts, and similar) is saved byte-for-byte, so the file you get is identical to what the server sent - the same response shown in the [preview above](#view-the-response-body).
### Check the Response Headers
Review the headers sent back by the server in the **Headers** tab.
 ## Next Steps
Now that you understand the basics, explore these guides to master API request creation:
## Next Steps
Now that you understand the basics, explore these guides to master API request creation: