> ## Documentation Index
> Fetch the complete documentation index at: https://docs.requestly.com/llms.txt
> Use this file to discover all available pages before exploring further.
# Parameters and Body Data
> Learn how to add query parameters, path variables, and request body data to your API requests in Requestly.
Parameters and request bodies allow you to send data with your API requests. This guide covers query parameters, path variables, and different request body formats.
## Path Variables
Path variables allow you to define dynamic segments in your API URL using the **:variableName** syntax. This is useful for RESTful APIs where resource identifiers are part of the URL path.
For example, if your API endpoint is:
```
https://api.example.com/users/:userId/posts/:postId
```
Requestly automatically detects the path variables (`:userId` and `:postId`) from the URL and displays them in the **Params** tab under **Path Variables**. You can then set values for each variable:
| Key | Value | Description |
| ------ | ----- | ---------------------------- |
| userId | 123 | The user's unique identifier |
| postId | 456 | The post's unique identifier |
When you send the request, Requestly compiles the URL with your provided values:
```
https://api.example.com/users/123/posts/456
```
Path variables are automatically extracted from your URL. Simply type a URL with `:variableName` segments, and they'll appear in the Path Variables table for you to fill in.
## Query Parameters
In the **Query Params** section, you can add query parameters as **key-value pairs** to send extra information with the URL. To add more parameters, click on the `+ Add More` button.
Each query parameter consists of:
* **Key**: The parameter name
* **Value**: The parameter value
* **Type**: An enum to enforce the value type
* **Description** (optional): Internal documentation explaining the purpose of the parameter
For example:
* Adding `uid=123` to `https://app.requestly.io/echo` results in: `https://app.requestly.io/echo?uid=123`
The checkboxes next to each parameter let you include or exclude them without deleting them. For instance, if you uncheck a parameter, the final URL will not include it.
### Bulk Edit Query Parameters
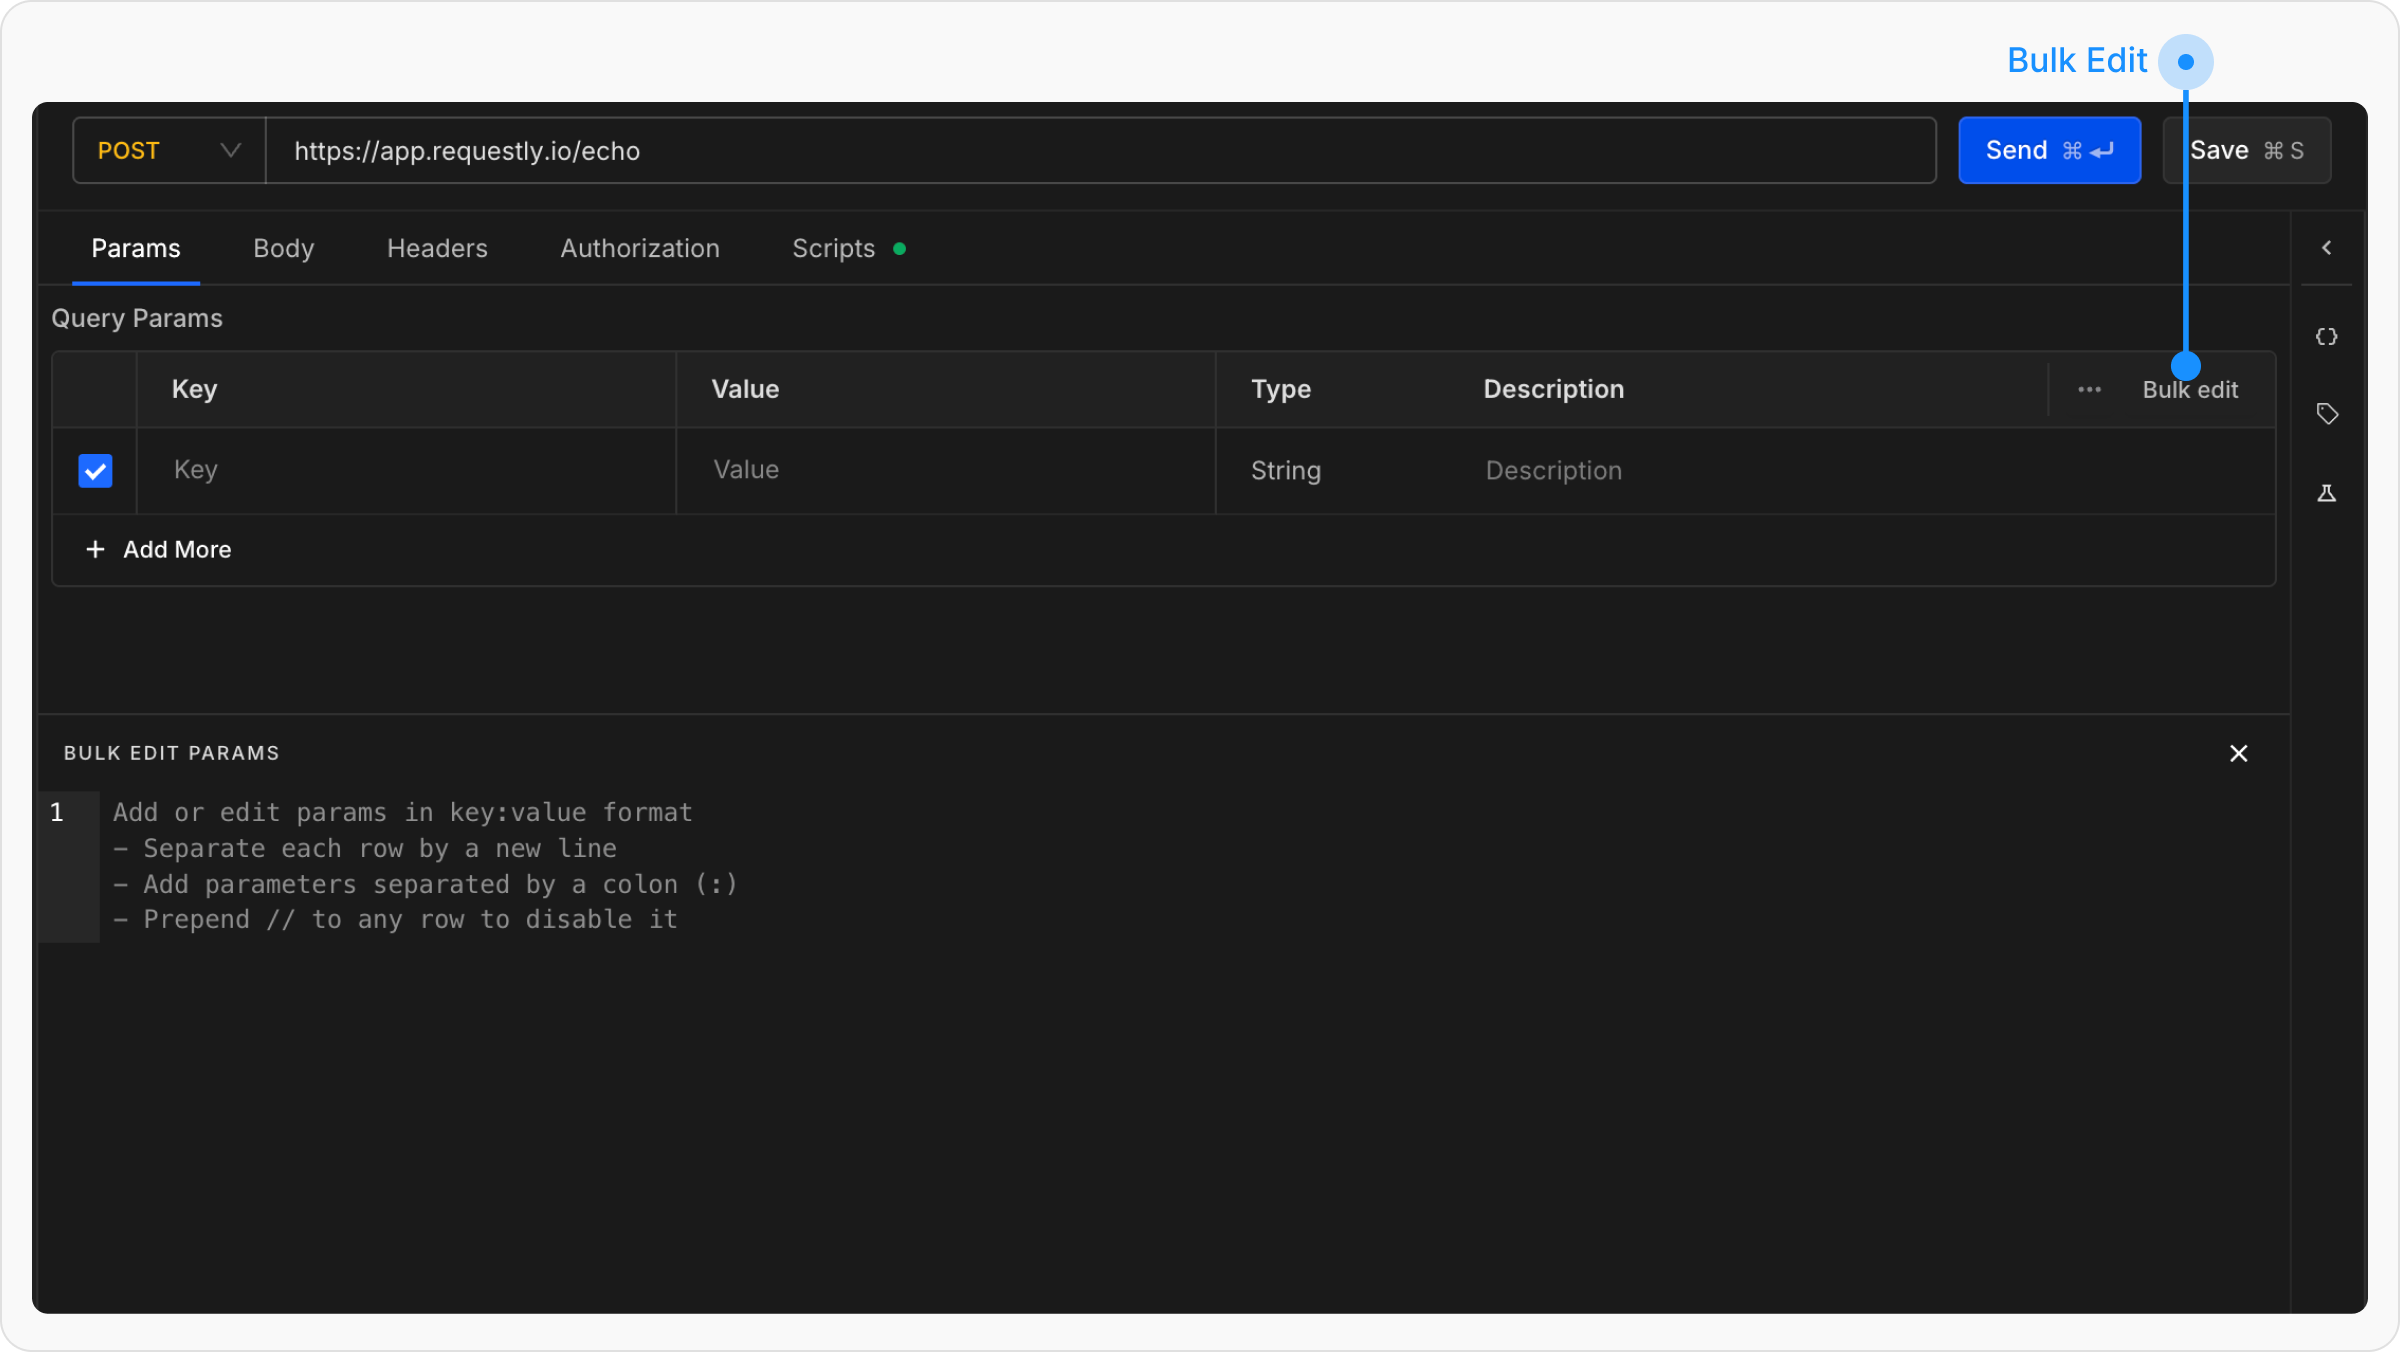 You can also manage query parameters using **Bulk Edit**. This allows you to add or update multiple parameters at once in a key:value format.
* Add one parameter per line
* Separate keys and values using a colon `:`
* Prefix any line with `//` to disable that parameter
Bulk Edit is useful when working with a large number of query parameters or when making quick mass updates.
**Example:**
```
page:1
limit:50
sort:desc
// filter:active
```
## Request Body
For POST, PUT, or PATCH requests, use the **Body** tab to send data to the server. Requestly supports multiple body formats to accommodate different API requirements.
### Supported Body Types
Send raw data as plain **text** or structured **JSON**.
**When to use:**
* Sending JSON data to REST APIs
* Posting XML or plain text
* Sending custom formatted data
You can select the language format:
* **JSON** – for structured data like API payloads
* **Text** – for plain string or unstructured data
* **XML** – for XML-based APIs
* **HTML** – for HTML content
You can also manage query parameters using **Bulk Edit**. This allows you to add or update multiple parameters at once in a key:value format.
* Add one parameter per line
* Separate keys and values using a colon `:`
* Prefix any line with `//` to disable that parameter
Bulk Edit is useful when working with a large number of query parameters or when making quick mass updates.
**Example:**
```
page:1
limit:50
sort:desc
// filter:active
```
## Request Body
For POST, PUT, or PATCH requests, use the **Body** tab to send data to the server. Requestly supports multiple body formats to accommodate different API requirements.
### Supported Body Types
Send raw data as plain **text** or structured **JSON**.
**When to use:**
* Sending JSON data to REST APIs
* Posting XML or plain text
* Sending custom formatted data
You can select the language format:
* **JSON** – for structured data like API payloads
* **Text** – for plain string or unstructured data
* **XML** – for XML-based APIs
* **HTML** – for HTML content
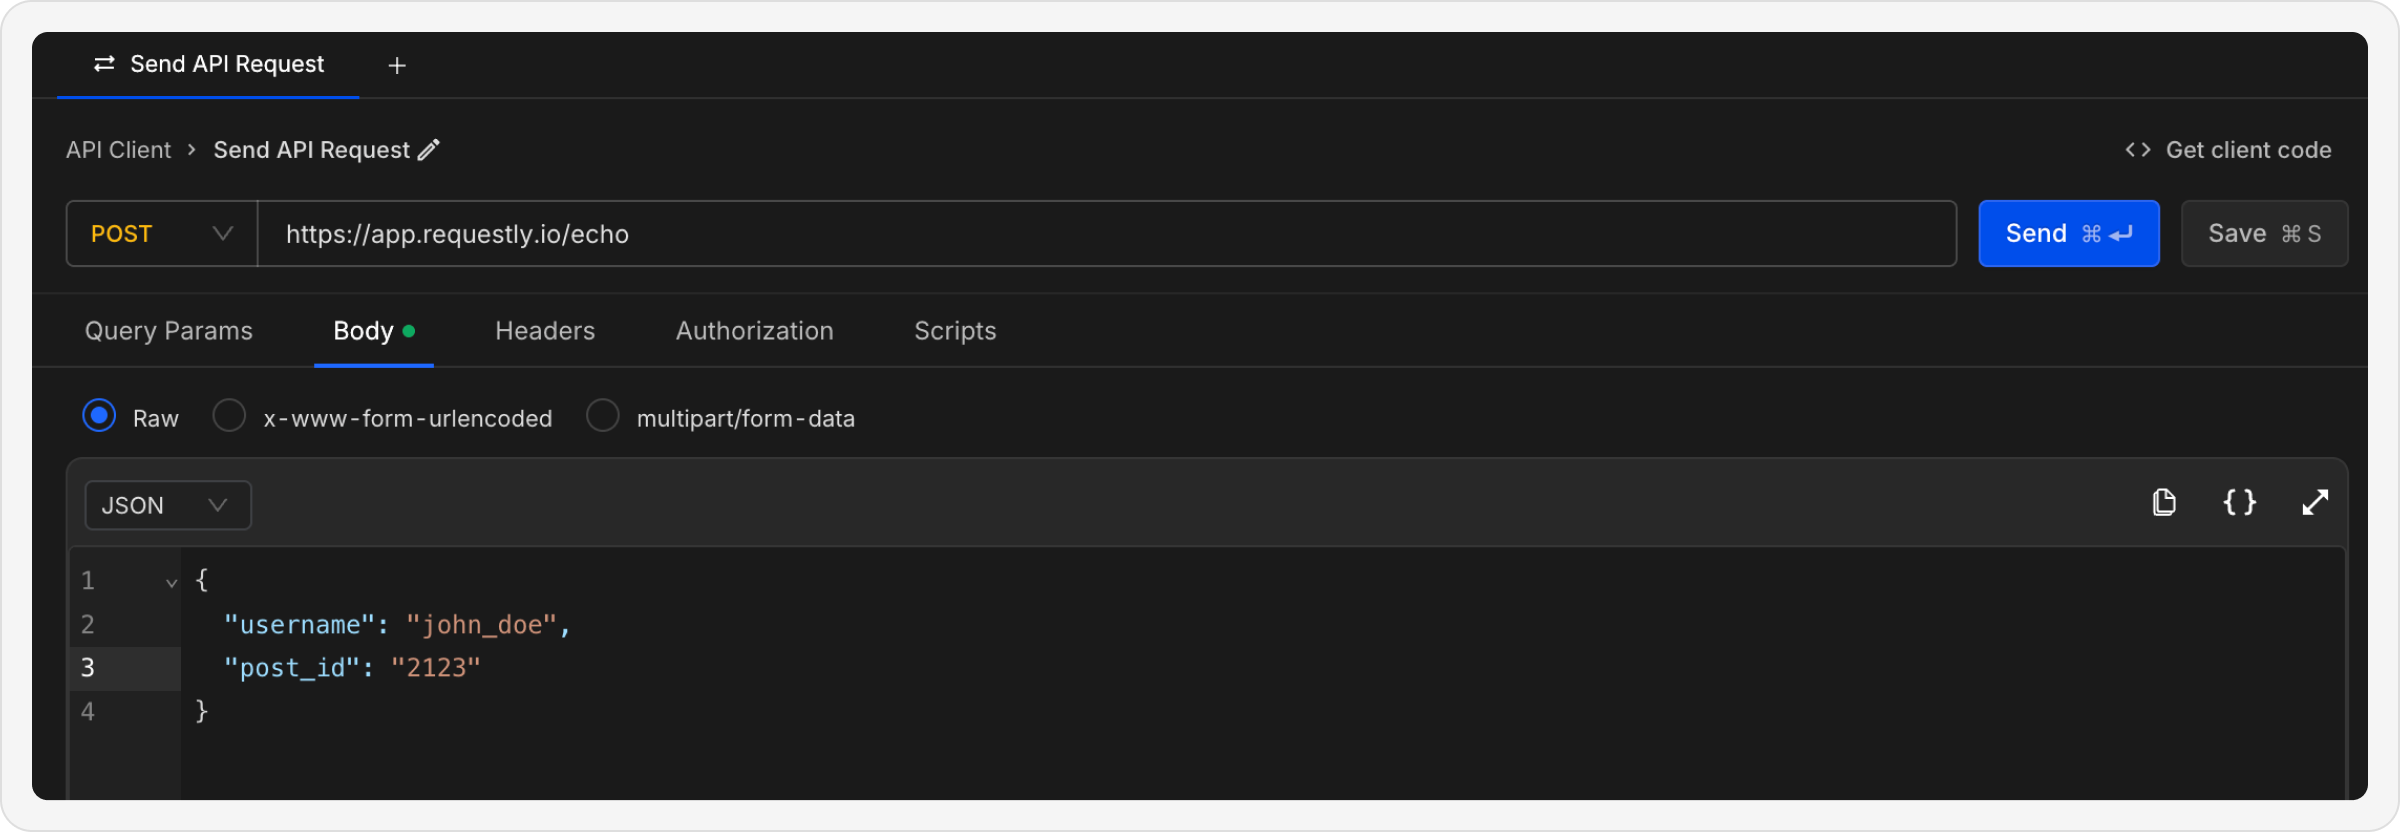 **Example JSON:**
```json theme={null}
{
"name": "John Doe",
"email": "john@example.com",
"age": 30,
"active": true
}
```
Sends data as URL-encoded key-value pairs. This format is commonly used for HTML form submissions.
**When to use:**
* Traditional web form submissions
* Simple key-value data
* APIs that expect form data
Each field consists of:
* **Key**: Field name
* **Value**: Field value
* **Description**: Optional documentation
**Example JSON:**
```json theme={null}
{
"name": "John Doe",
"email": "john@example.com",
"age": 30,
"active": true
}
```
Sends data as URL-encoded key-value pairs. This format is commonly used for HTML form submissions.
**When to use:**
* Traditional web form submissions
* Simple key-value data
* APIs that expect form data
Each field consists of:
* **Key**: Field name
* **Value**: Field value
* **Description**: Optional documentation
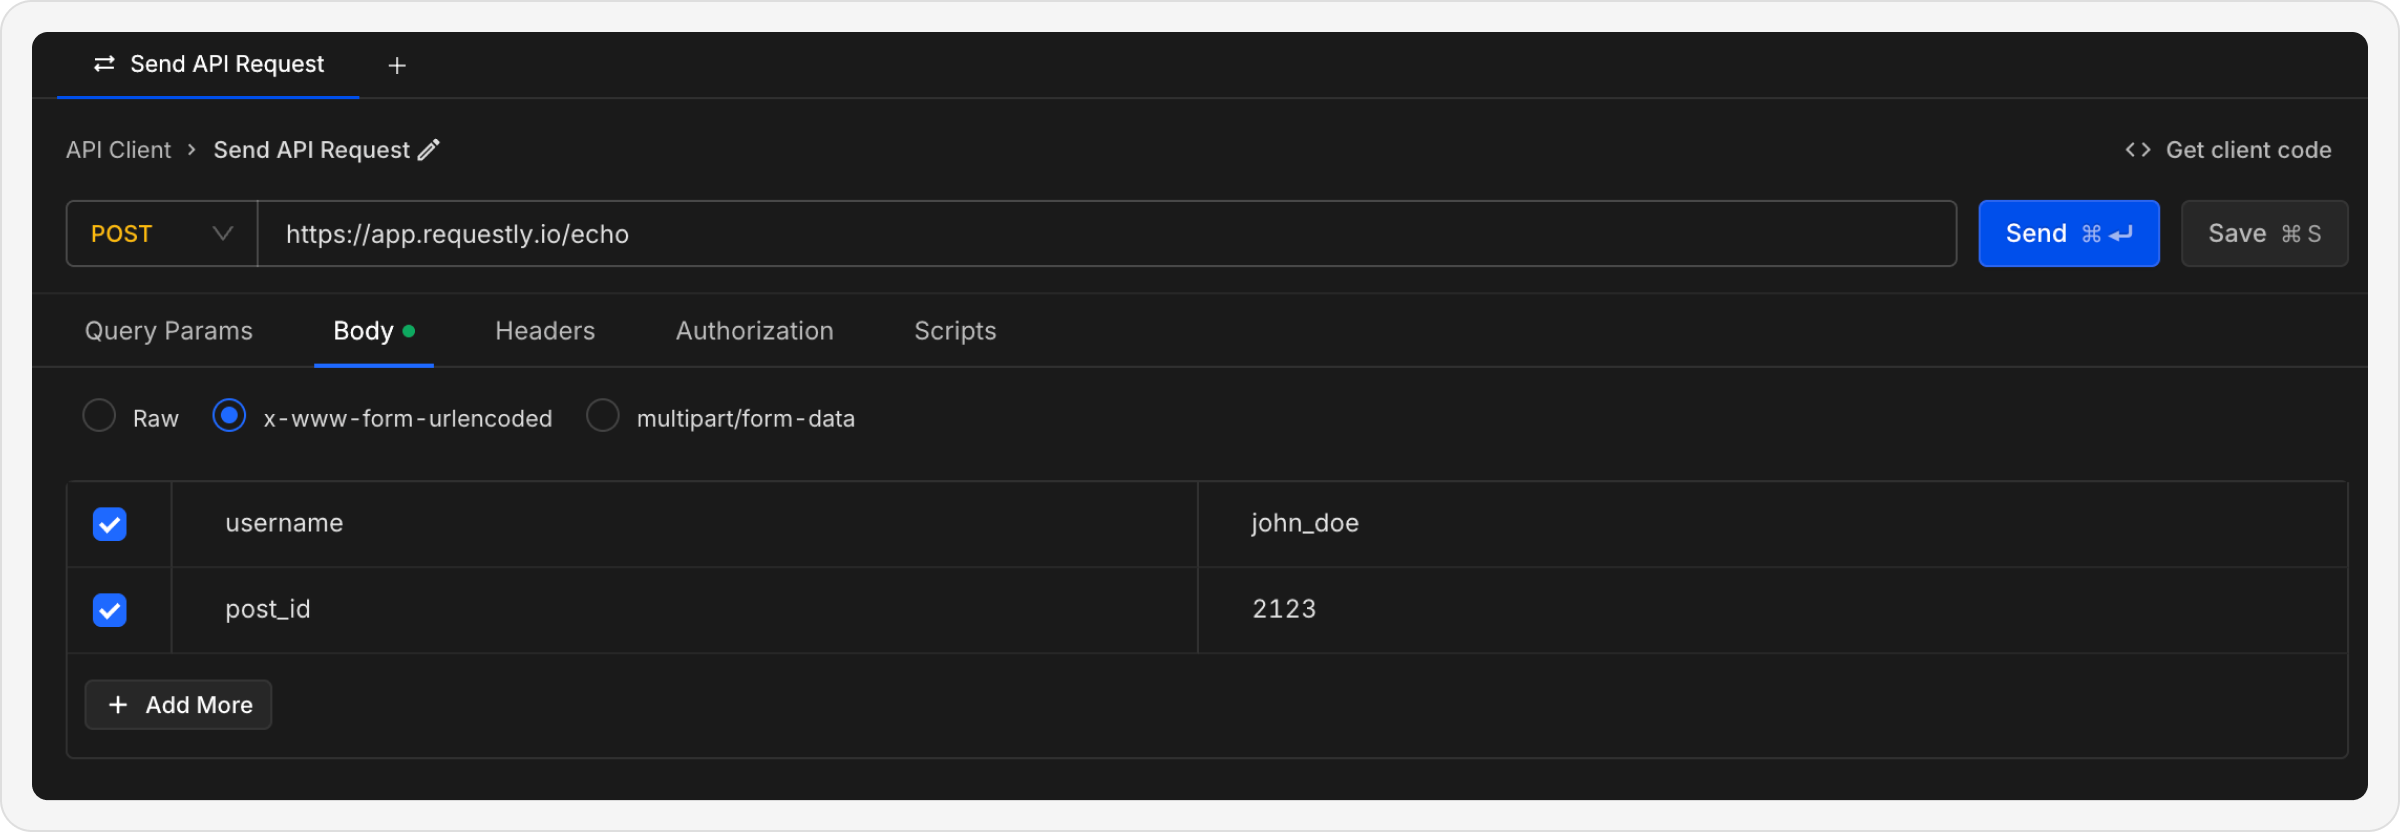 **Example:**
```
username=johndoe
password=secret123
remember=true
```
Used when uploading files along with form fields. Each field is sent as a separate part of the request body.
**When to use:**
* Uploading images, documents, or files
* Sending files with metadata
* Form submissions with file attachments
Each field can be either:
* **Text field**: Regular key-value pair
* **File field**: File upload with browse button
**Example:**
```
username=johndoe
password=secret123
remember=true
```
Used when uploading files along with form fields. Each field is sent as a separate part of the request body.
**When to use:**
* Uploading images, documents, or files
* Sending files with metadata
* Form submissions with file attachments
Each field can be either:
* **Text field**: Regular key-value pair
* **File field**: File upload with browse button
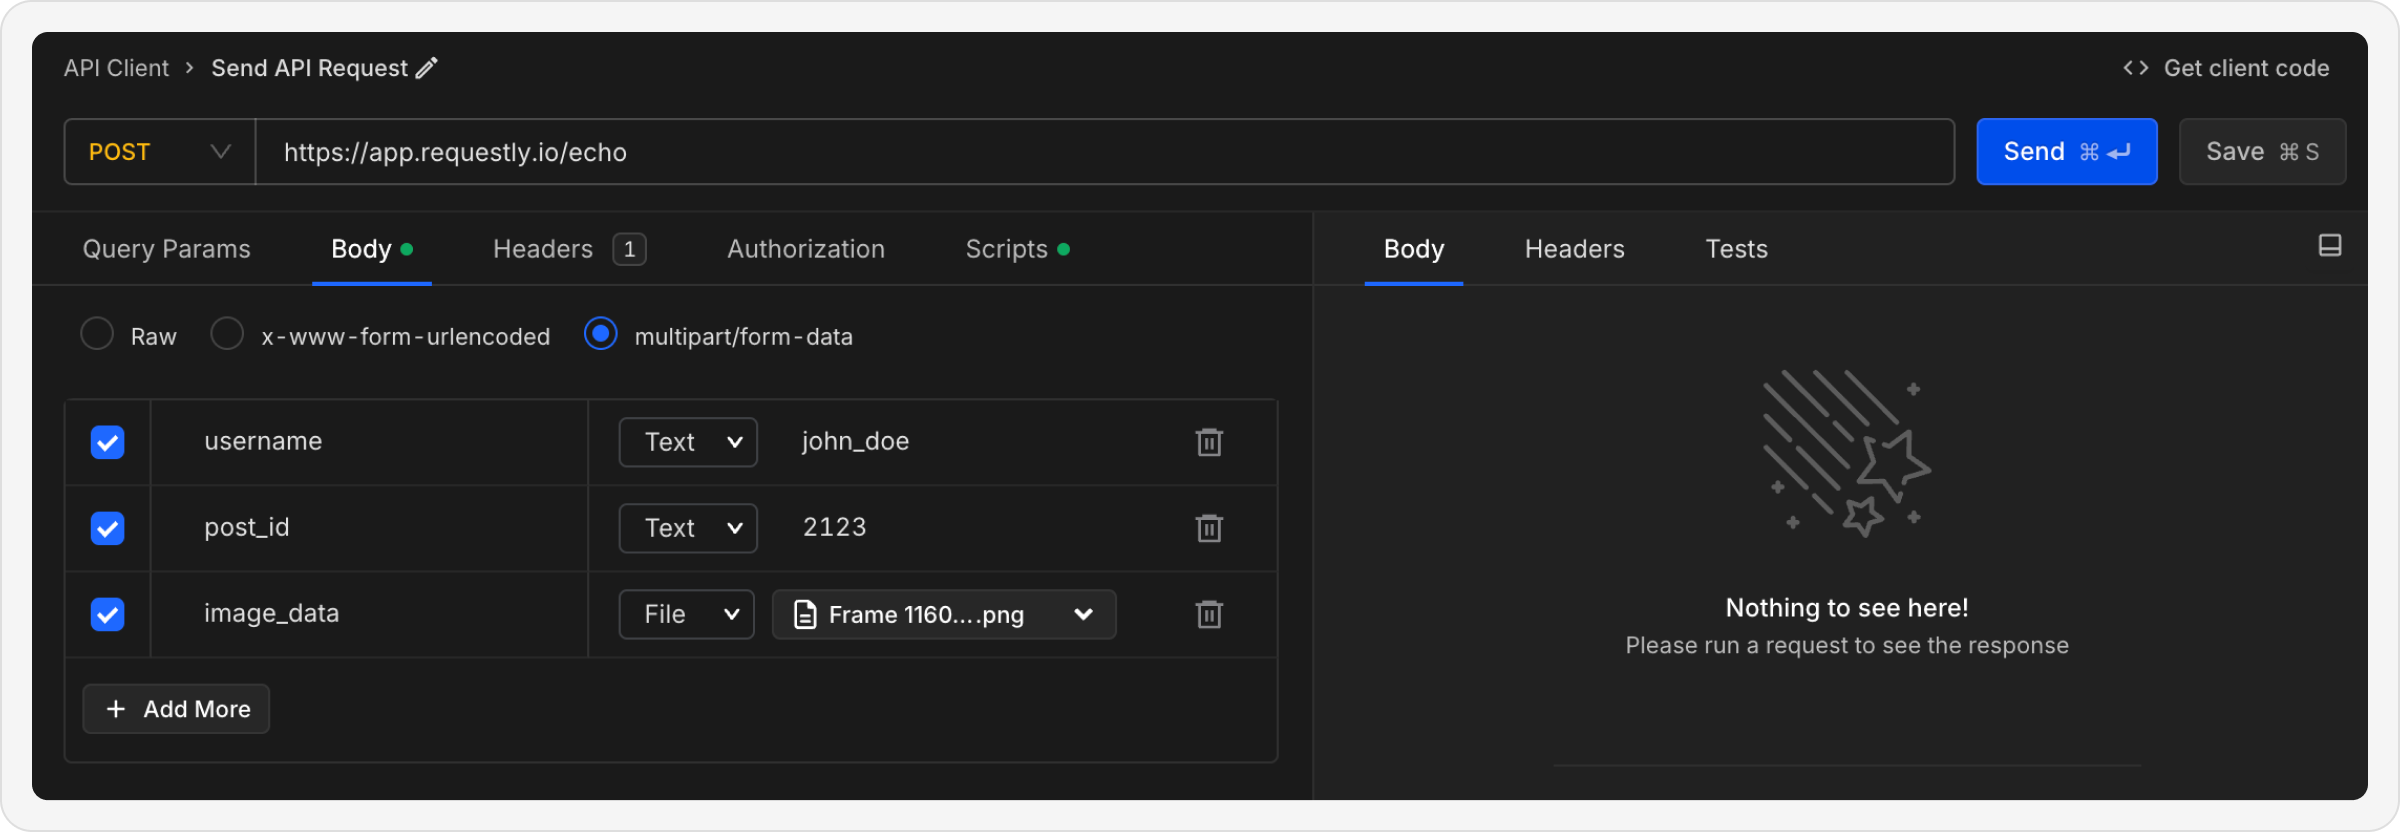 **Example use case:** Uploading a user profile picture with name and bio
For GraphQL APIs, use the dedicated GraphQL request type which provides:
* Query/Mutation editor with syntax highlighting
* Variables panel
* Schema introspection
Learn more in our [GraphQL Request guide](/api-client/graphql-request).
## Autogenerated Headers
Requestly will automatically add certain headers to your requests based on your request body selections. When you add a request body, Requestly automatically sets the appropriate `Content-Type` header:
| Body Type | Content-Type Header |
| --------------------- | ----------------------------------- |
| RAW (JSON) | `application/json` |
| RAW (Text) | `text/plain` |
| RAW (XML) | `application/xml` |
| x-www-form-urlencoded | `application/x-www-form-urlencoded` |
| multipart/form-data | `multipart/form-data` |
You can view and override the autogenerated headers in the Headers tab. These headers are automatically managed by Requestly to ensure your requests are properly formatted.
## What's Next?
Add authentication and custom headers to your requests
Set up API authentication methods
Make your requests dynamic with variables
**Example use case:** Uploading a user profile picture with name and bio
For GraphQL APIs, use the dedicated GraphQL request type which provides:
* Query/Mutation editor with syntax highlighting
* Variables panel
* Schema introspection
Learn more in our [GraphQL Request guide](/api-client/graphql-request).
## Autogenerated Headers
Requestly will automatically add certain headers to your requests based on your request body selections. When you add a request body, Requestly automatically sets the appropriate `Content-Type` header:
| Body Type | Content-Type Header |
| --------------------- | ----------------------------------- |
| RAW (JSON) | `application/json` |
| RAW (Text) | `text/plain` |
| RAW (XML) | `application/xml` |
| x-www-form-urlencoded | `application/x-www-form-urlencoded` |
| multipart/form-data | `multipart/form-data` |
You can view and override the autogenerated headers in the Headers tab. These headers are automatically managed by Requestly to ensure your requests are properly formatted.
## What's Next?
Add authentication and custom headers to your requests
Set up API authentication methods
Make your requests dynamic with variables