Modifying cookies is useful when you’re testing authentication flows, simulating different user states, or tweaking behavior without changing backend code. Requestly Interceptor makes this easy by letting you intercept HTTP requests/responses and manipulate cookies on the fly.Documentation Index
Fetch the complete documentation index at: https://docs.requestly.com/llms.txt
Use this file to discover all available pages before exploring further.
Use Cases
- Testing login/logout behavior
- A/B testing variants
- Simulating admin/user roles
- Bypassing feature flags
Modify Cookies in Requestly Interceptor
- In Request Header
- In Response Header
This is useful for sending a custom cookie value to the server.
Create a New Modify Headers Rule
Go to the HTTP Rules section, click on 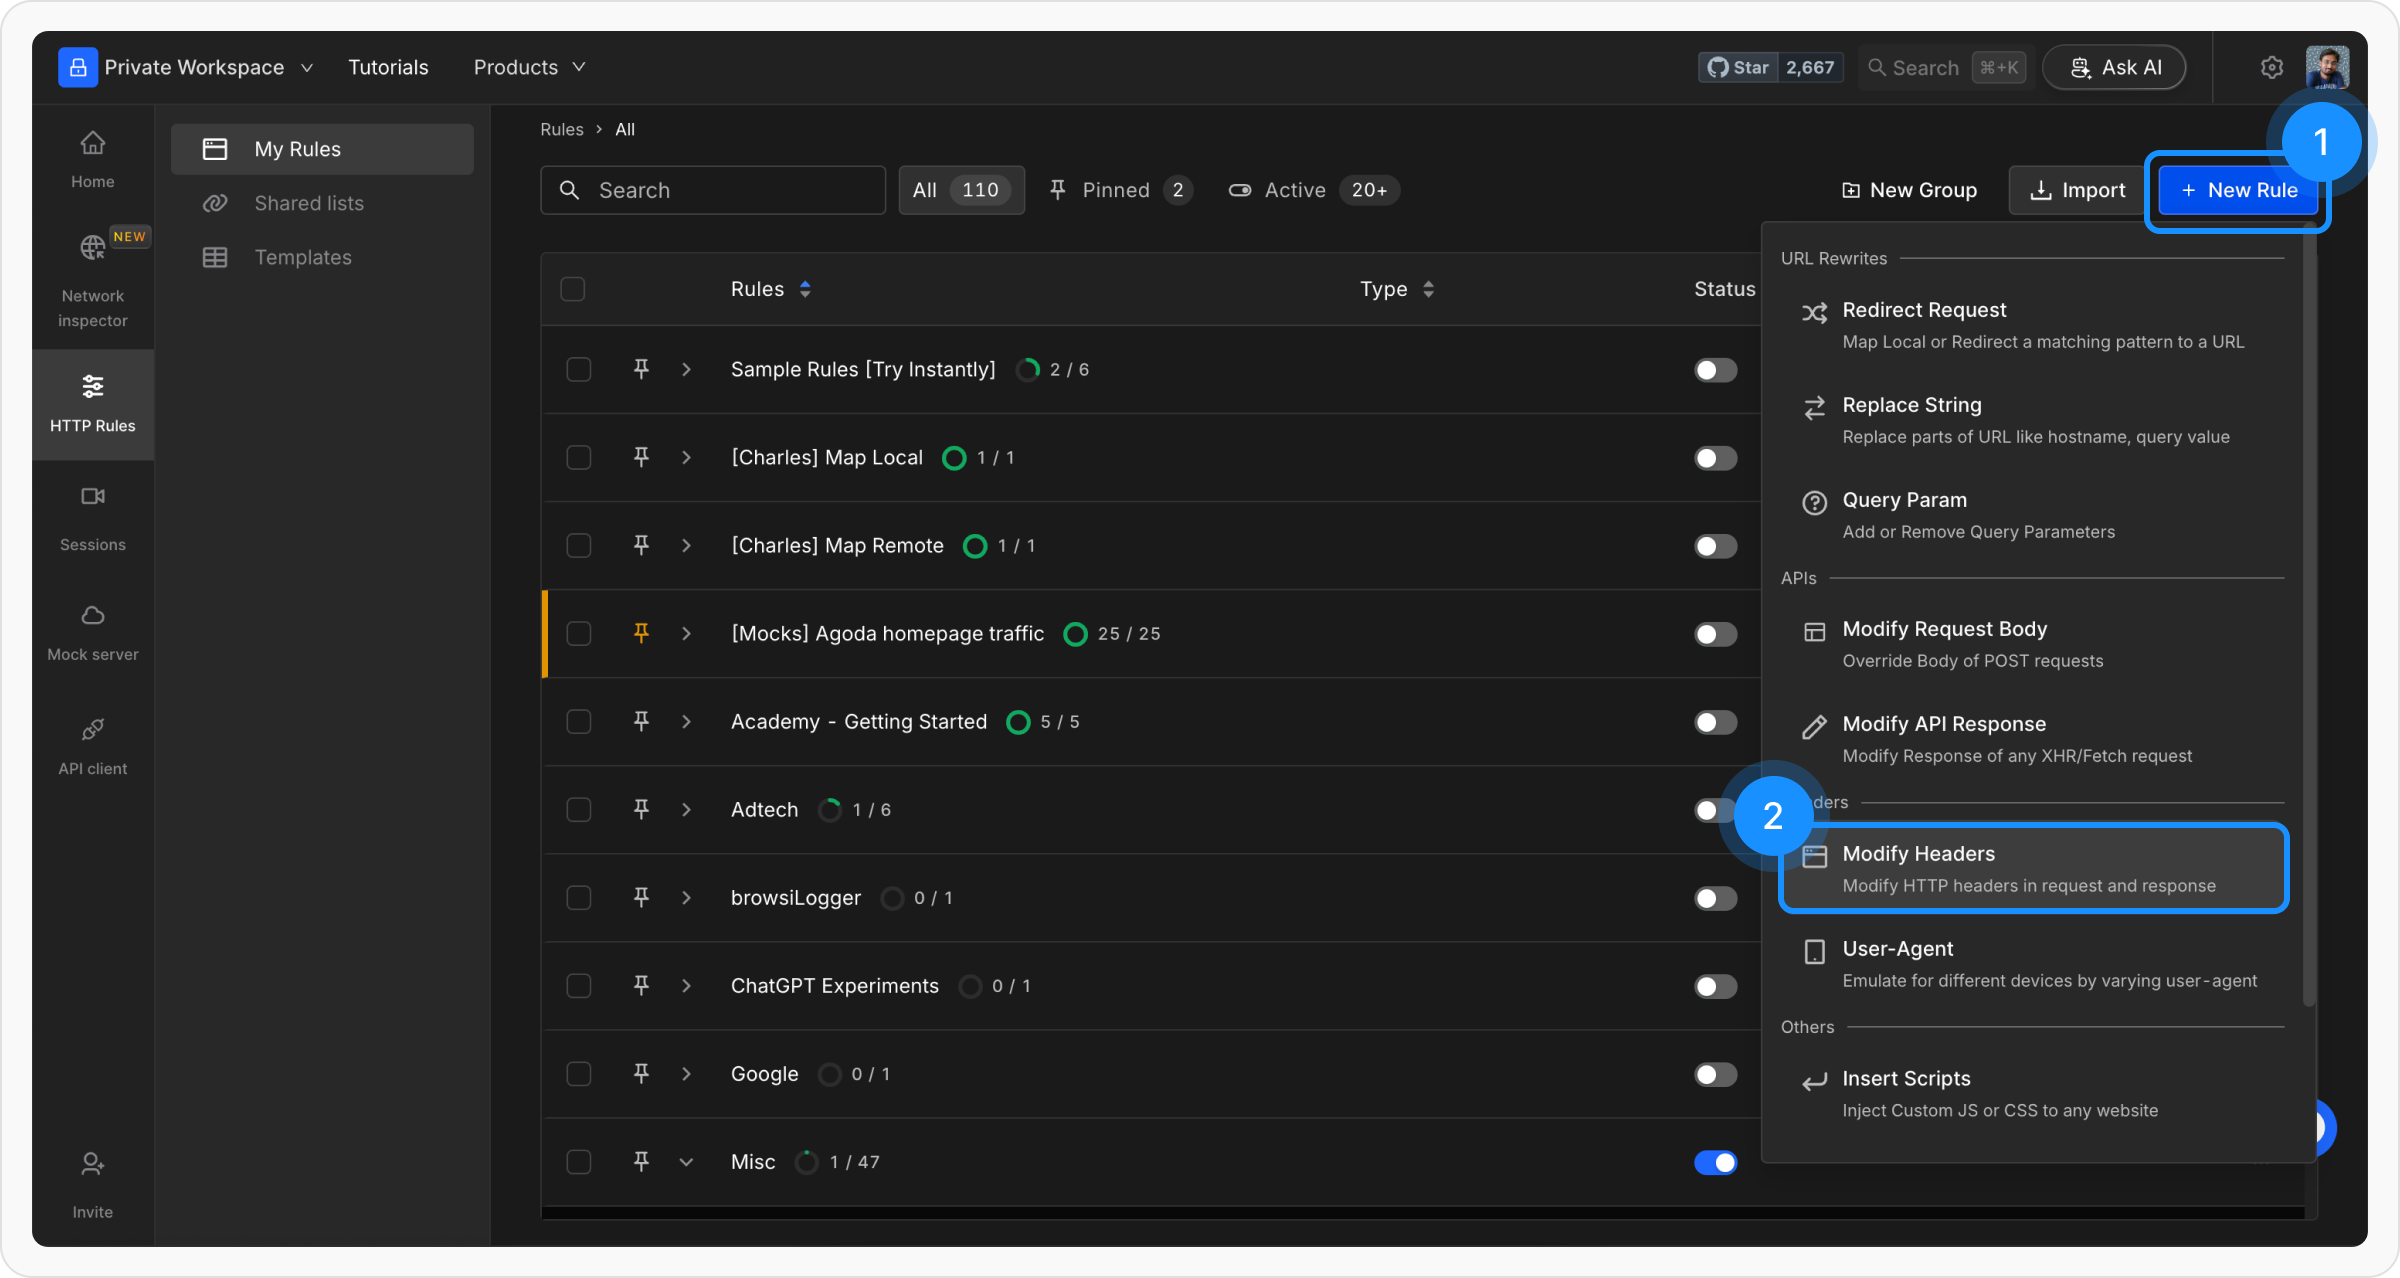
+ New Rule , and select Modify Headers from the list of options.Name and Describe Your Rule
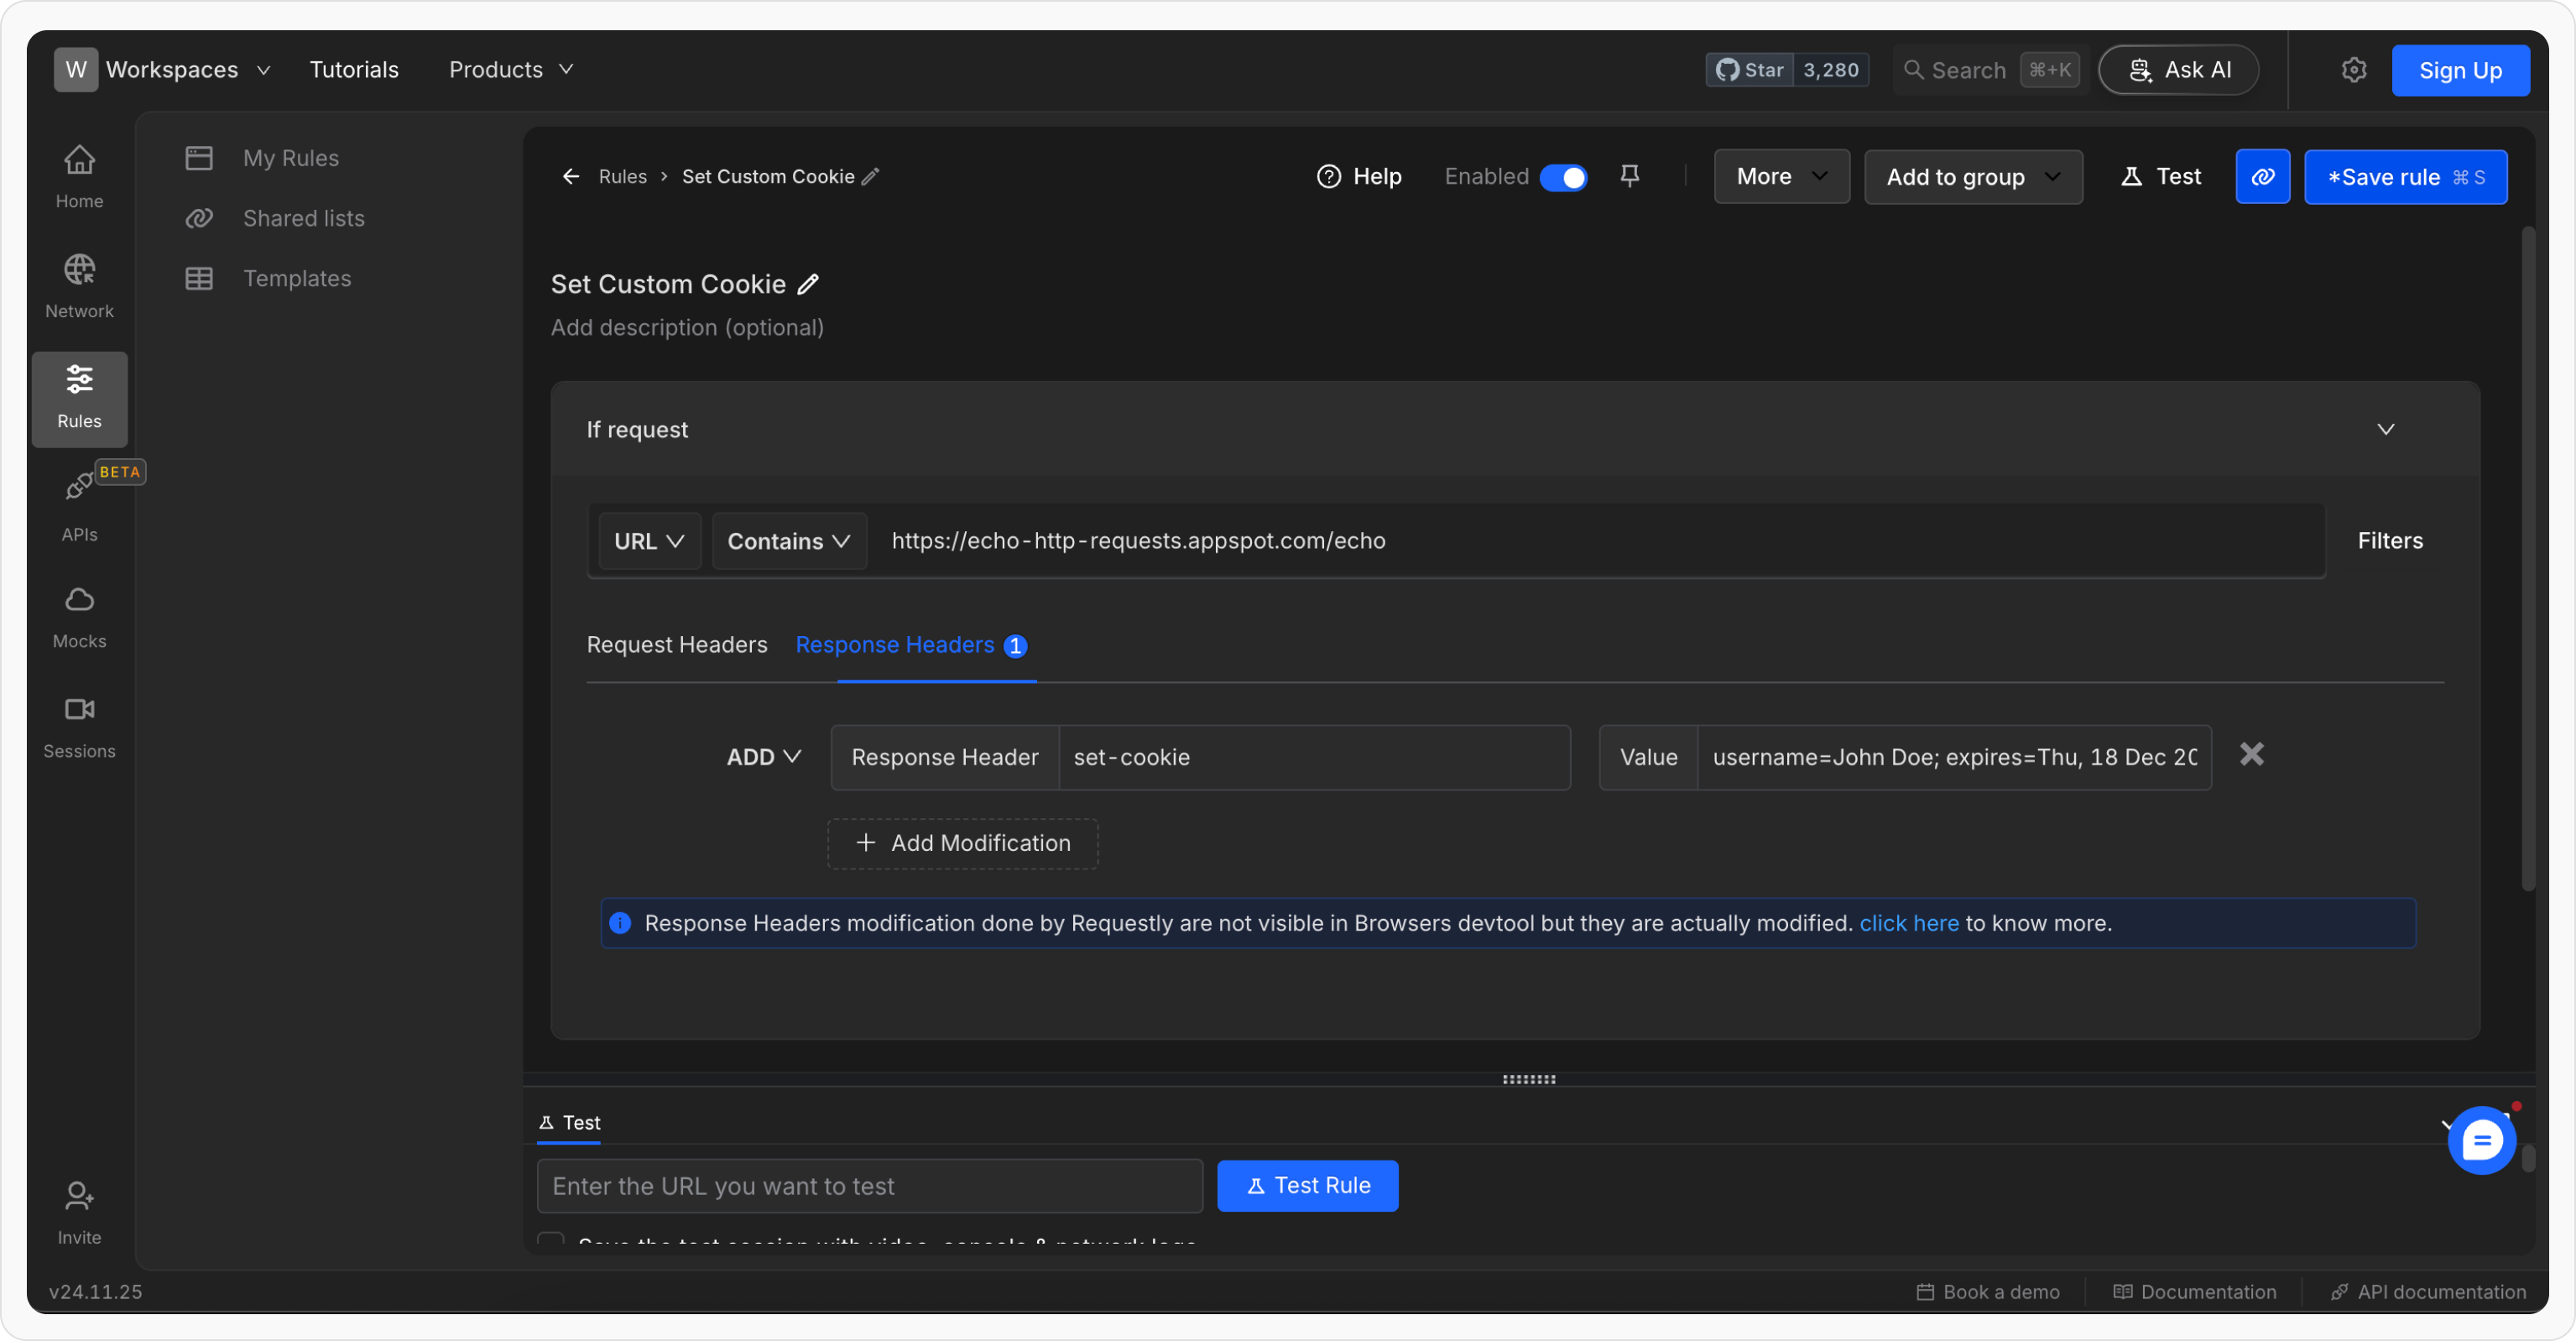
Give your rule a clear name like Set Custom Cookie. Optionally, add a short description so you can easily identify its purpose later.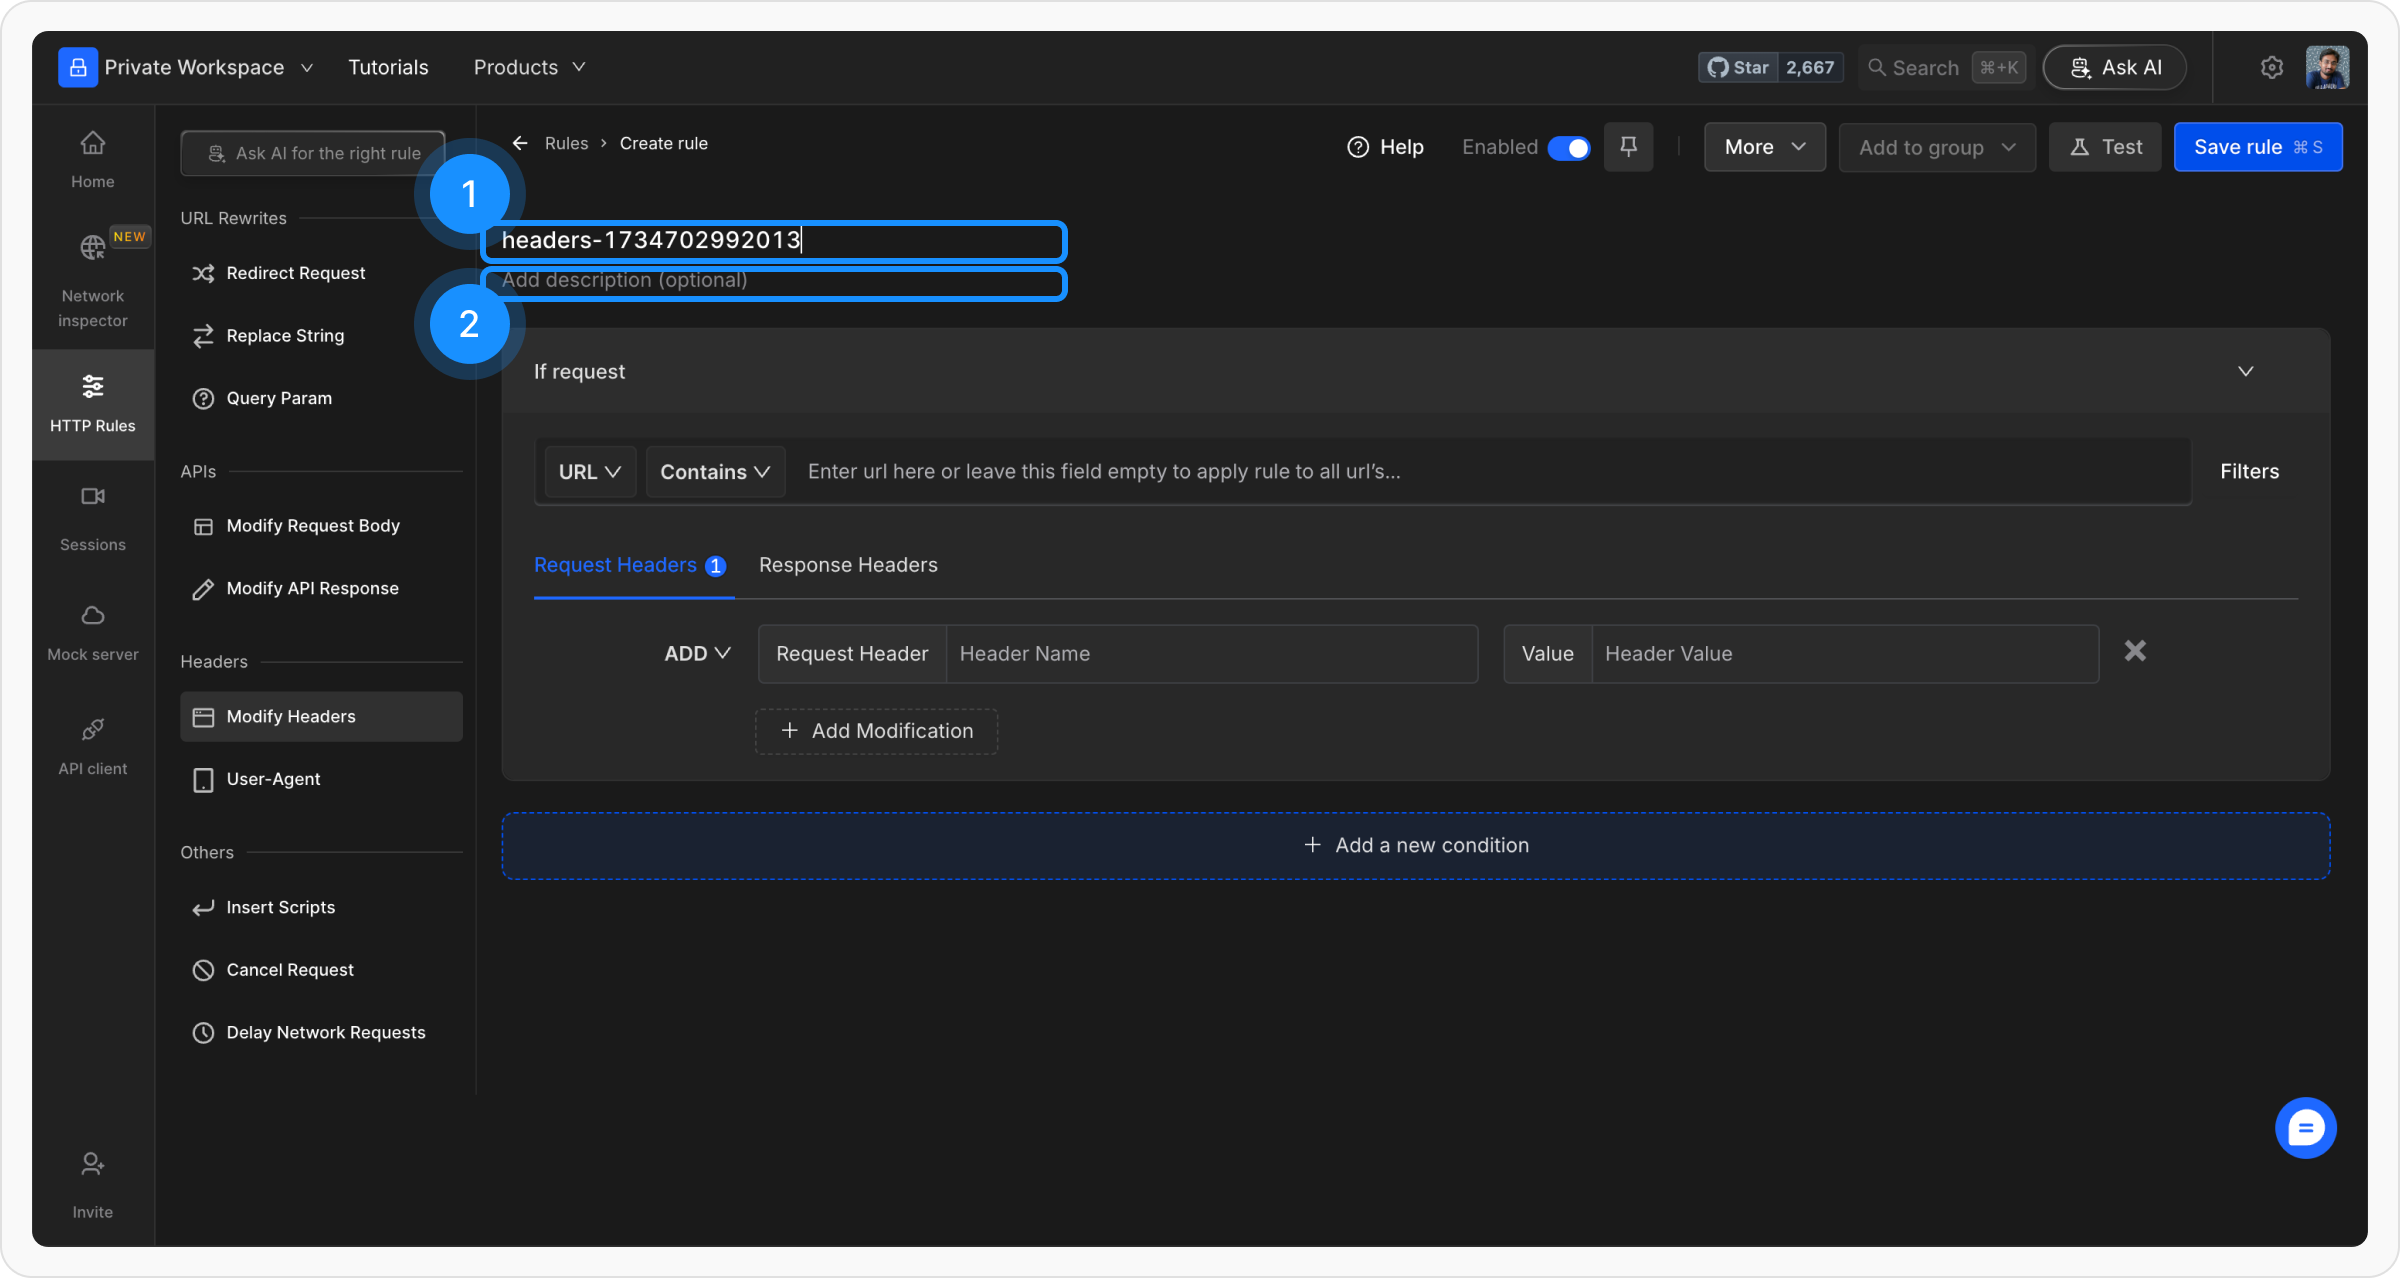
Define Where the Rule Should Apply
Define where the rule should be applied by specifying criteria such as URL, Host, or Path. You can choose from options like Regex, Contains, Wildcard, or Equals, or use Advance Filters for more precise conditions.For more details on source conditions, read this guide.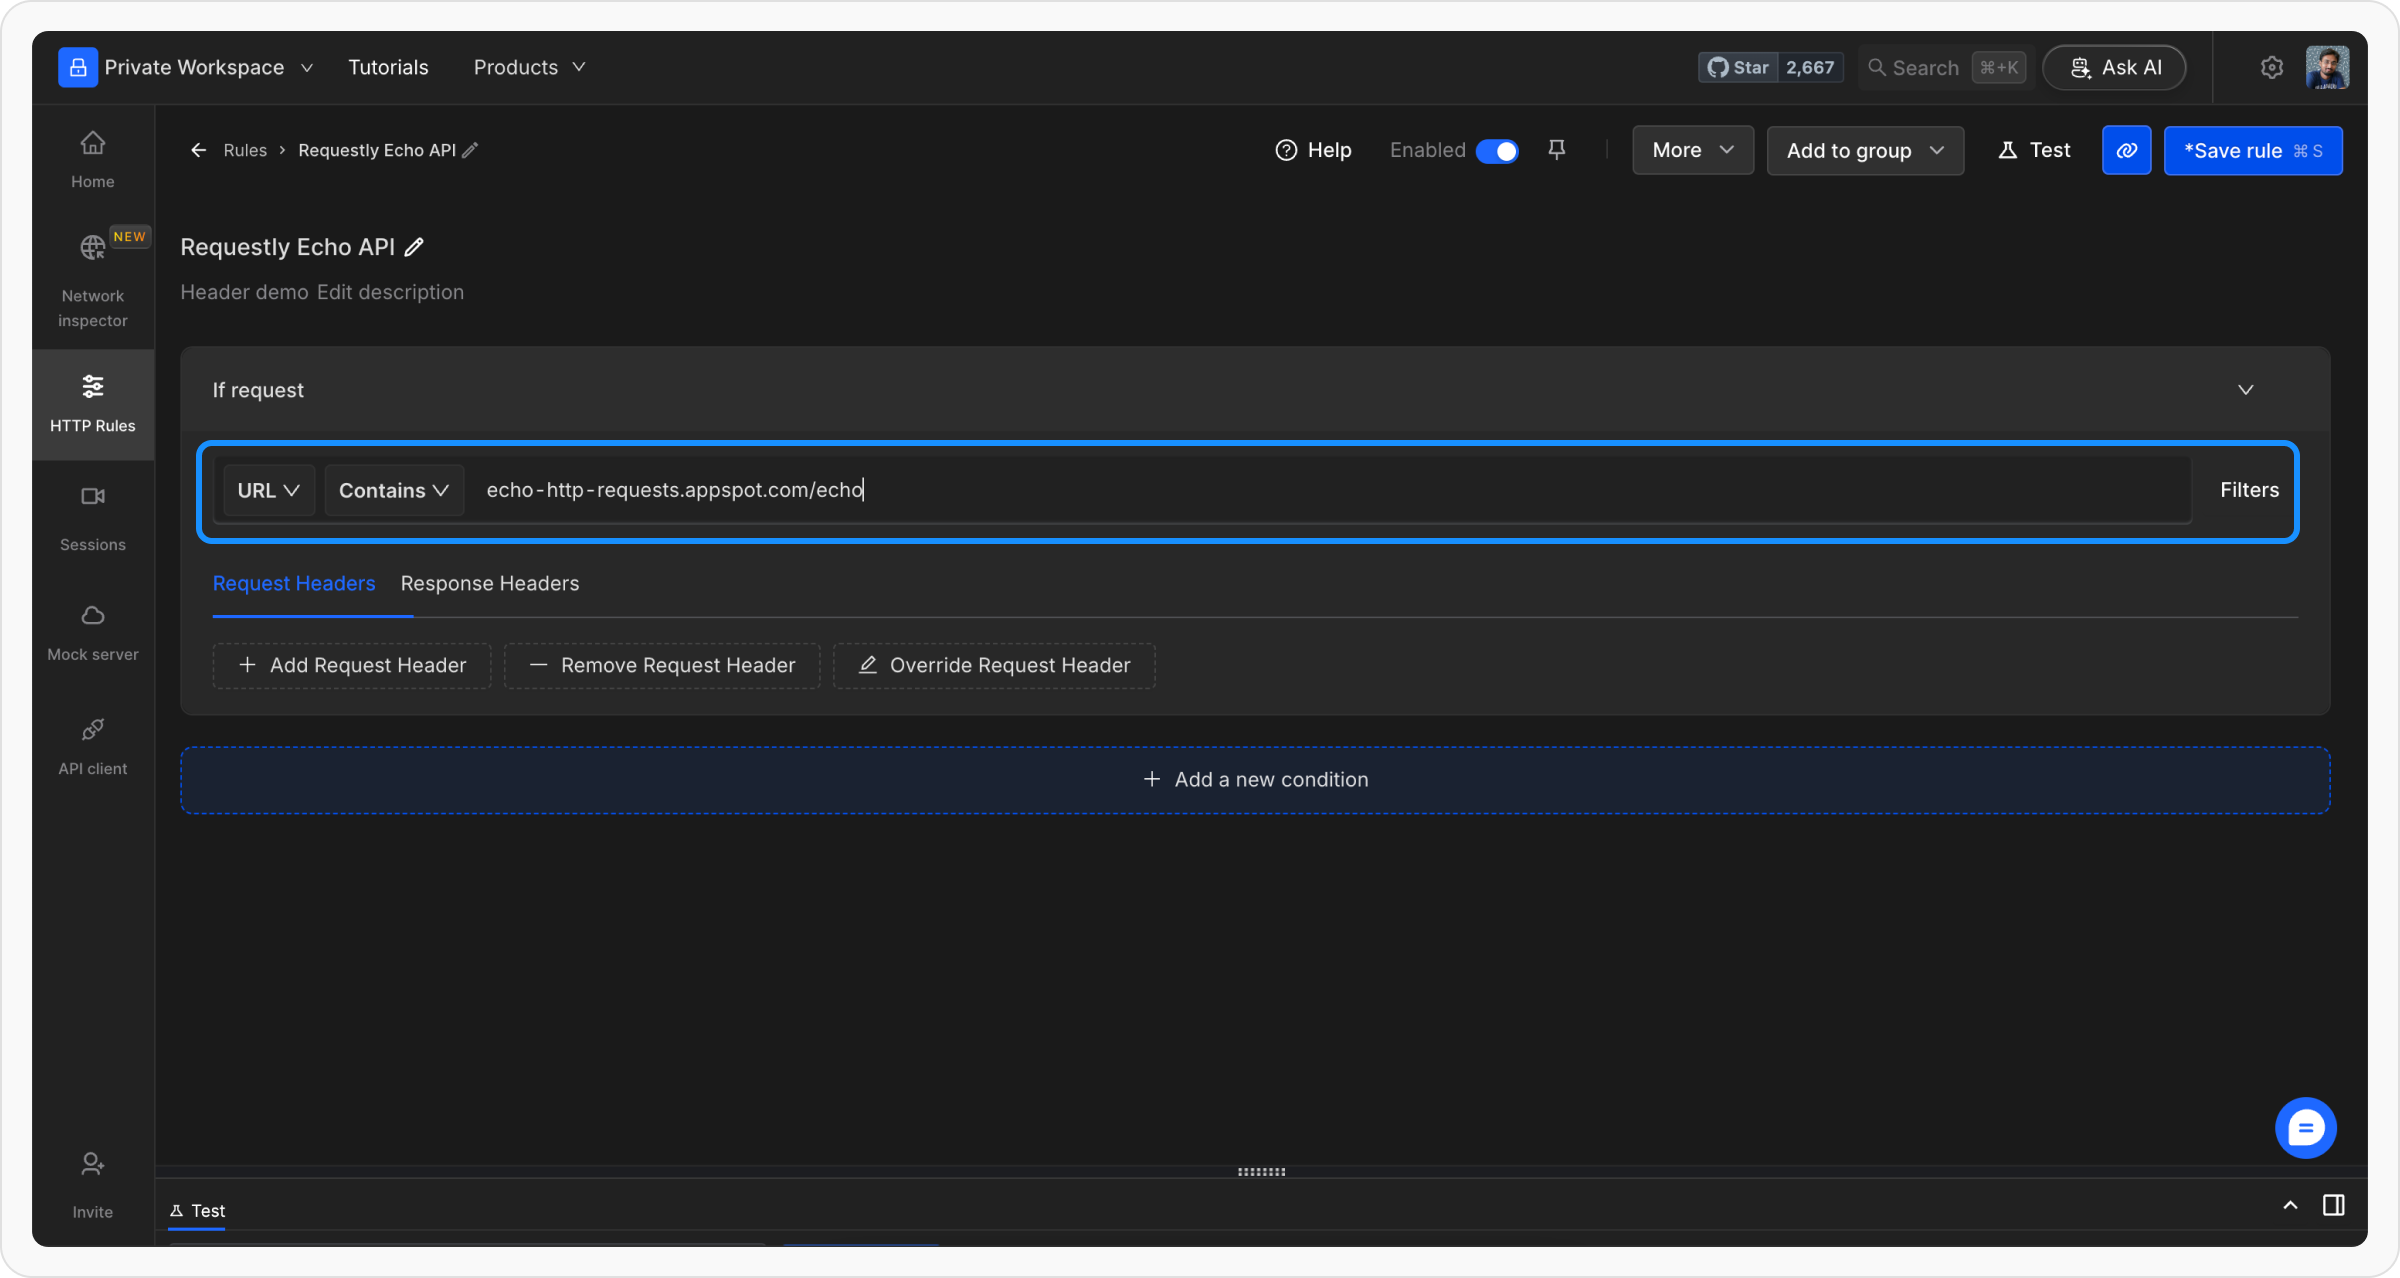
Set Up the Header Modification
In the Modification Type, select Request Headers since we’re modifying outgoing request headers.
Under the Request Headers tab, click Add Header and set the following:
Under the Request Headers tab, click Add Header and set the following:
- Action: Add or Override
-
Header Name:
Cookie -
Value:
username=John Doe; expires=Thu, 18 Dec 2013 12:00:00 UTC