You can upload a JSON file to Requestly Interceptor’s File Server and use it as a API endpoint in your application by creating a Redirect Rule, which is perfect for testing and development scenarios. Here are the steps to set it up:Documentation Index
Fetch the complete documentation index at: https://docs.requestly.com/llms.txt
Use this file to discover all available pages before exploring further.
Go to the File Server in Requestly Interceptor Dashboard
From the Requestly Interceptor dashboard, click on “Files” in the left menu bar.
Click on "New file" or upload a JSON file directly.
This allows you to start creating a new JSON or import an existing JSON file.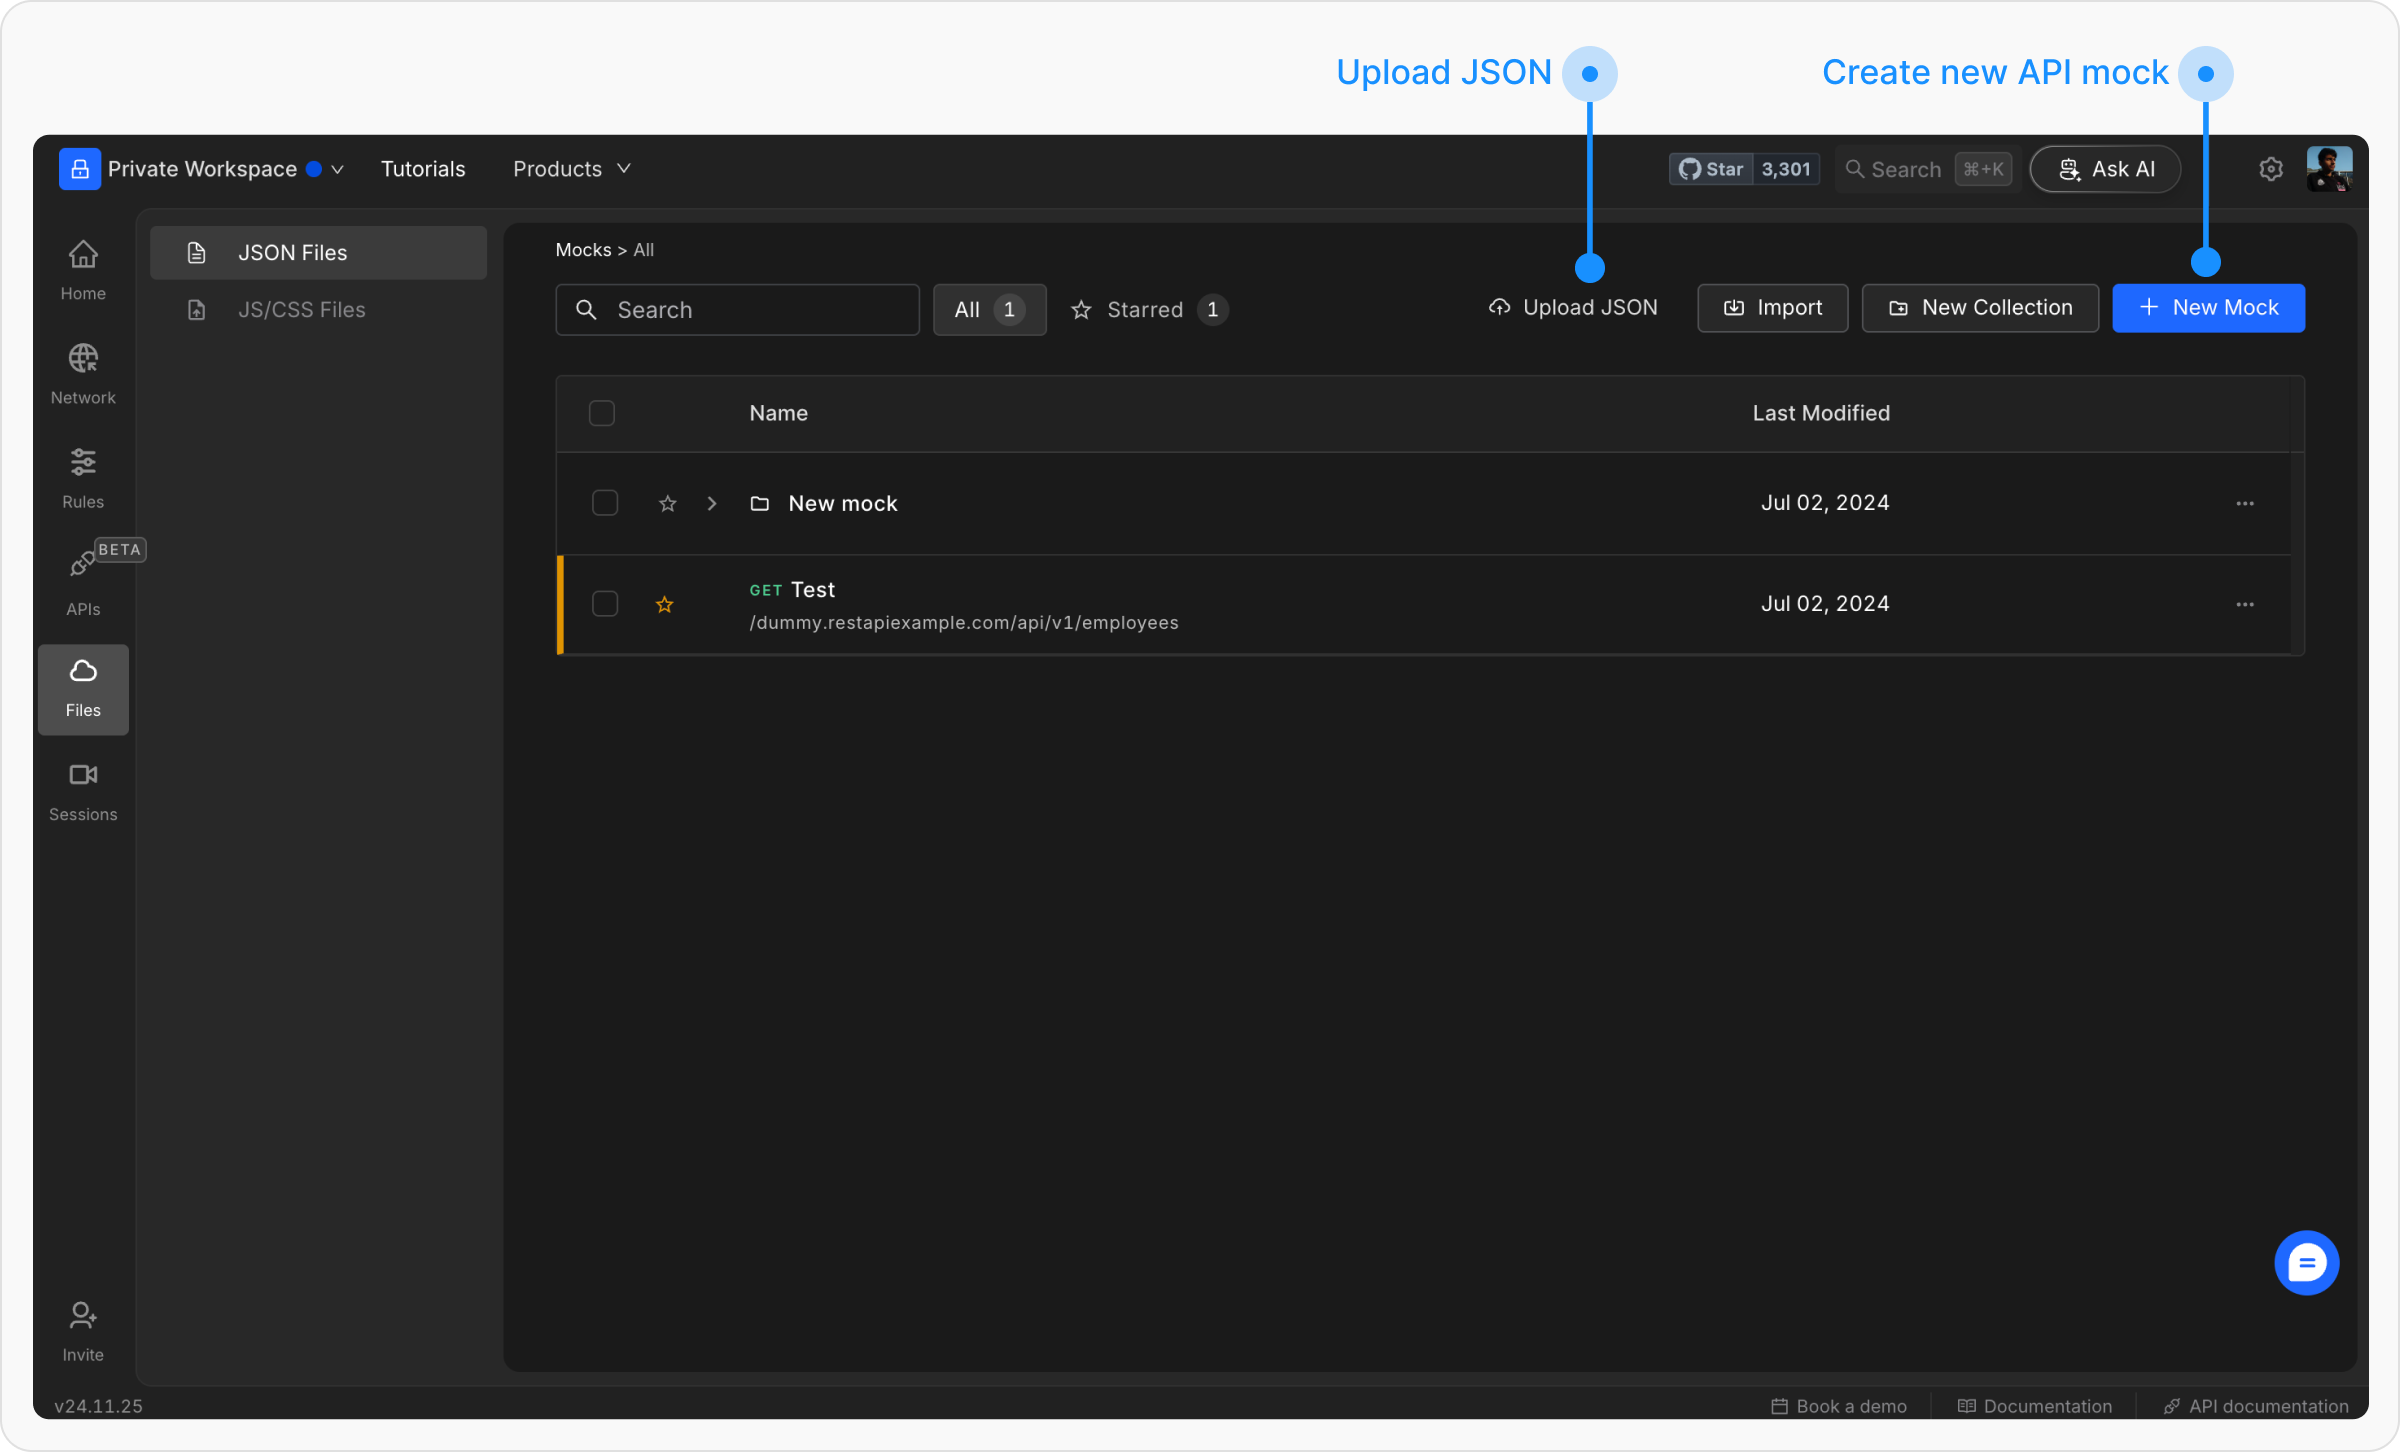
Enter the details for the New File.
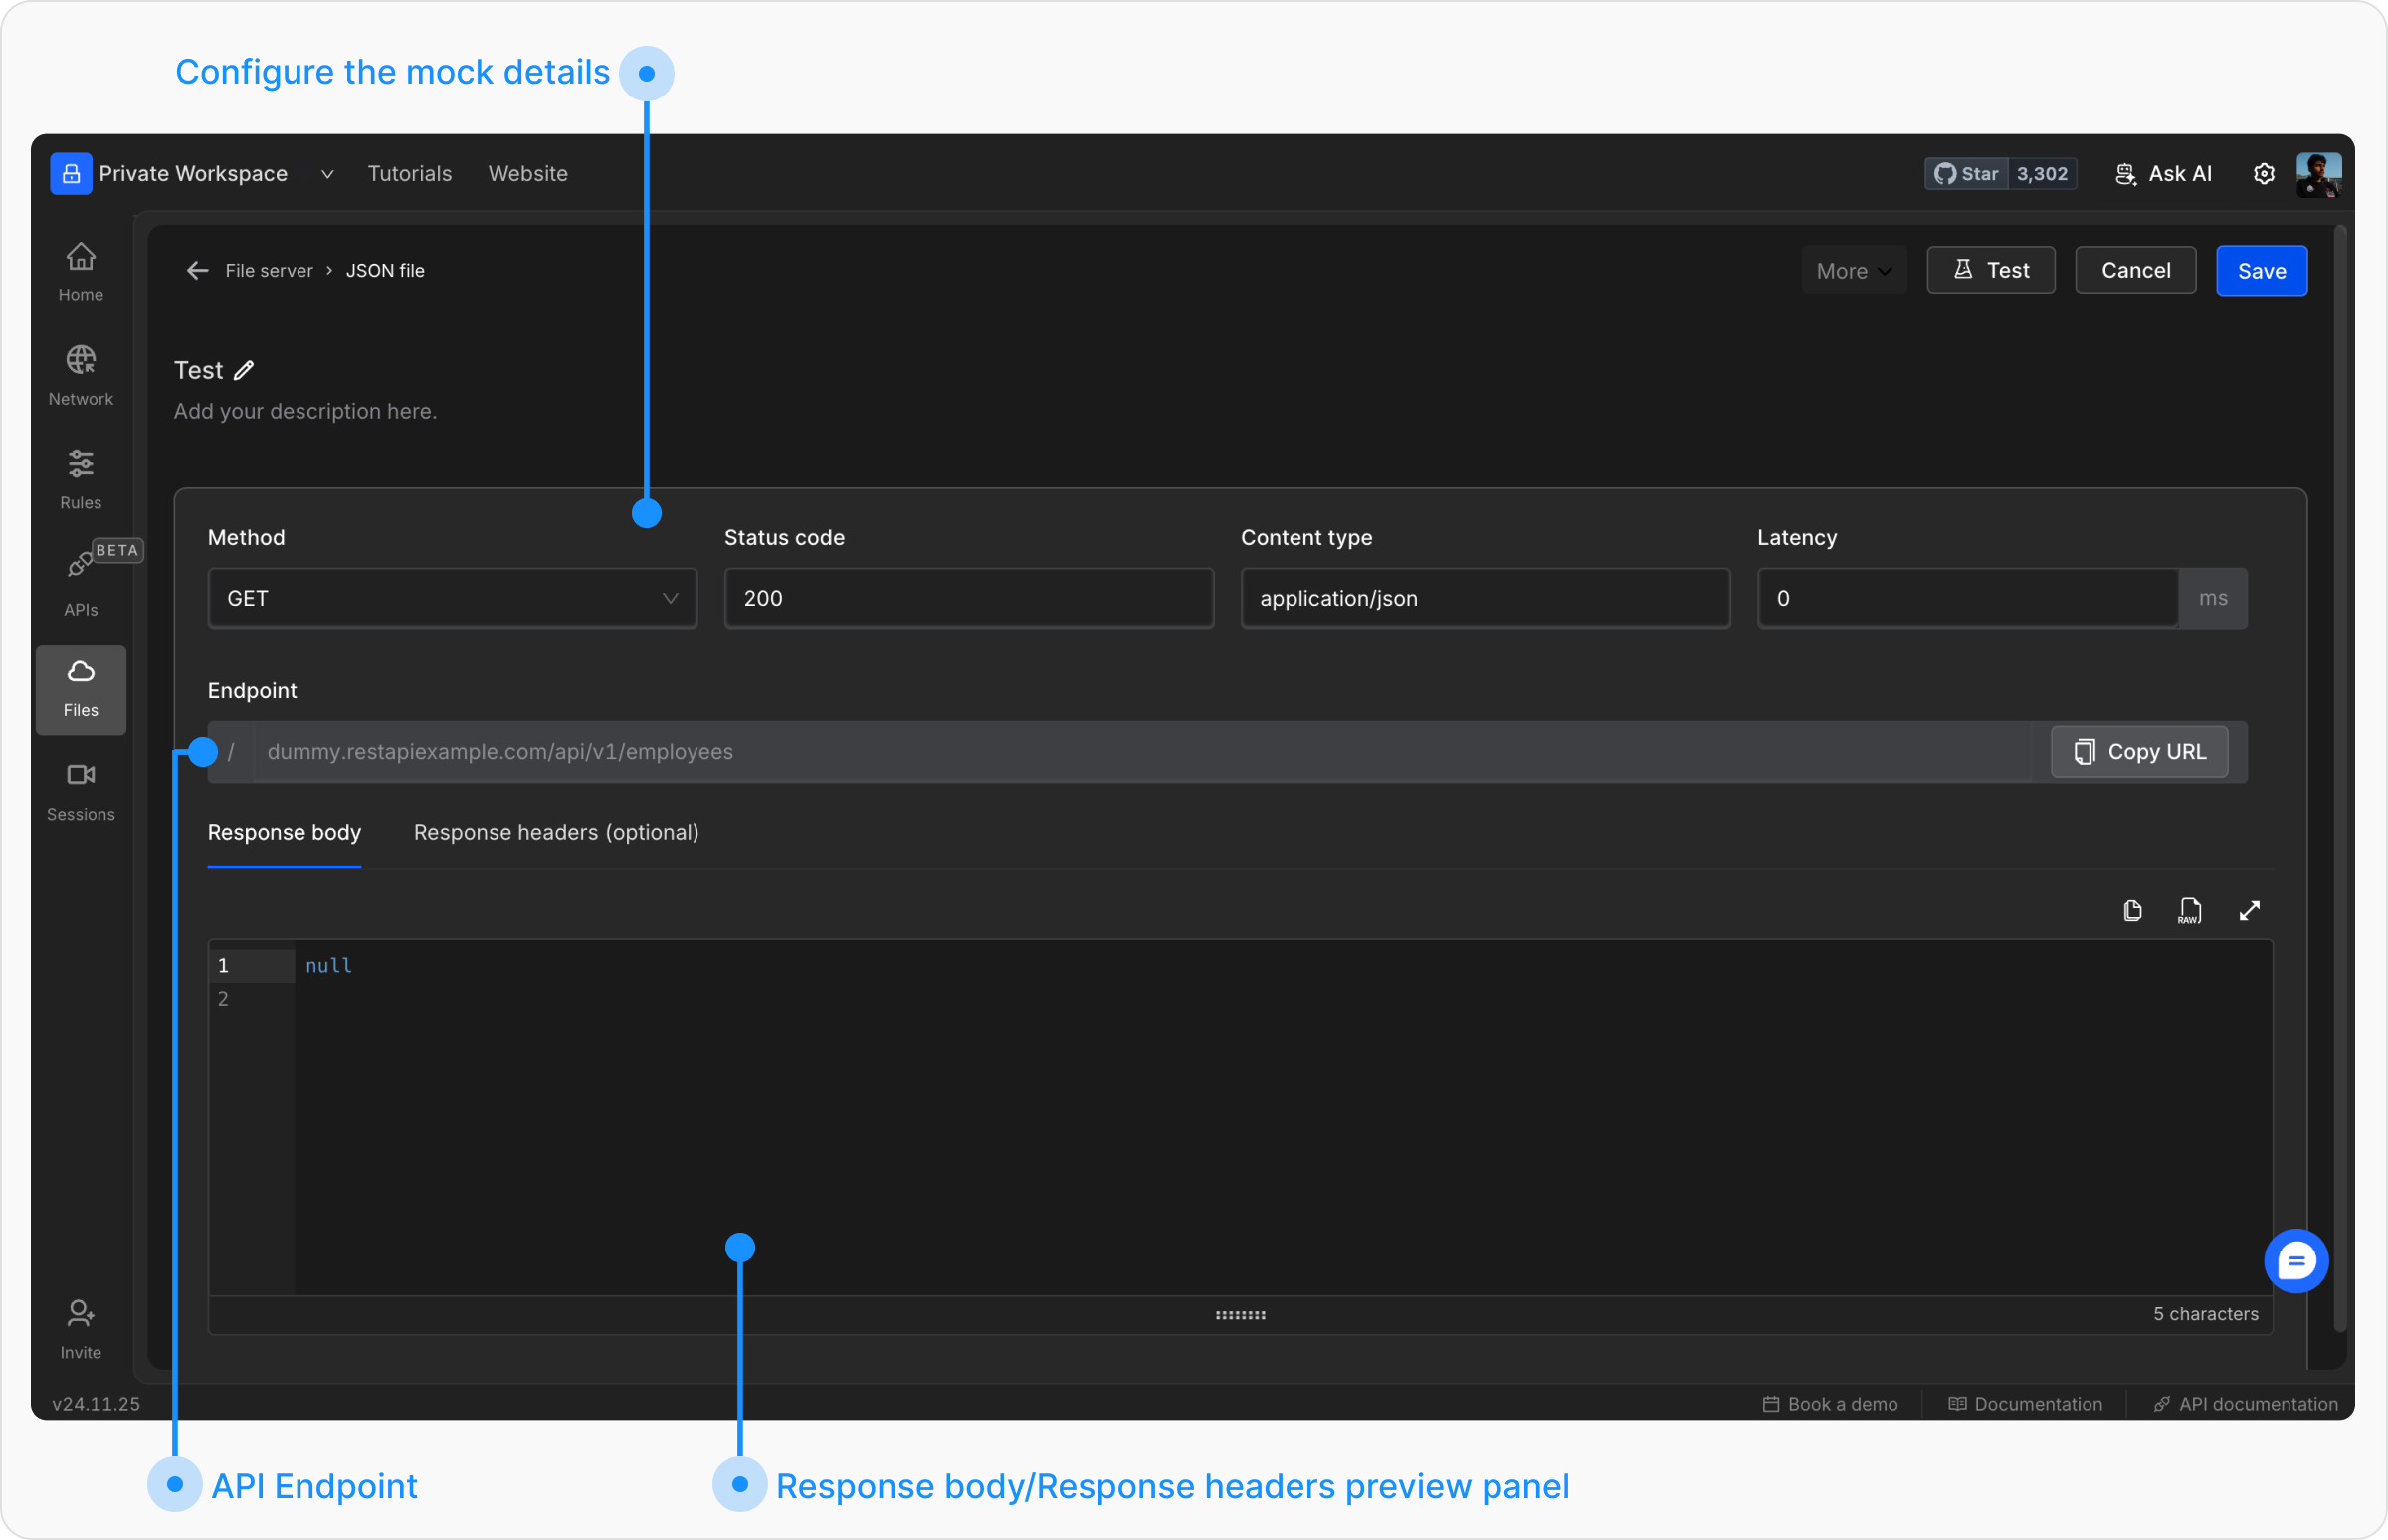
- Method: Select the HTTP method to be used (e.g., GET, POST, etc.).
- Status: Specify the HTTP response status code (e.g., 200, 404, 500).
- Content Type: Define the content type of the response (e.g., application/json).
- Latency: Optionally, add a delay (in milliseconds) to simulate network latency.
- Endpoint: Define the unique path or endpoint for the File.
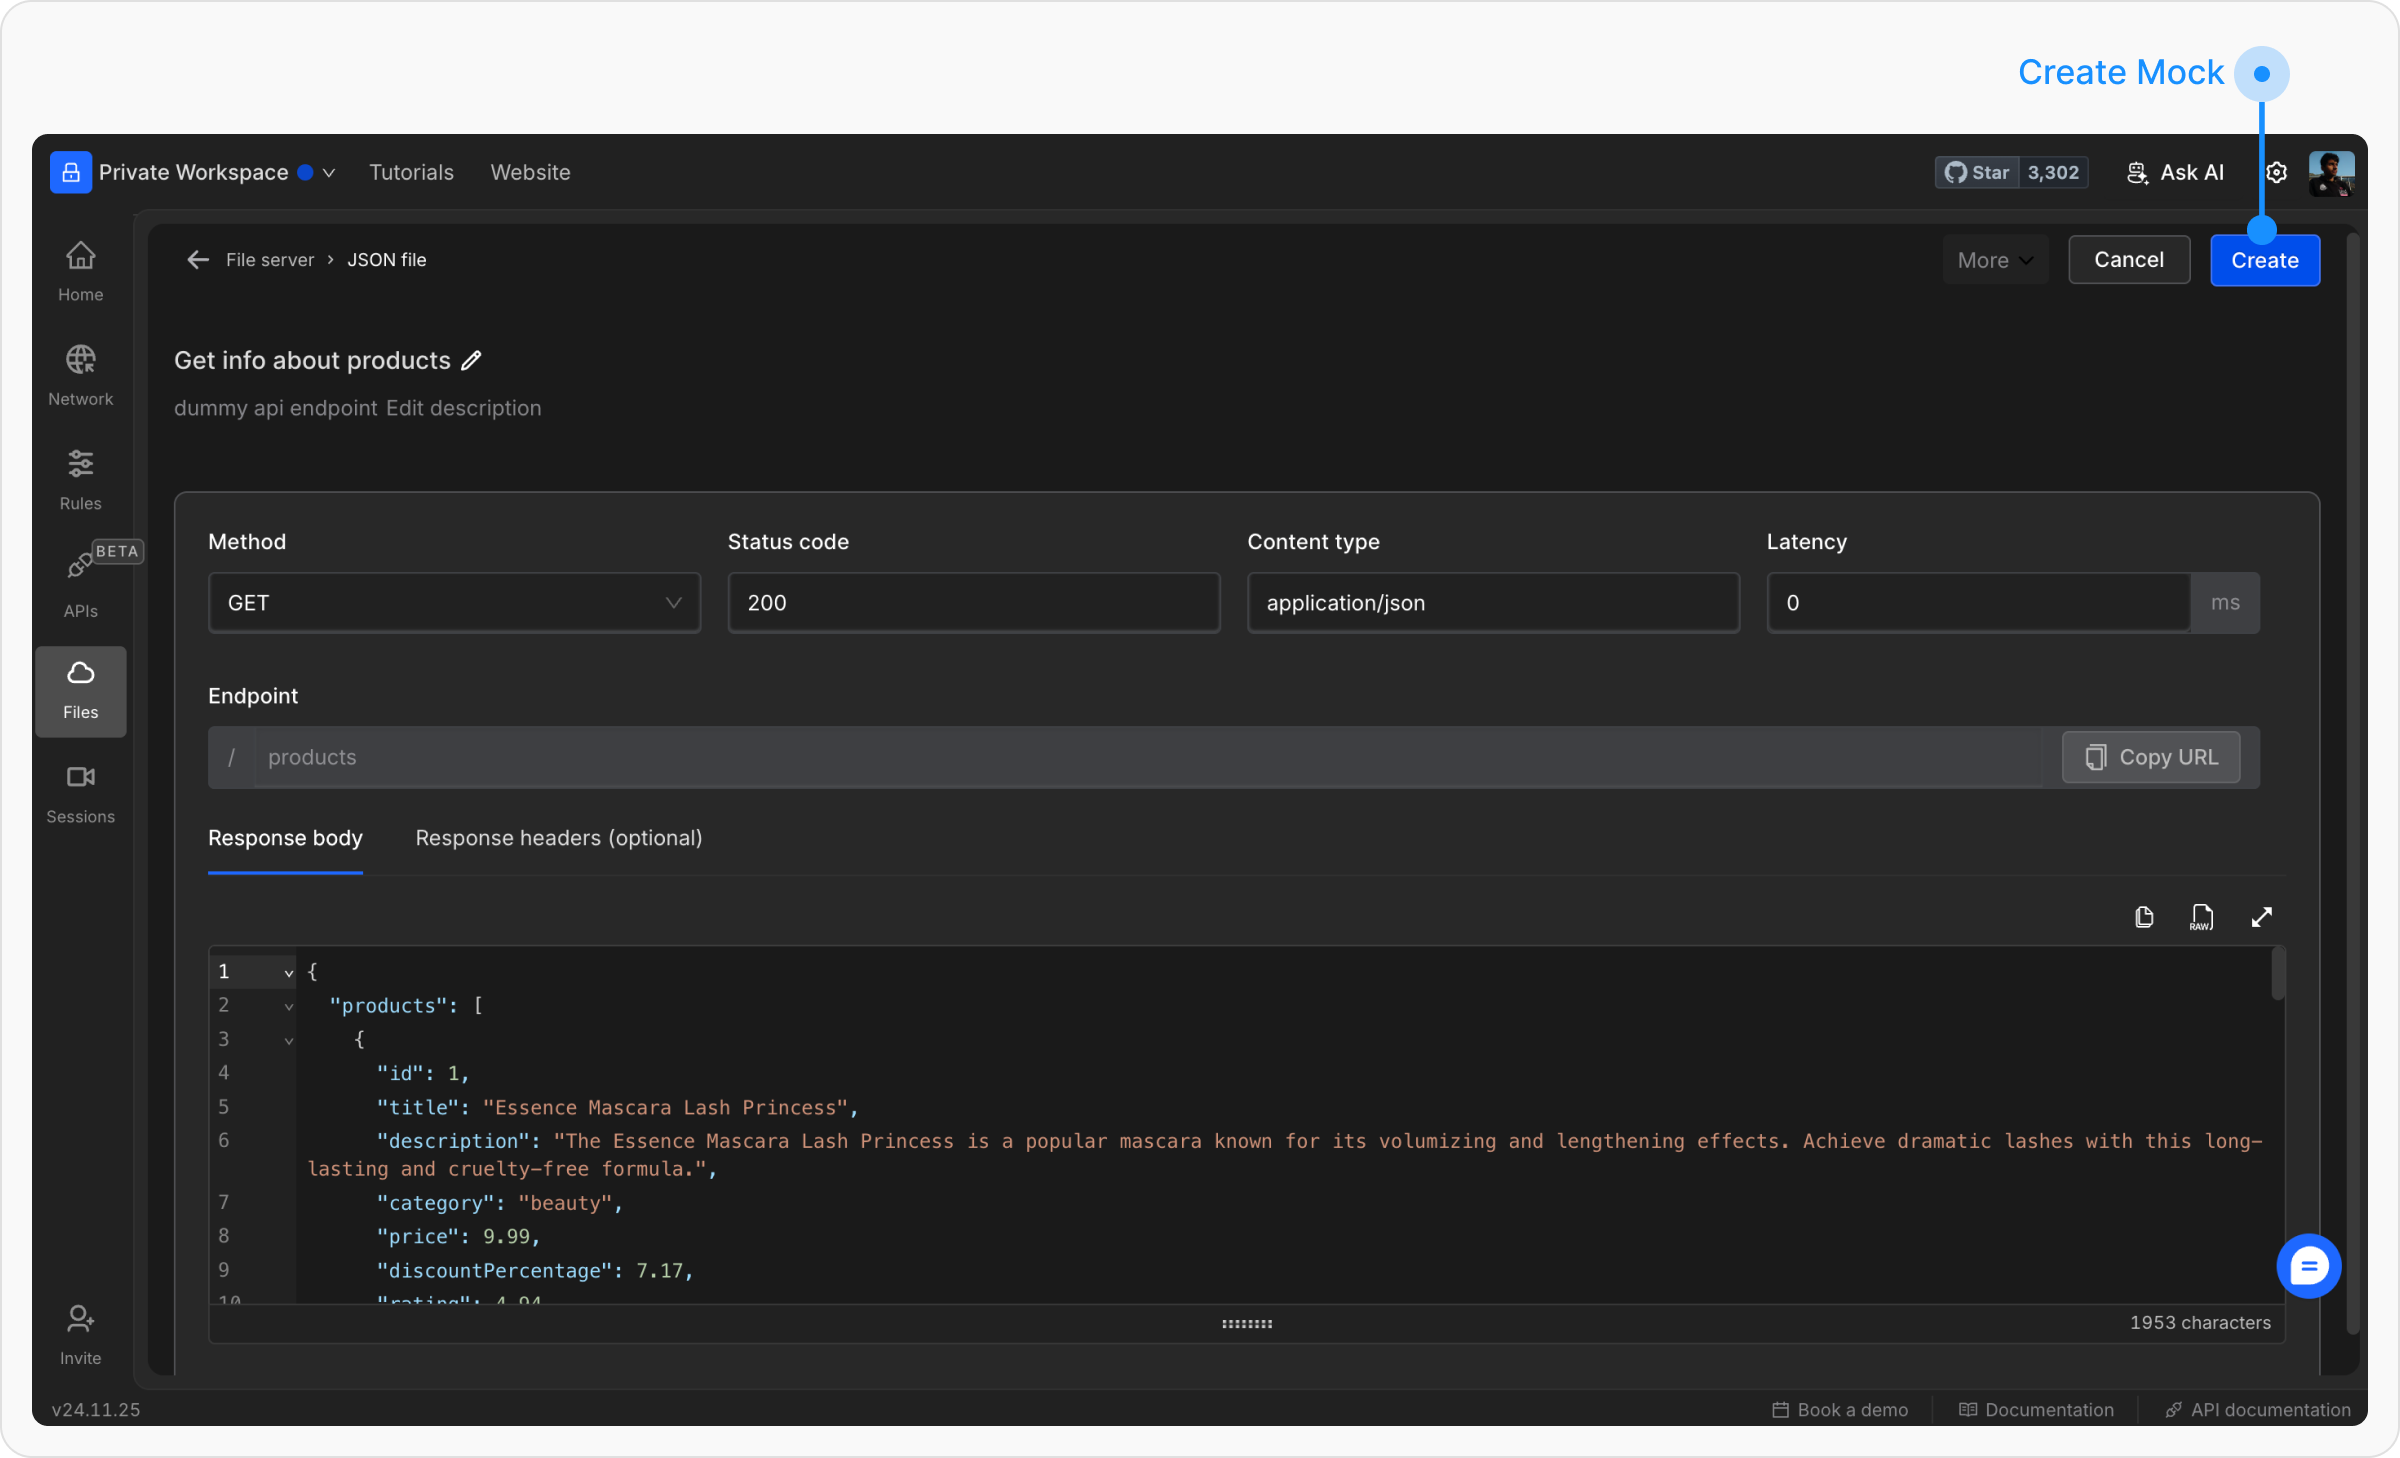
- Response Body: Provide the body of the response in JSON or plain text.
- Response Headers (optional): Add custom headers to the response as needed.
-
Password Protection: In the “More” dropdown, you can set a password for your JSON file. If a password is set, users must include it as a query parameter (e.g.,
rq_password=<password>) to access the file’s contents.
- Integrate the endpoint into your application to replace live API calls during testing.
- Use tools like Postman or cURL to manually test and validate the file responses.