Setting up a shared project
Let’s create a shared project and invite teammates to collaborate in real time. Follow these simple steps to get started.Create a project
1
Open project switcher
In the top-left corner of the sidebar, find the project dropdown (you start in a project named Default Project).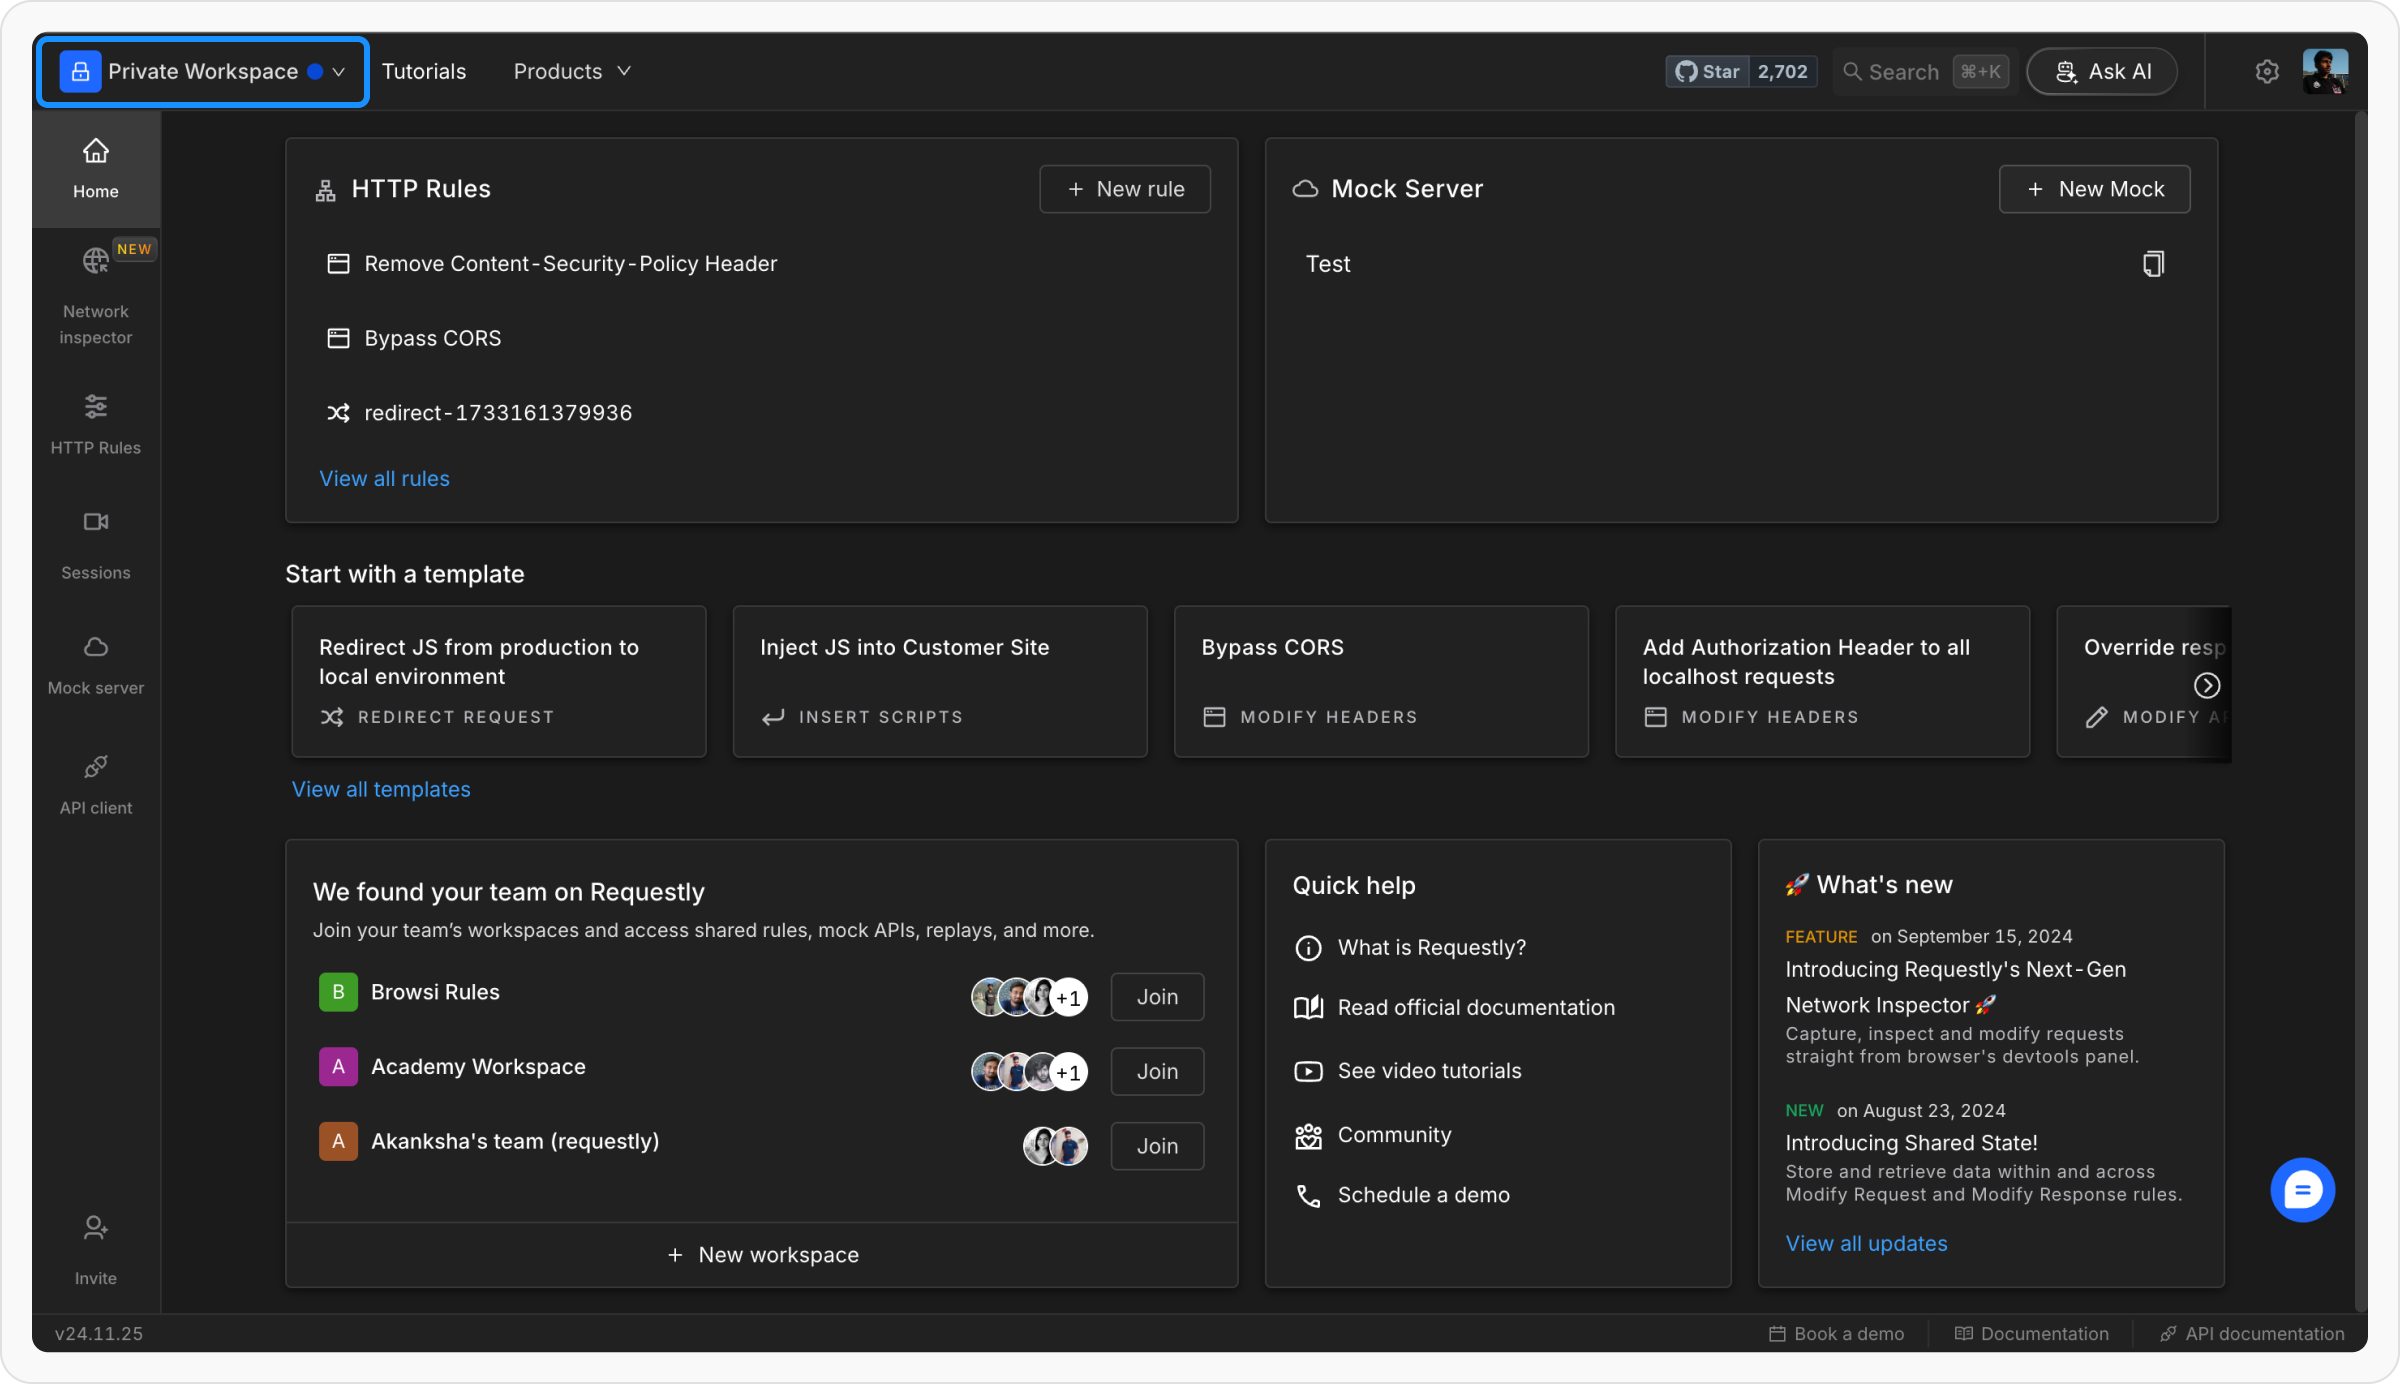
2
Open the create options
Click the project dropdown. The switcher lists your Local projects and Team projects, each with a create option.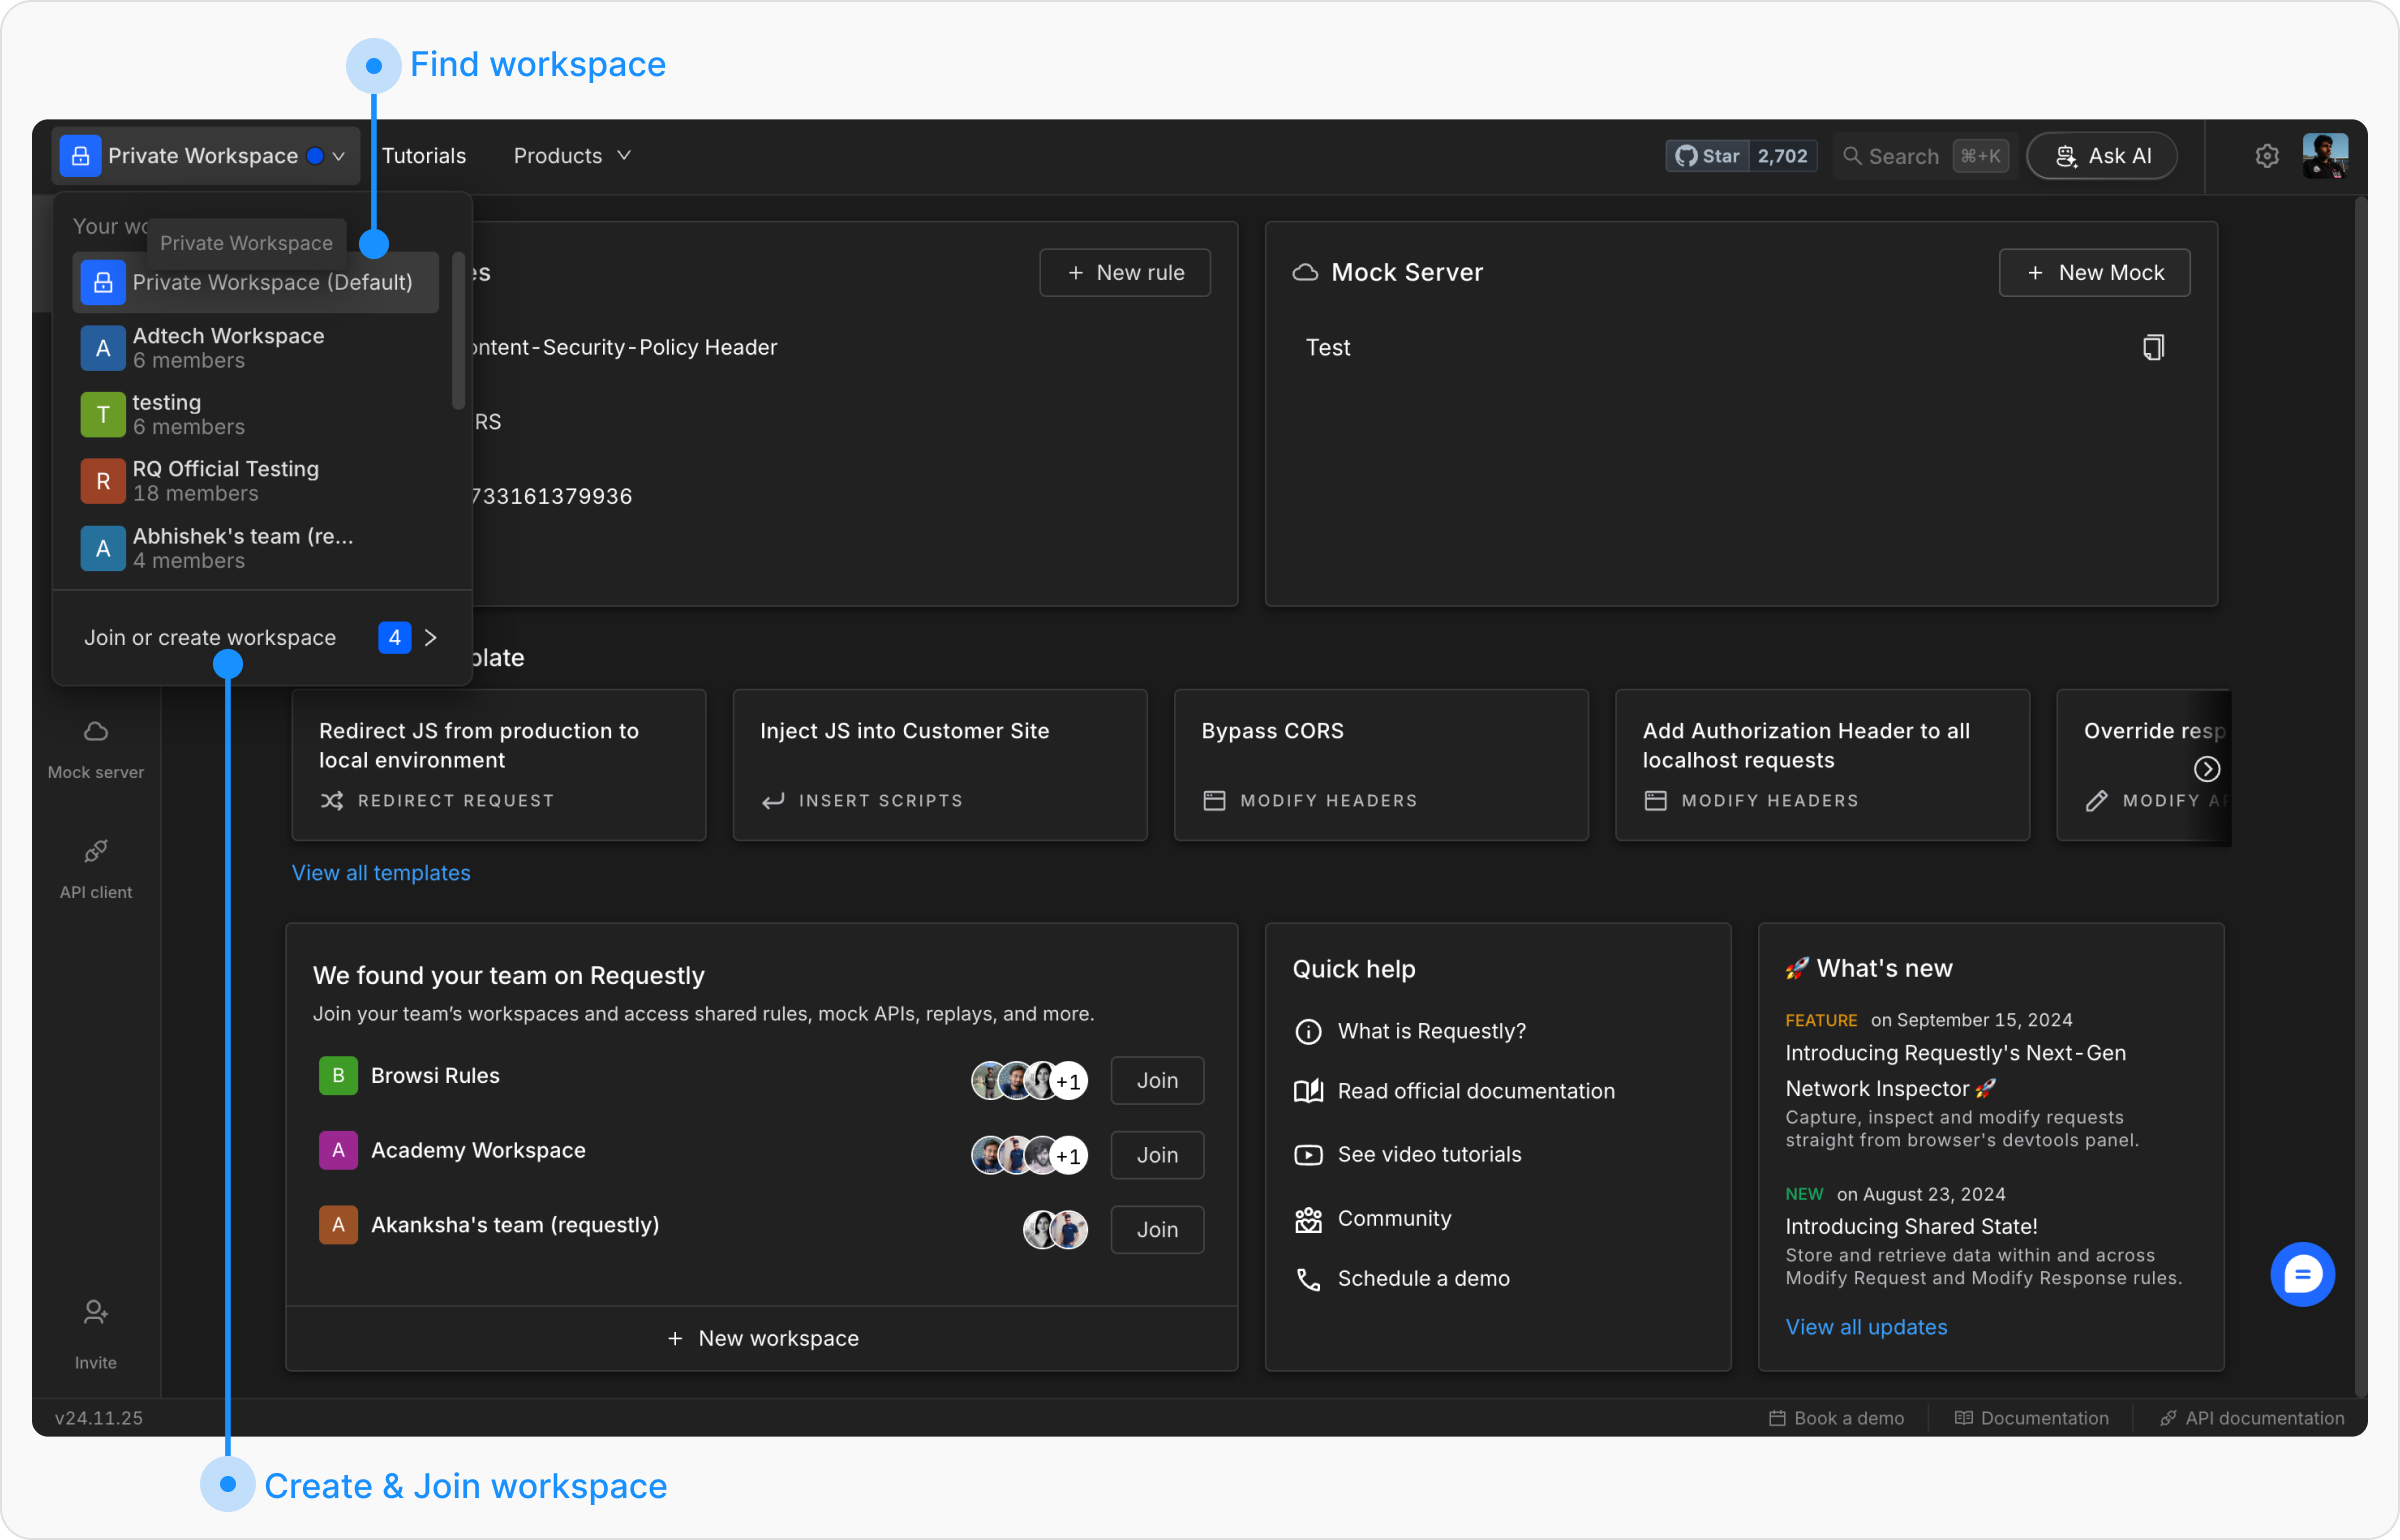
3
Create a new project
Click Create a team project to make a shared project (or Create a local project for a device-only project). Enter a name for your project in the provided field and click Create project.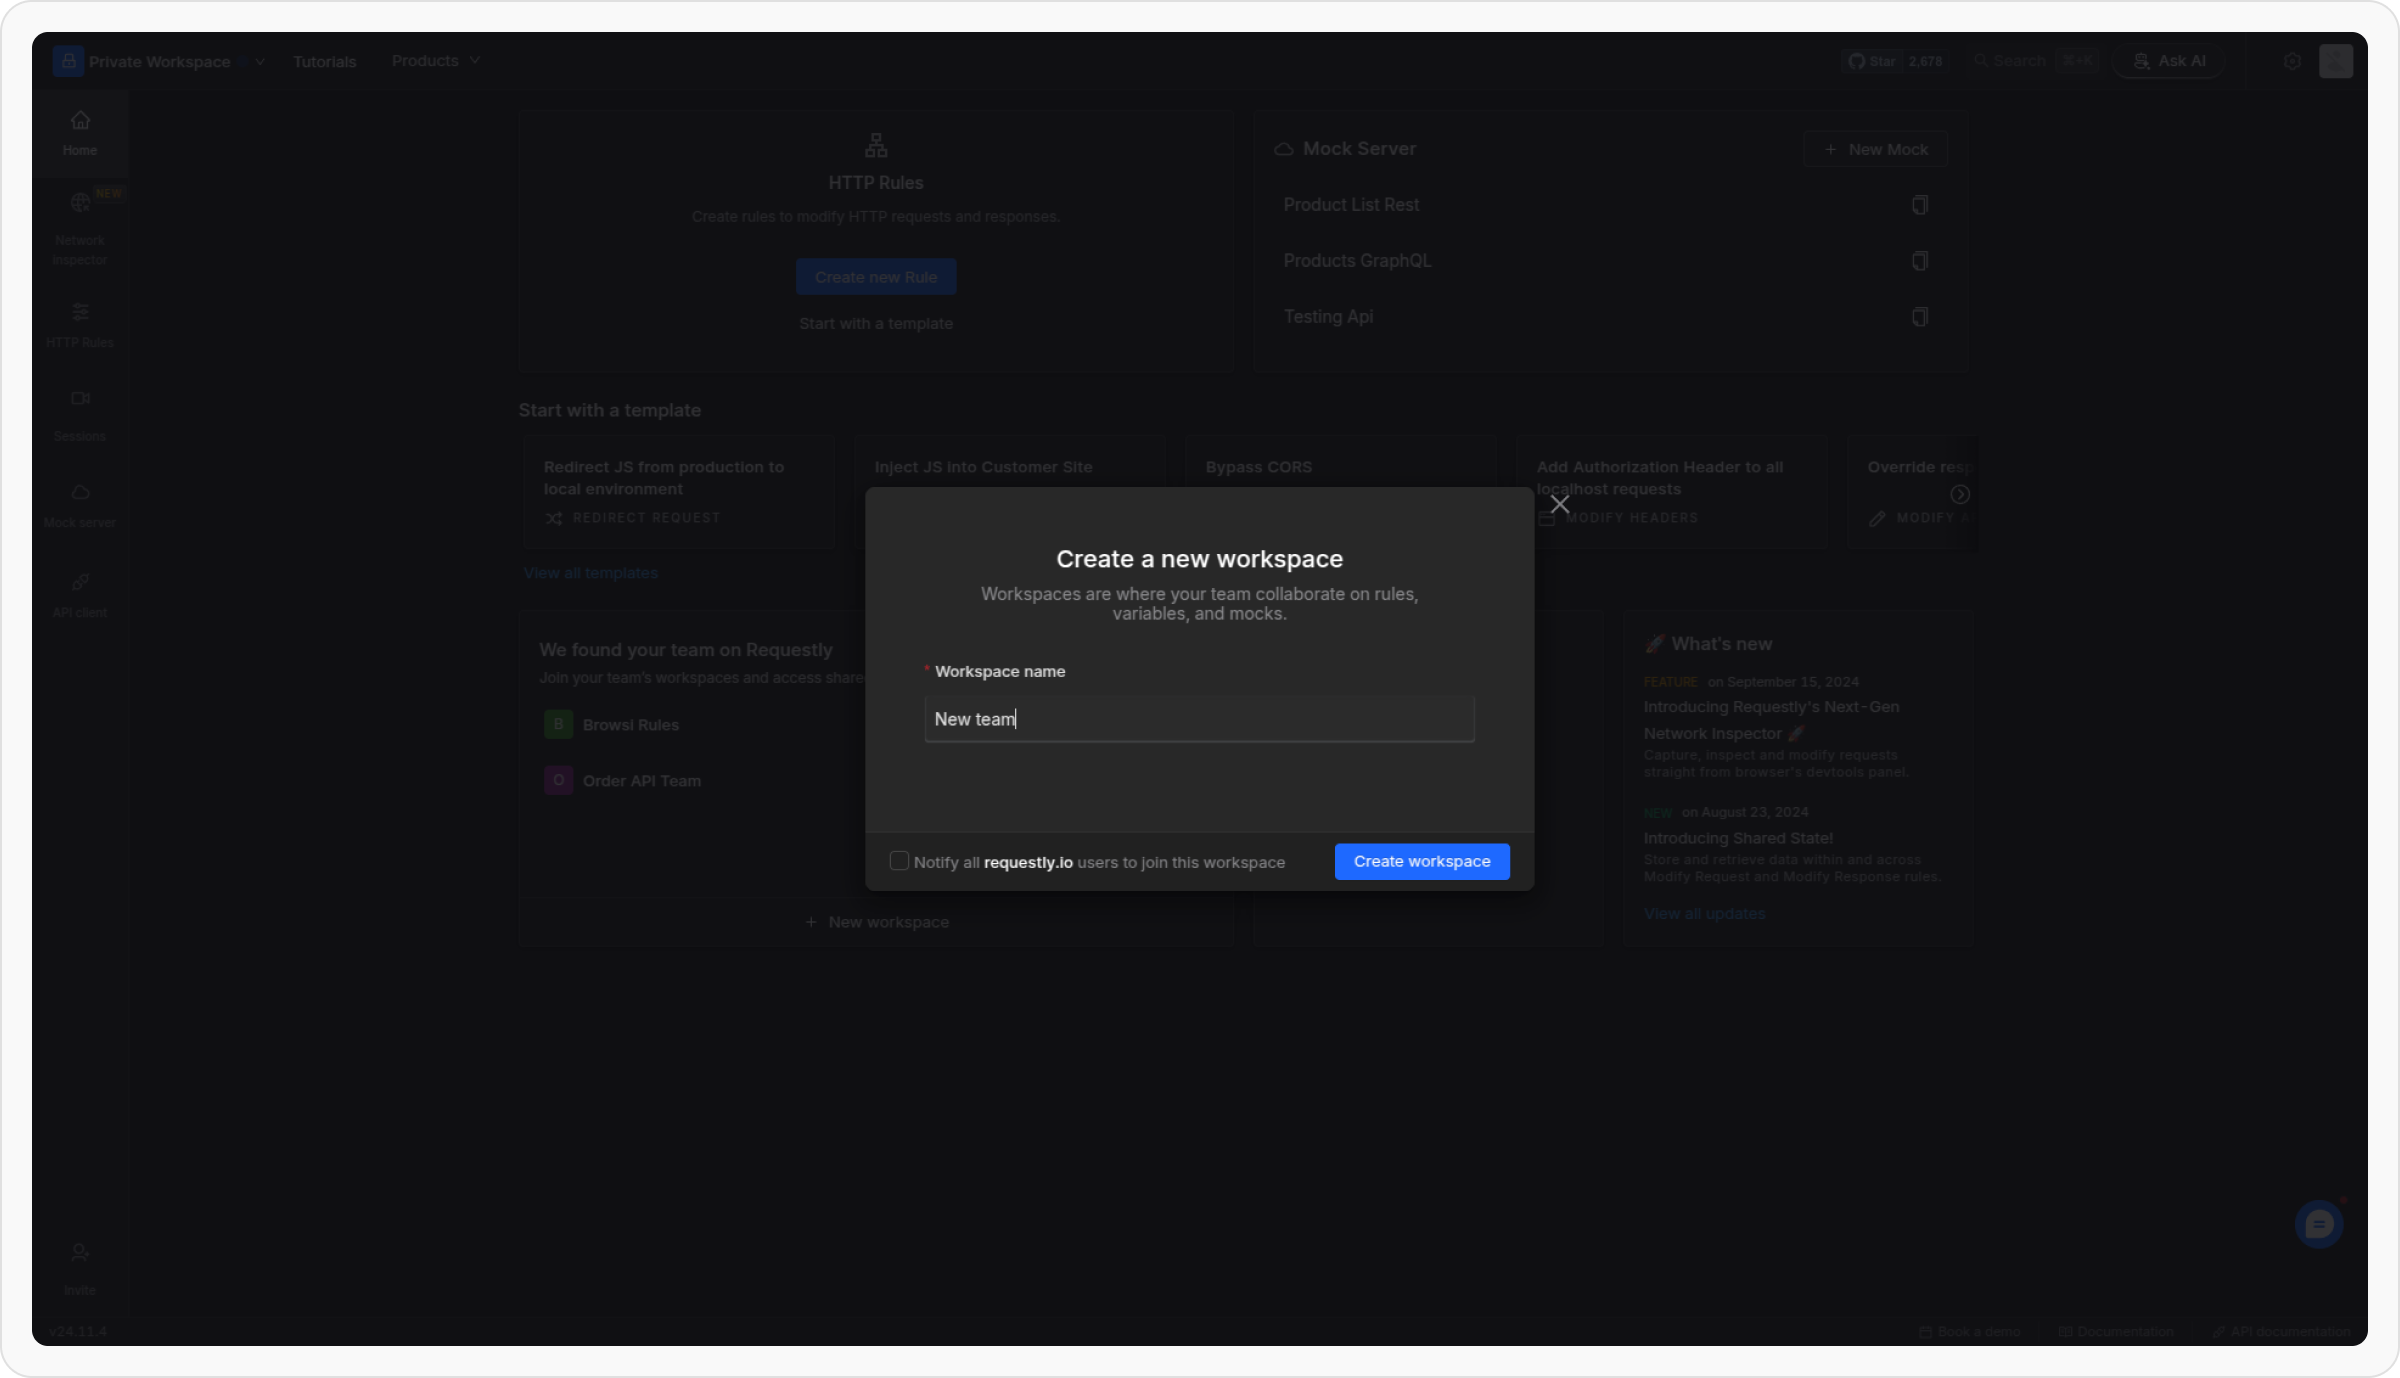
Managing team members
If your account is managed through a BrowserStack organization, project creation and member management happen on the BrowserStack projects dashboard instead of in the app. In that case the create and member controls open the BrowserStack dashboard, and your changes sync back into Requestly automatically.
Adding new members
1
Switch to the project
Navigate to the Requestly dashboard and switch to the project where you want to add members.
2
Open project settings
In the project switcher, hover the project row and click the Project settings gear (or Add members).
3
Invite people
In the Members tab, use the Add member form.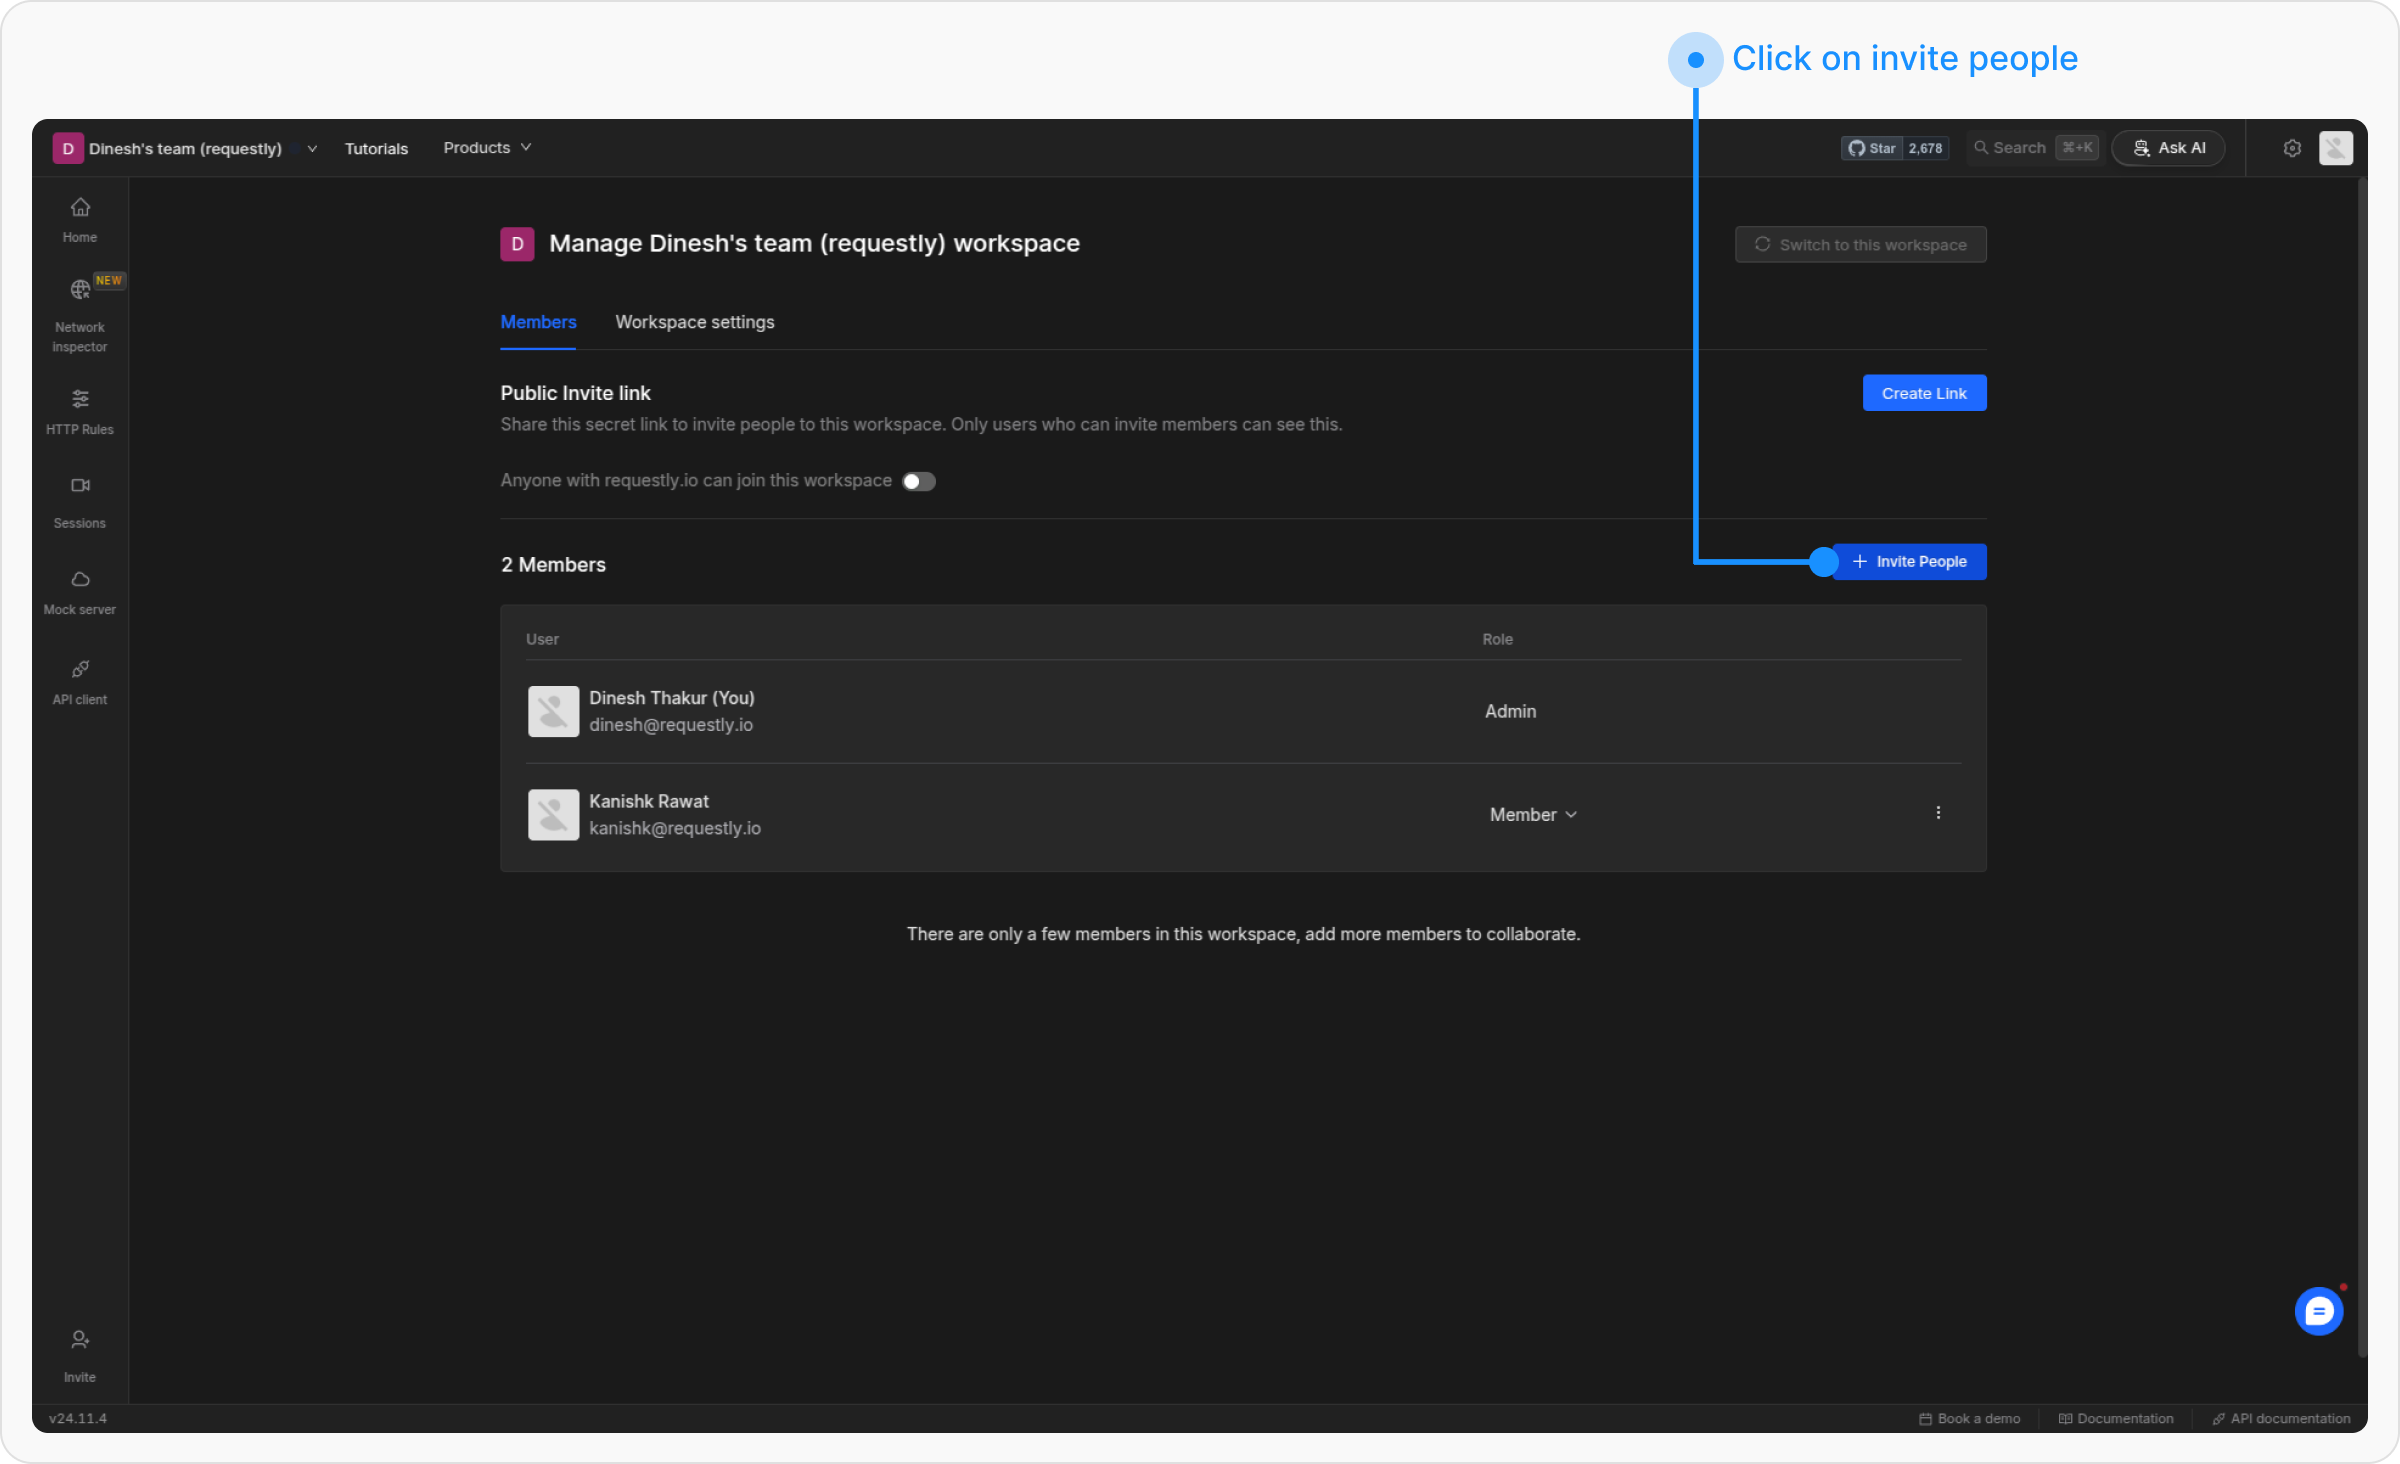
4
Invite teammates and set roles
Enter your teammates email addresses and assign them specific roles.
5
Await confirmation
Invited members will receive an email to join the project. Once they accept, they will appear in the members list.
Removing members
1
Switch to the project
Navigate to the Requestly dashboard and switch to the project where you want to remove members.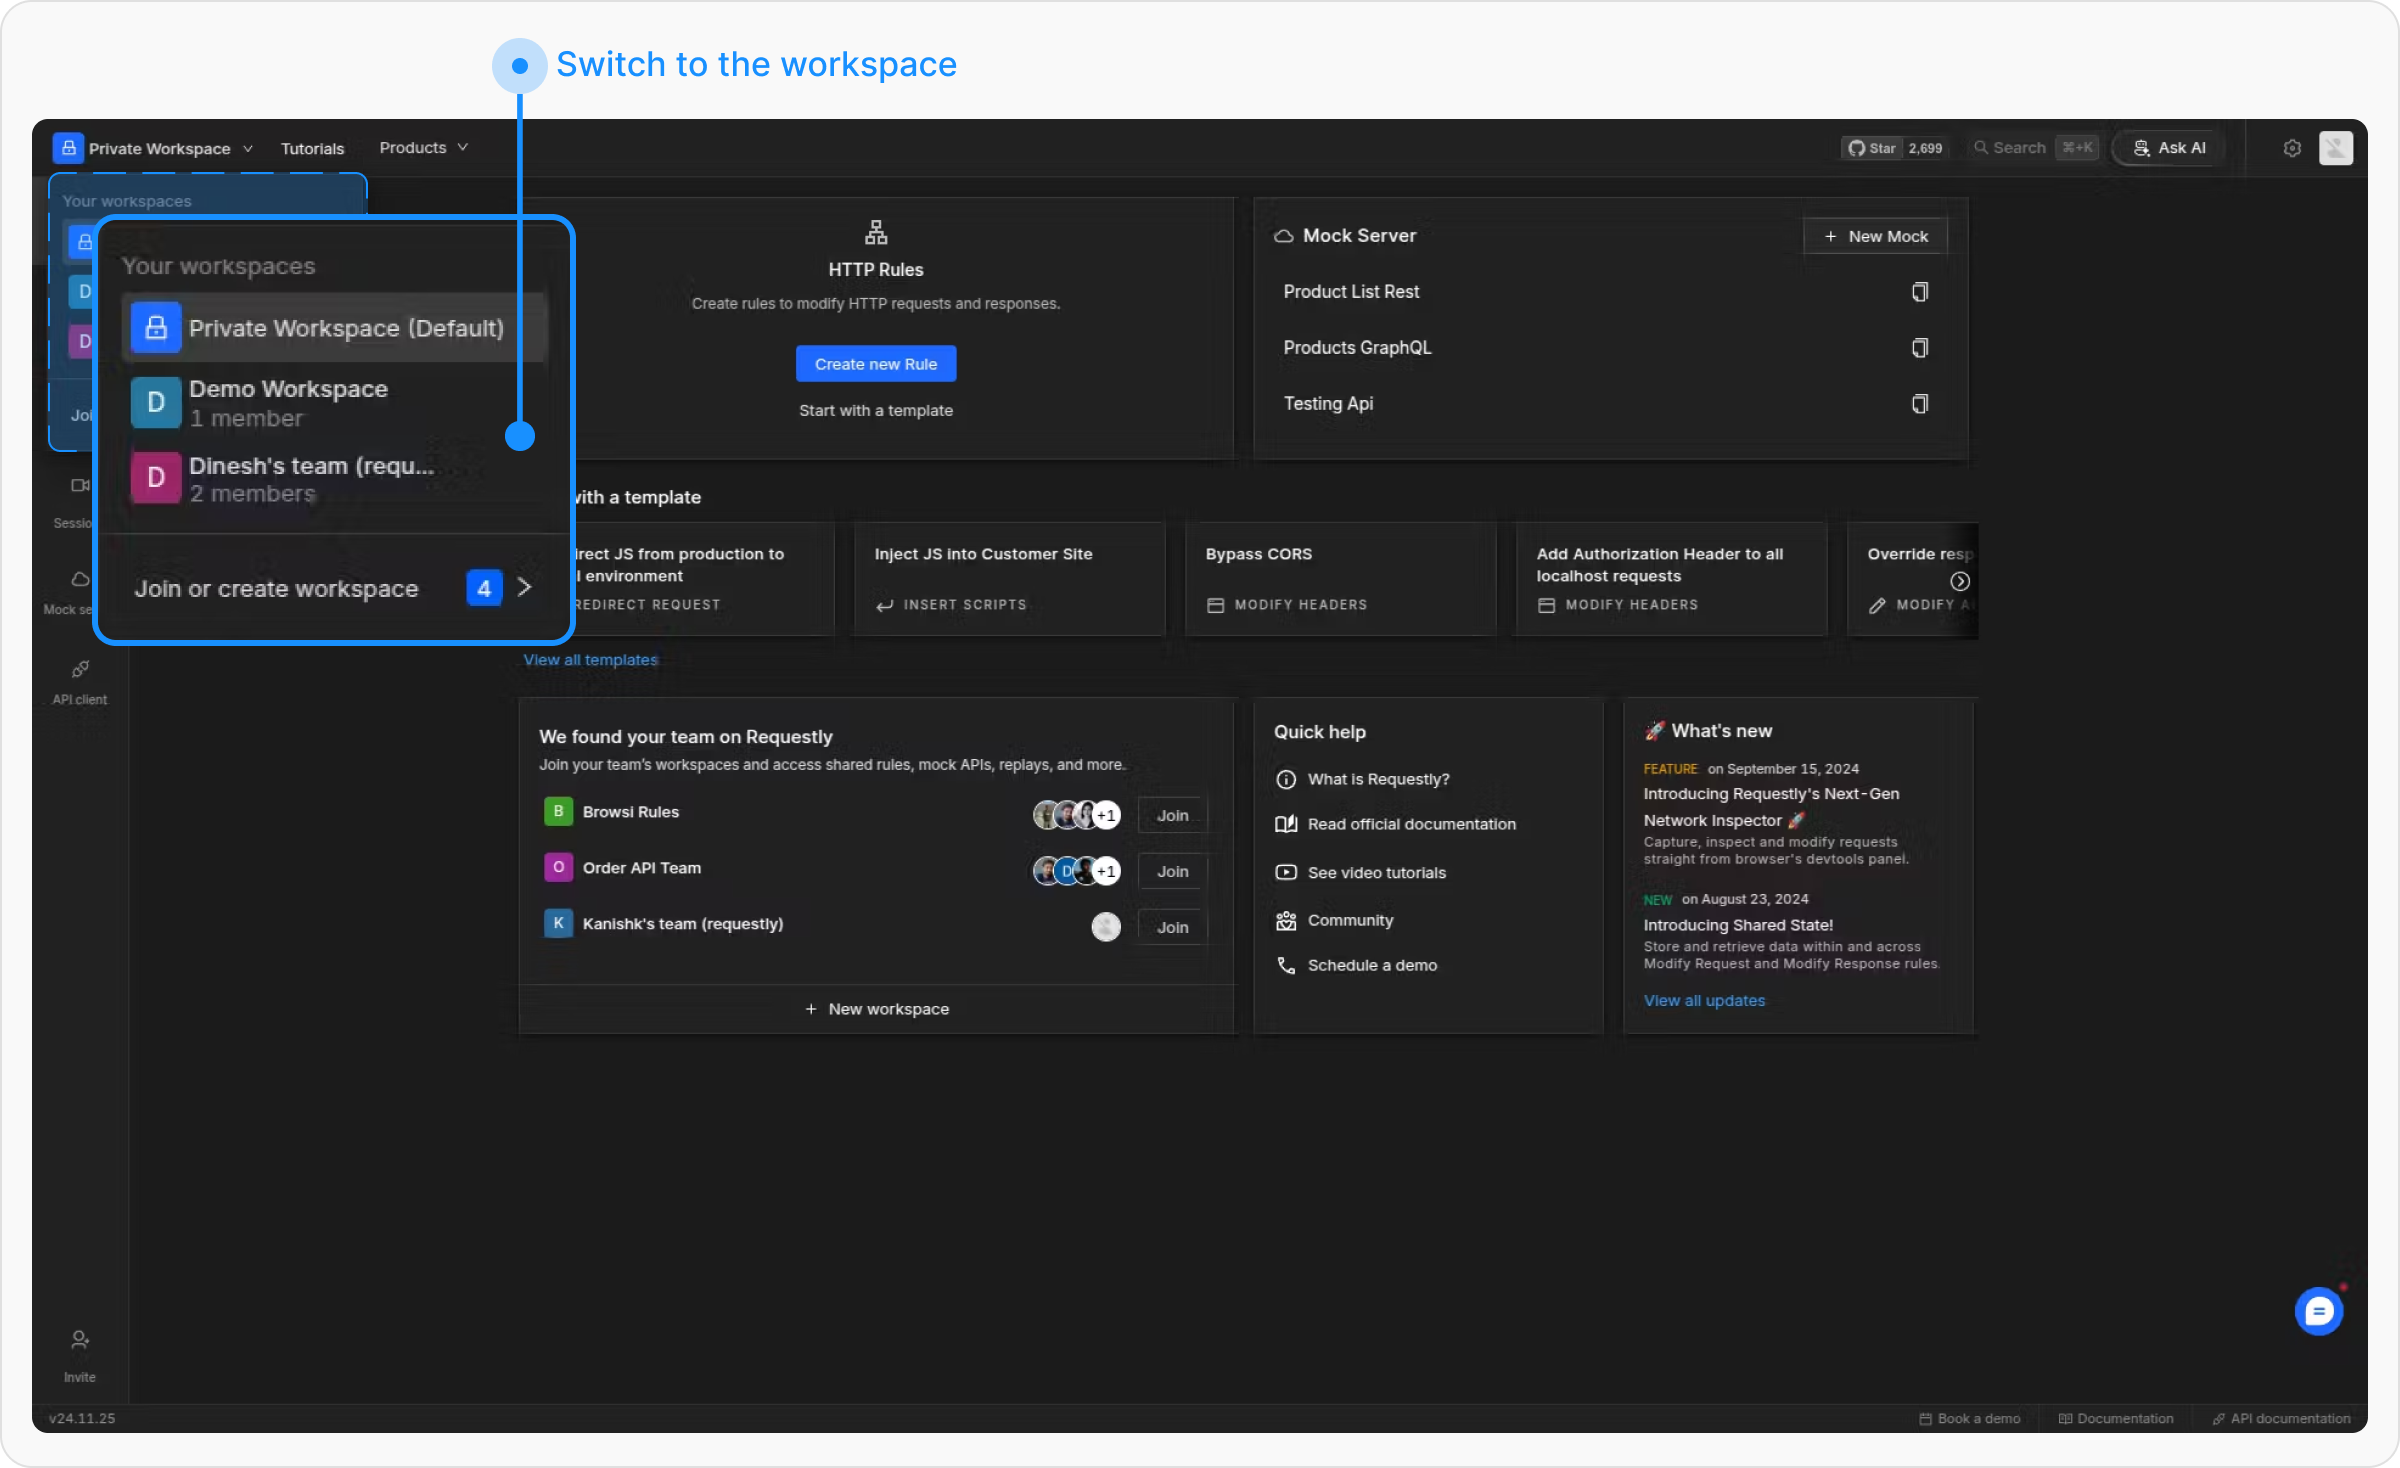
2
Open project settings
In the project switcher, hover the project row and click the Project settings gear (or Add members).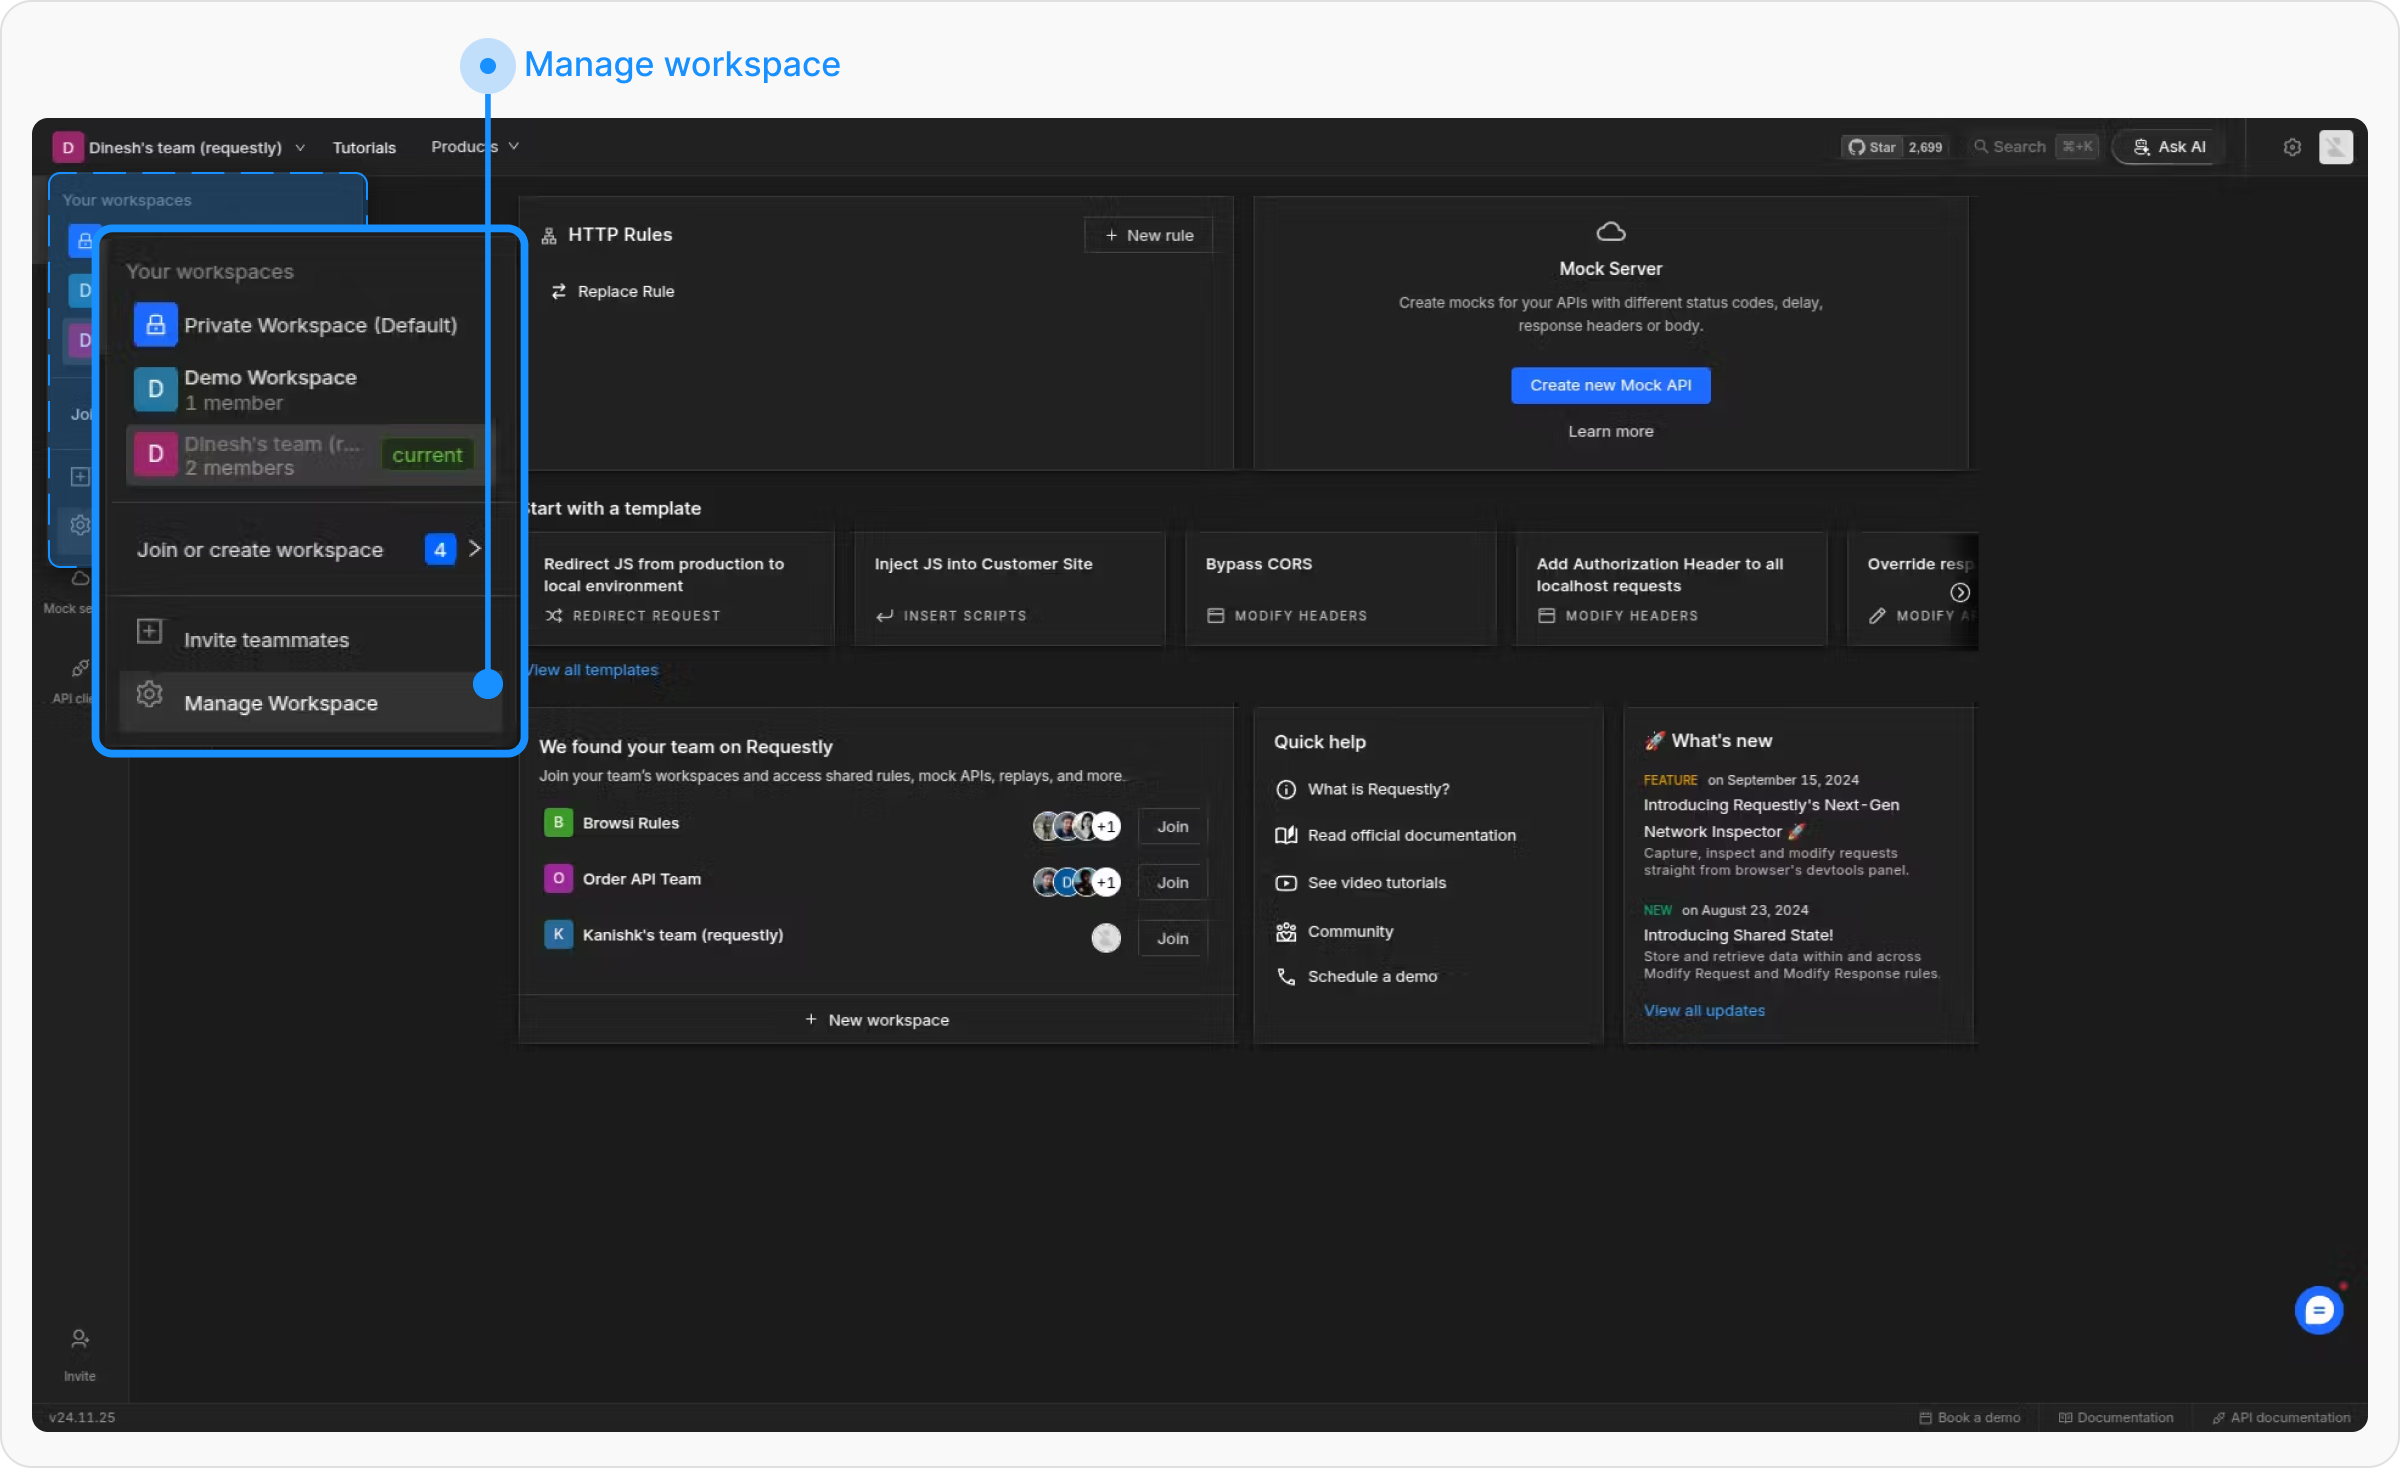
3
Remove the member
Locate the member you want to remove from the members’ list. Click the 3-dot menu next to their role and select Remove user from project.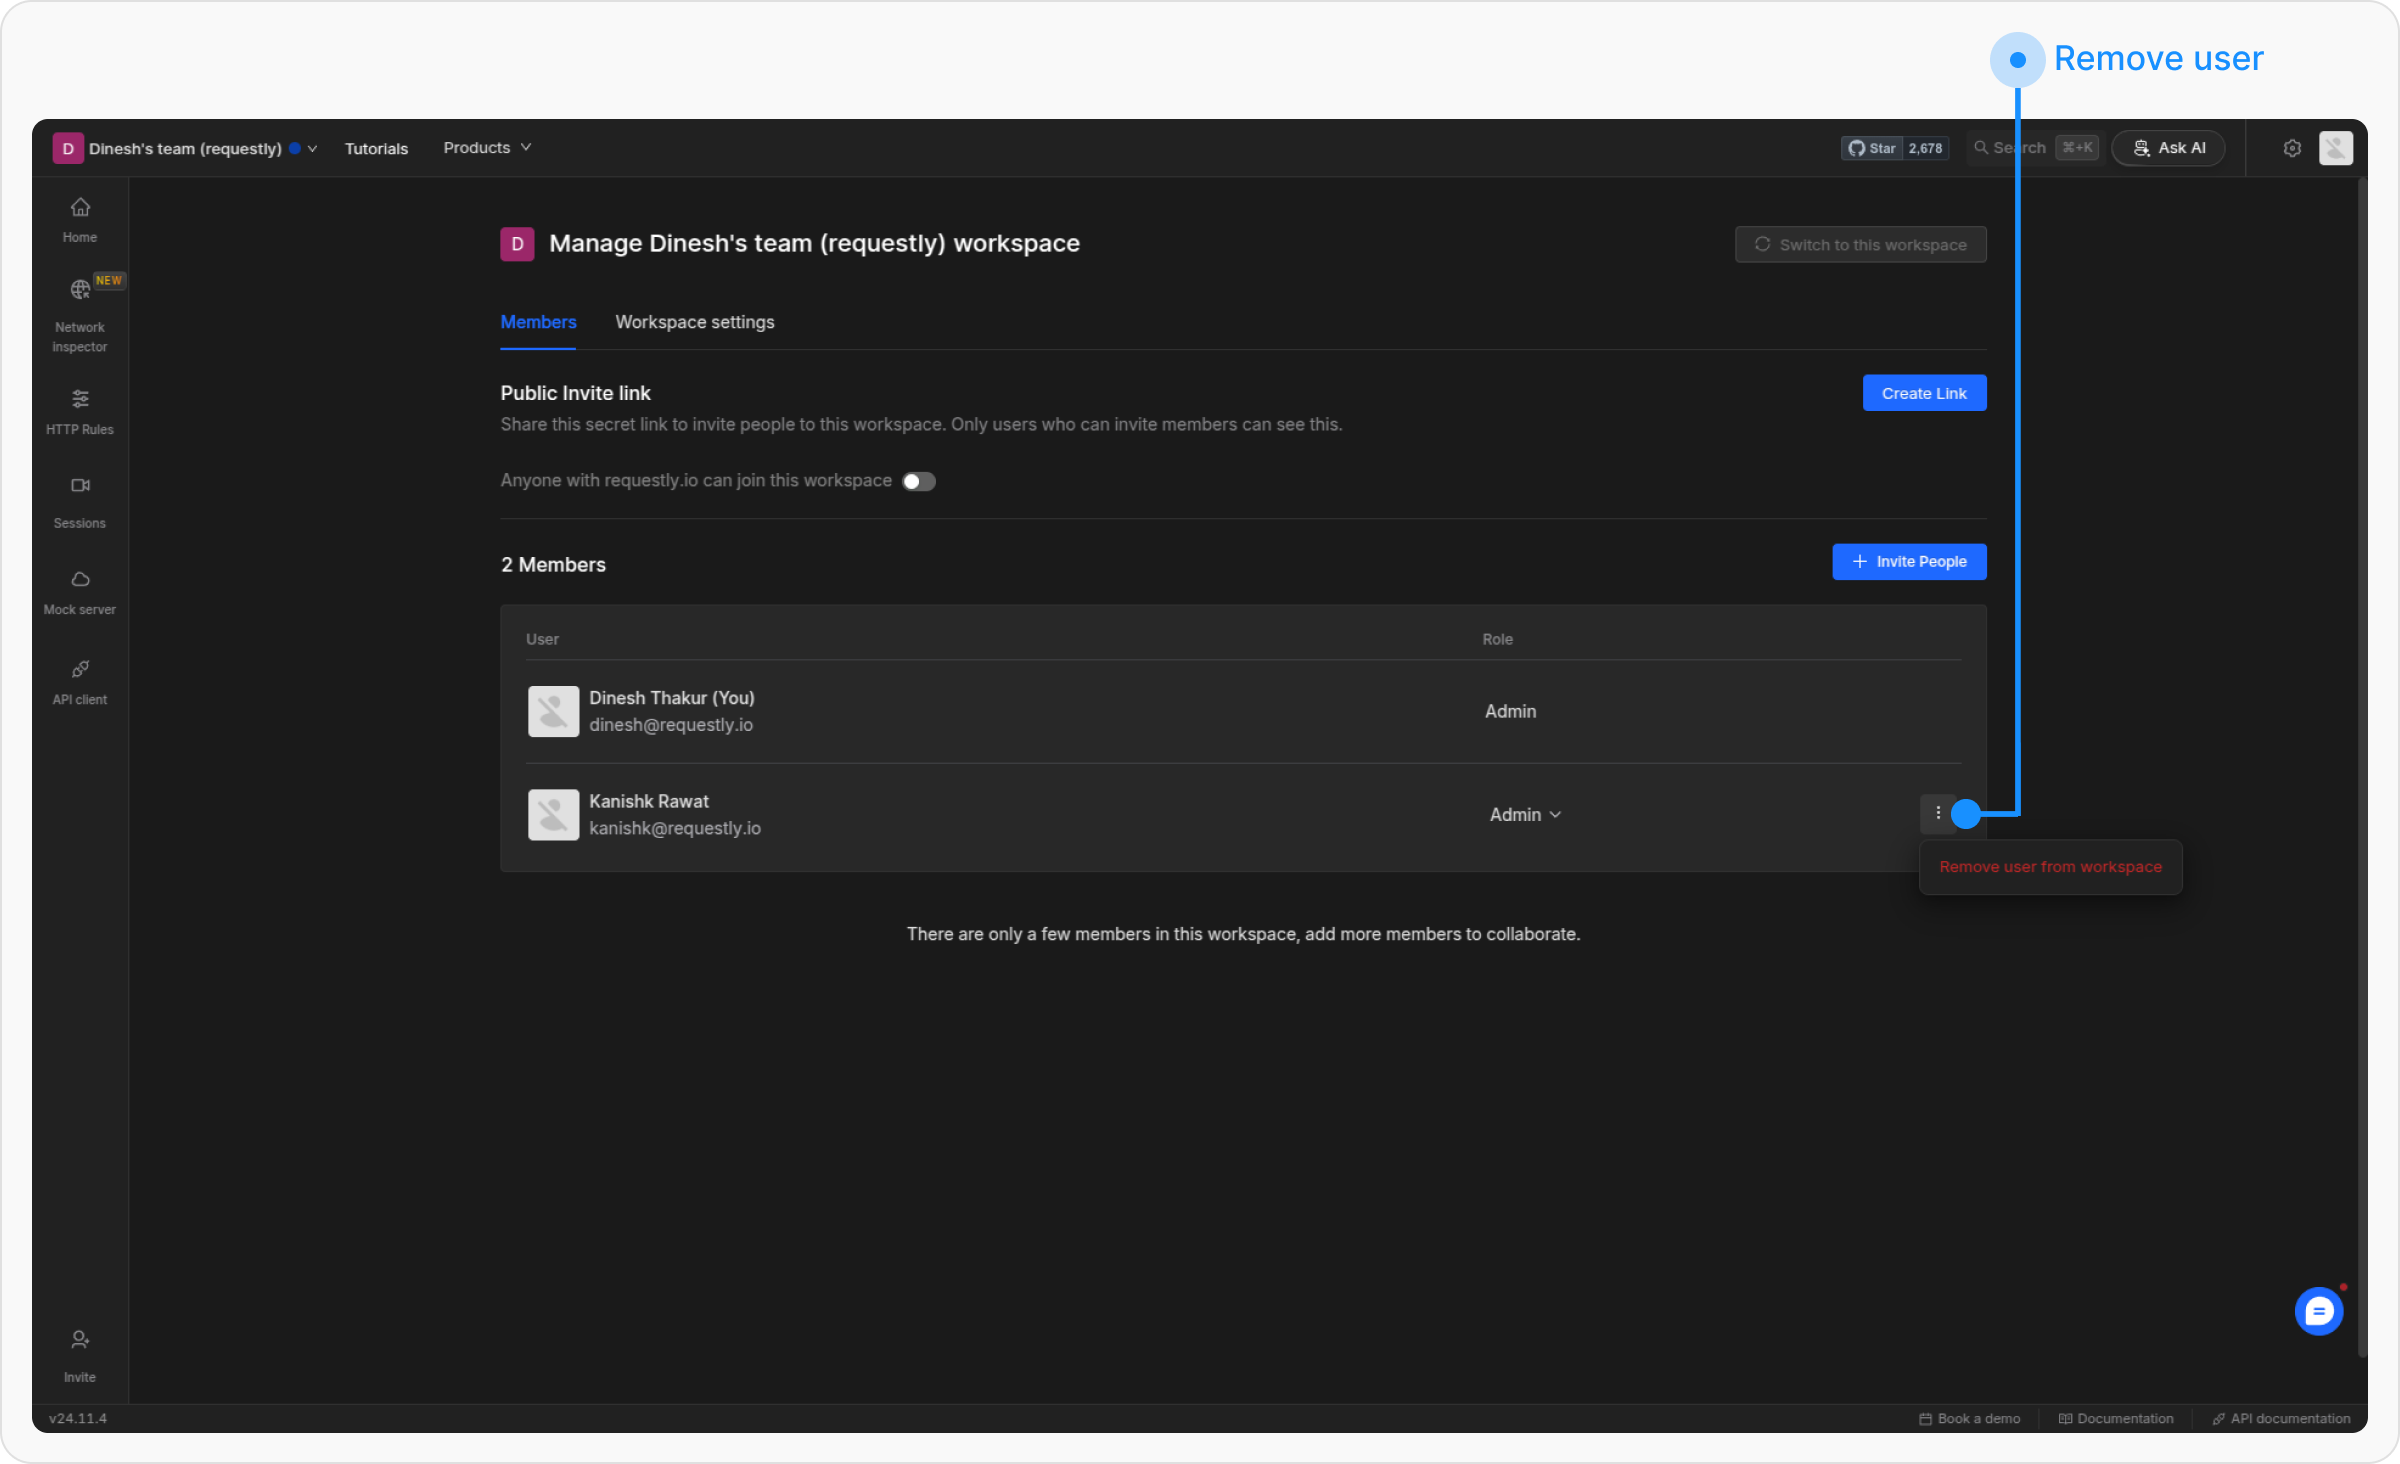
4
Confirm the removal
A confirmation prompt will appear. Confirm the action to remove the member successfully.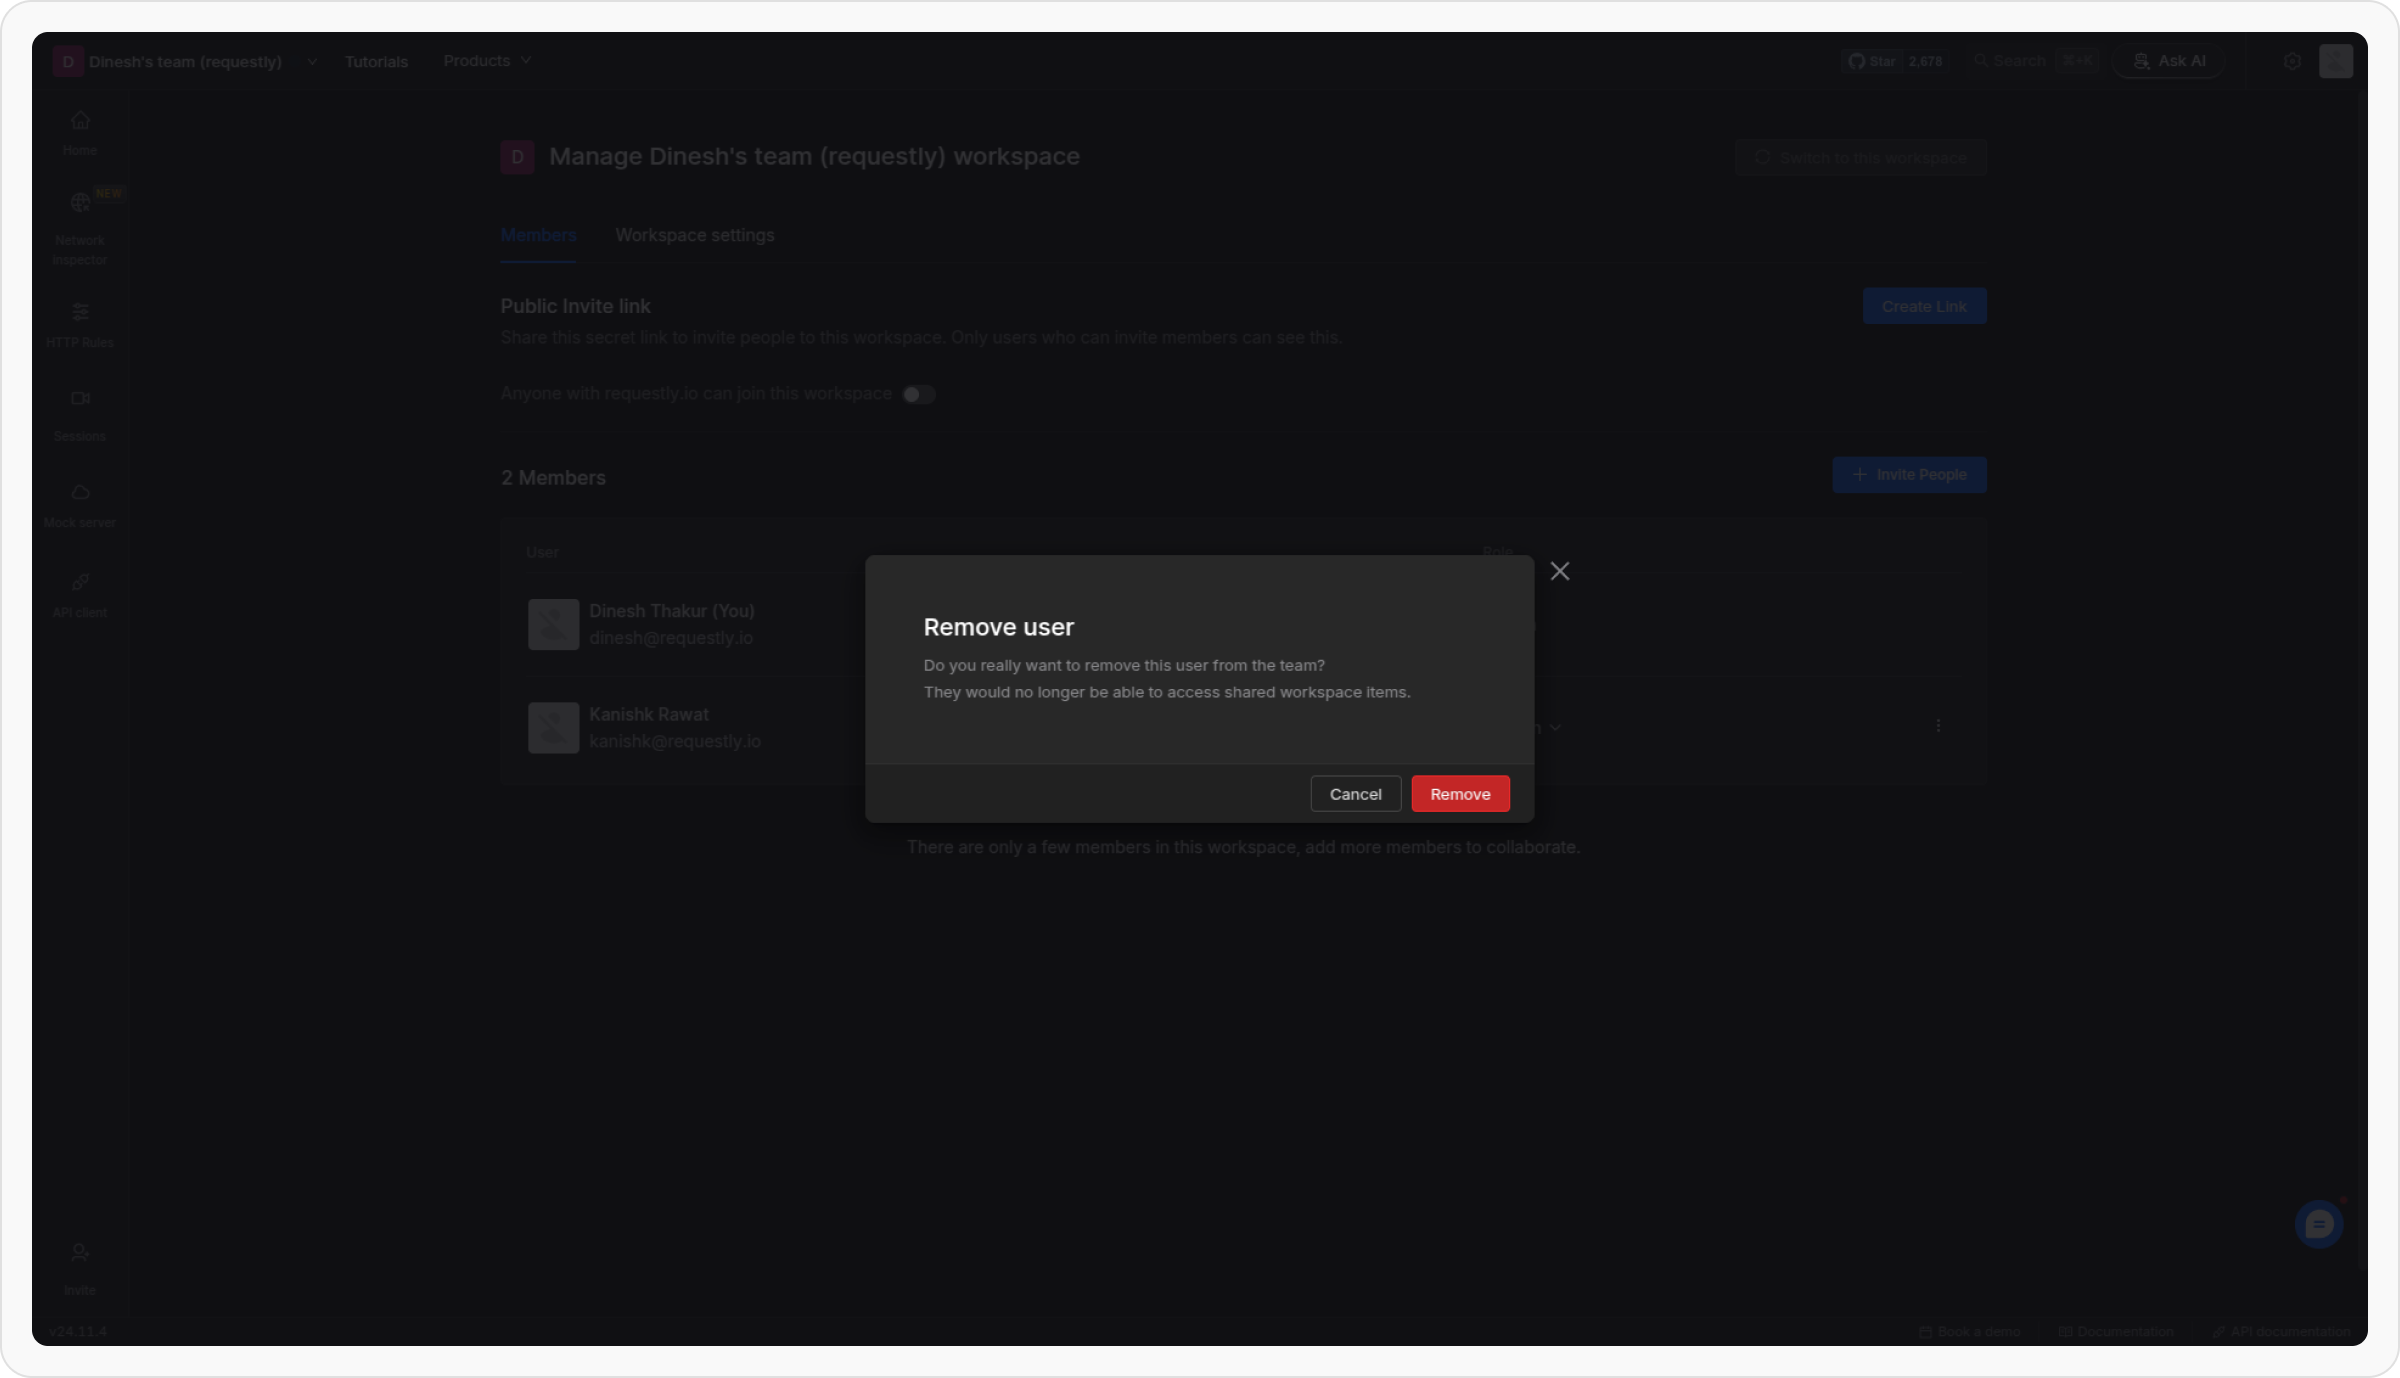
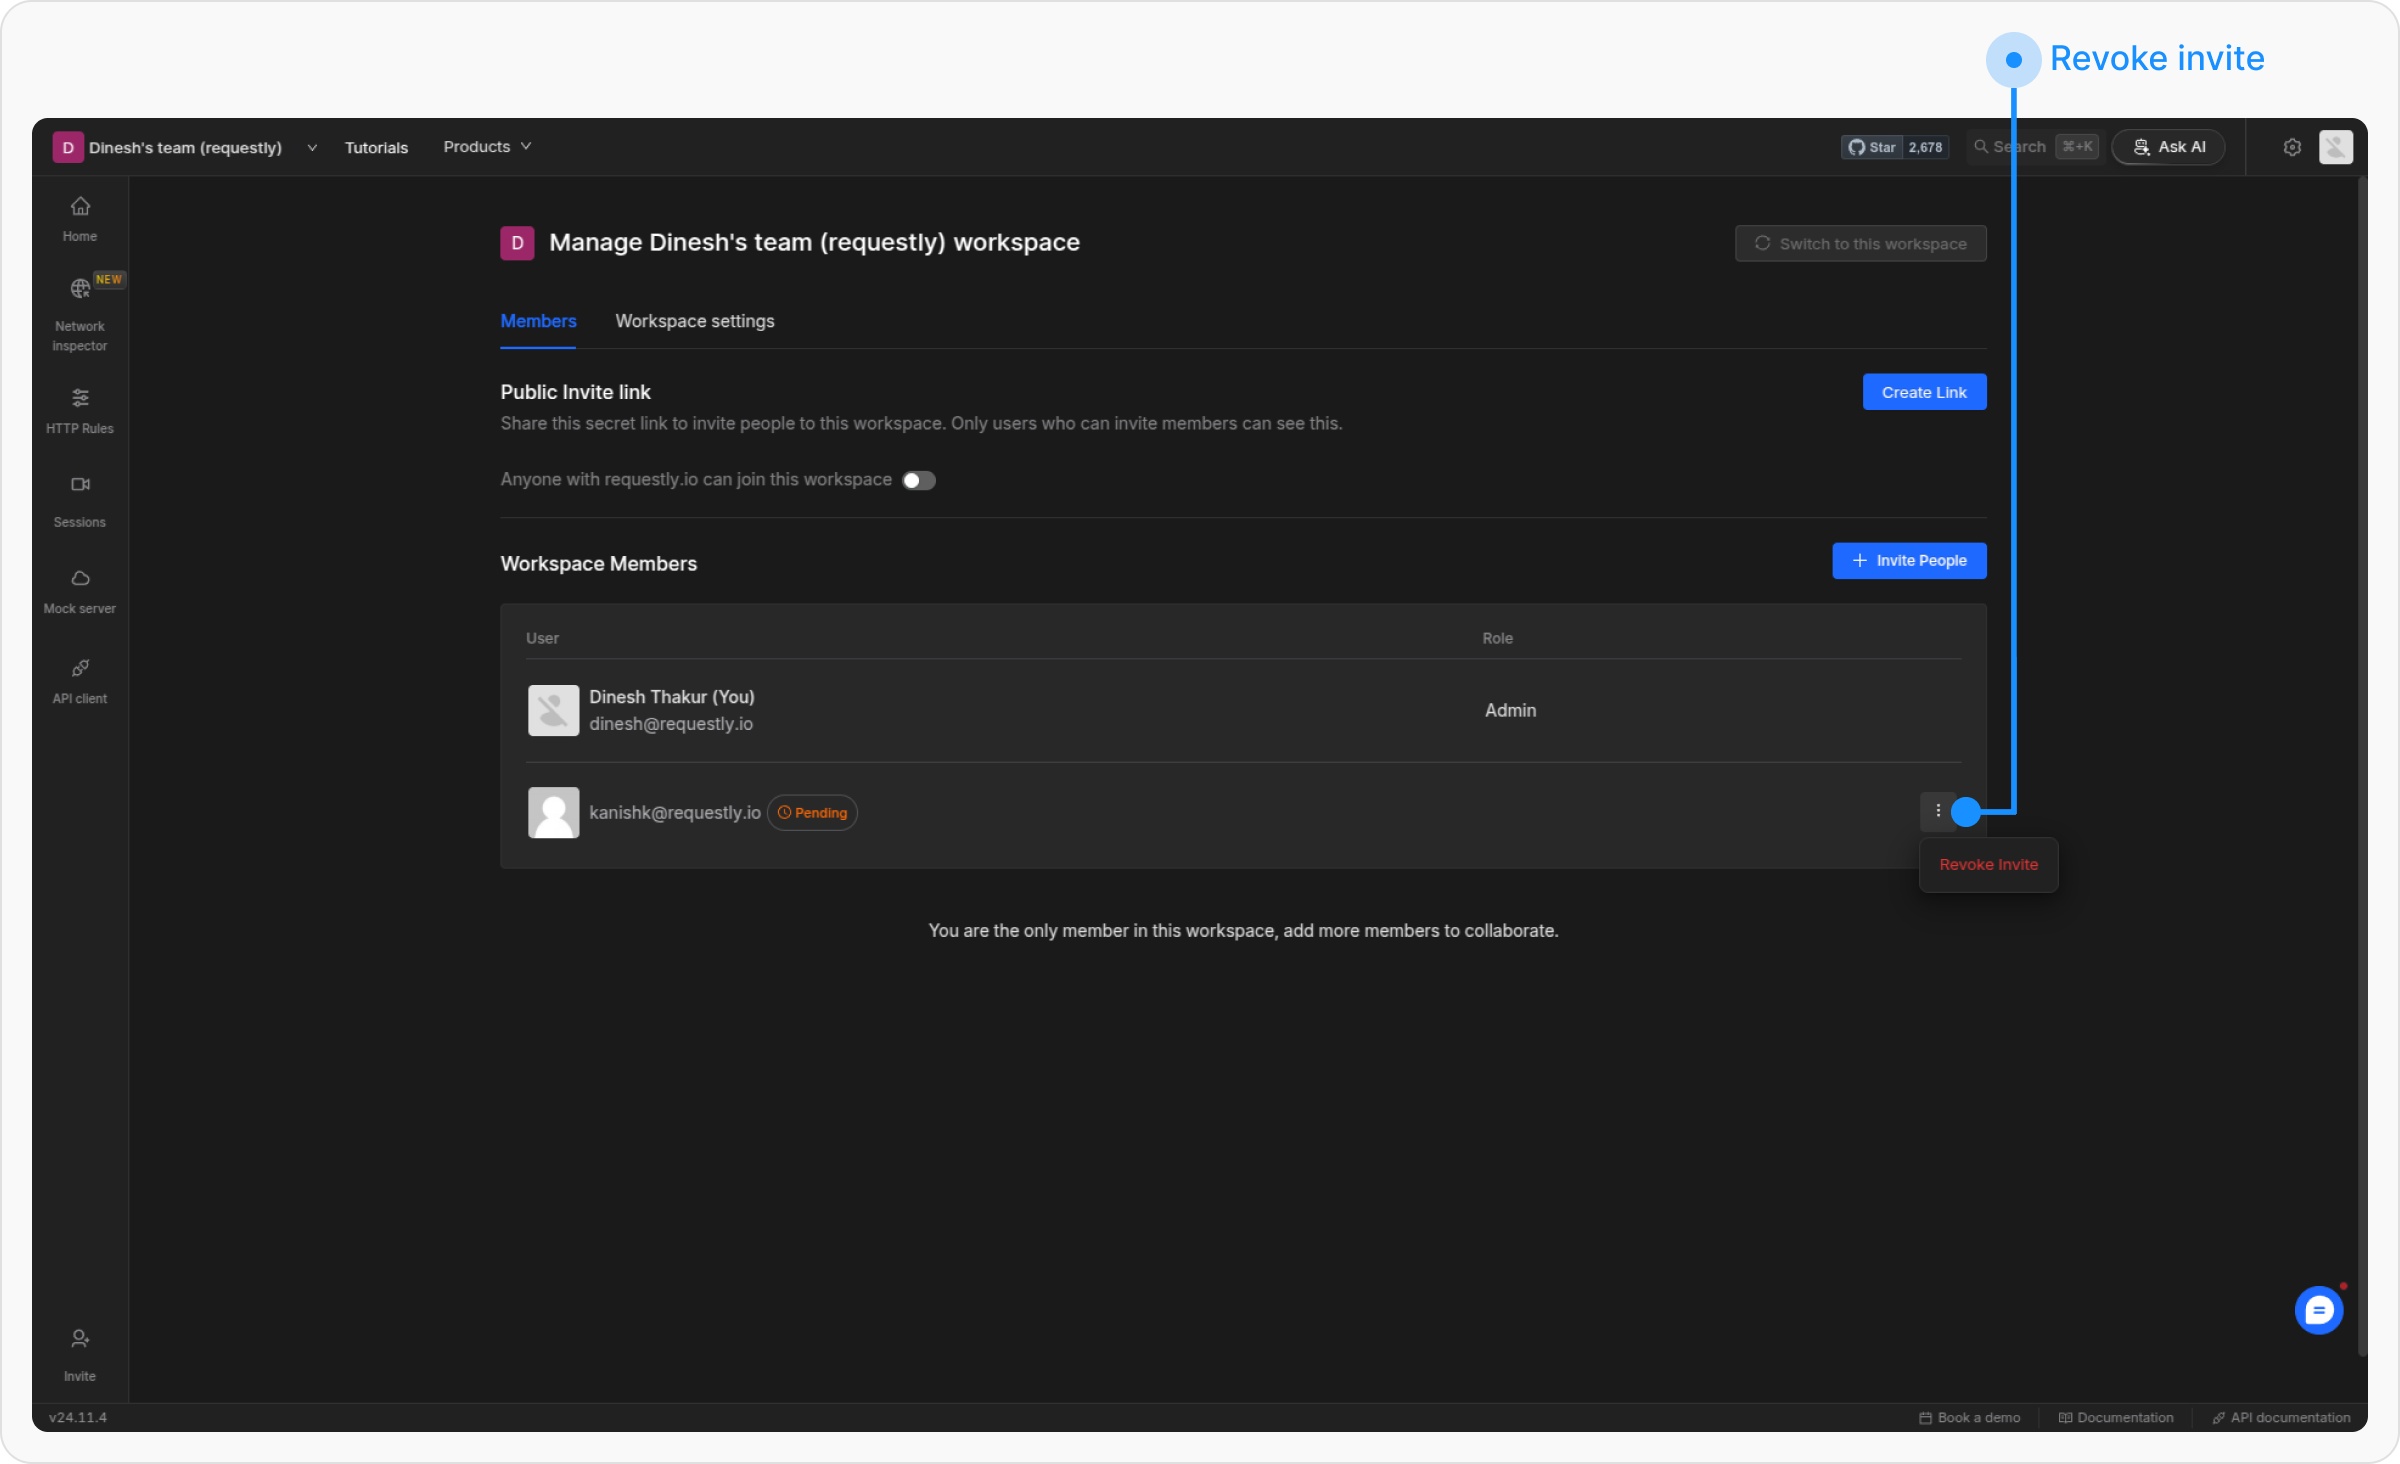
5
Revoke pending invites
If a member has been invited but not yet joined, you can revoke their invite from the same dropdown.