
Efficient license management is essential for seamless operations. Requestly allows organizations to effortlessly manage their subscriptions and licenses.
Billing, subscriptions, and license management are handled on the BrowserStack billing dashboard, not inside the Requestly desktop app. The desktop app’s Settings does not include a Billing section. Open the Billing area of your BrowserStack account to complete the steps below.
Role Overview
To better understand how Billing Teams works, watch the following video:
Creating a Billing Team
Setting up a billing team is the first step in managing your organization’s licenses. Follow these steps to create one:1
Open the Billing dashboard
Sign in to your BrowserStack account and open the Billing dashboard.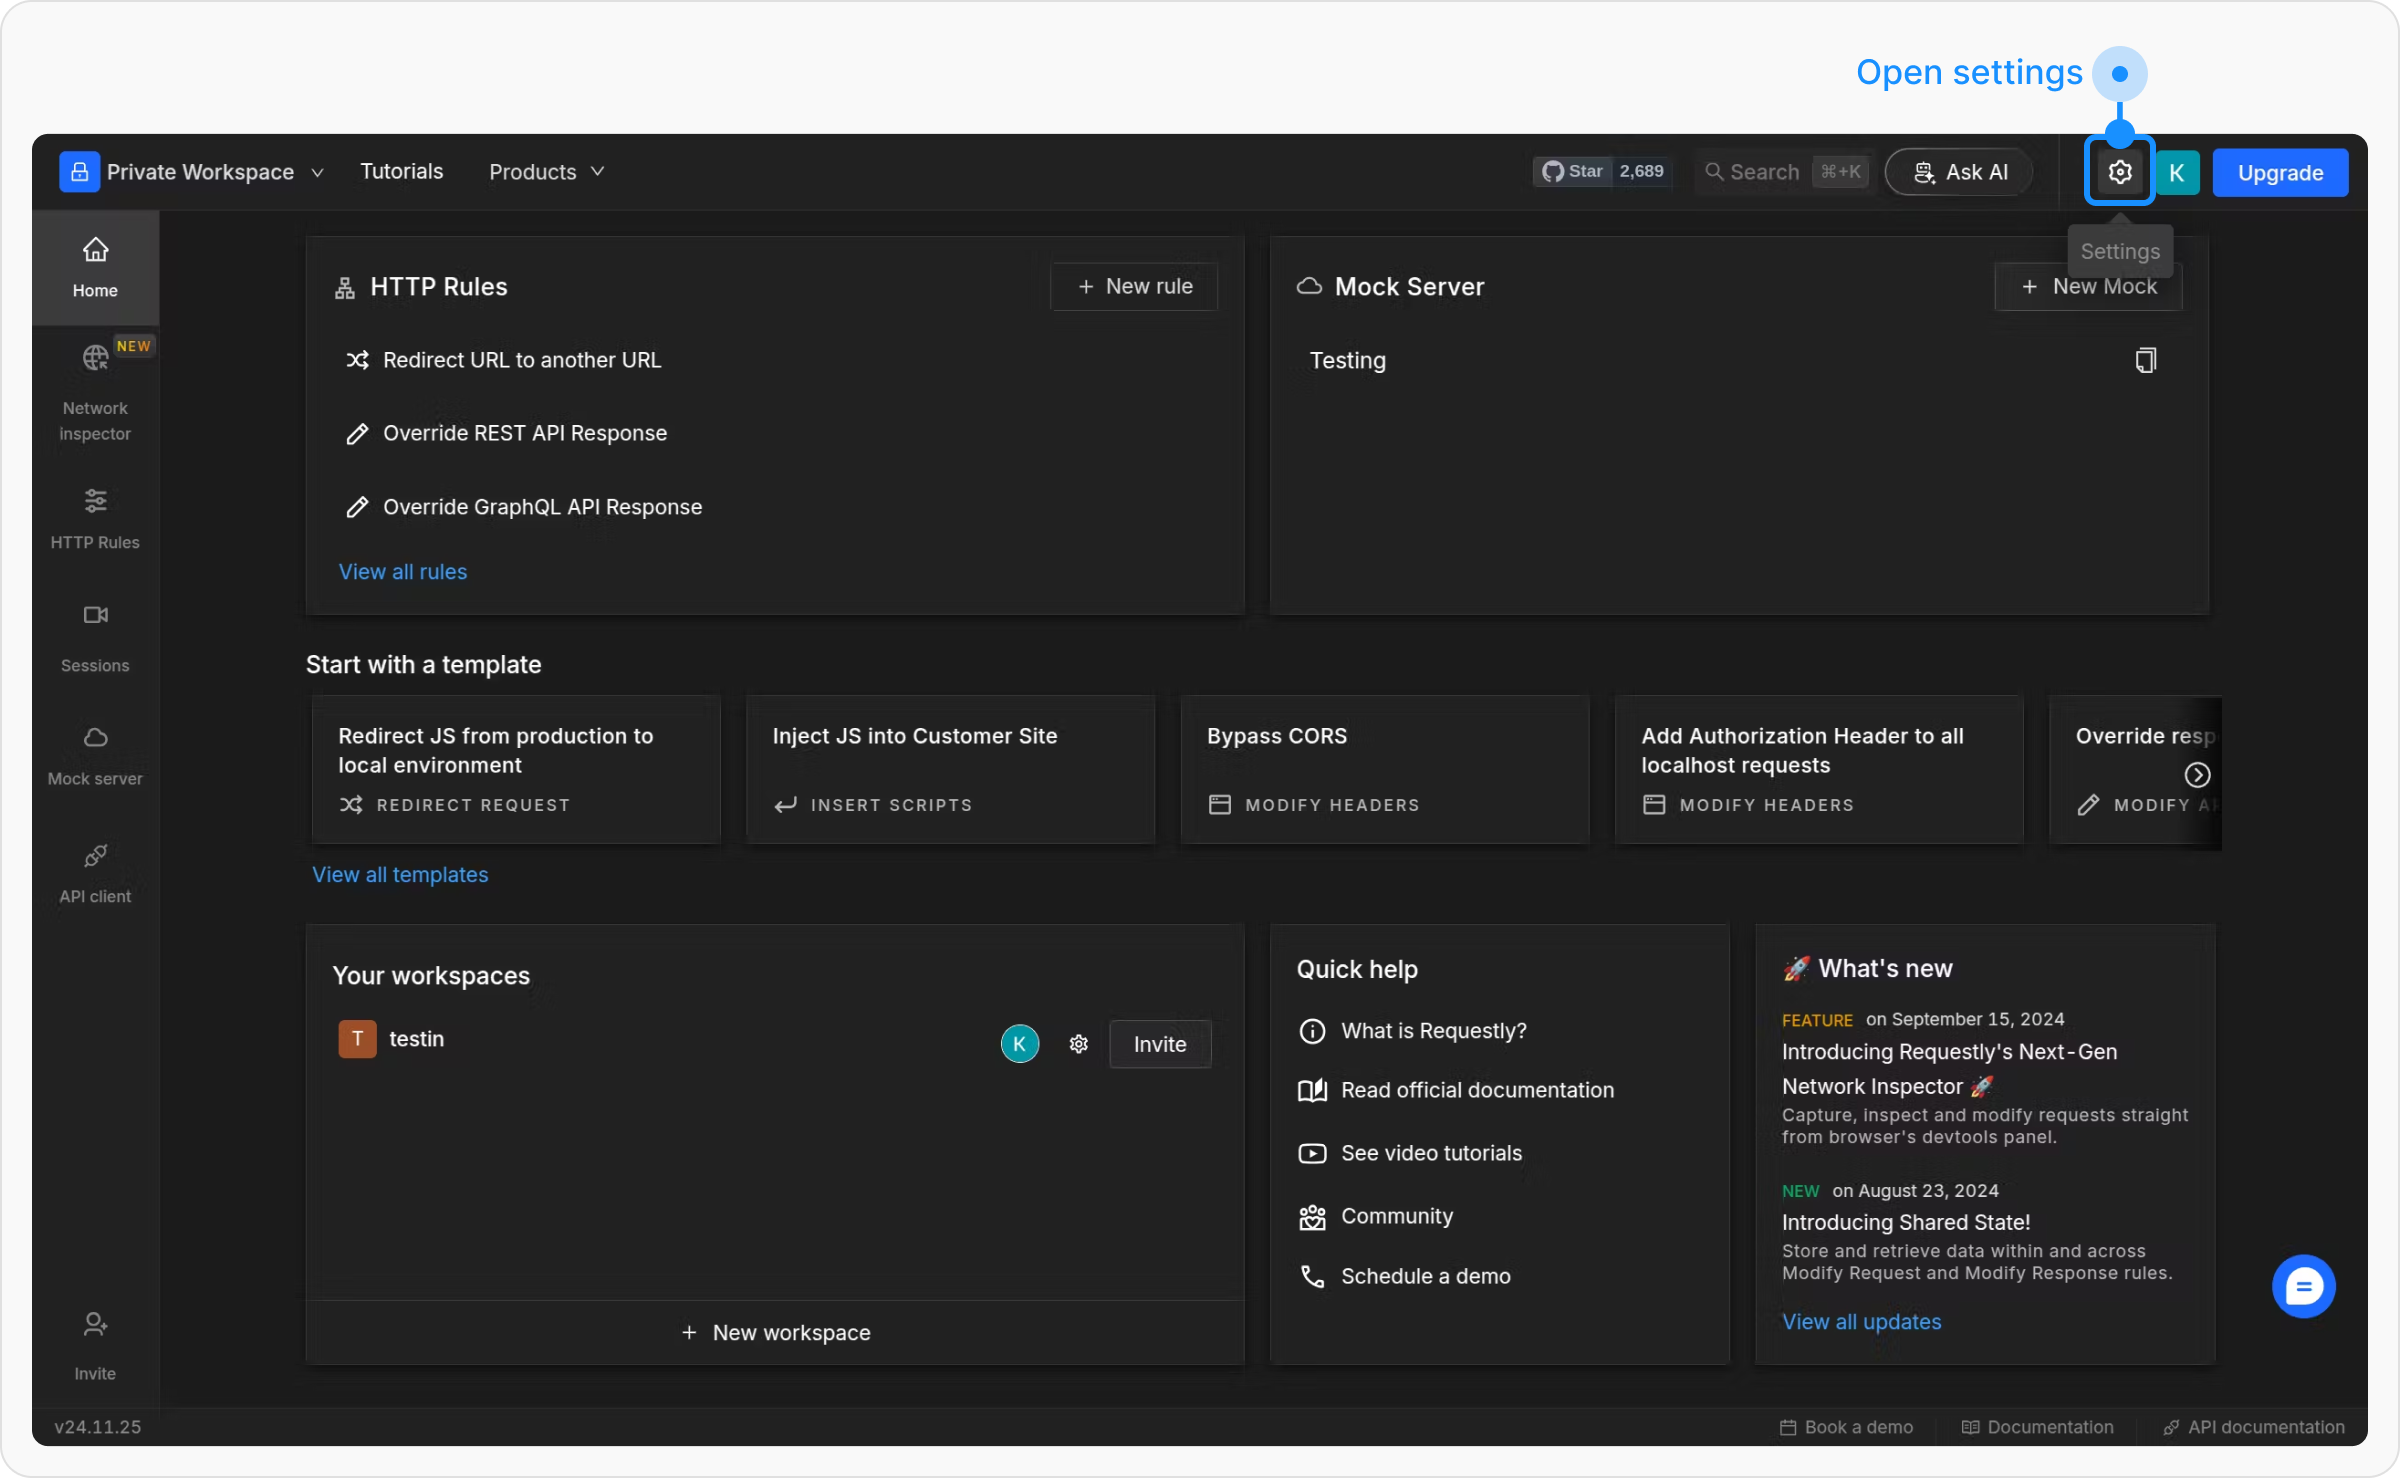
2
Click Upgrade
After you open Billing, click the Upgrade button to select your plan and begin the process of allocating seats.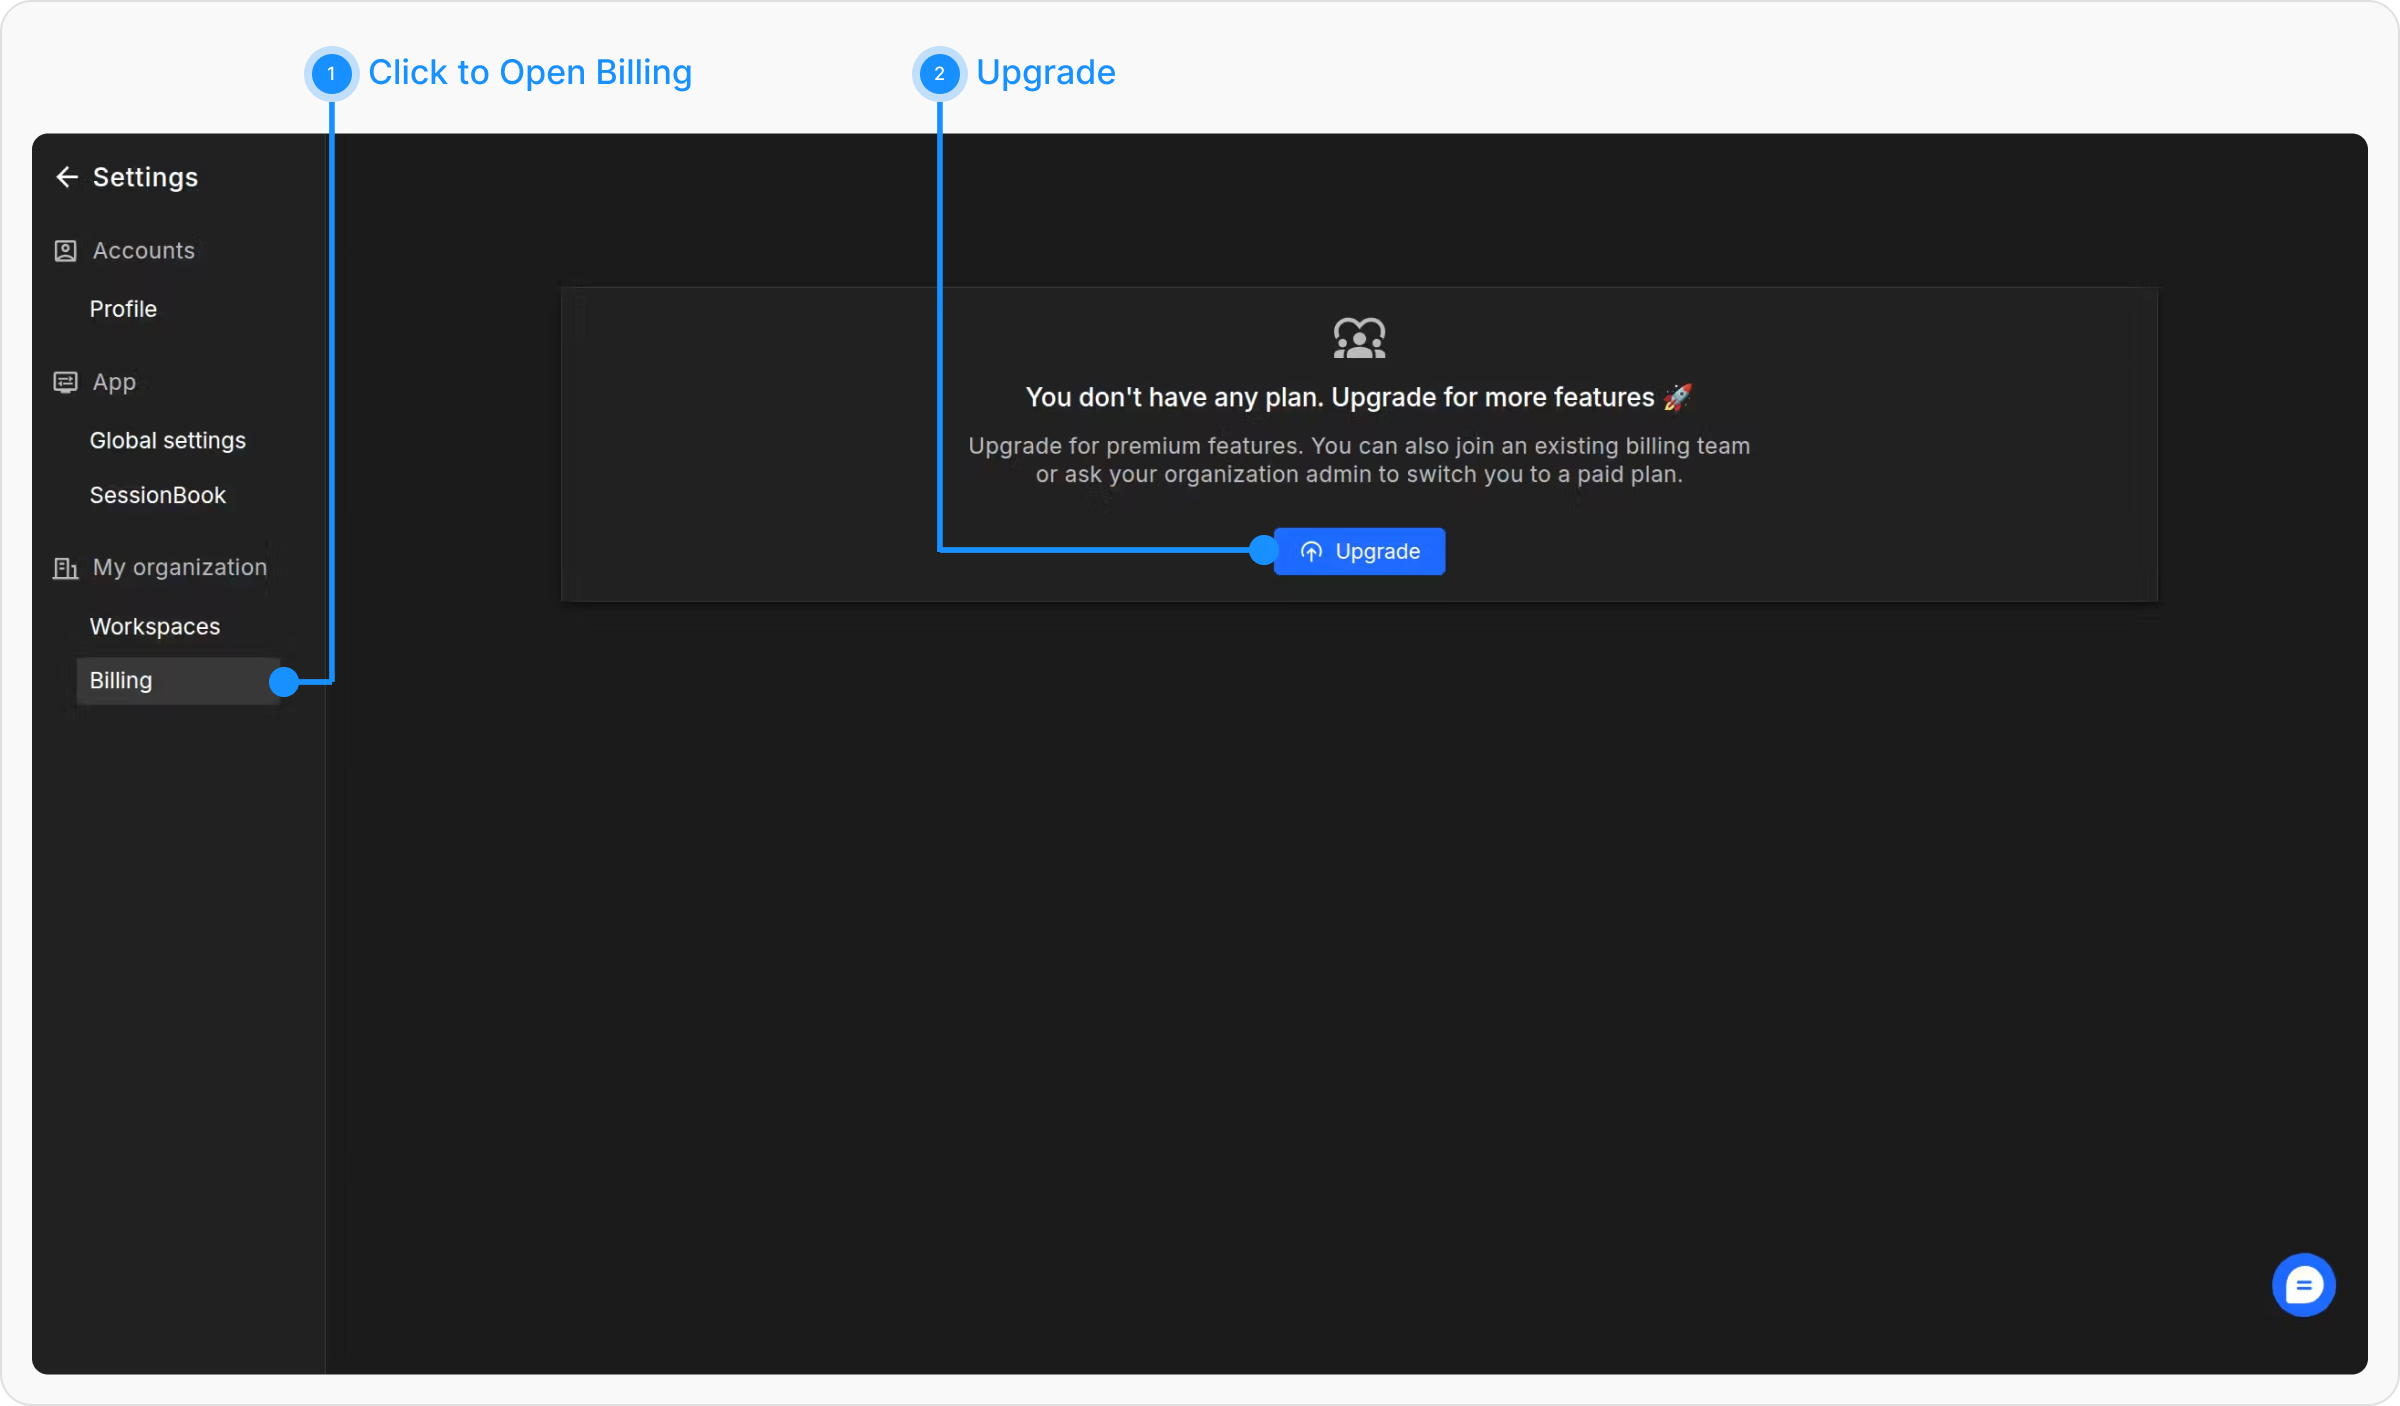
3
Select Seats
Choose the number of seats you want to allocate for your team. This will determine how many licenses are available for assignment.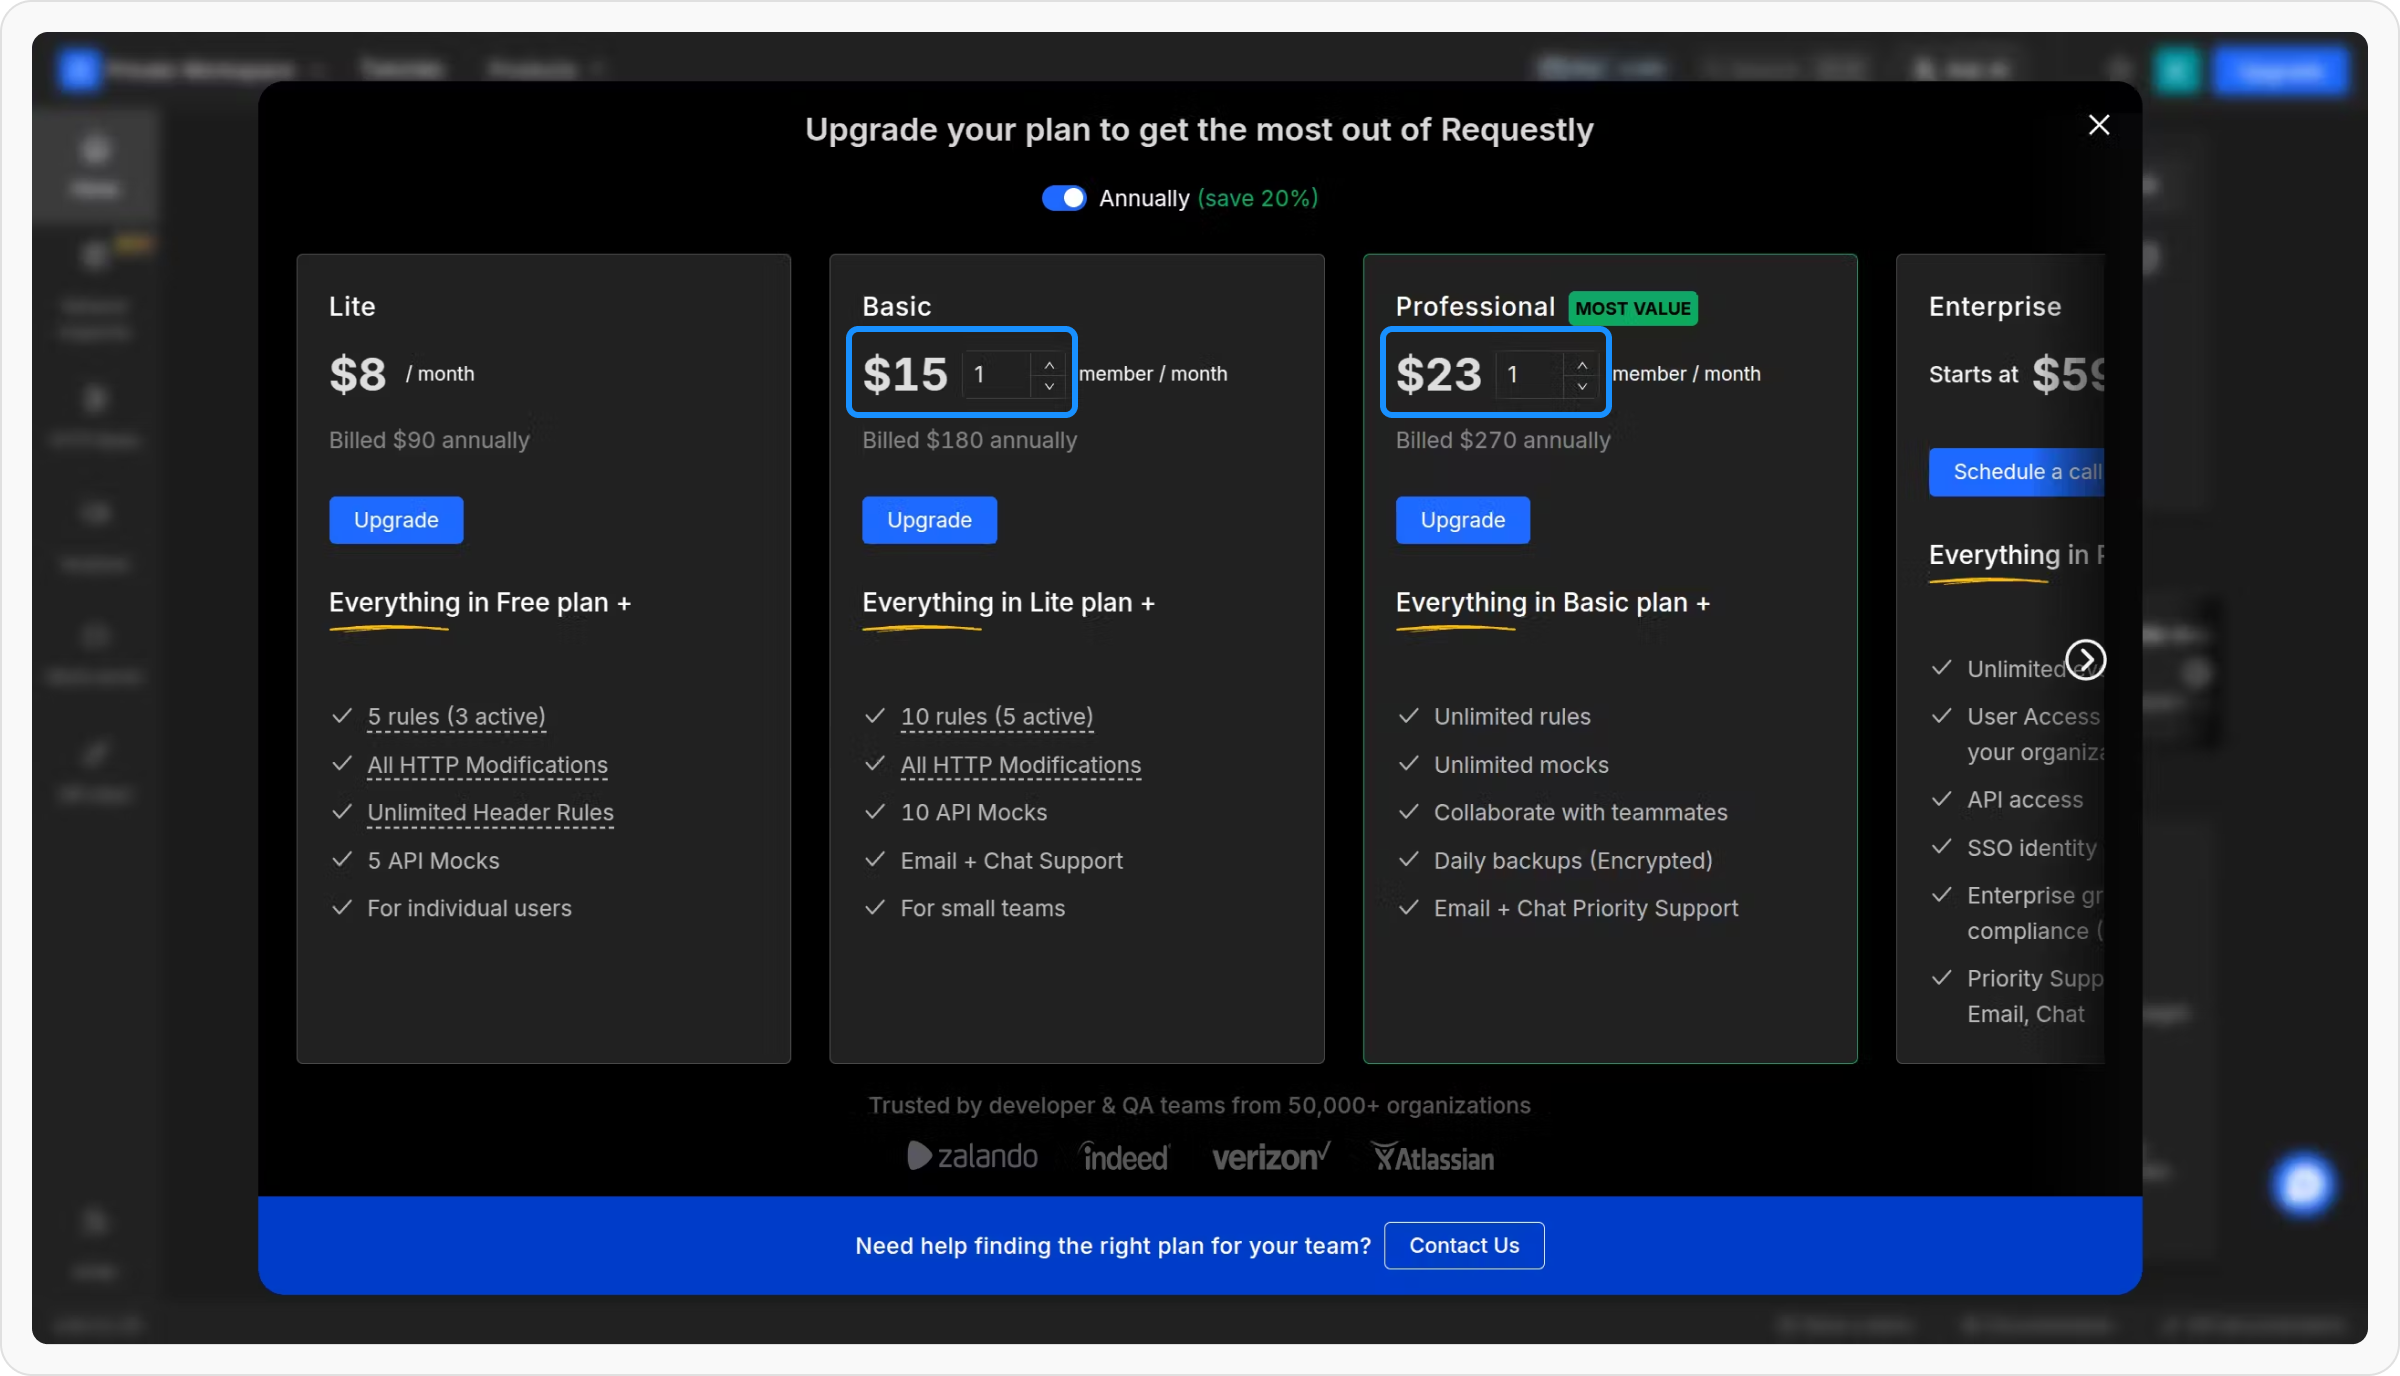
4
Proceed to Checkout
After selecting the number of seats, click the Upgrade button to go to the checkout page.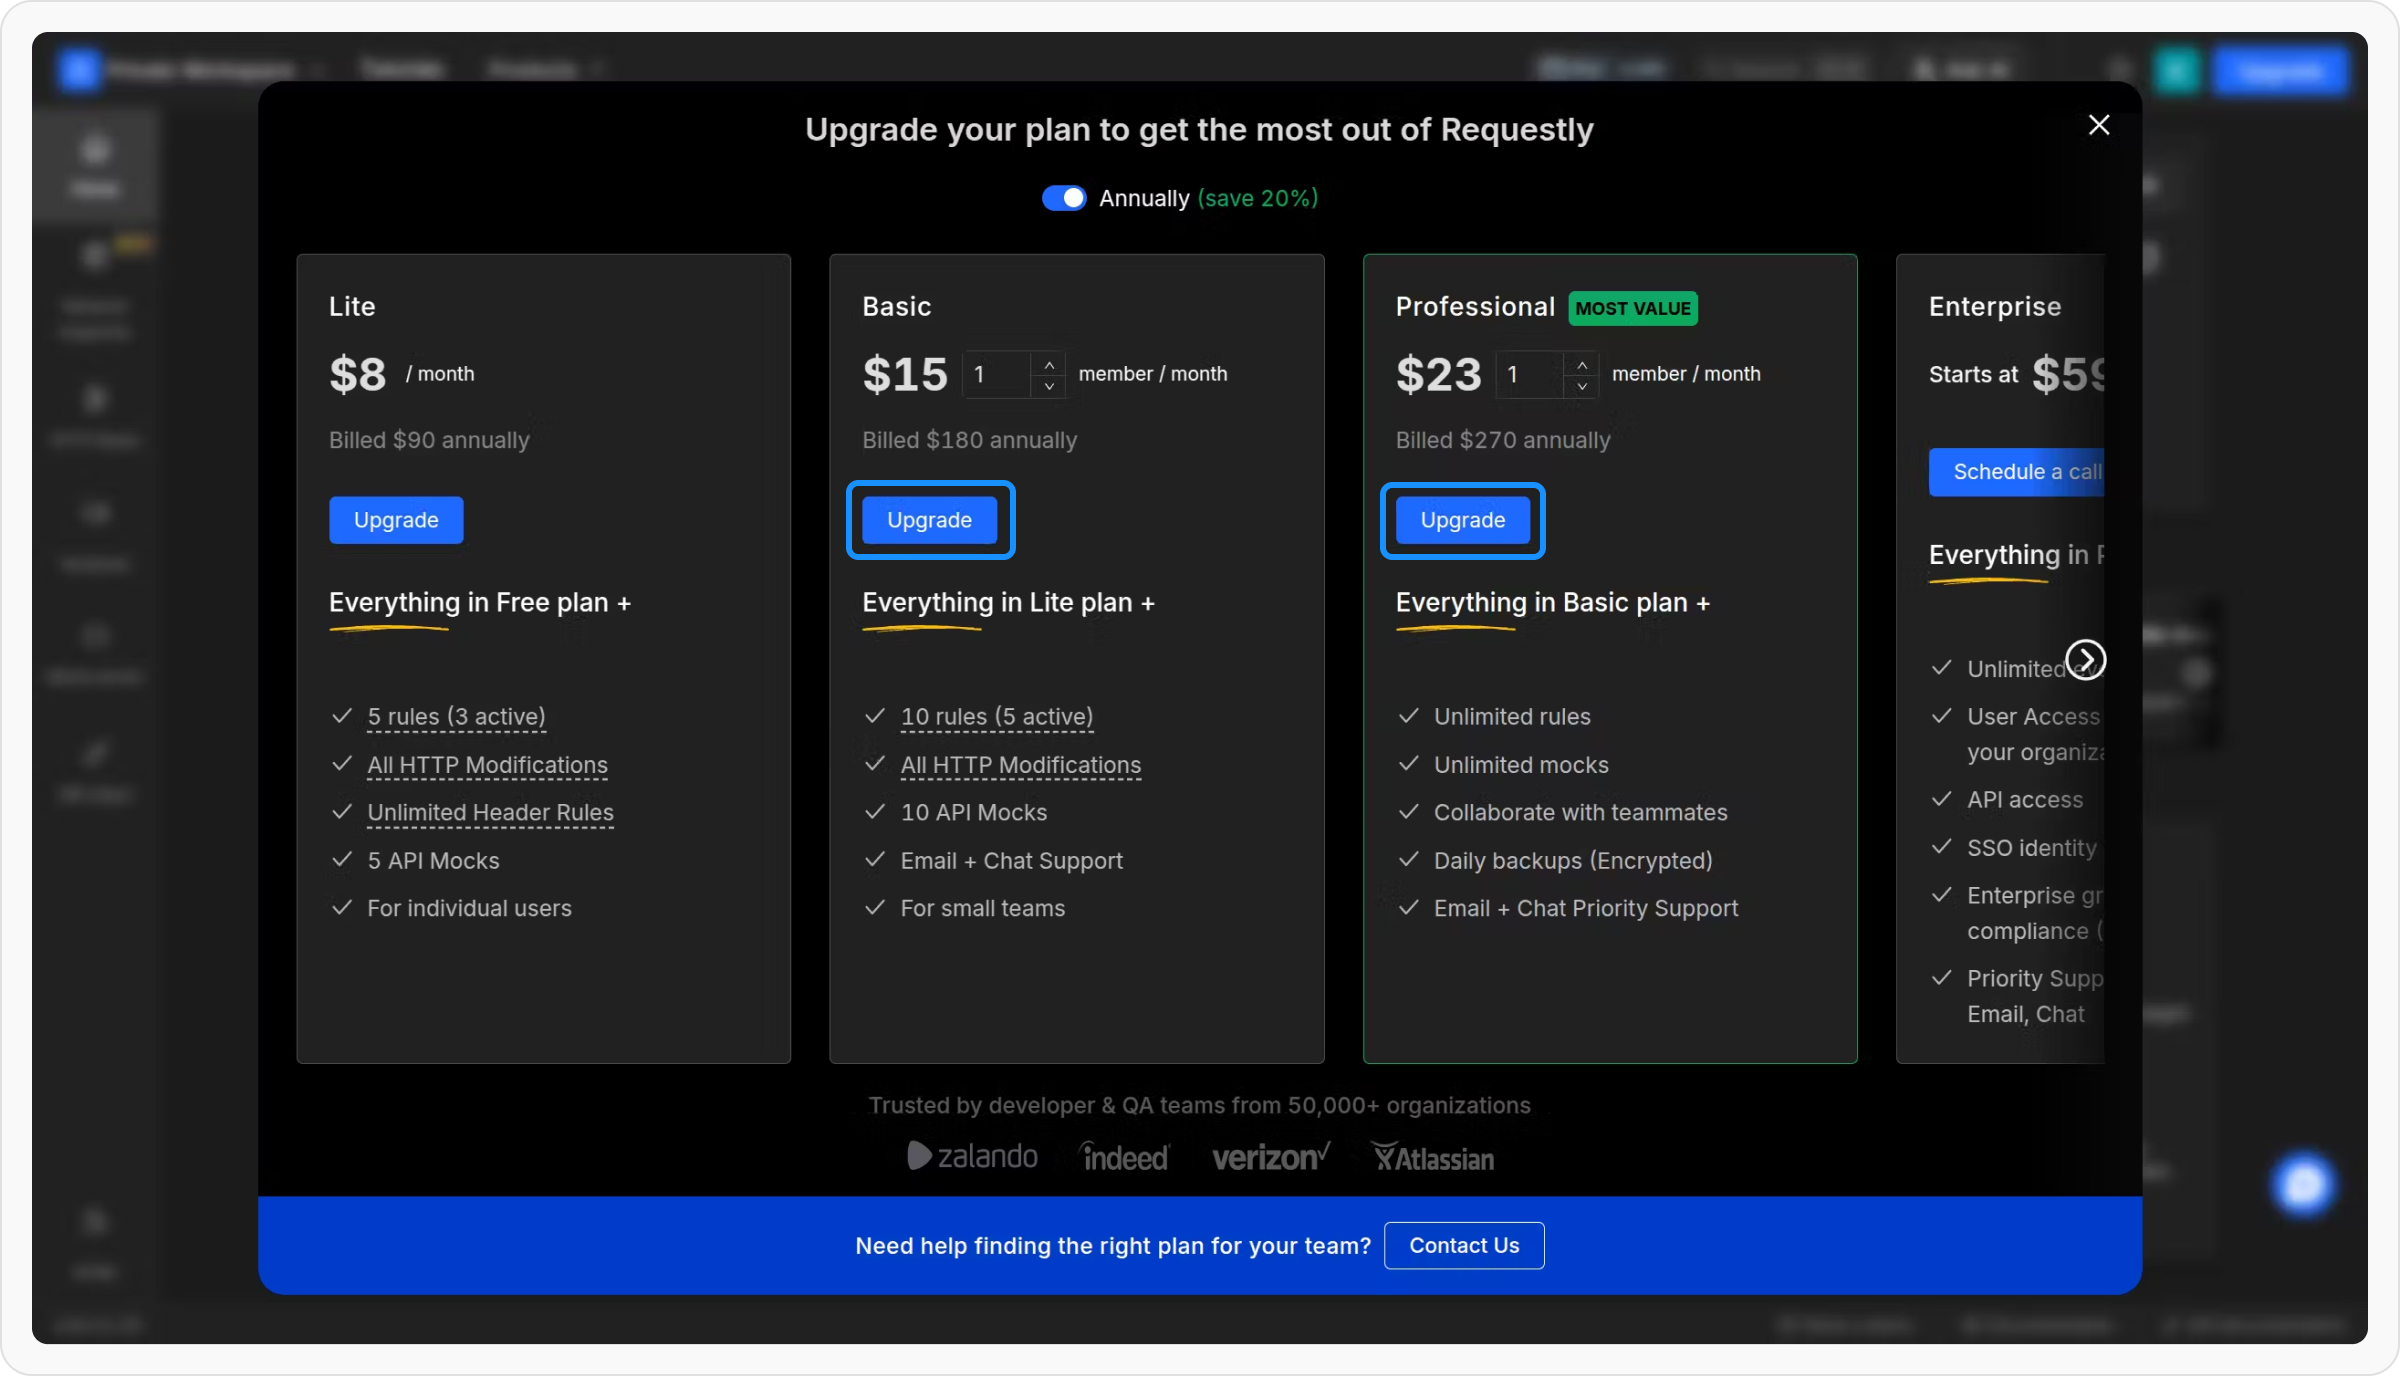
5
Complete Checkout
Review your order summary on the checkout page. Enter the required payment details and complete the purchase.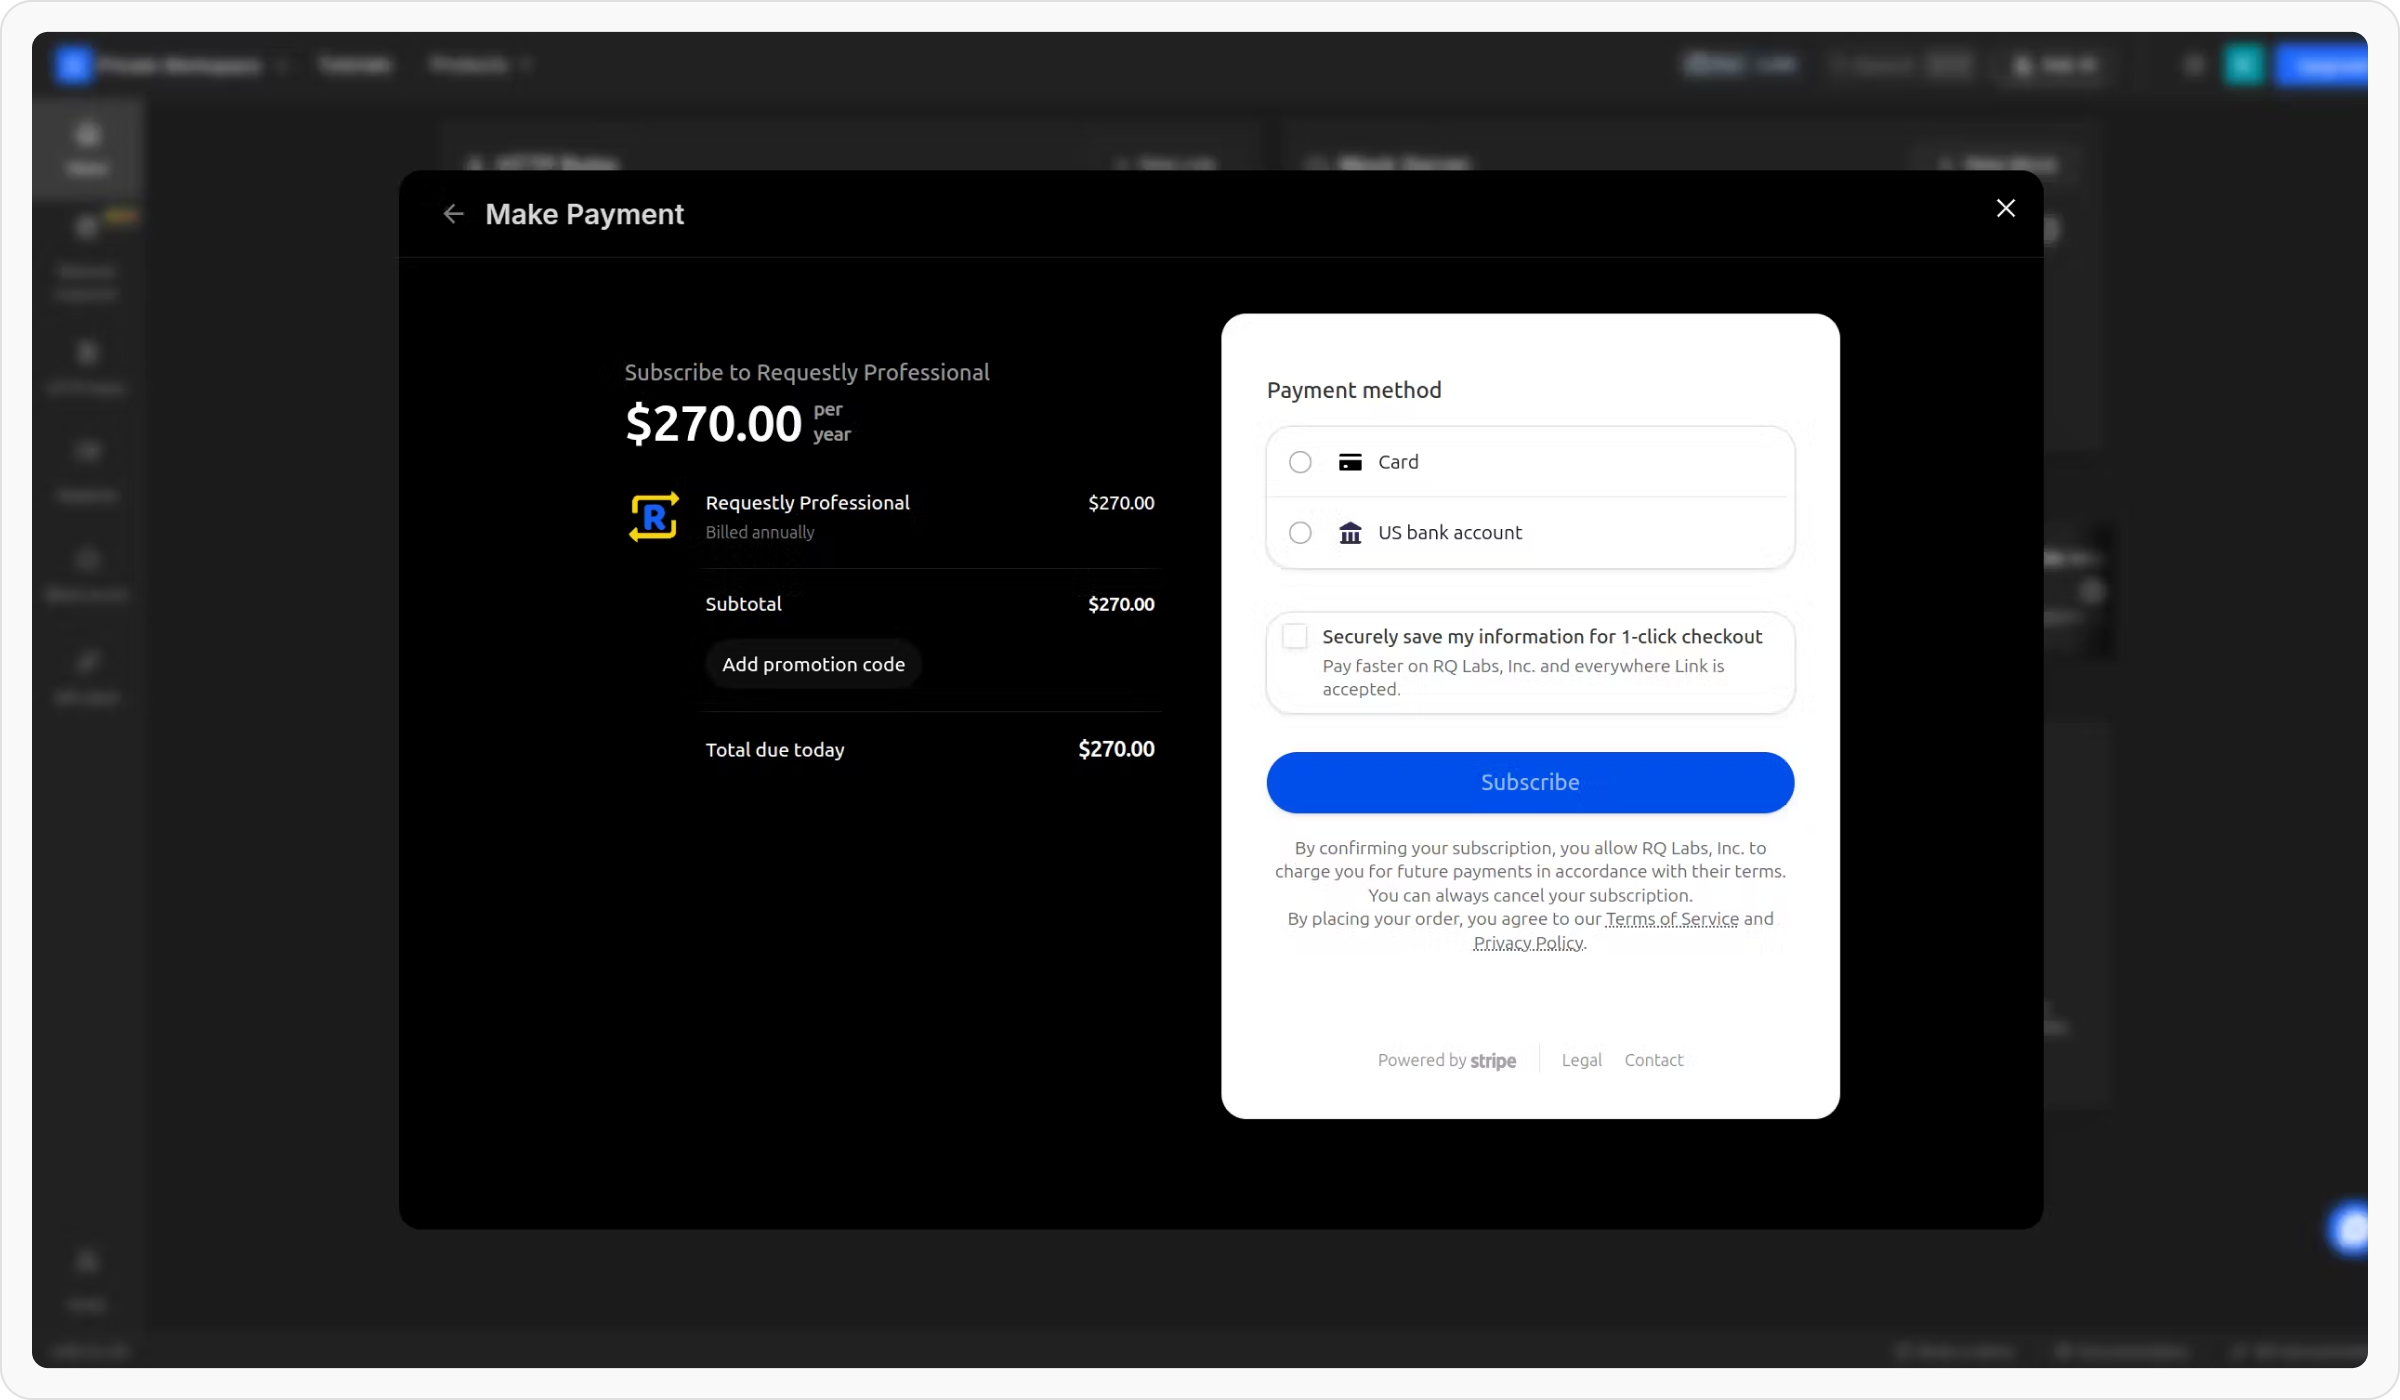
6
Automatic Team Creation
After the checkout is complete, a Billing Team will be created automatically. You’ll be redirected to the Billing Dashboard, where you can manage your plan.
7
Review Plan Details
In the Billing Dashboard, you can view the details of your current plan, including the number of licenses purchased and their status.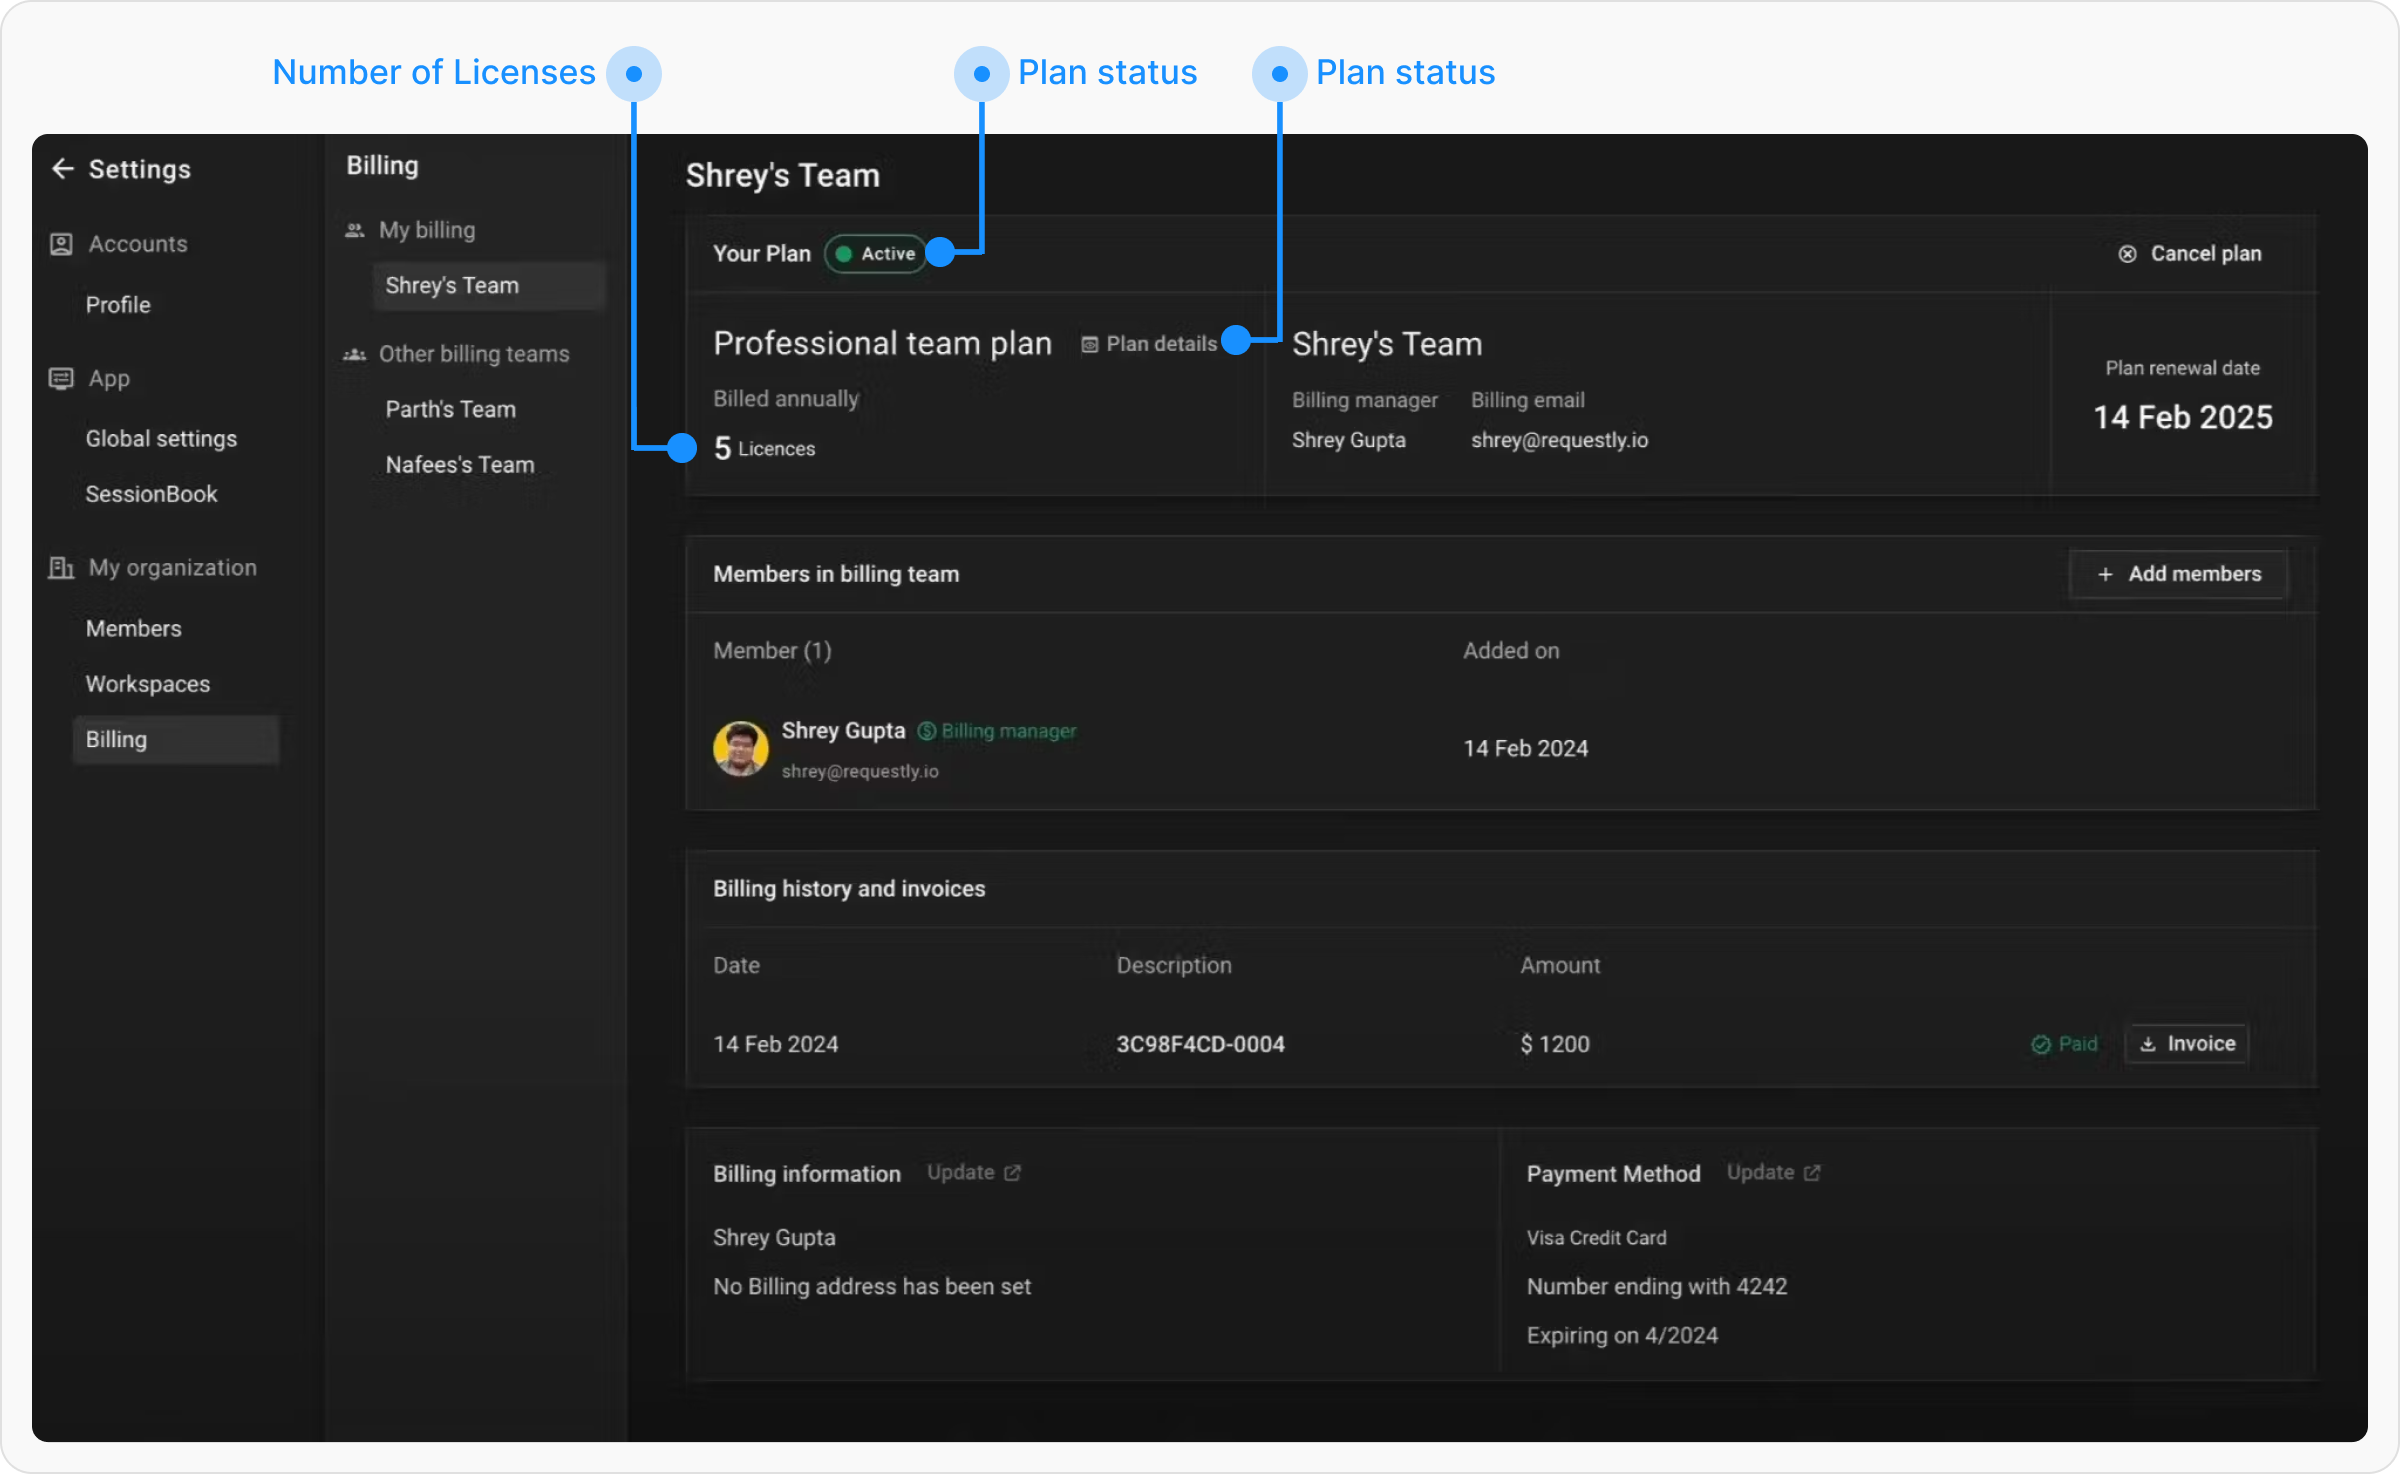
Managing Licenses
The Billing Dashboard provides a simple way to manage license holders, ensuring your team has seamless access to premium features.Assigning a License
Easily allocate licenses to team members who need premium access to tools and features.1
Open Billing Dashboard
Open the Billing dashboard in your BrowserStack account.
2
Click Assign License
Click the Assign License button to begin the allocation process.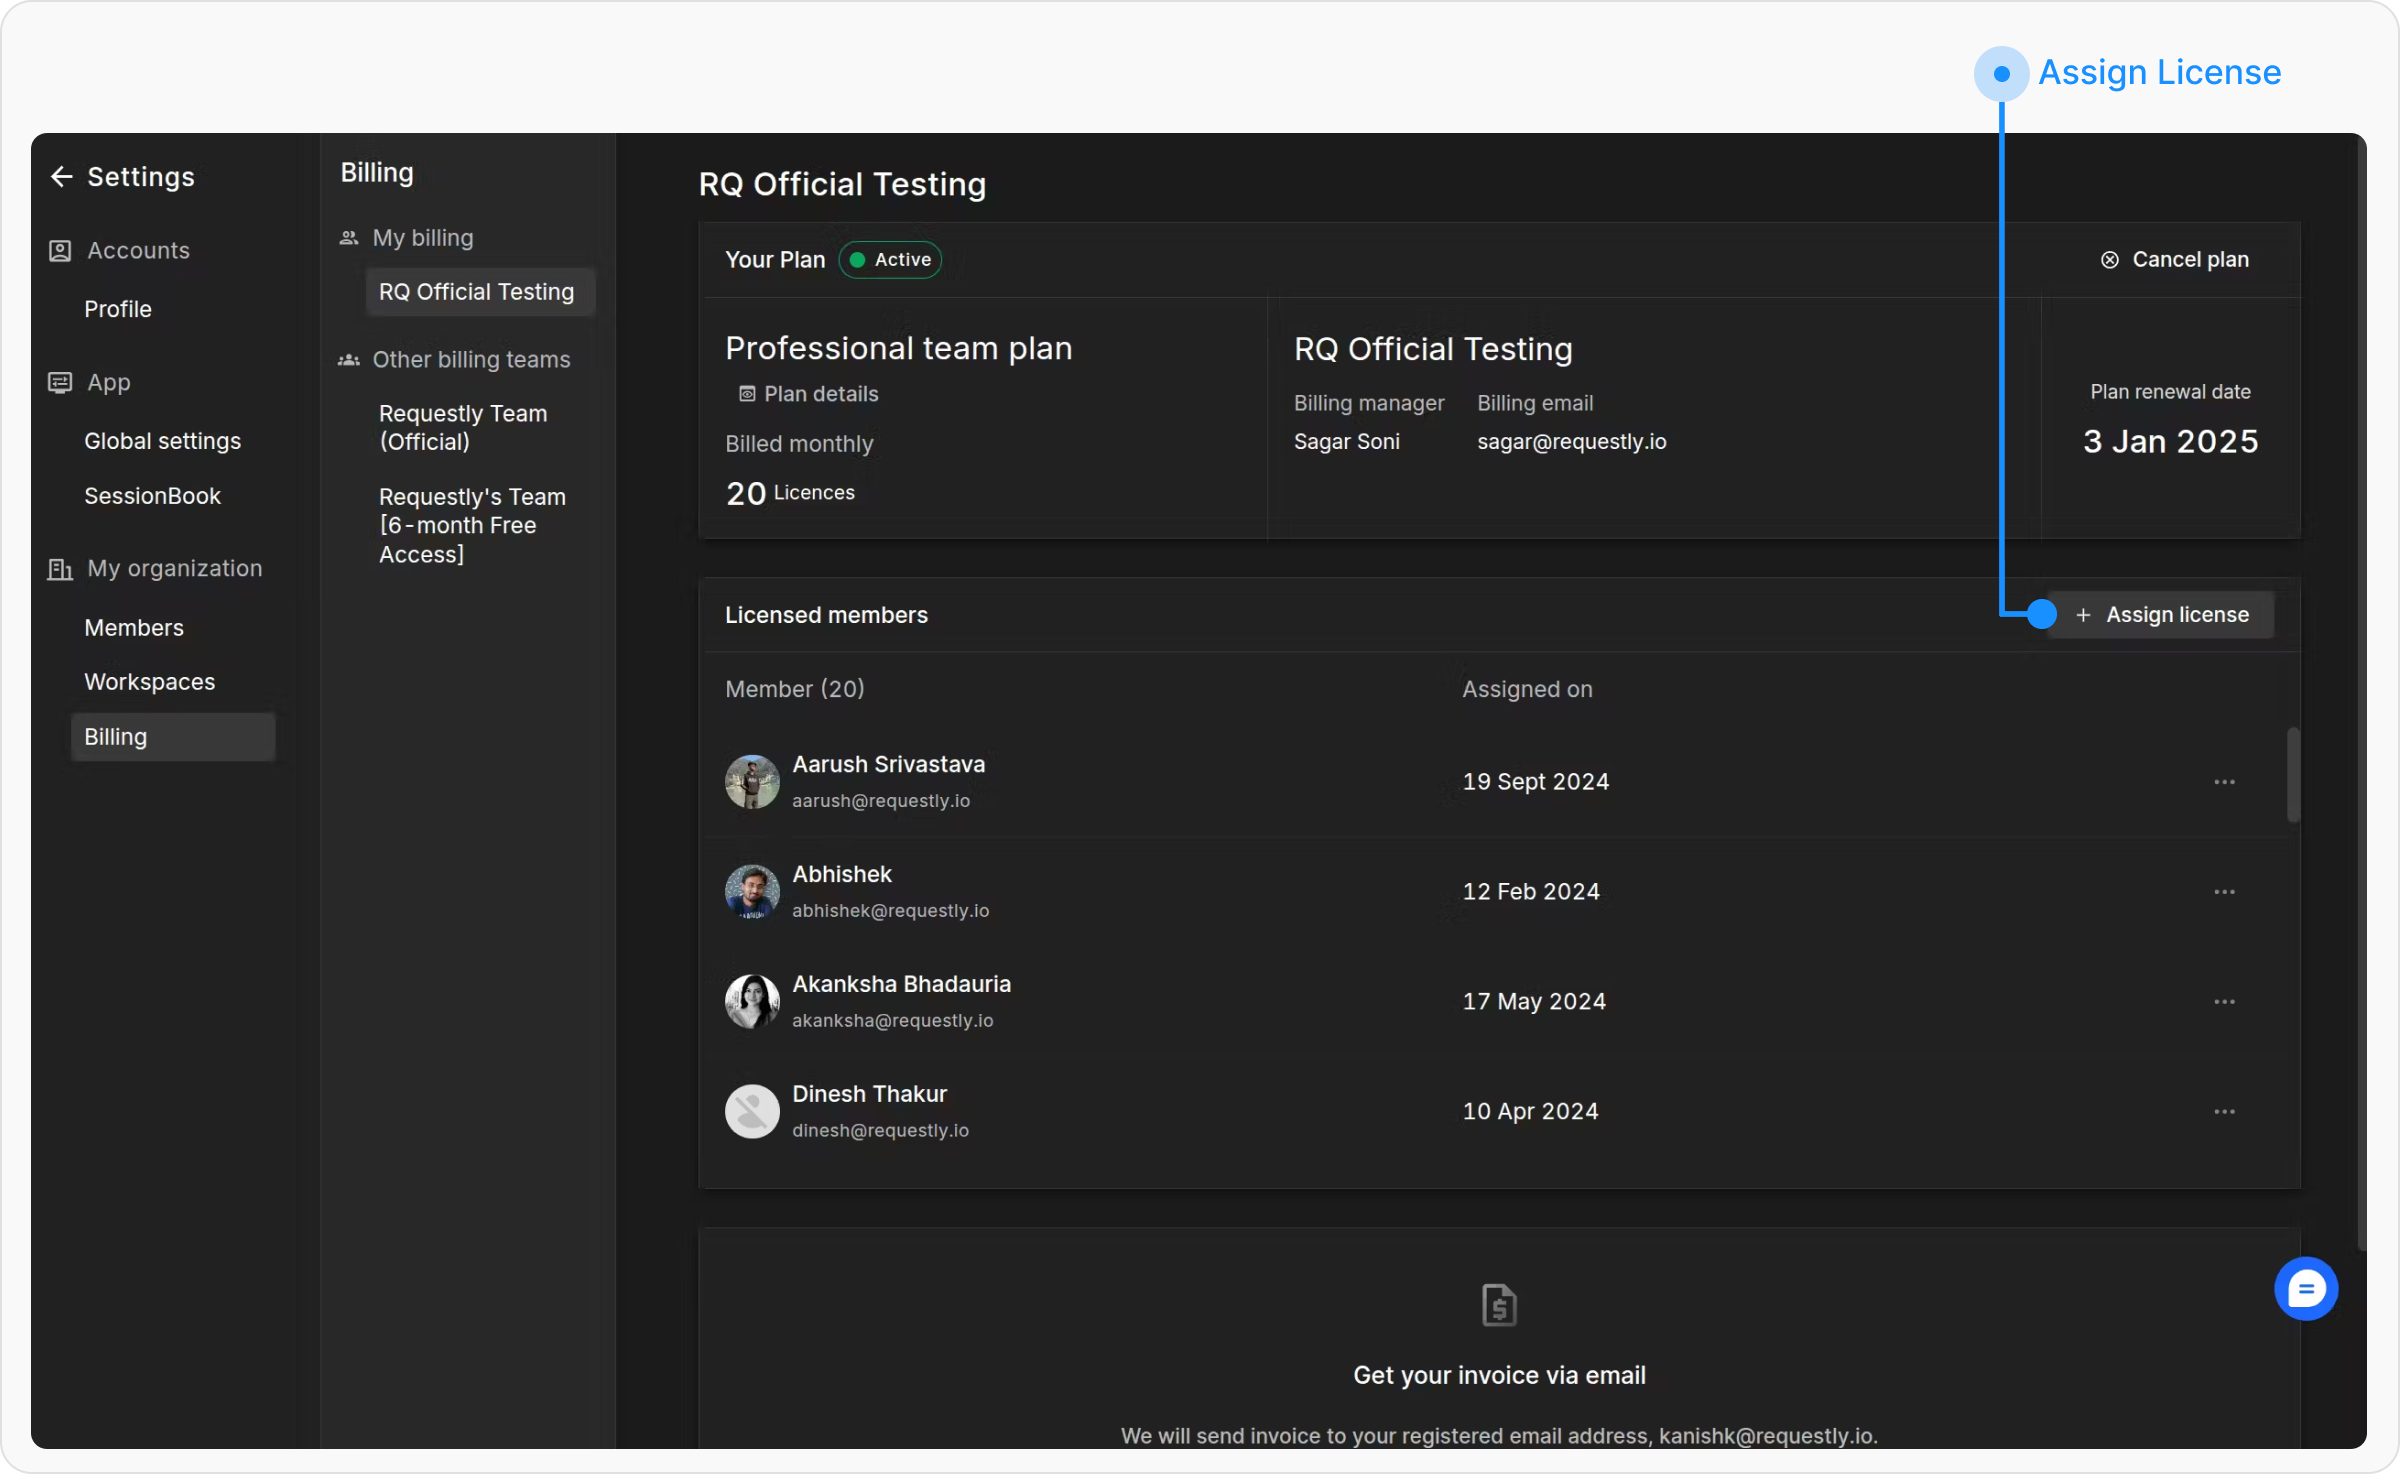
3
Select User and Assign
Select a user from the list of available members and click Assign.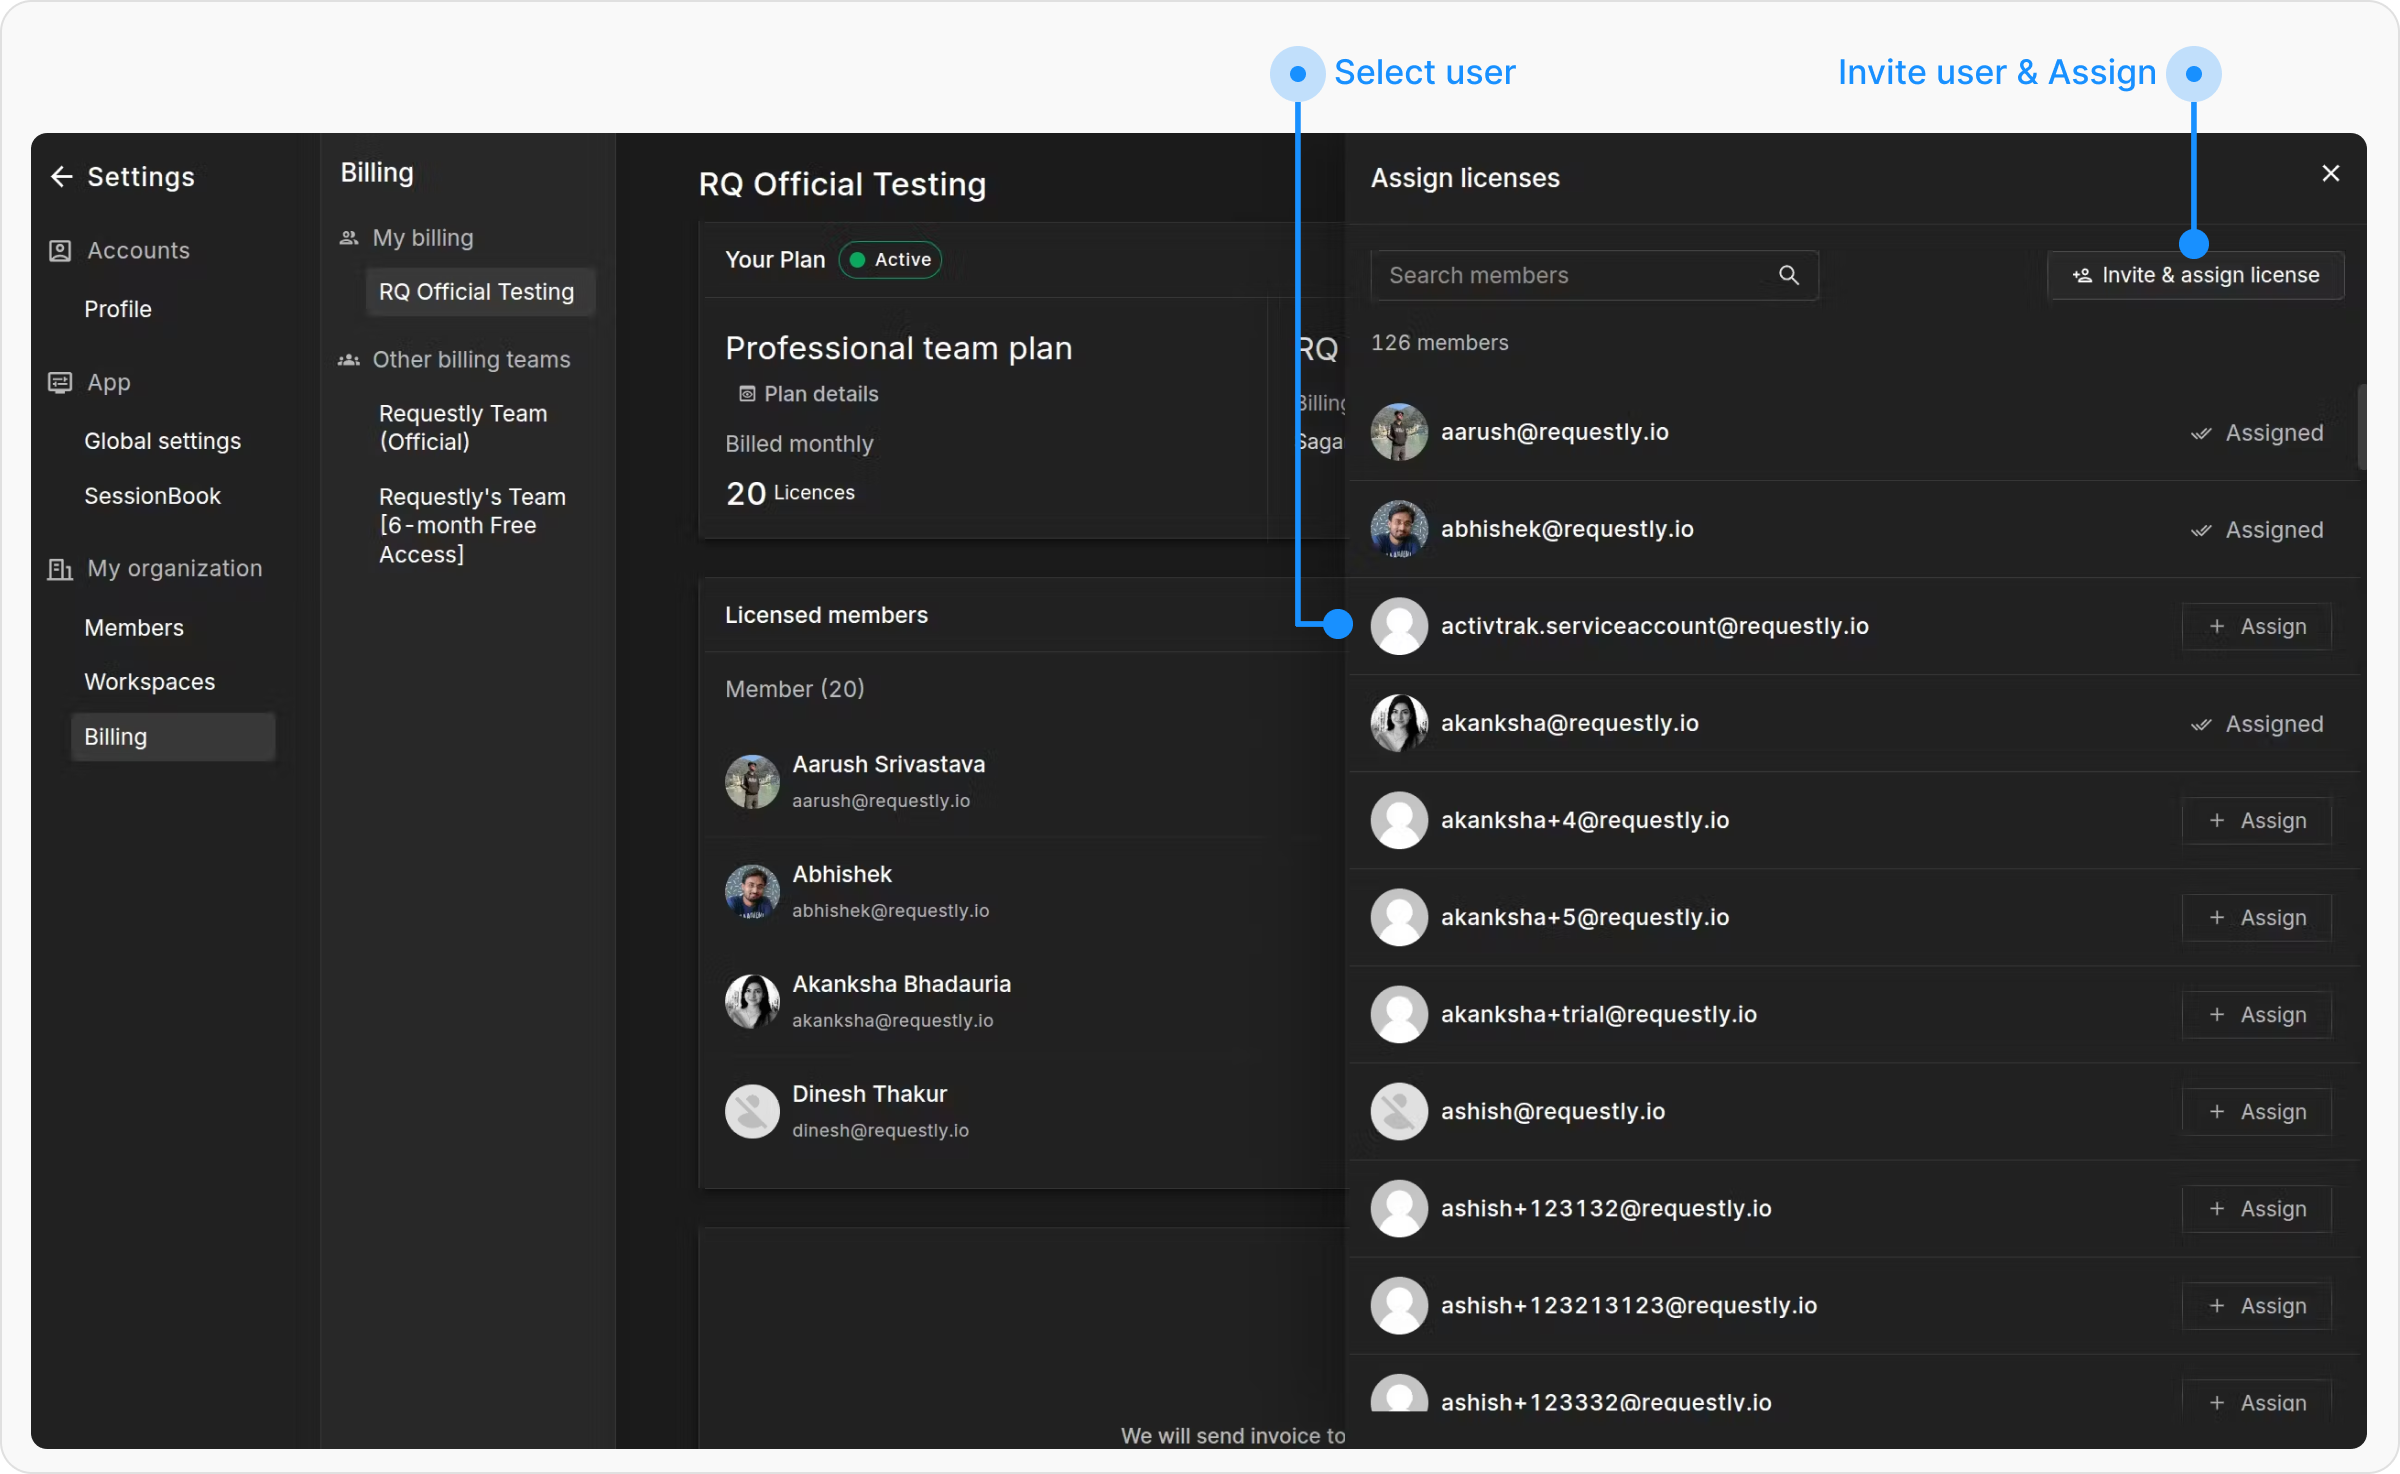
Revoking a License
Revoking a license ensures that premium access is no longer available to users who no longer need it, helping maintain efficient license usage.1
Go to Billing Dashboard
Open the Billing dashboard in your BrowserStack account.
2
Locate User
Find the user whose license you wish to revoke.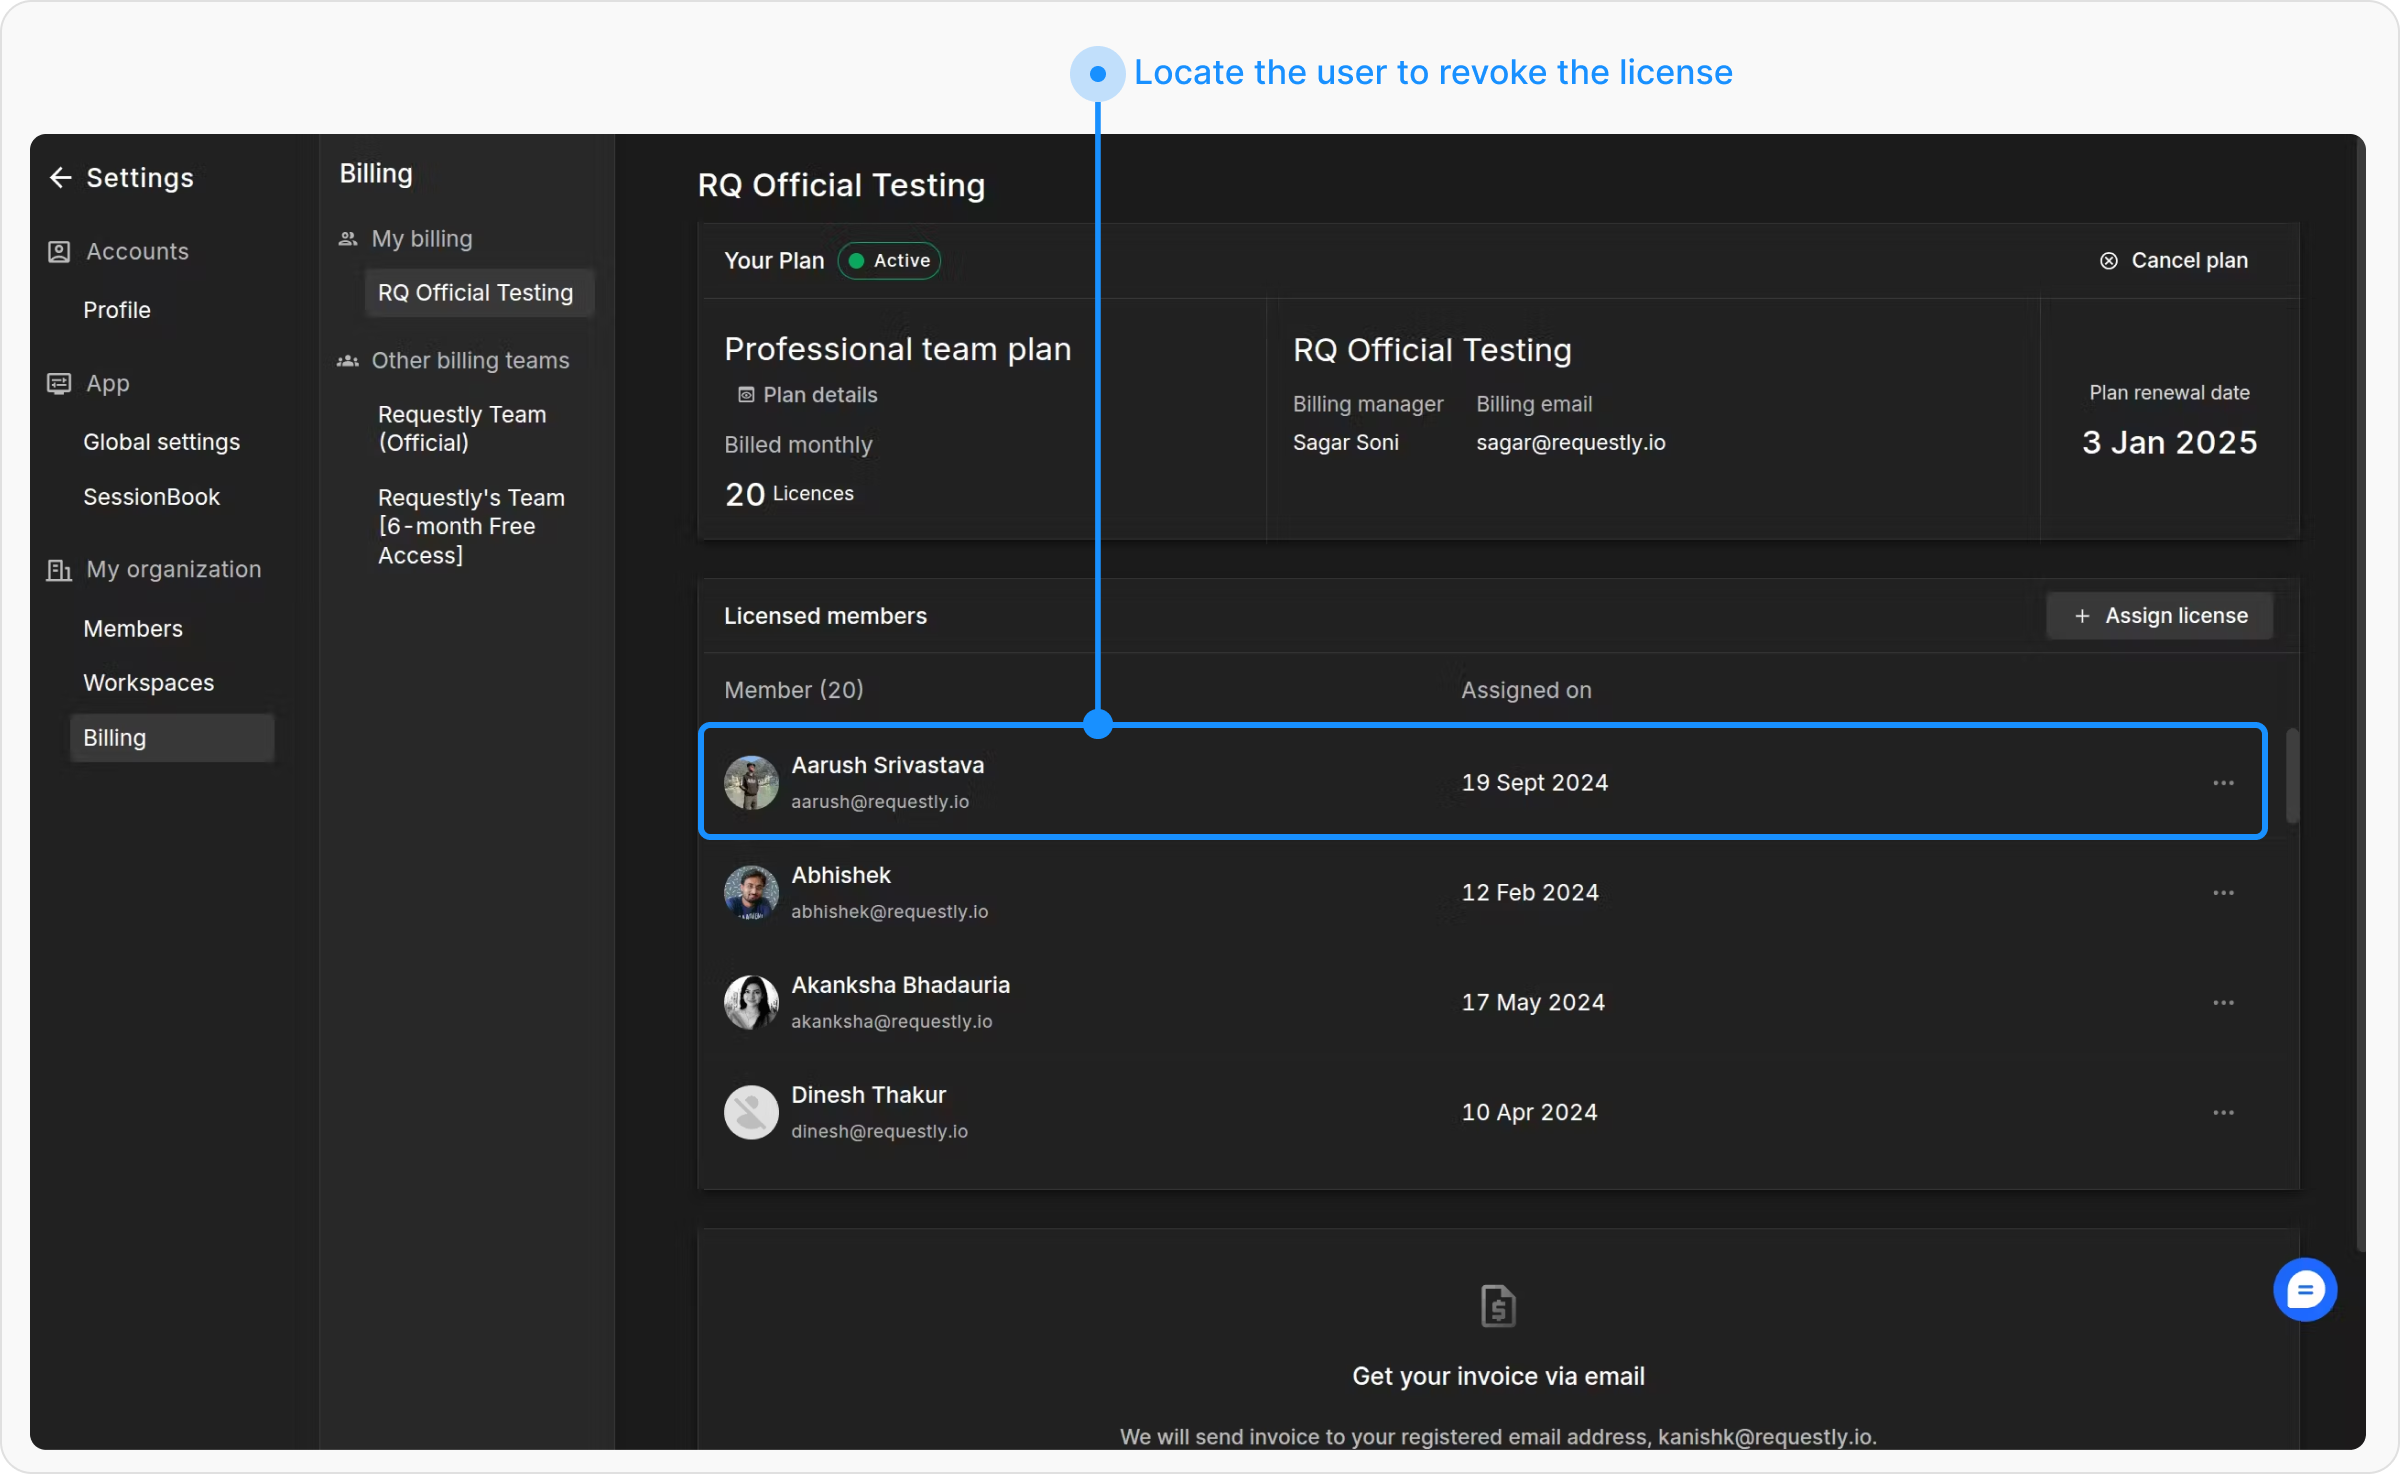
3
Revoke License
Click the ellipsis(three-dot) menu next to their name and select Revoke License.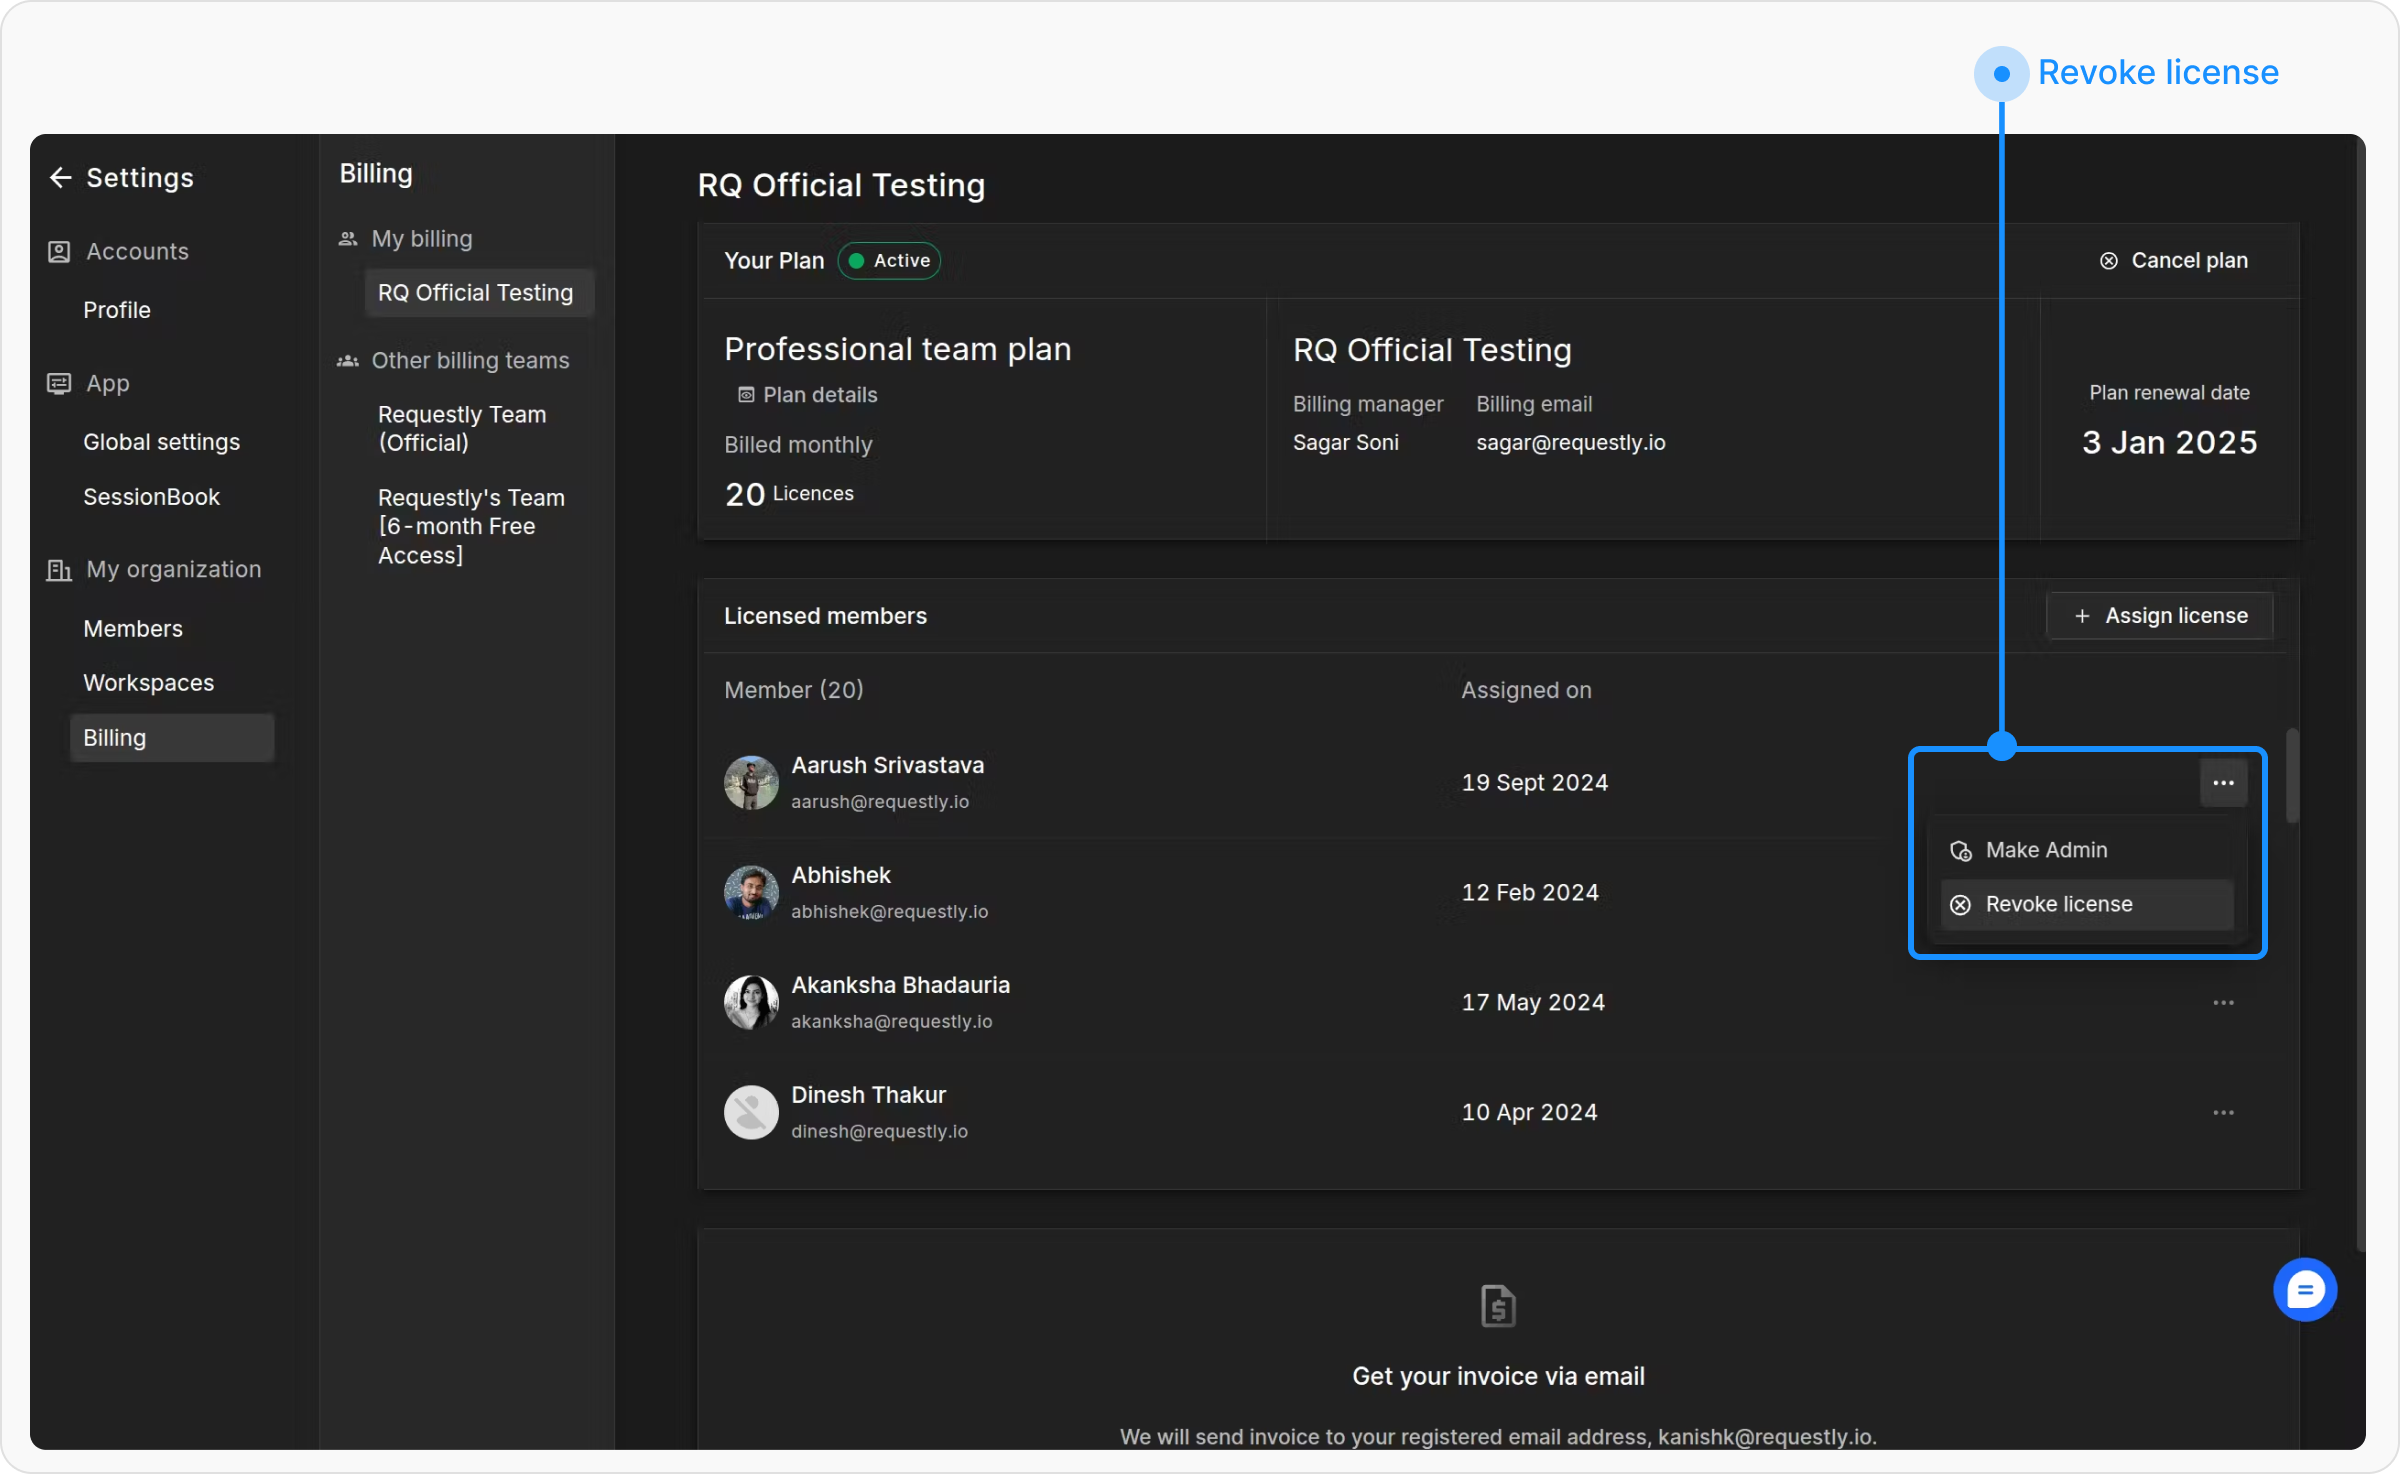
Updating Billing Information
Keep your billing details up to date to avoid service disruptions.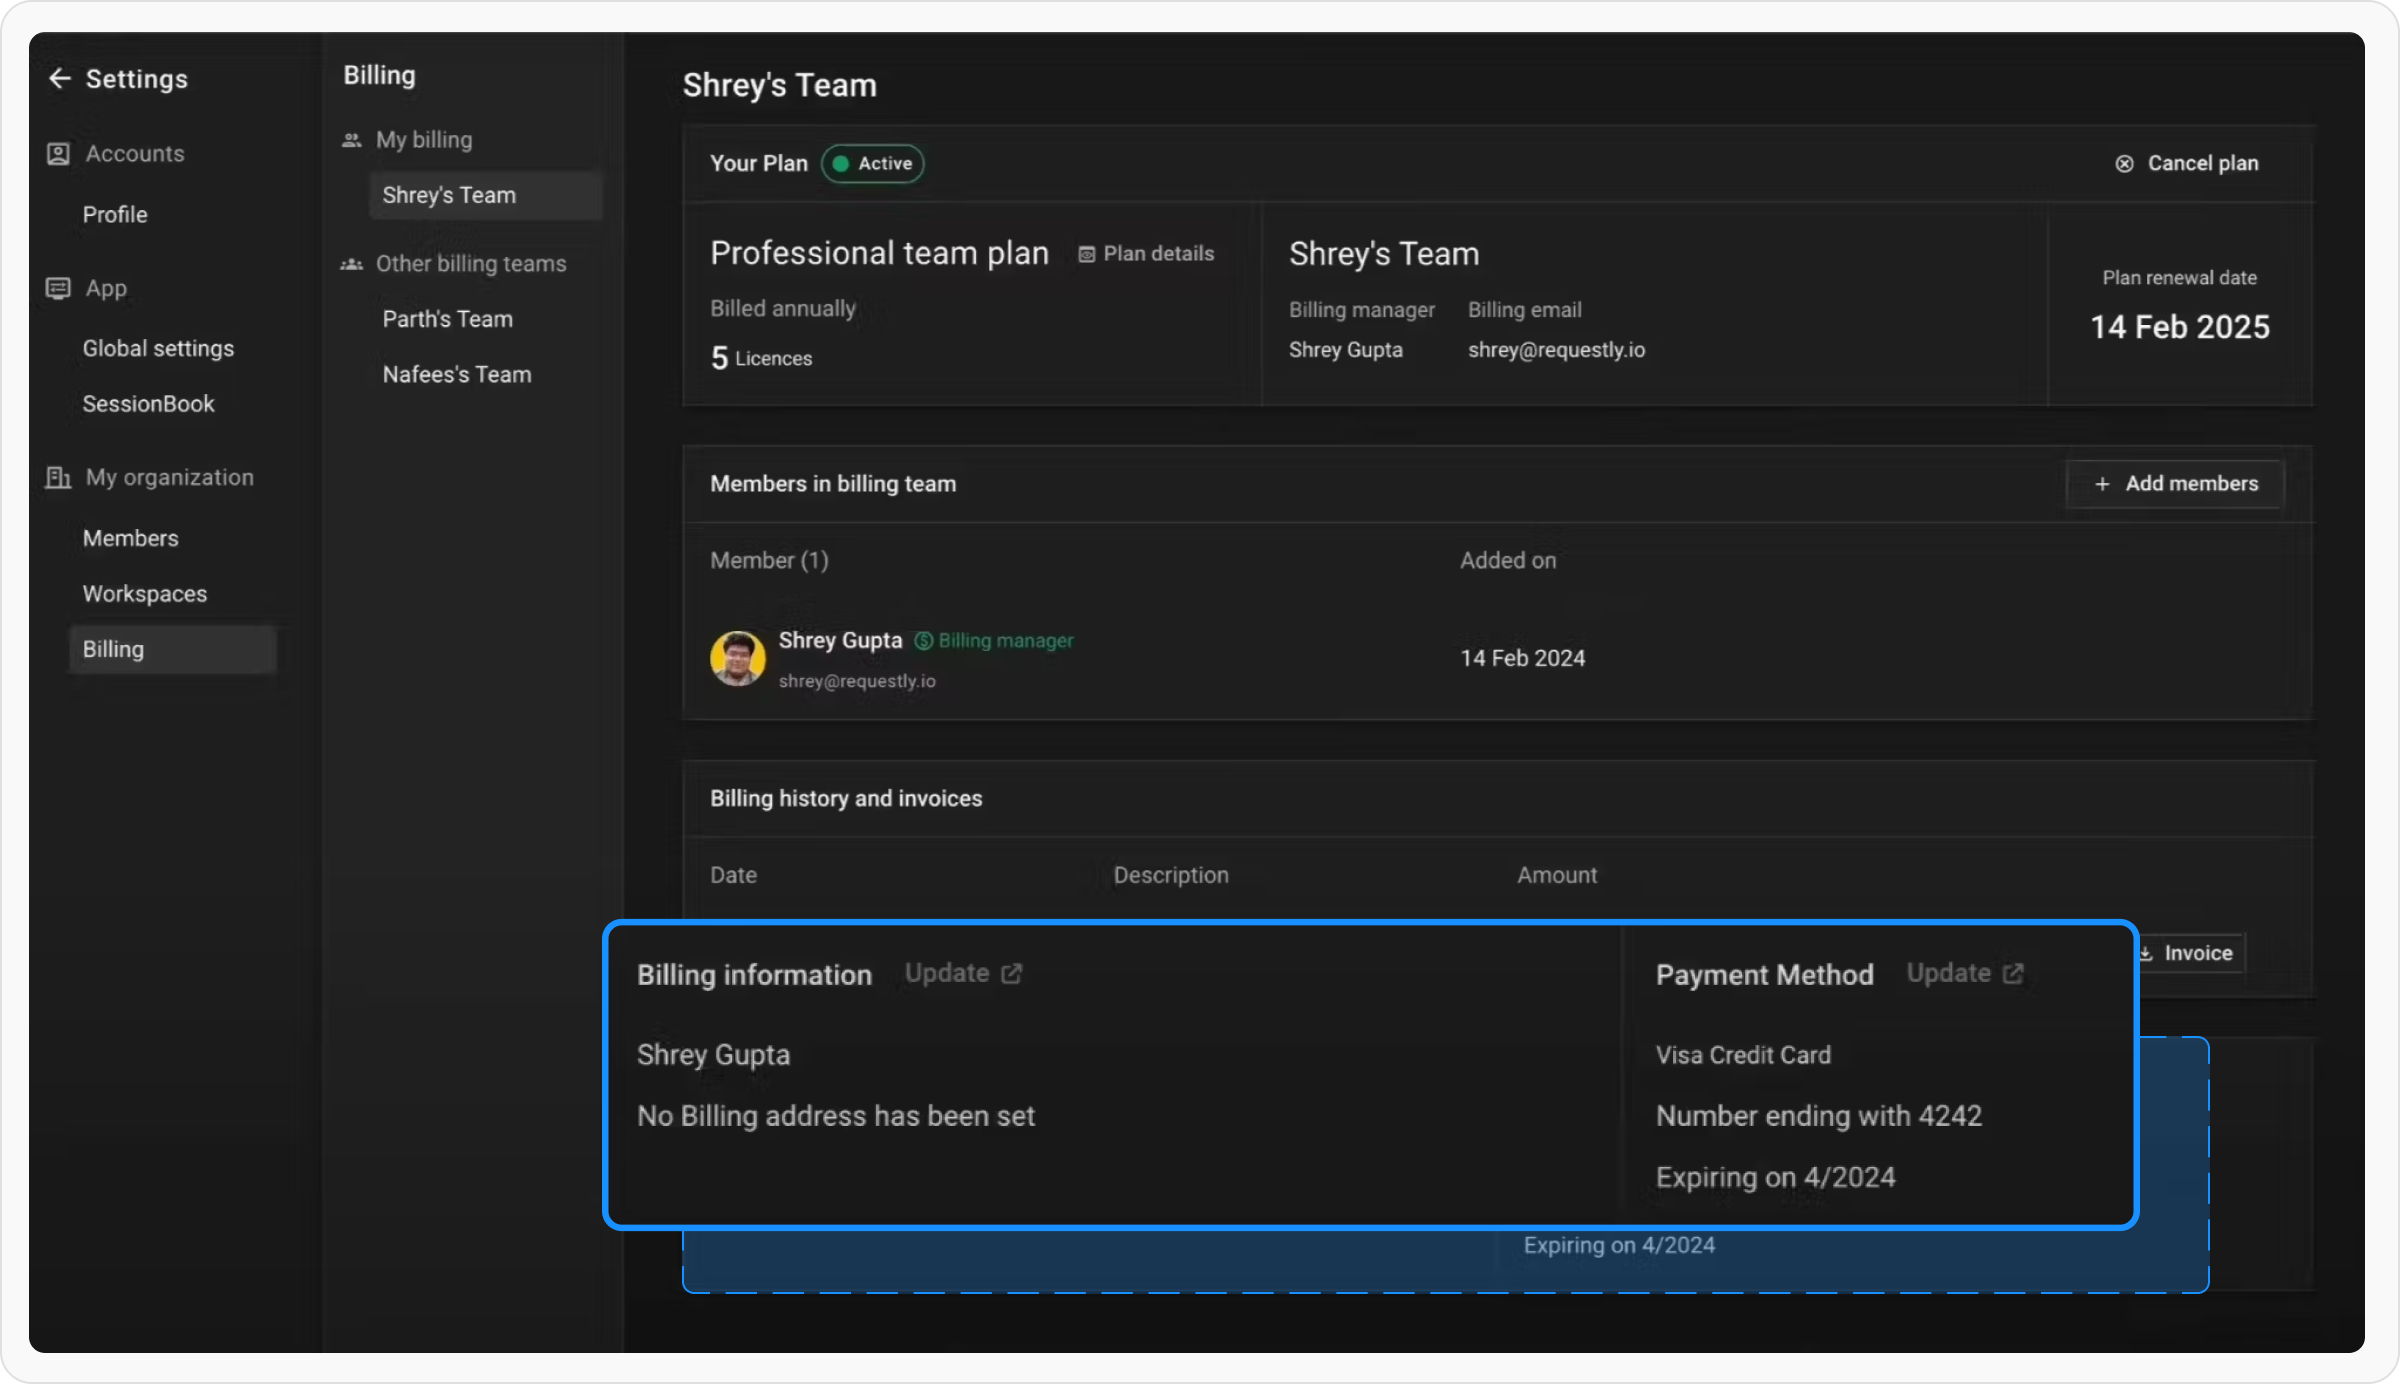
Modify Billing Information
Navigate to the Billing Information section. Update your billing addresses and contact details as needed.Change Payment Method
Go to the Payment Methods section. Add a new payment option or edit existing ones to ensure uninterrupted service.Billing History and Invoices
Stay on top of your financial records with easy access to billing history and invoices.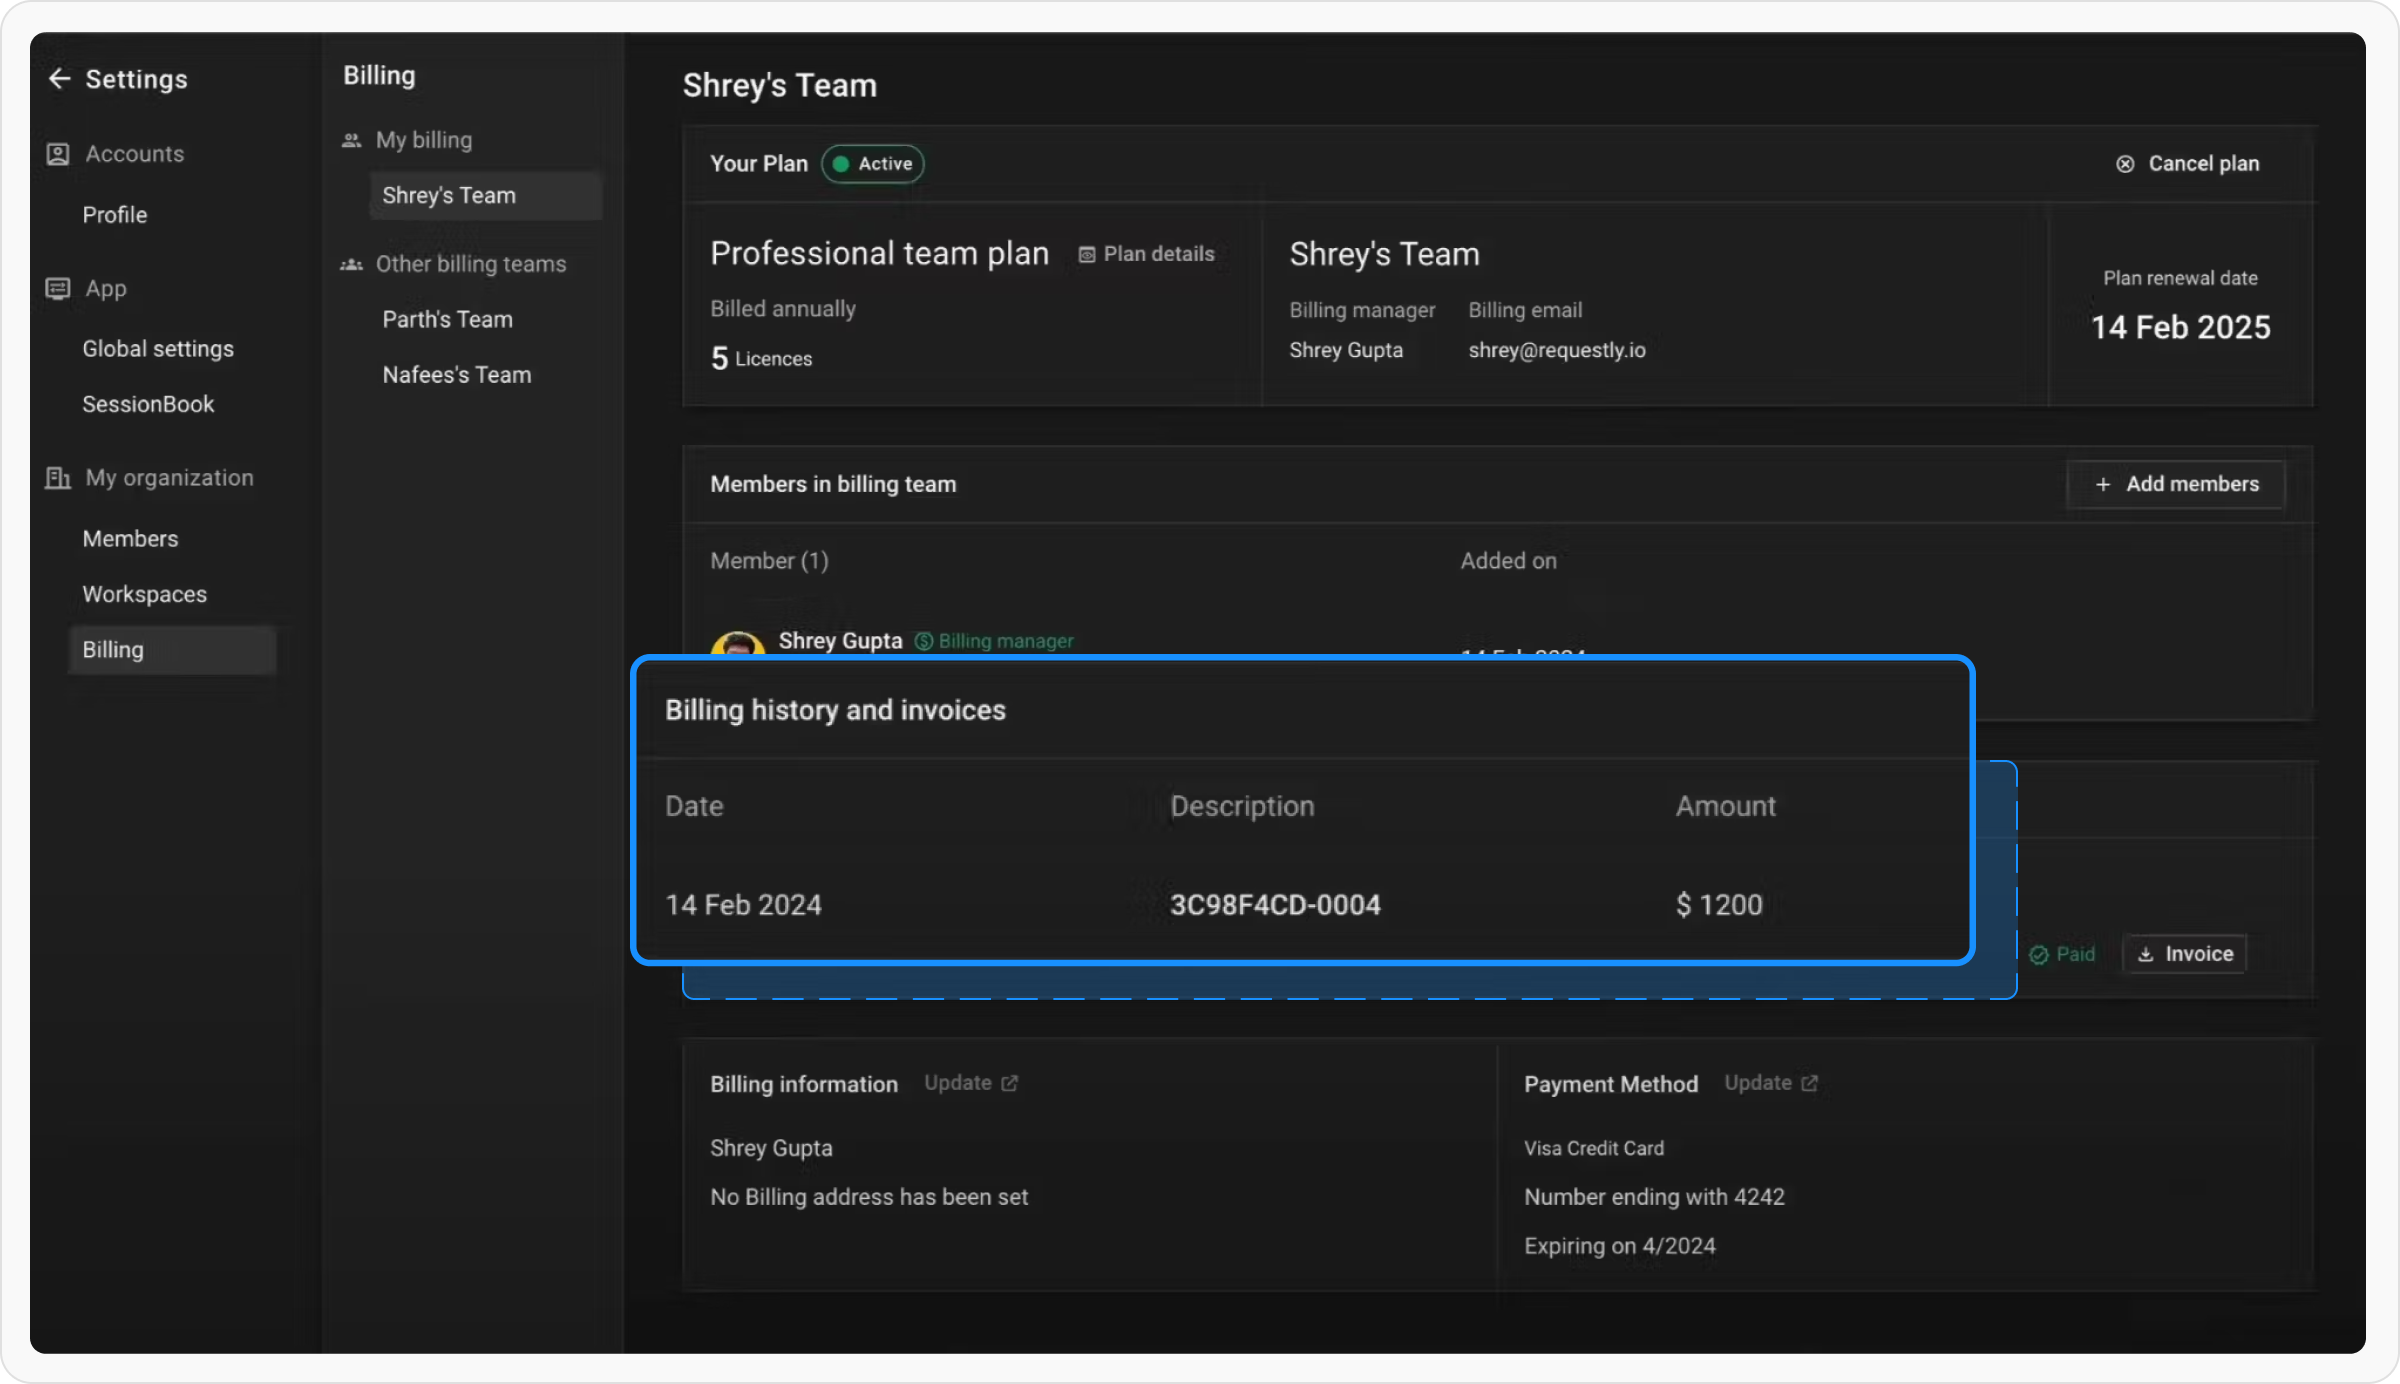
View Billing History
Navigate to the Billing History section to review records of past billing activities.Download Invoices
Go to the Invoices section and click Download next to the invoice you wish to save.Handle Unpaid Invoices
Locate any outstanding payments in the Billing Dashboard and follow the prompts to complete the payment process.Billing Teams vs. Team Projects
- Billing Teams: Responsible for managing licenses and billing processes on the BrowserStack dashboard.
- Team Projects: Enable collaboration by letting teams share and manage API collections, environments, and variables inside the Requestly app.