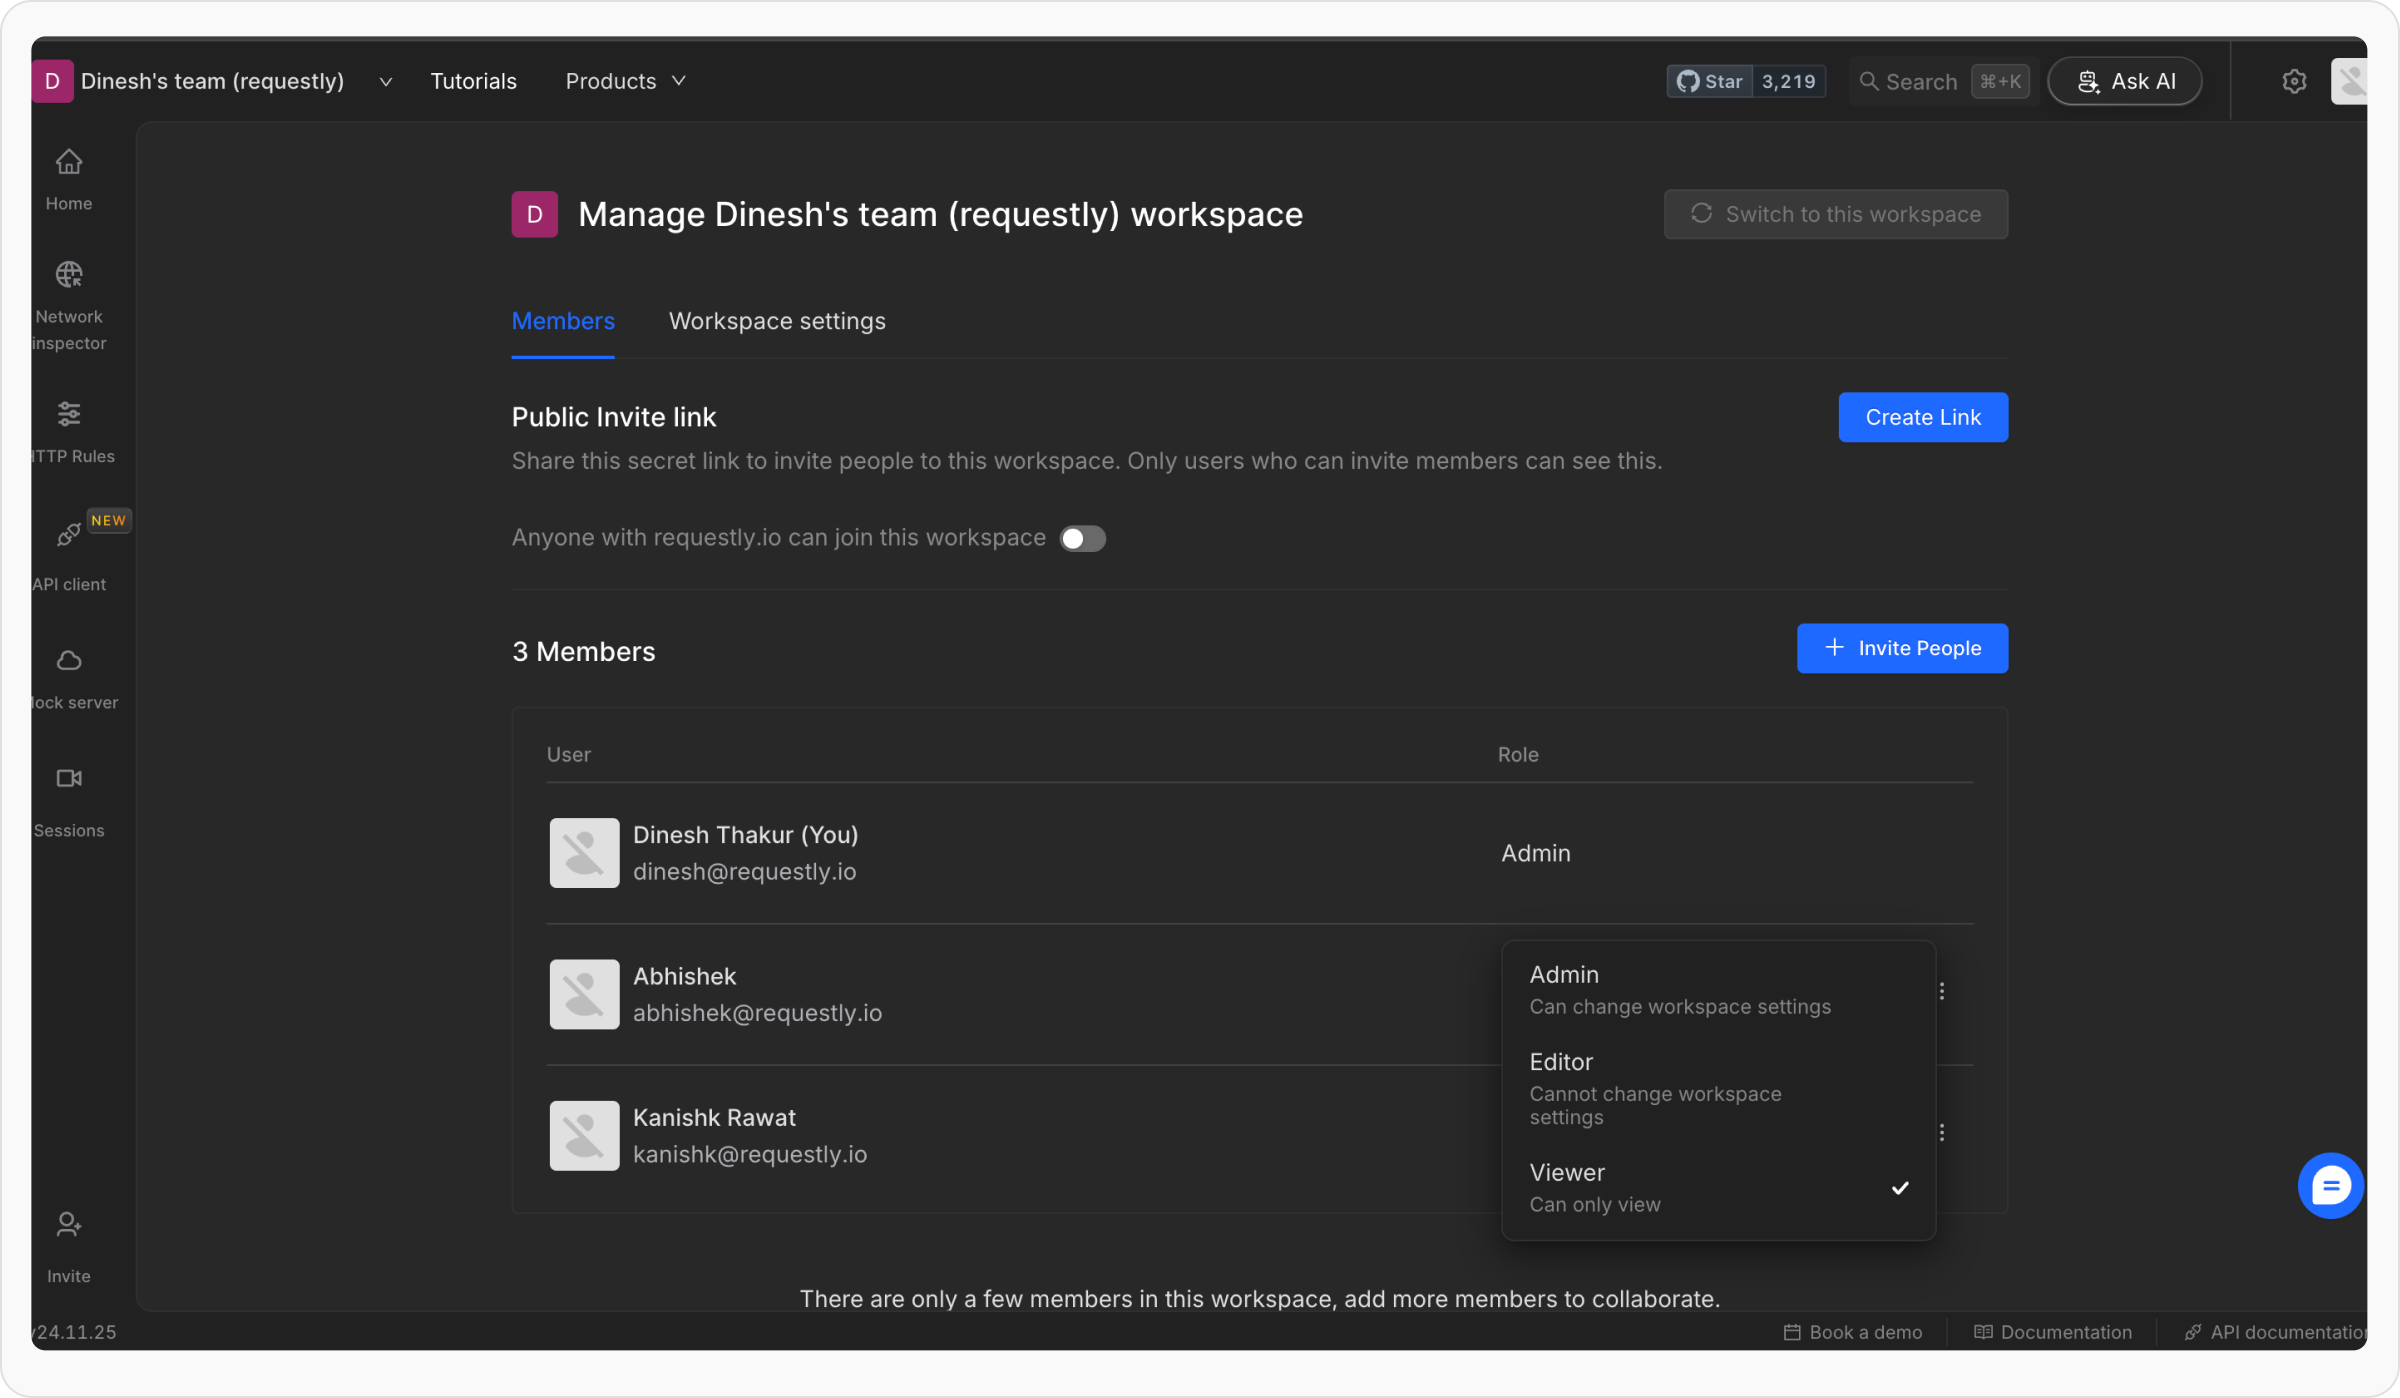

Requestly enhances collaboration and security by allowing project admins to assign specific roles to users. This role-based access control (RBAC) ensures that only authorized members can access sensitive configurations, such as API keys and authentication tokens, and helps prevent unauthorised modifications. In this doc, you’ll learn how Requestly’s RBAC works, the specific roles available, the permissions associated with each role, and how to change user roles within your project
How RBAC Works in Requestly
Requestly uses role-based access control (RBAC) to ensure that every team member only gets access to what they need. It has three roles, Admin, User, and Viewer, each with permissions that protect sensitive data like API keys and tokens and reduce mistakes or unauthorised changes, making teamwork smoother and more efficient.User Roles and Their Permissions
Each project has three roles, each with distinct permissions:Admin
- Full control over project settings, member management, and permissions.
- Can create, edit, delete, and execute API requests, collections, and environments.
User
- Can create, edit, delete, and execute API requests, collections, and environments.
- Cannot manage team settings, members, or project-wide configurations.
Viewer
- Read-only access.
- Can view and execute API requests, collections, and environments but cannot make any changes or access sensitive project settings.
Permissions Table
Below is a table that outlines key permissions for each role:- Project
- API Client
Changing Roles
At times, you may need to update a team member’s role. Follow these steps to change roles within your project:1
Switch to the project
Navigate to the Requestly dashboard and switch to the project where you want to add members.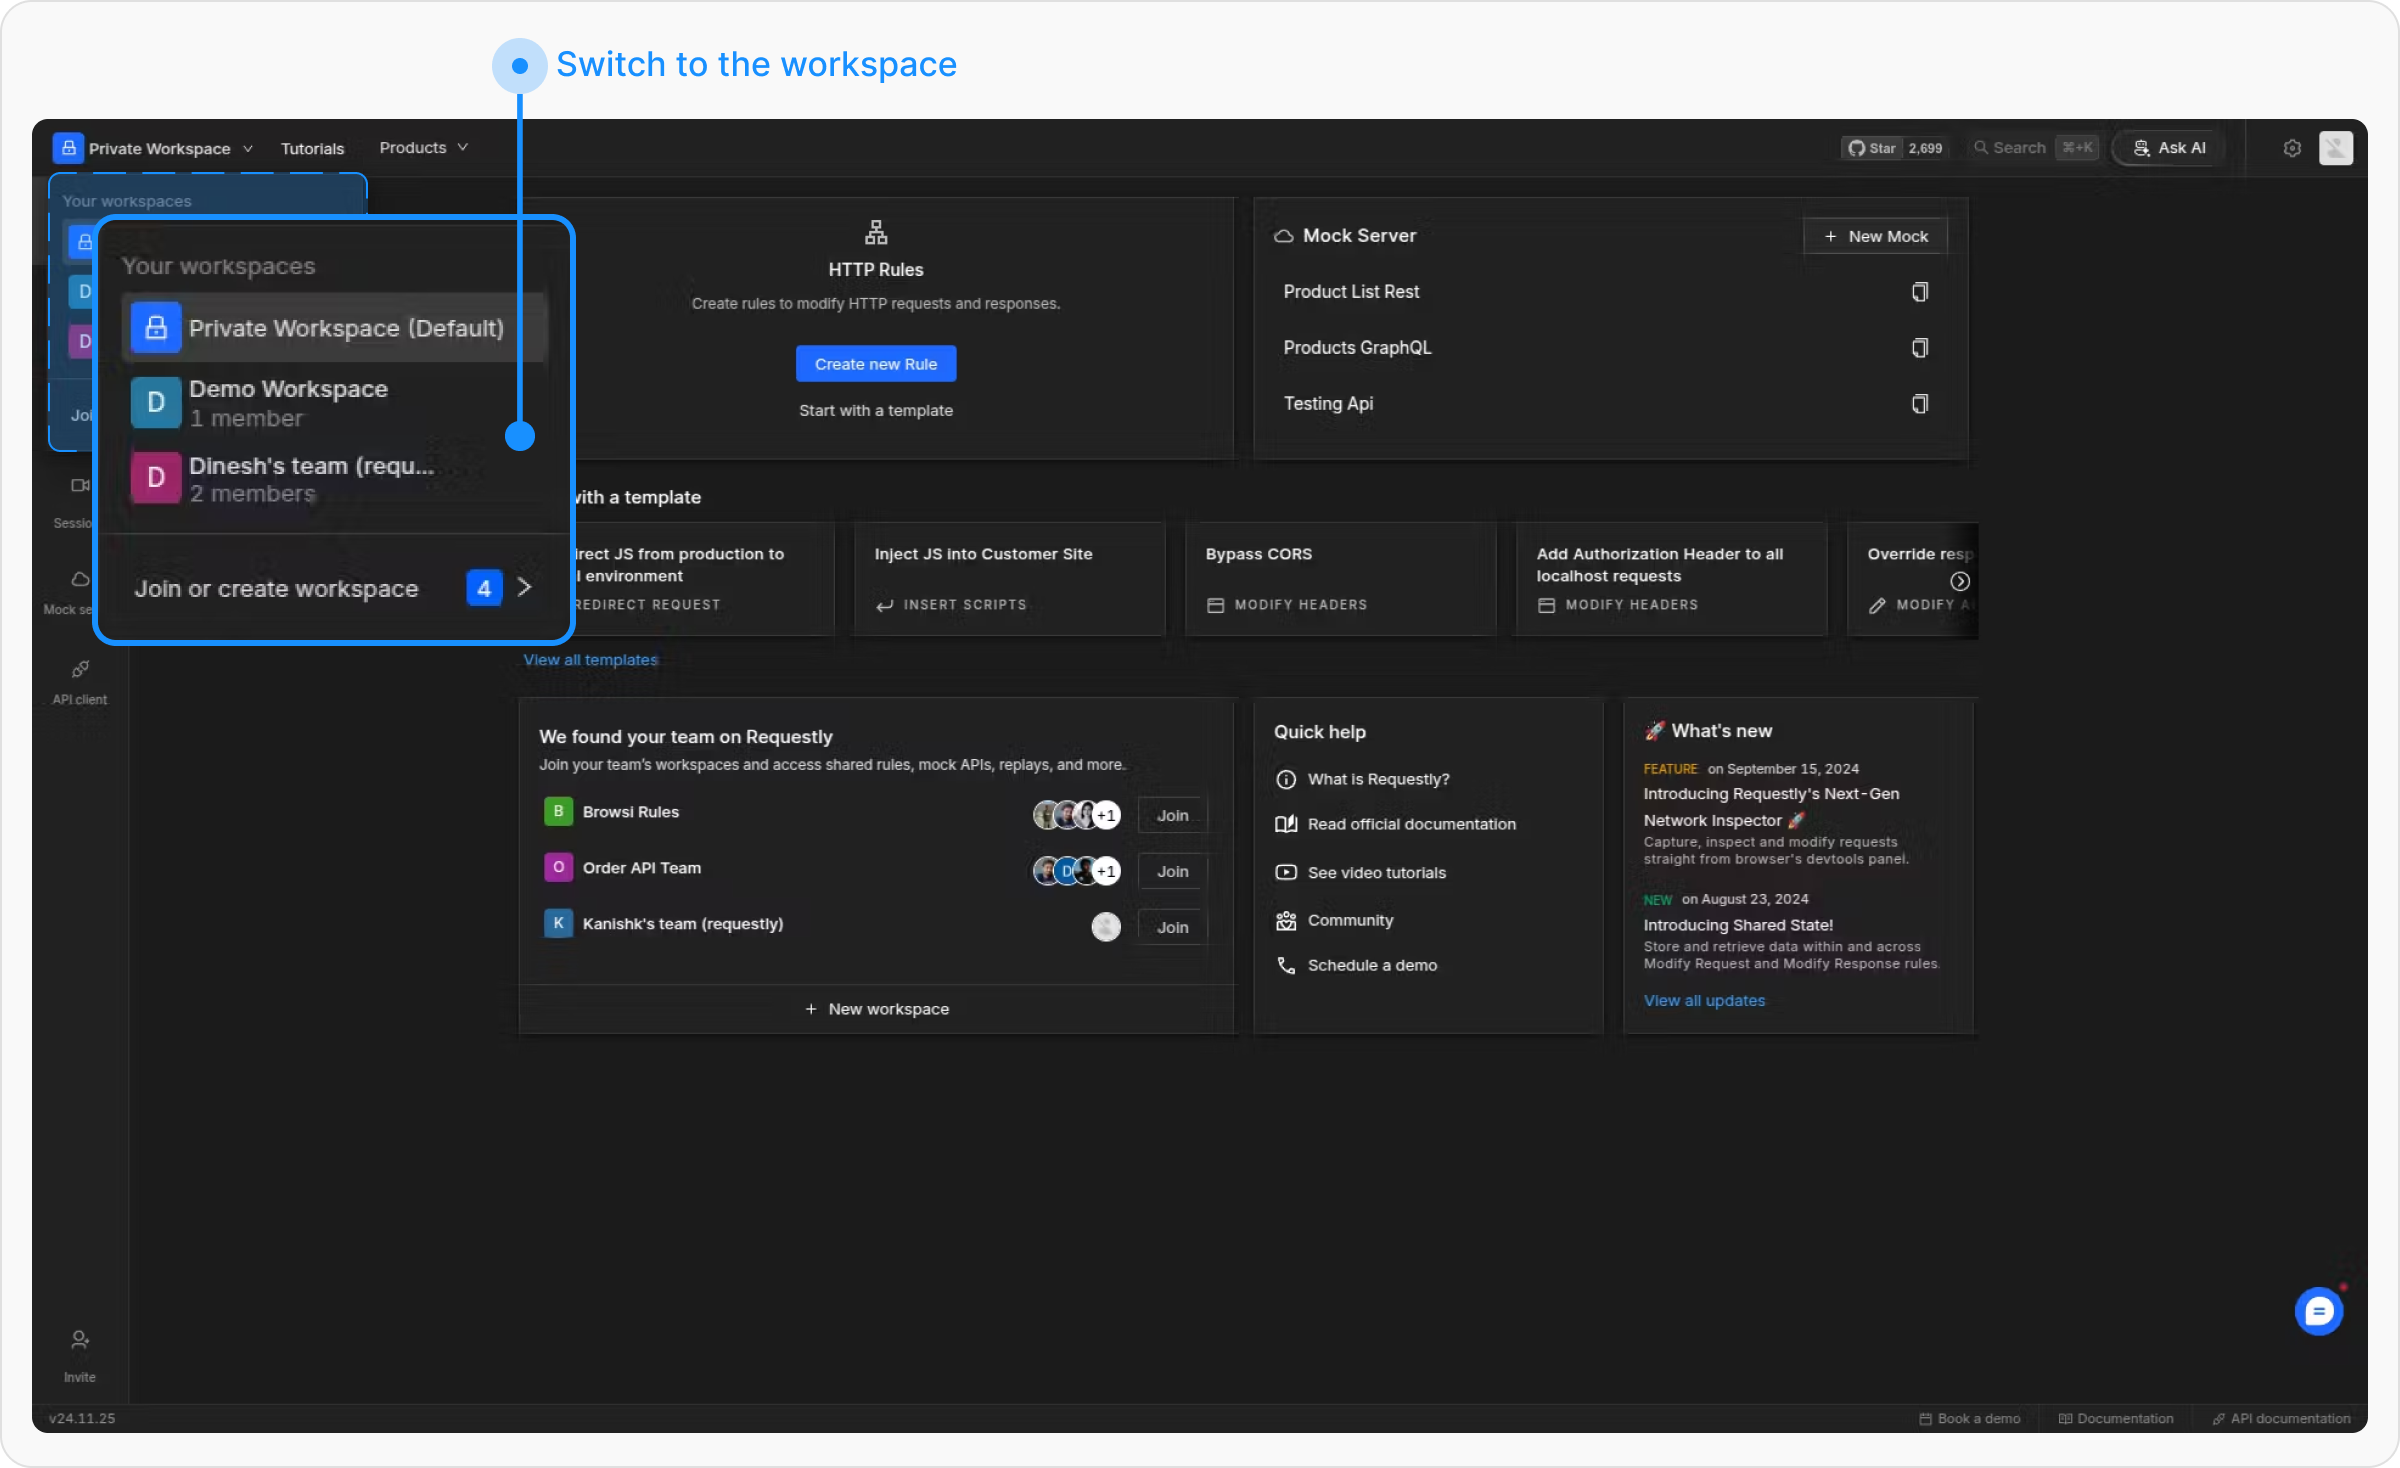
2
Open project settings
In the project switcher, hover the project row and click the Project settings gear.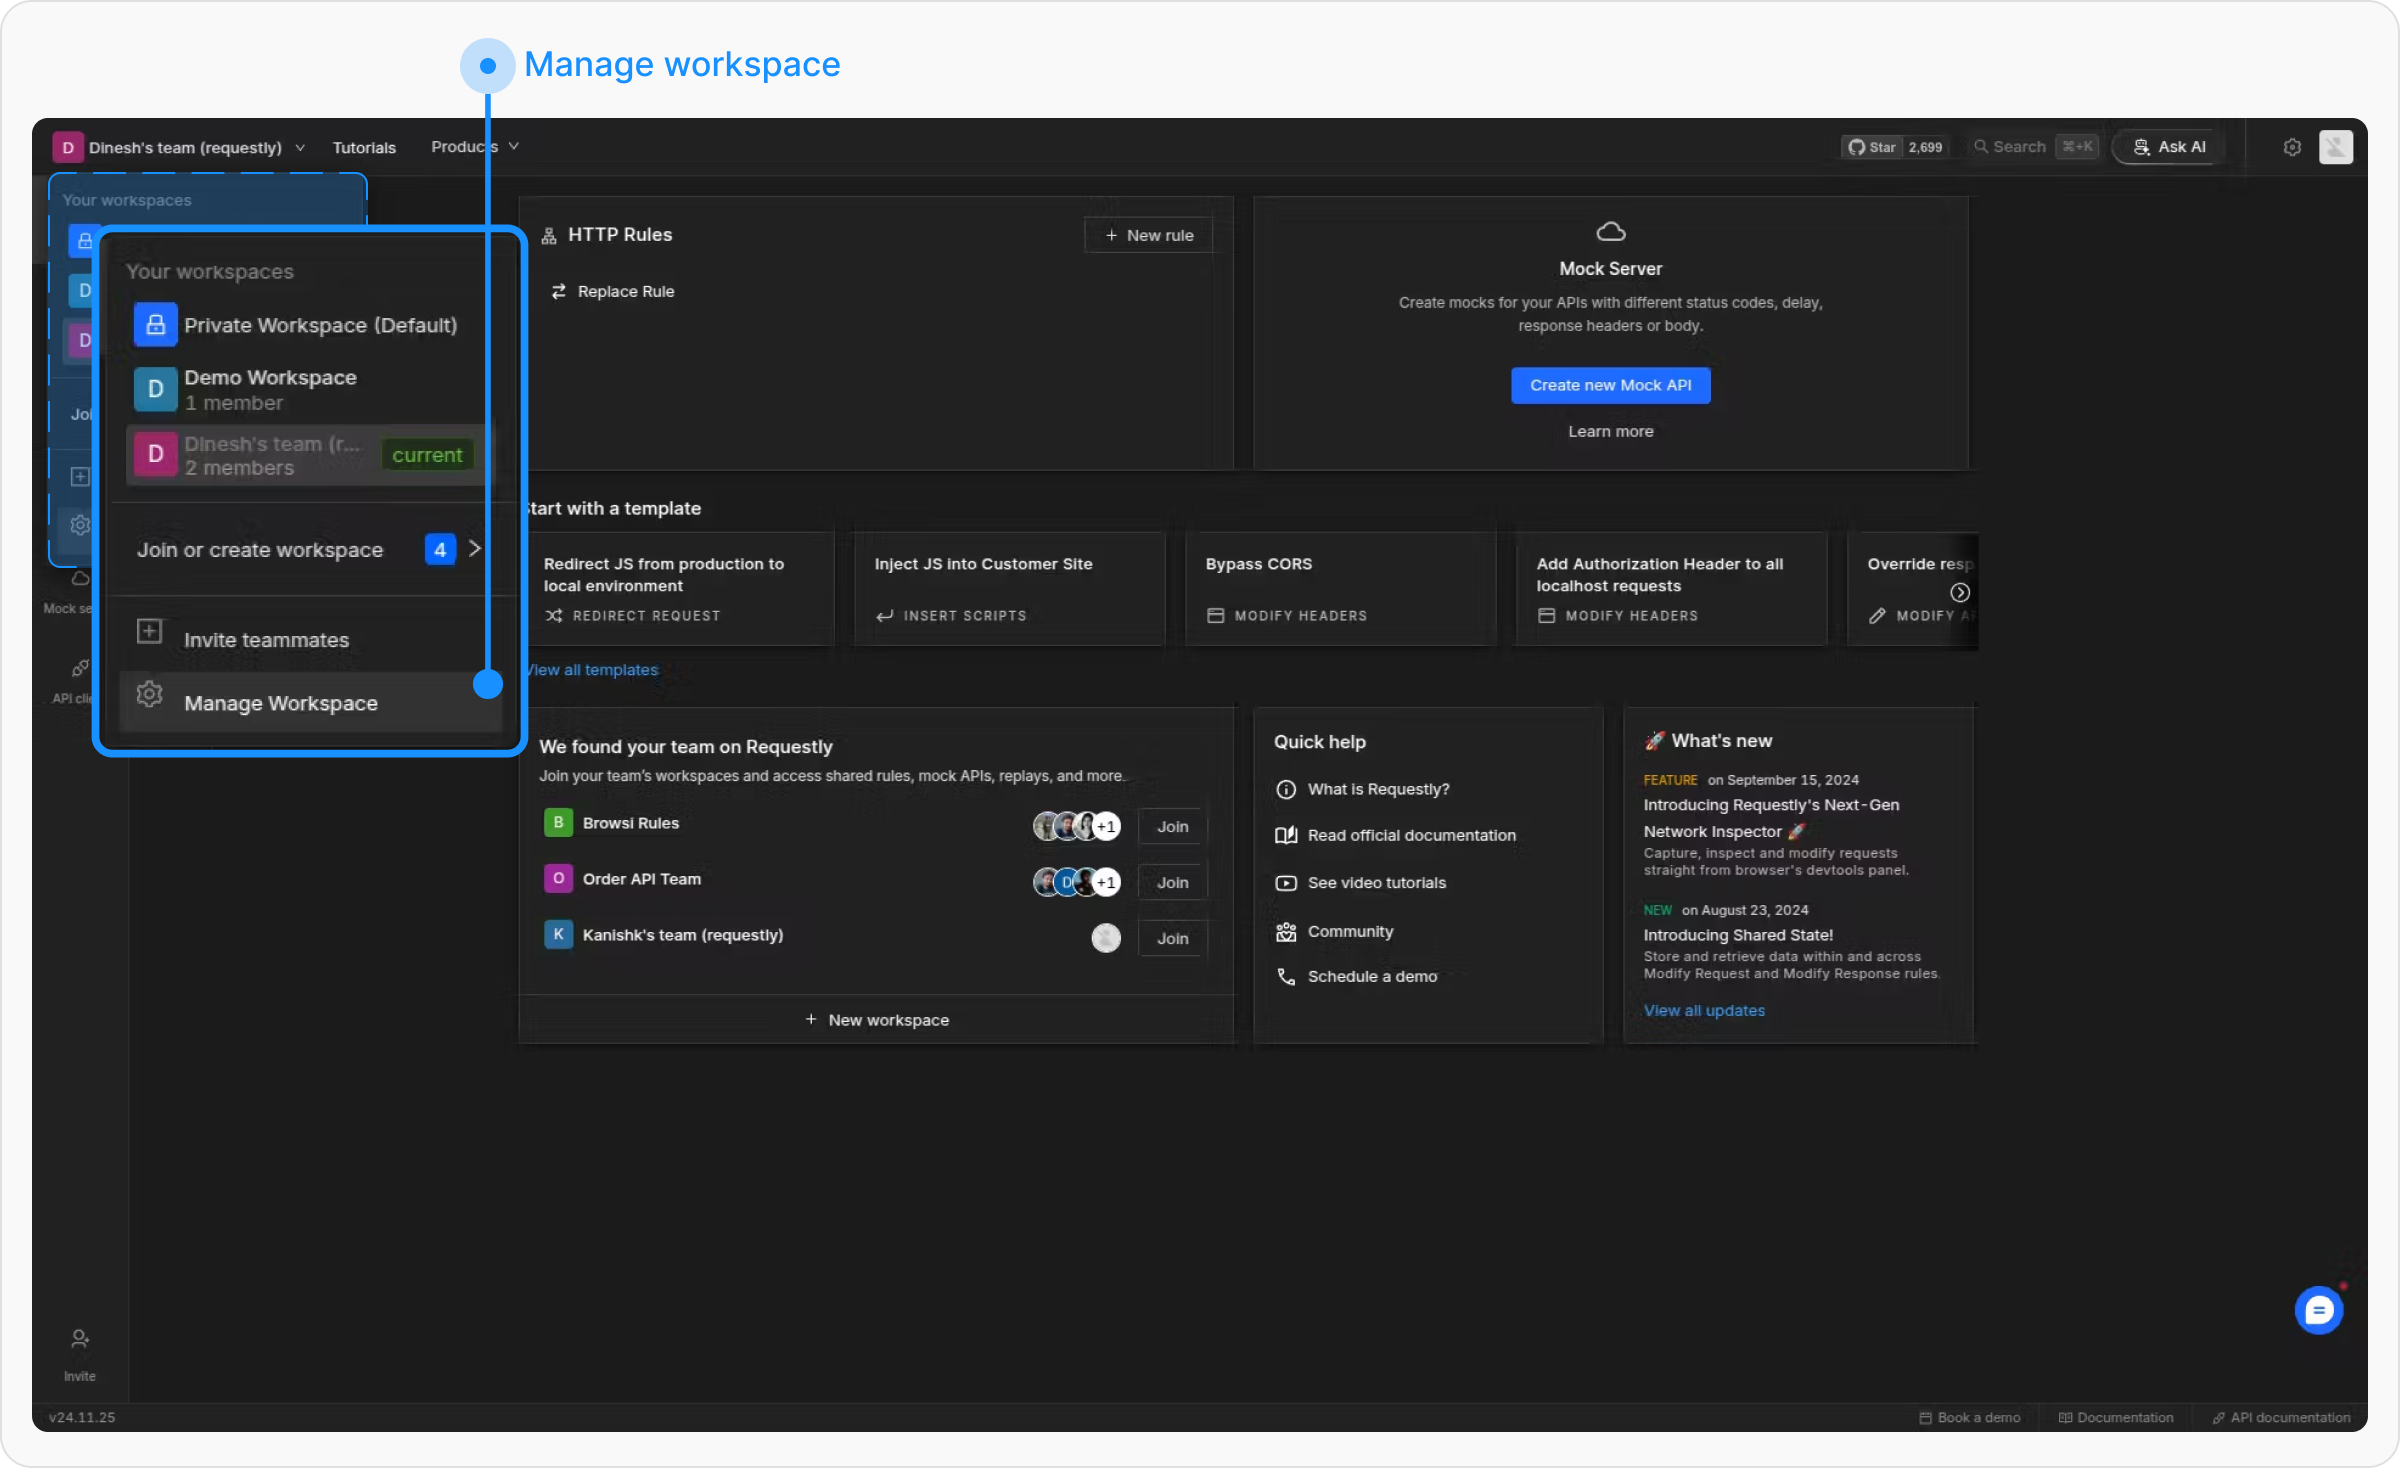
3
Select a Member
Find the member whose role you want to change in the members list.
4
Update Role
Use the dropdown next to their name to select the new role (e.g. Admin, User, or Viewer) and confirm the change.