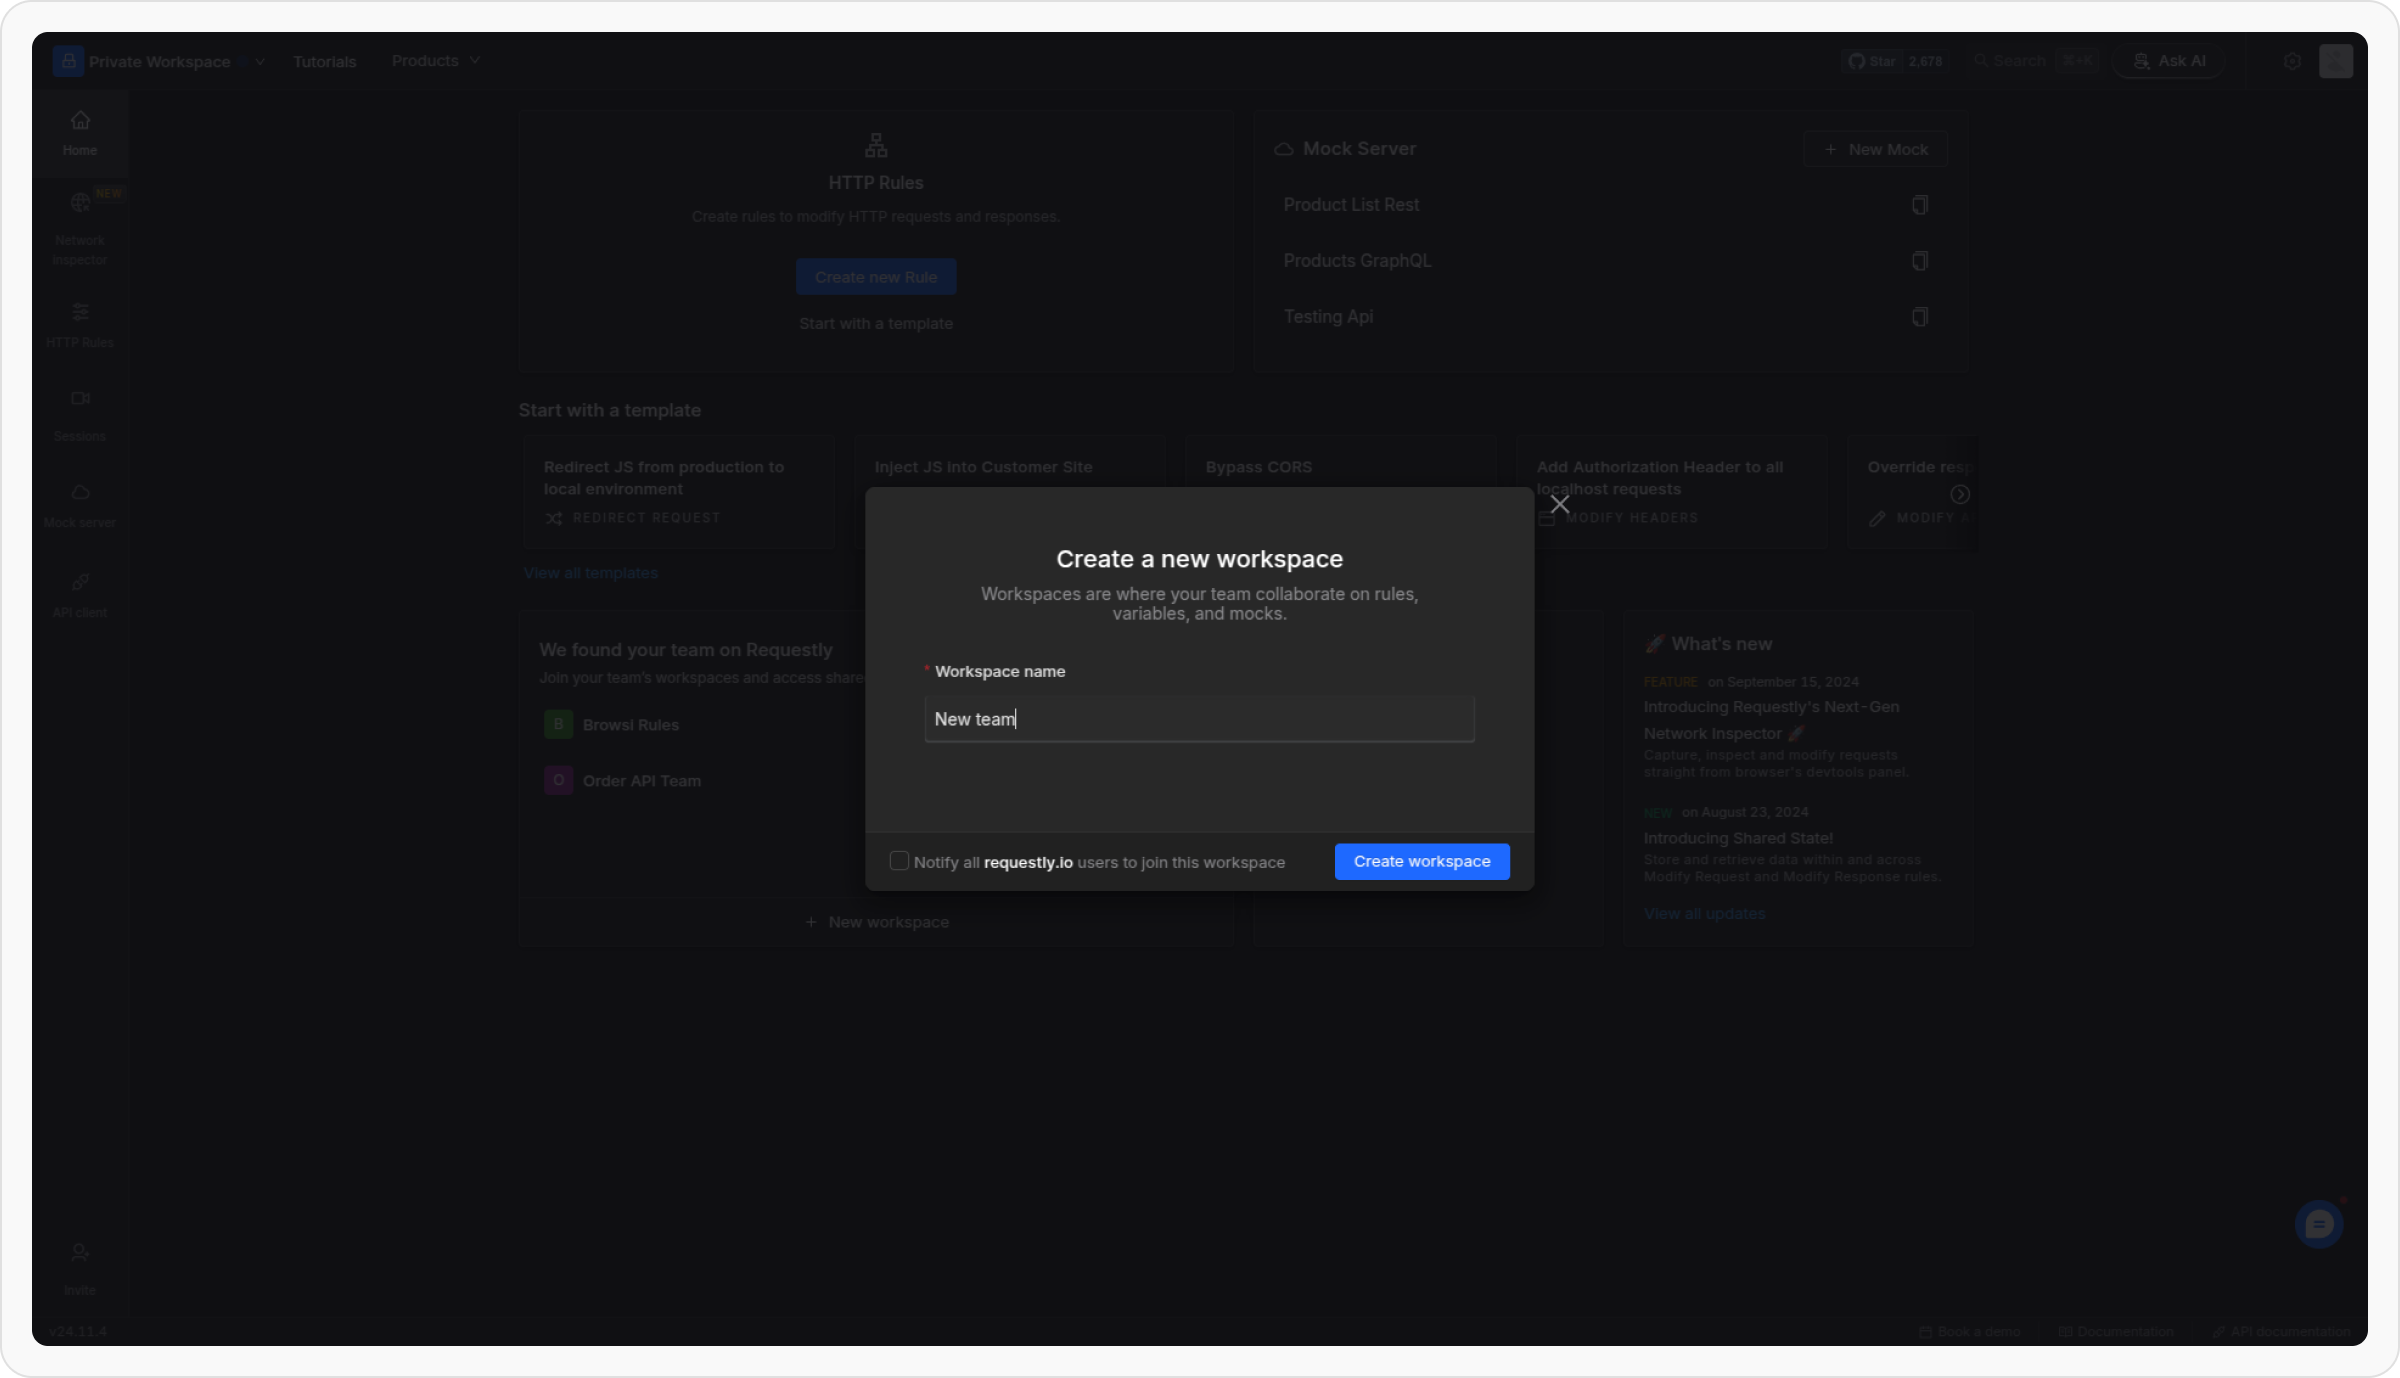
Setting up a shared project
Let’s create a shared project and invite teammates to collaborate in real time. Follow these simple steps to get started.Create a project
Open project switcher
In the top-left corner of the sidebar, find the project dropdown (the default option is Private project).
Access the project options
Click on the project dropdown and select the option Join or Create Project.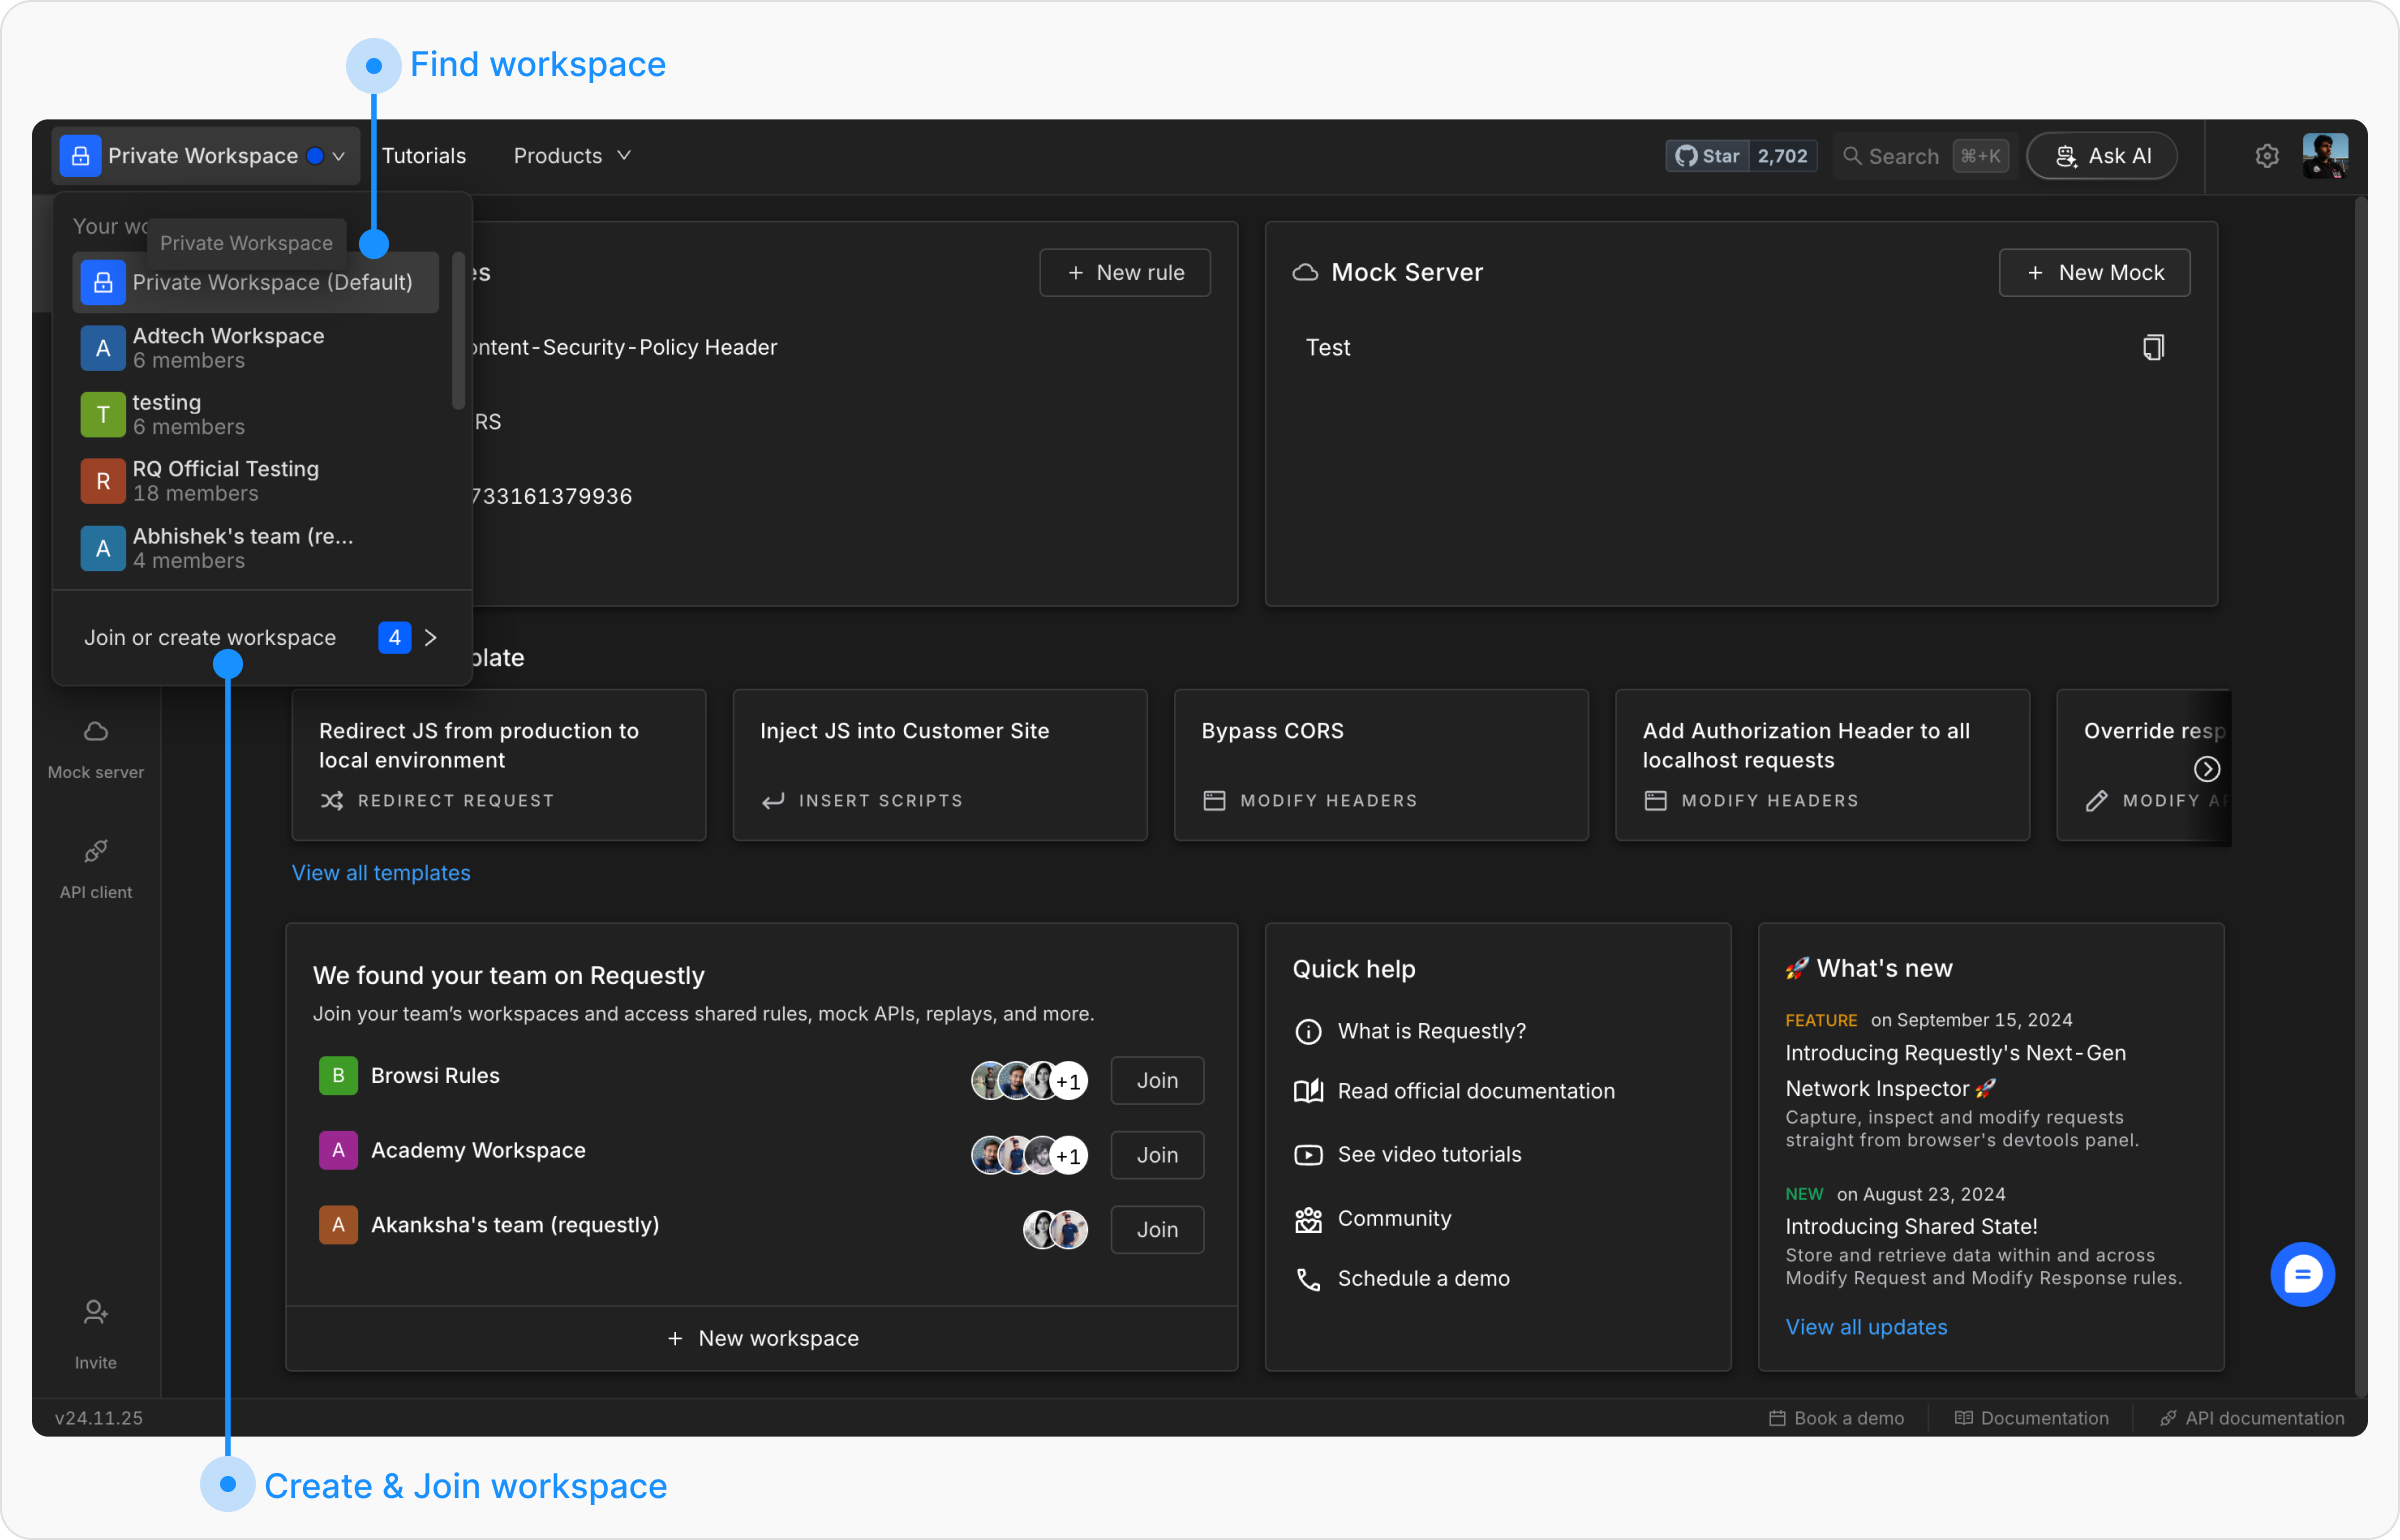
Managing team members
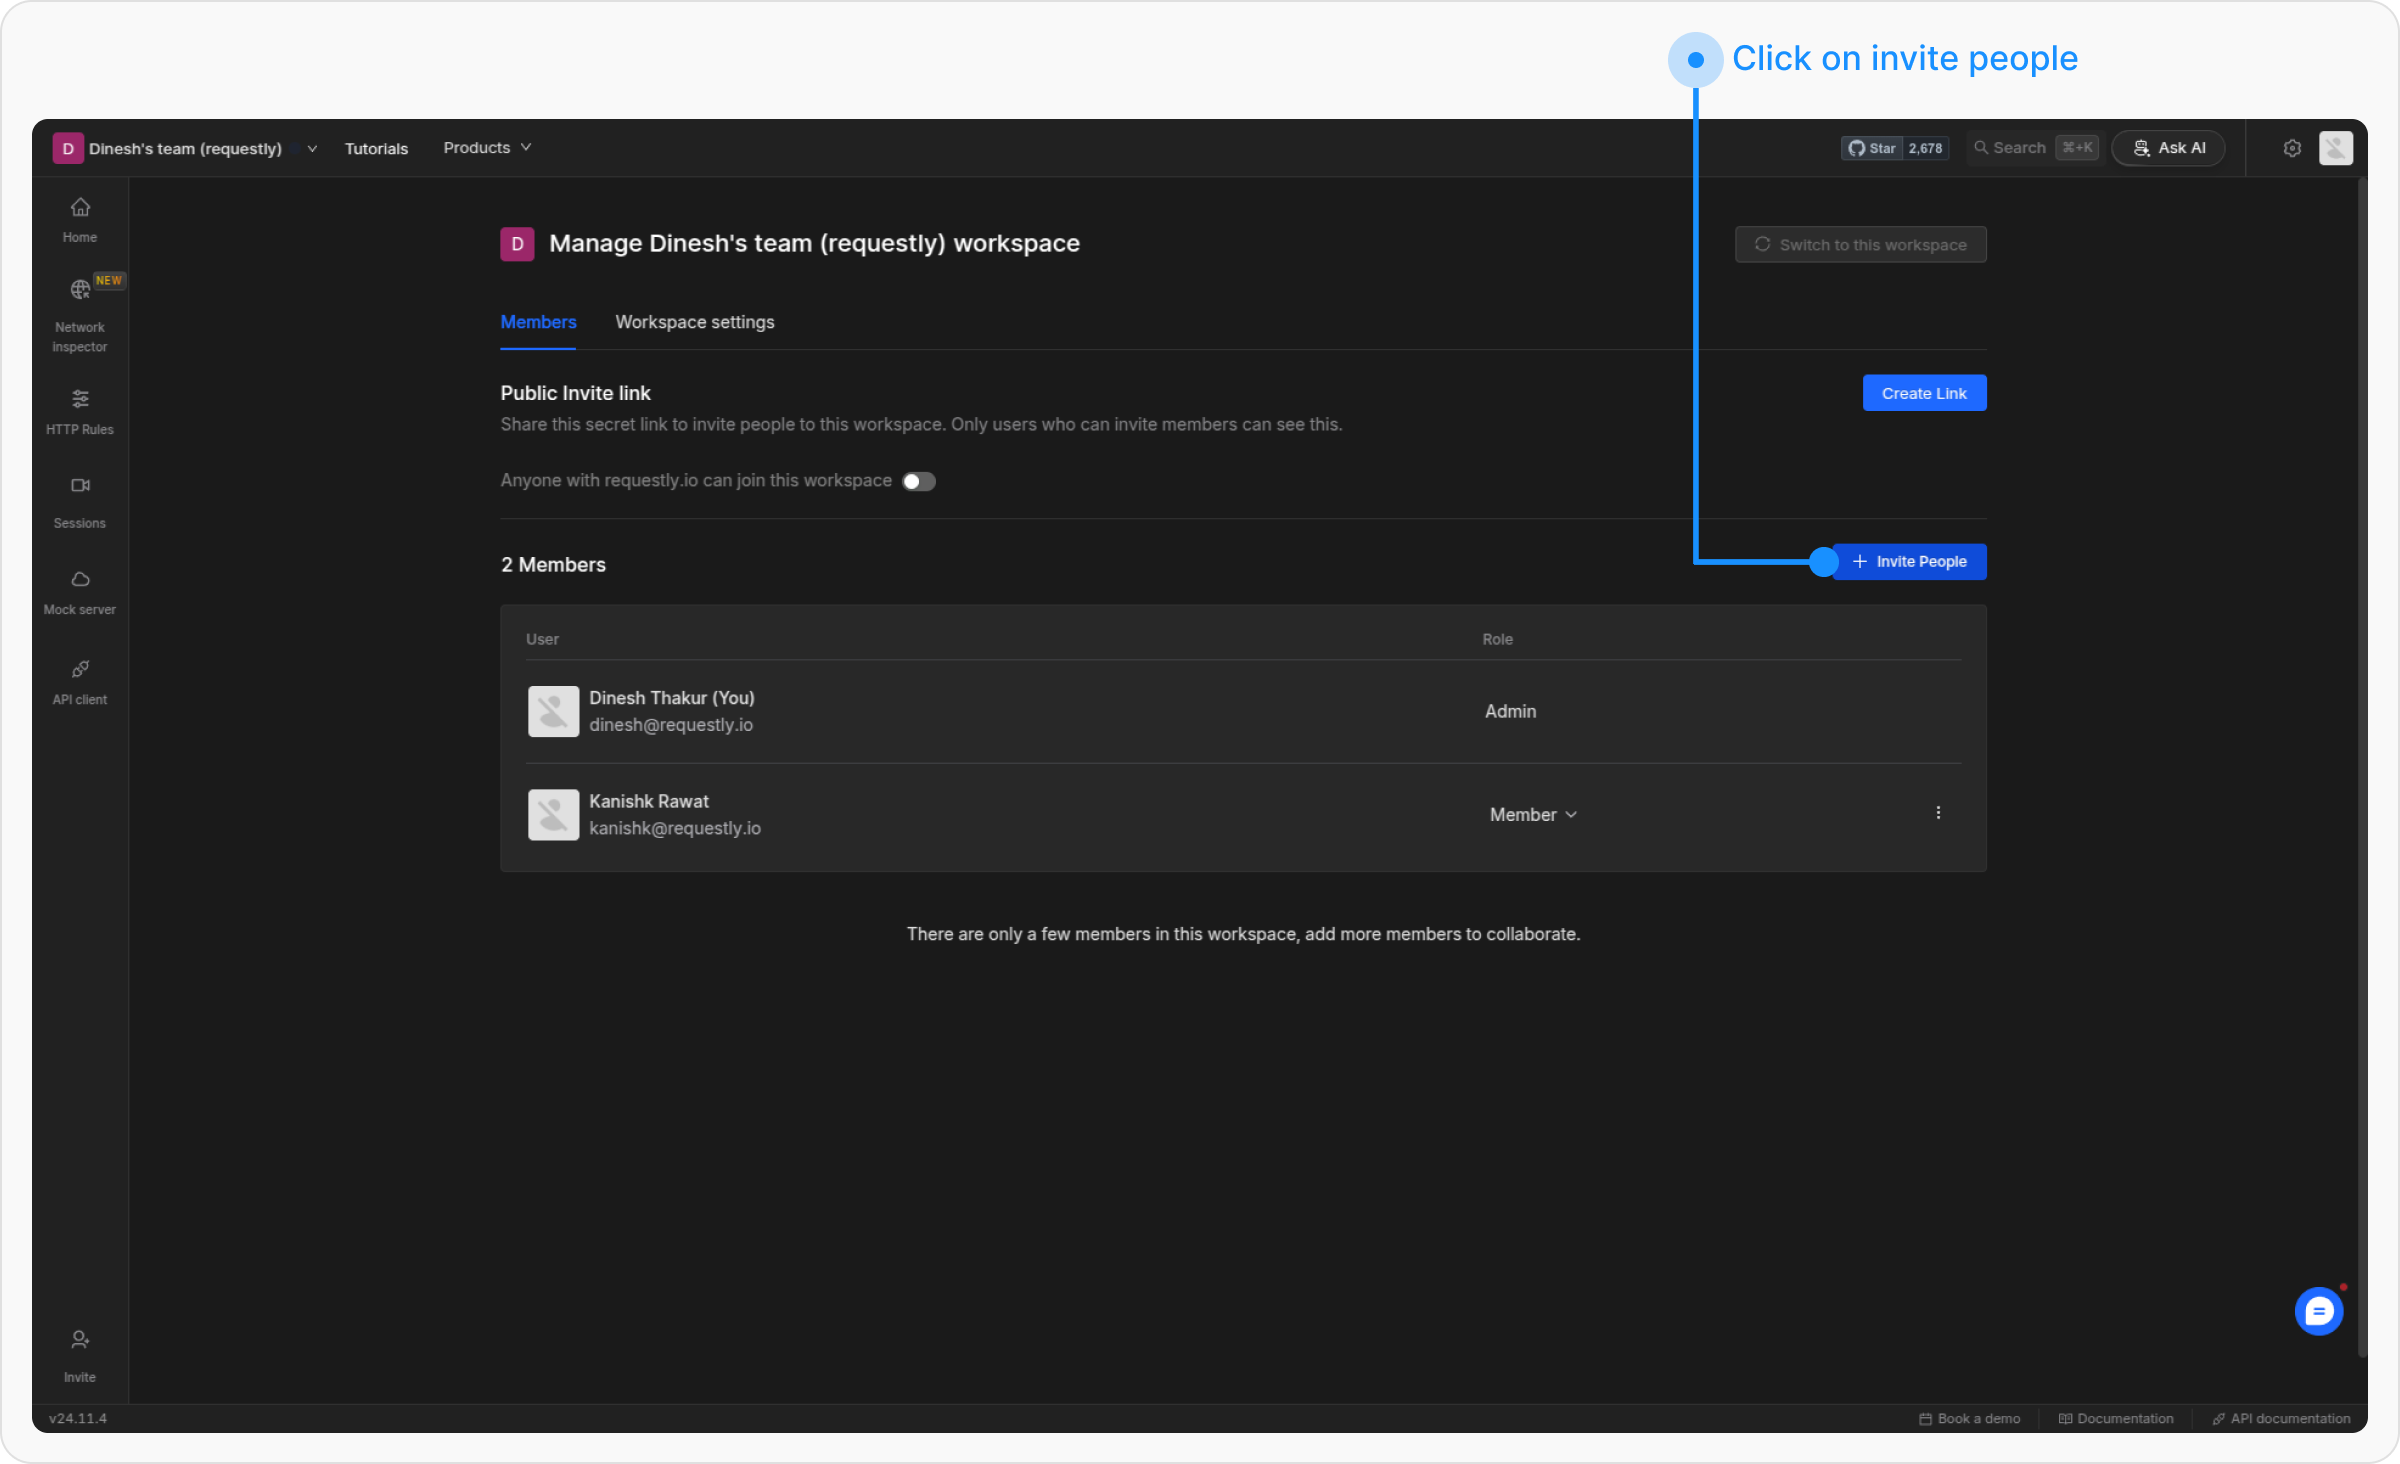
To effectively manage access, admins can add team members, update their roles, or remove team members within a project. Below are the steps to perform these actions.Adding new members
Switch to the project
Navigate to the Requestly dashboard and switch to the project where you want to add members.
Open Manage project
Open the switch project panel and select “Manage project”

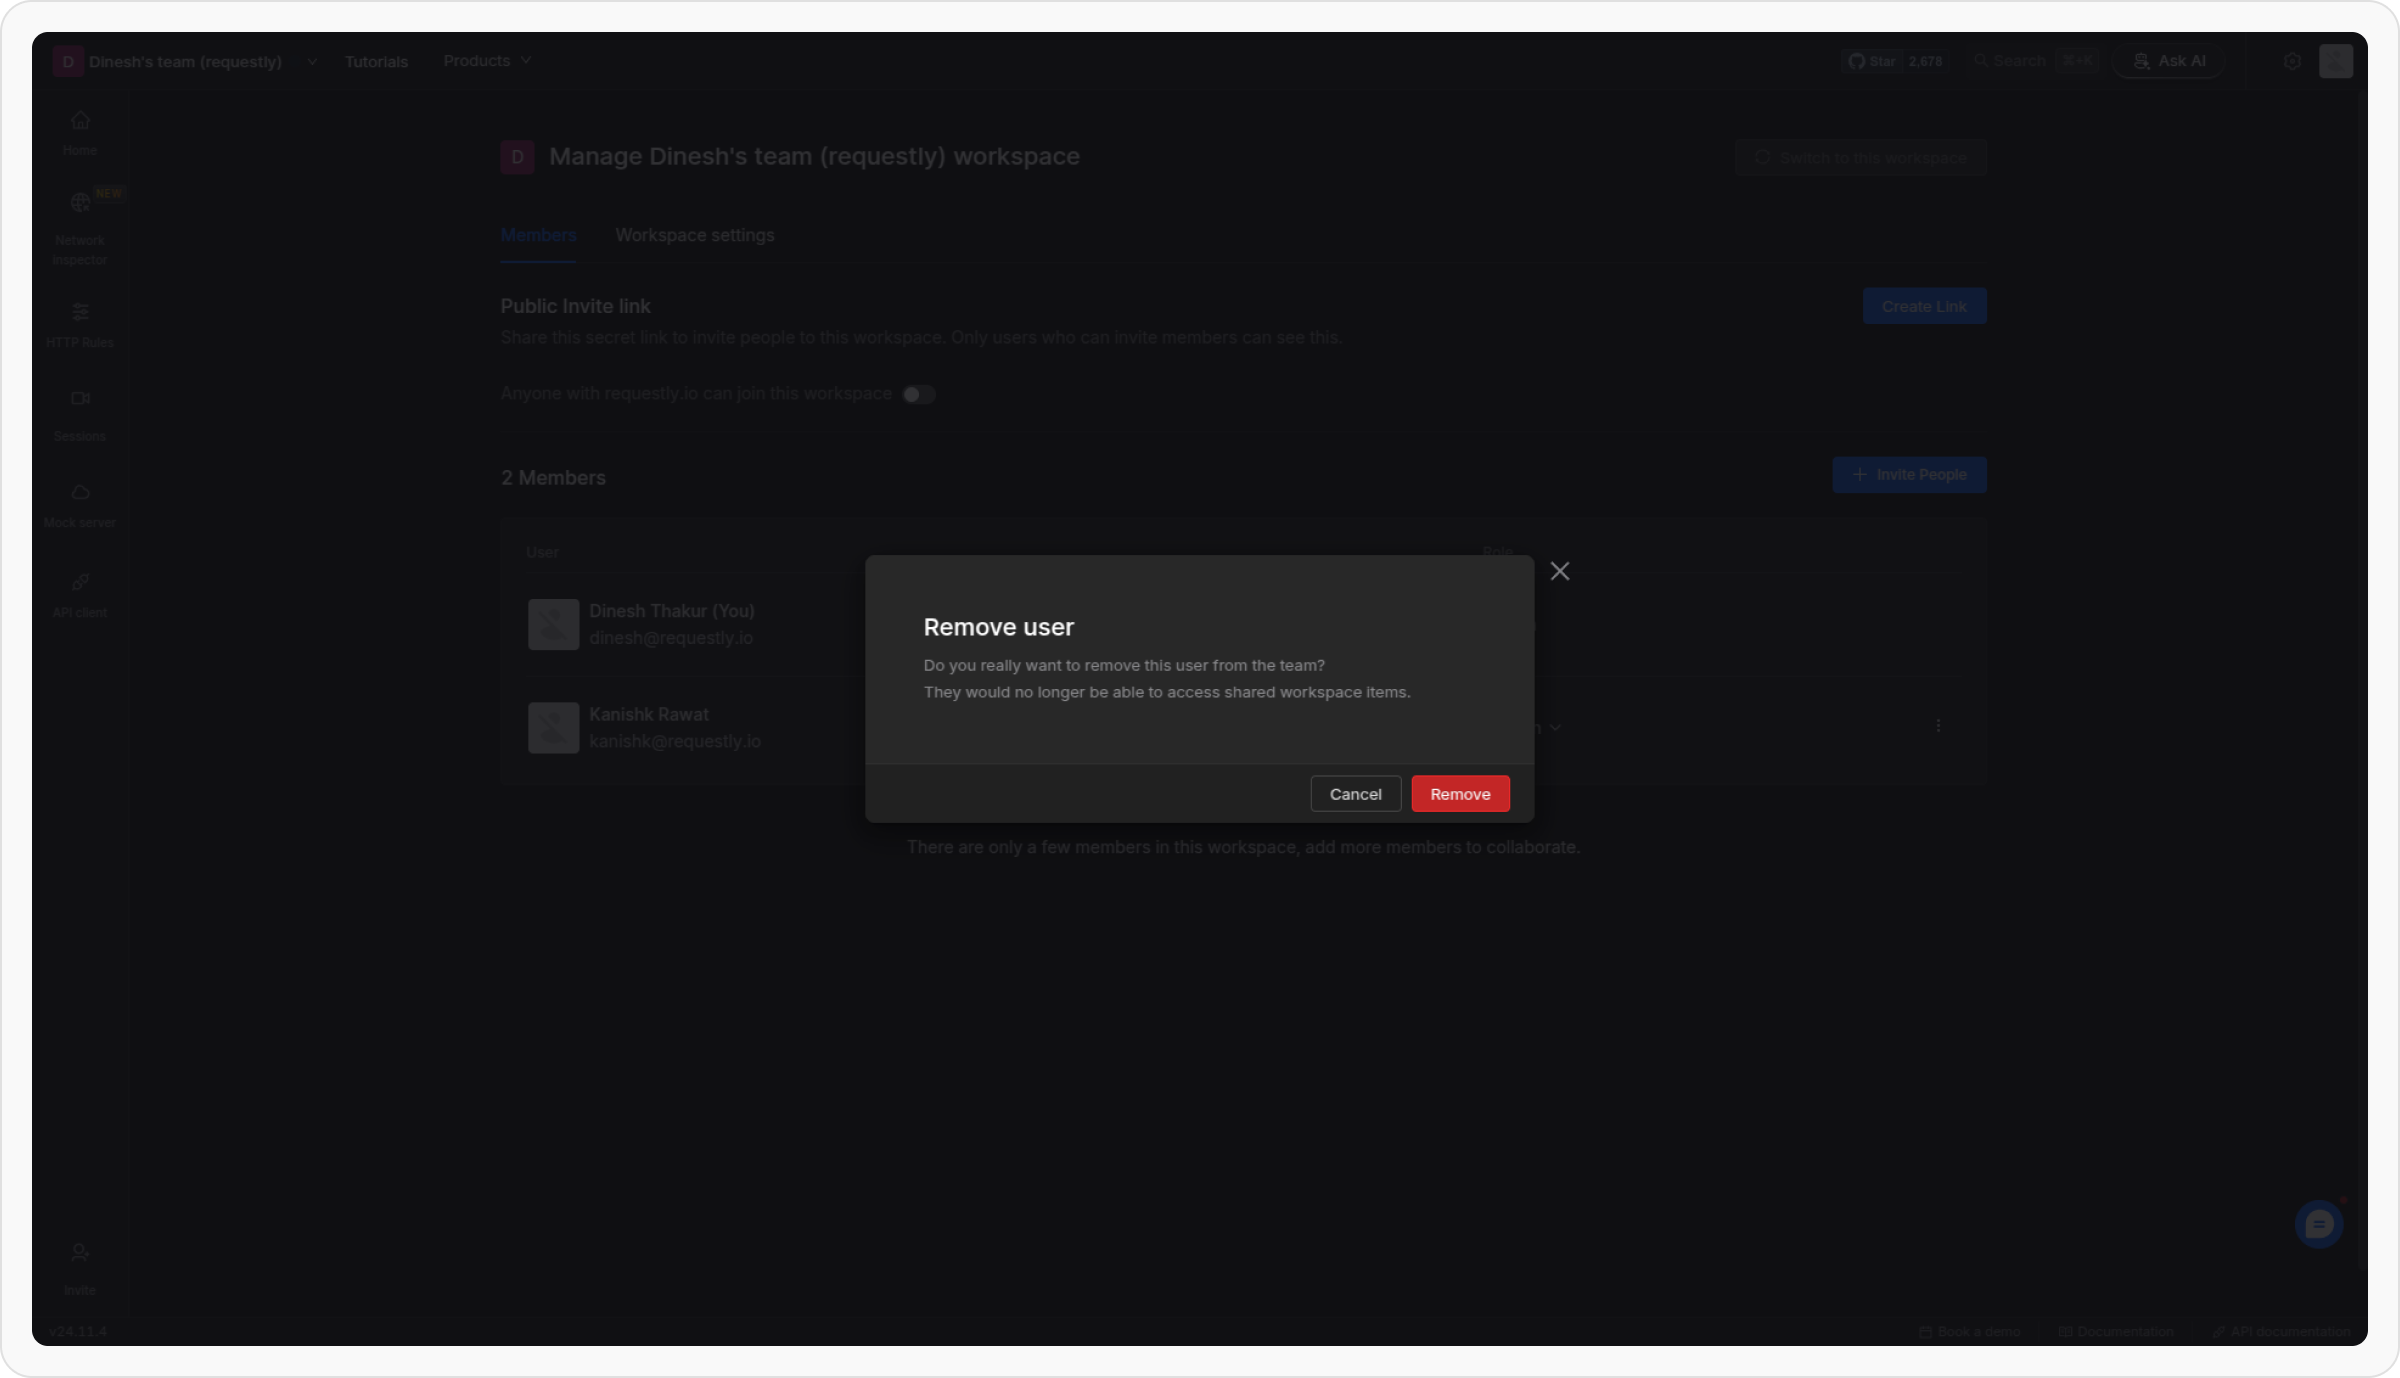
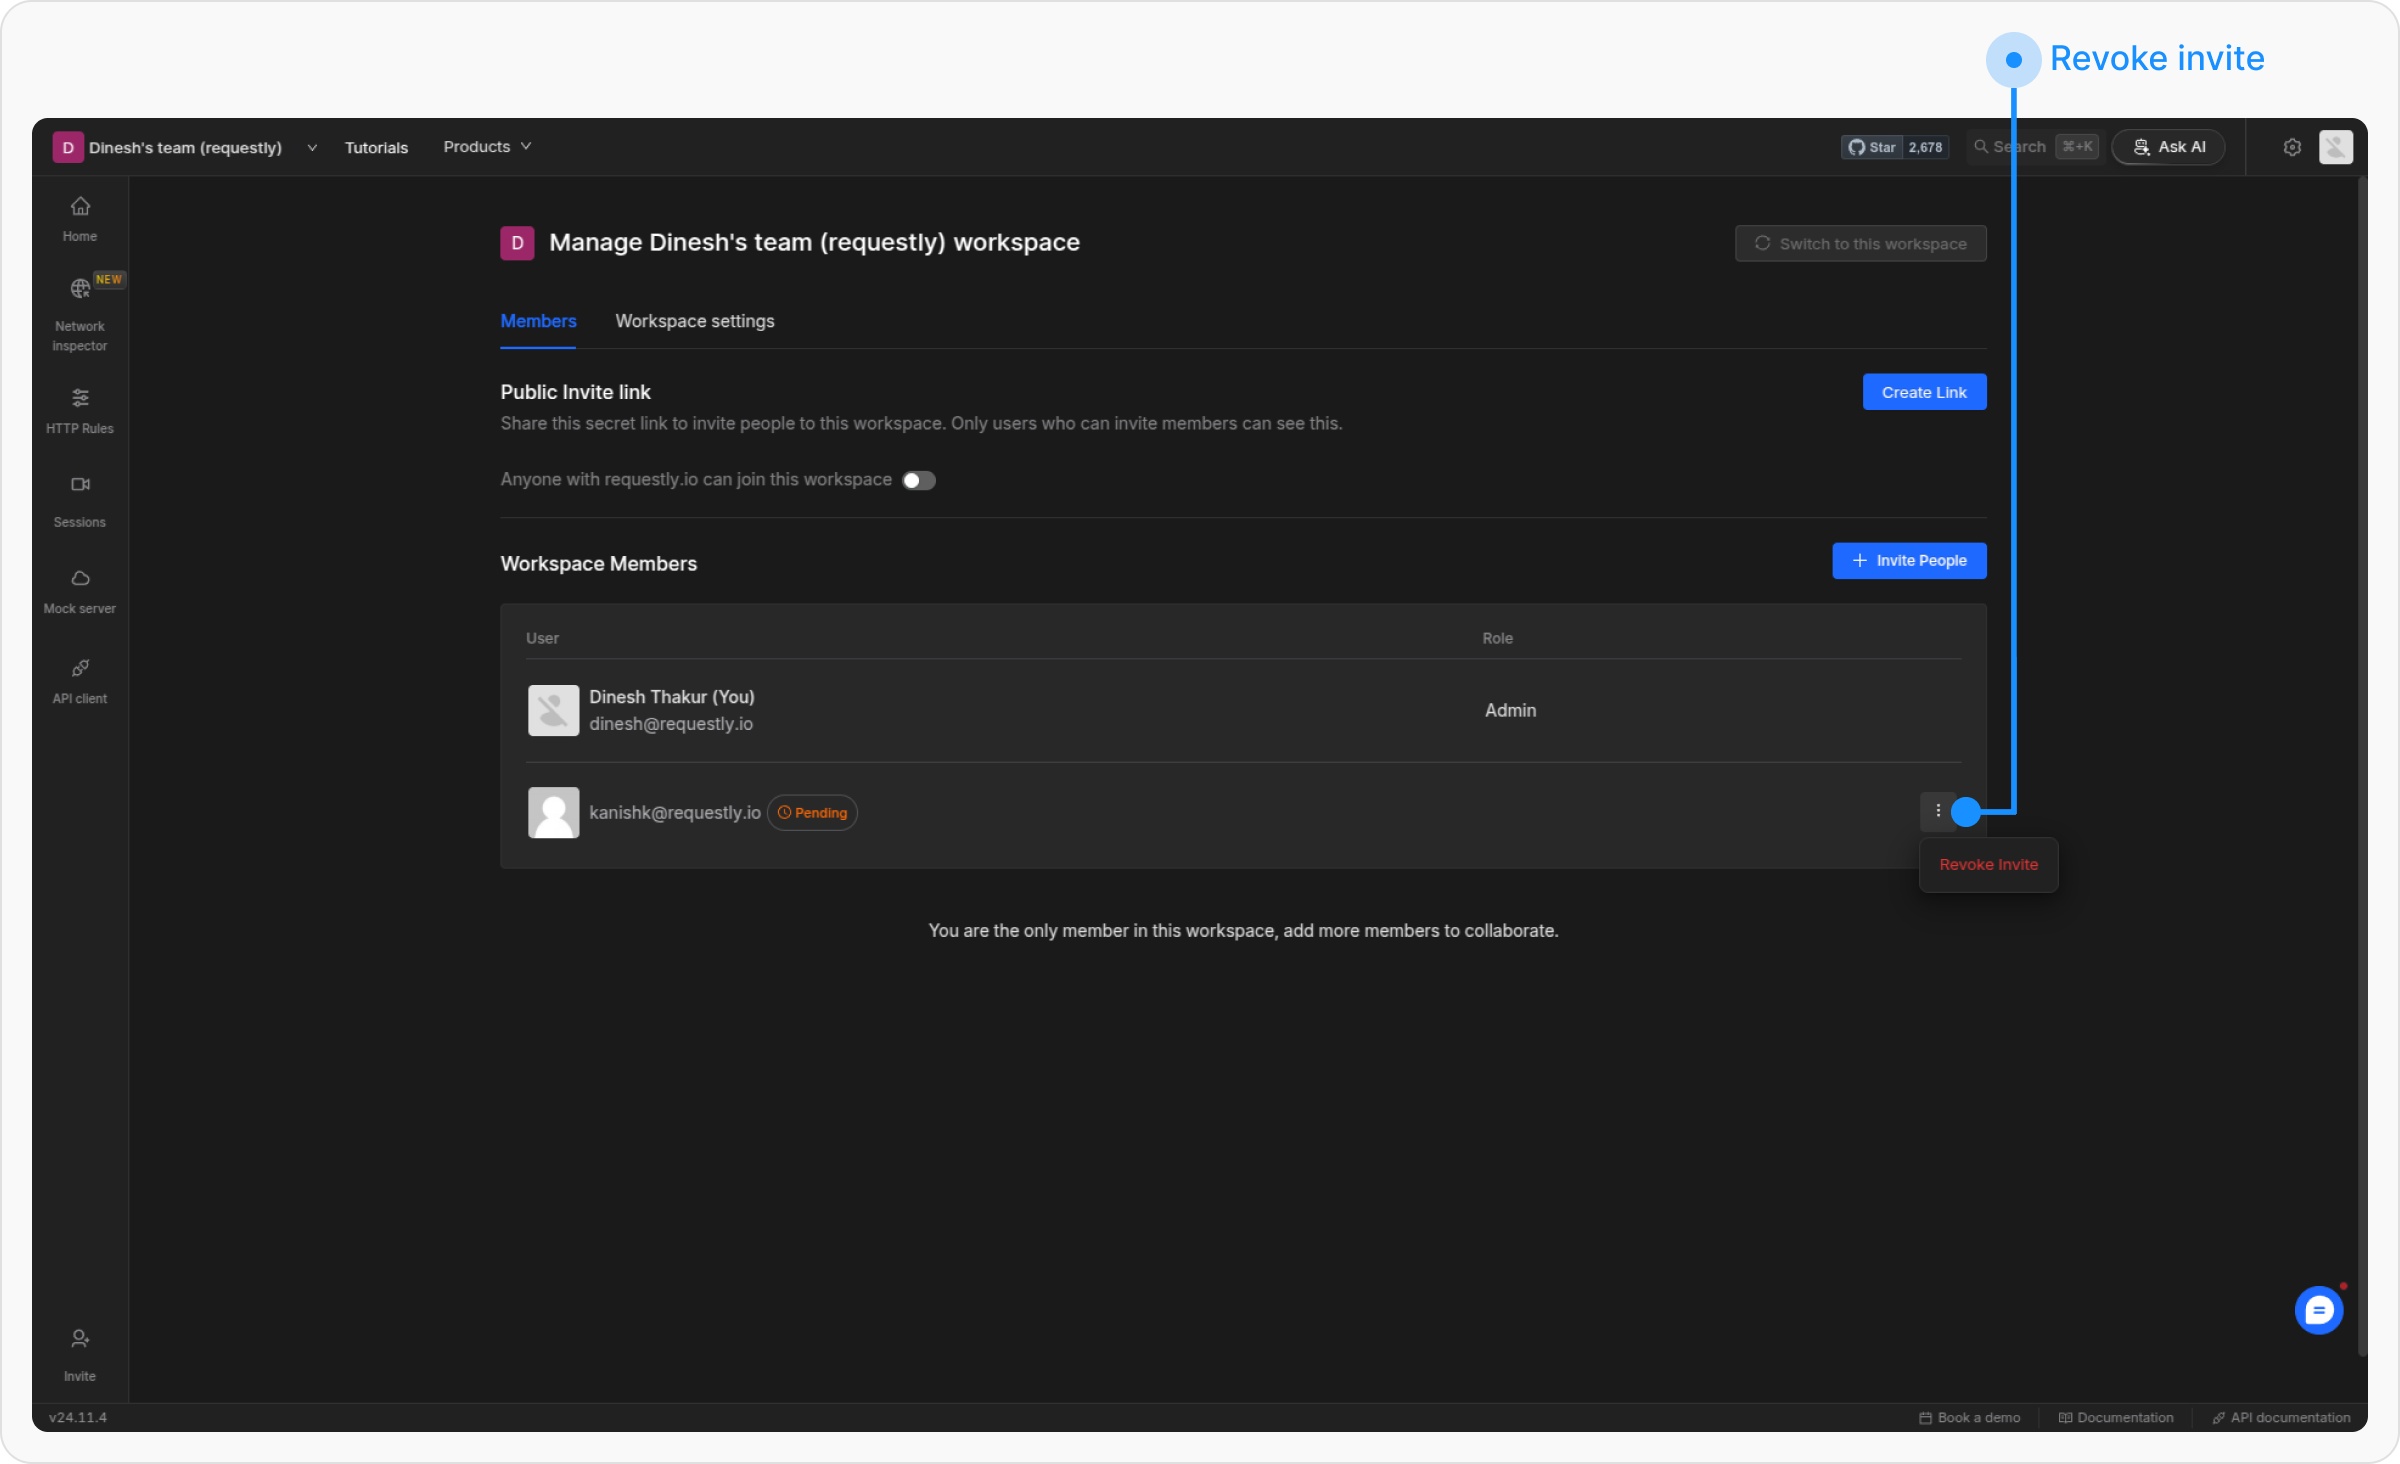
Removing members
Switch to the project
Navigate to the Requestly dashboard and switch to the project where you want to remove members.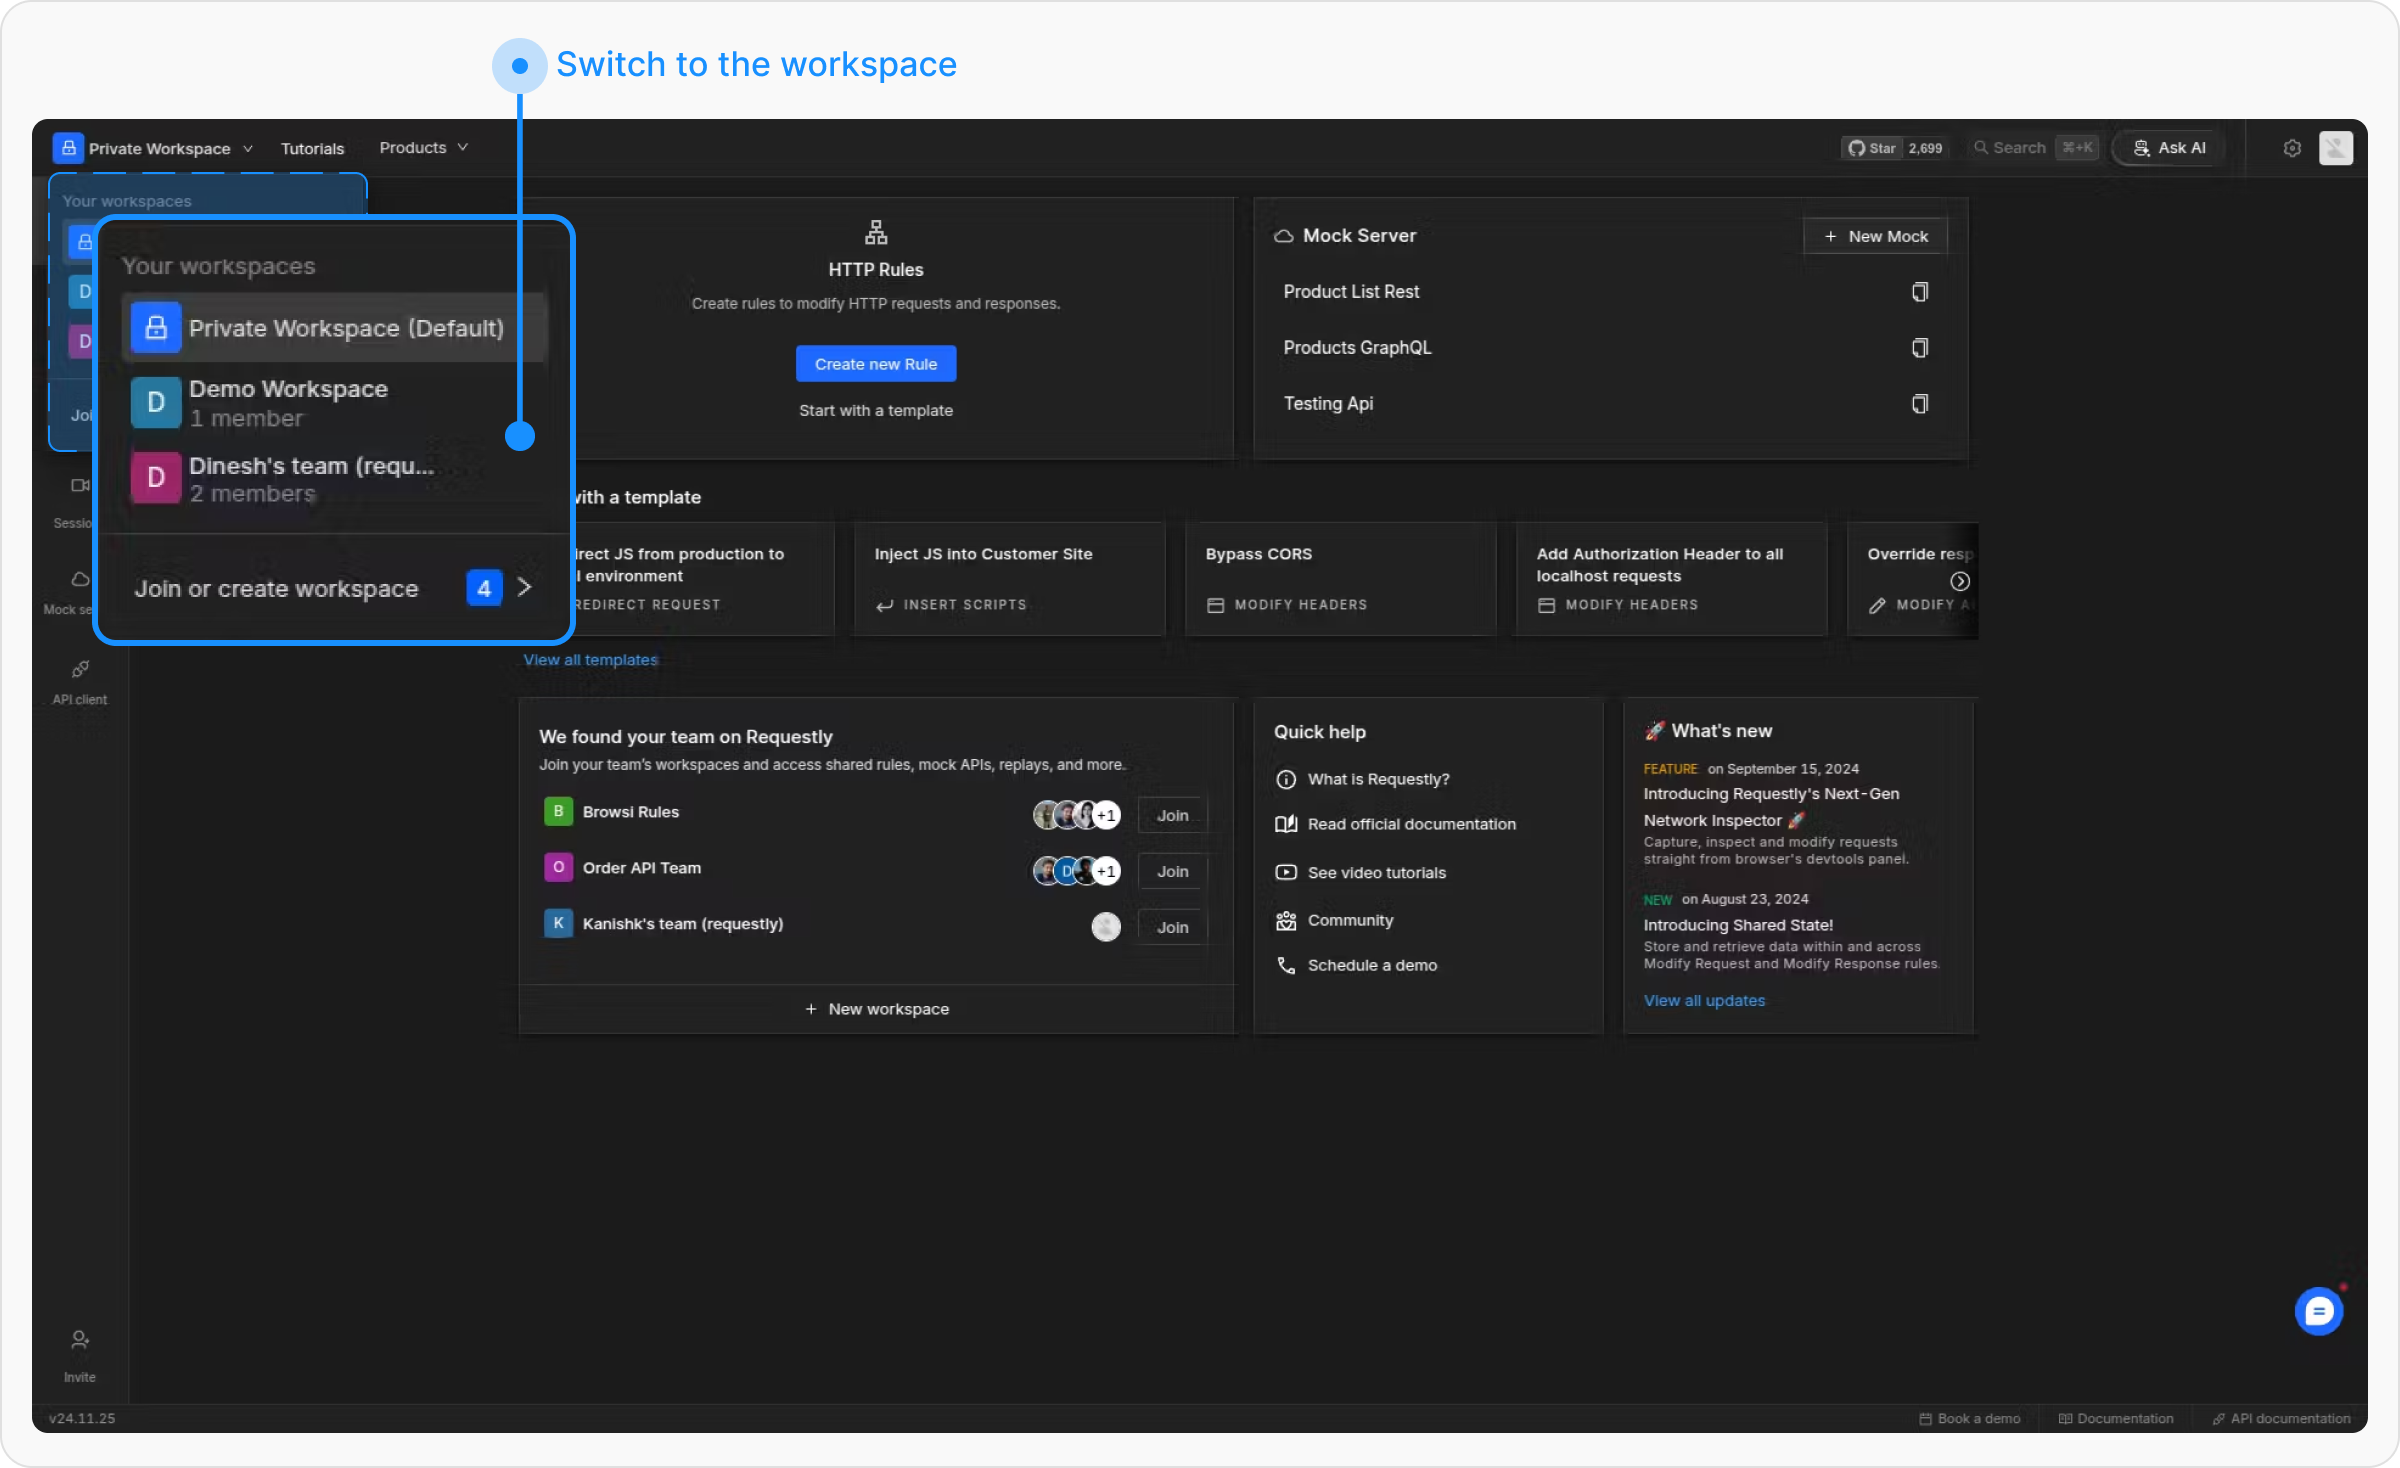
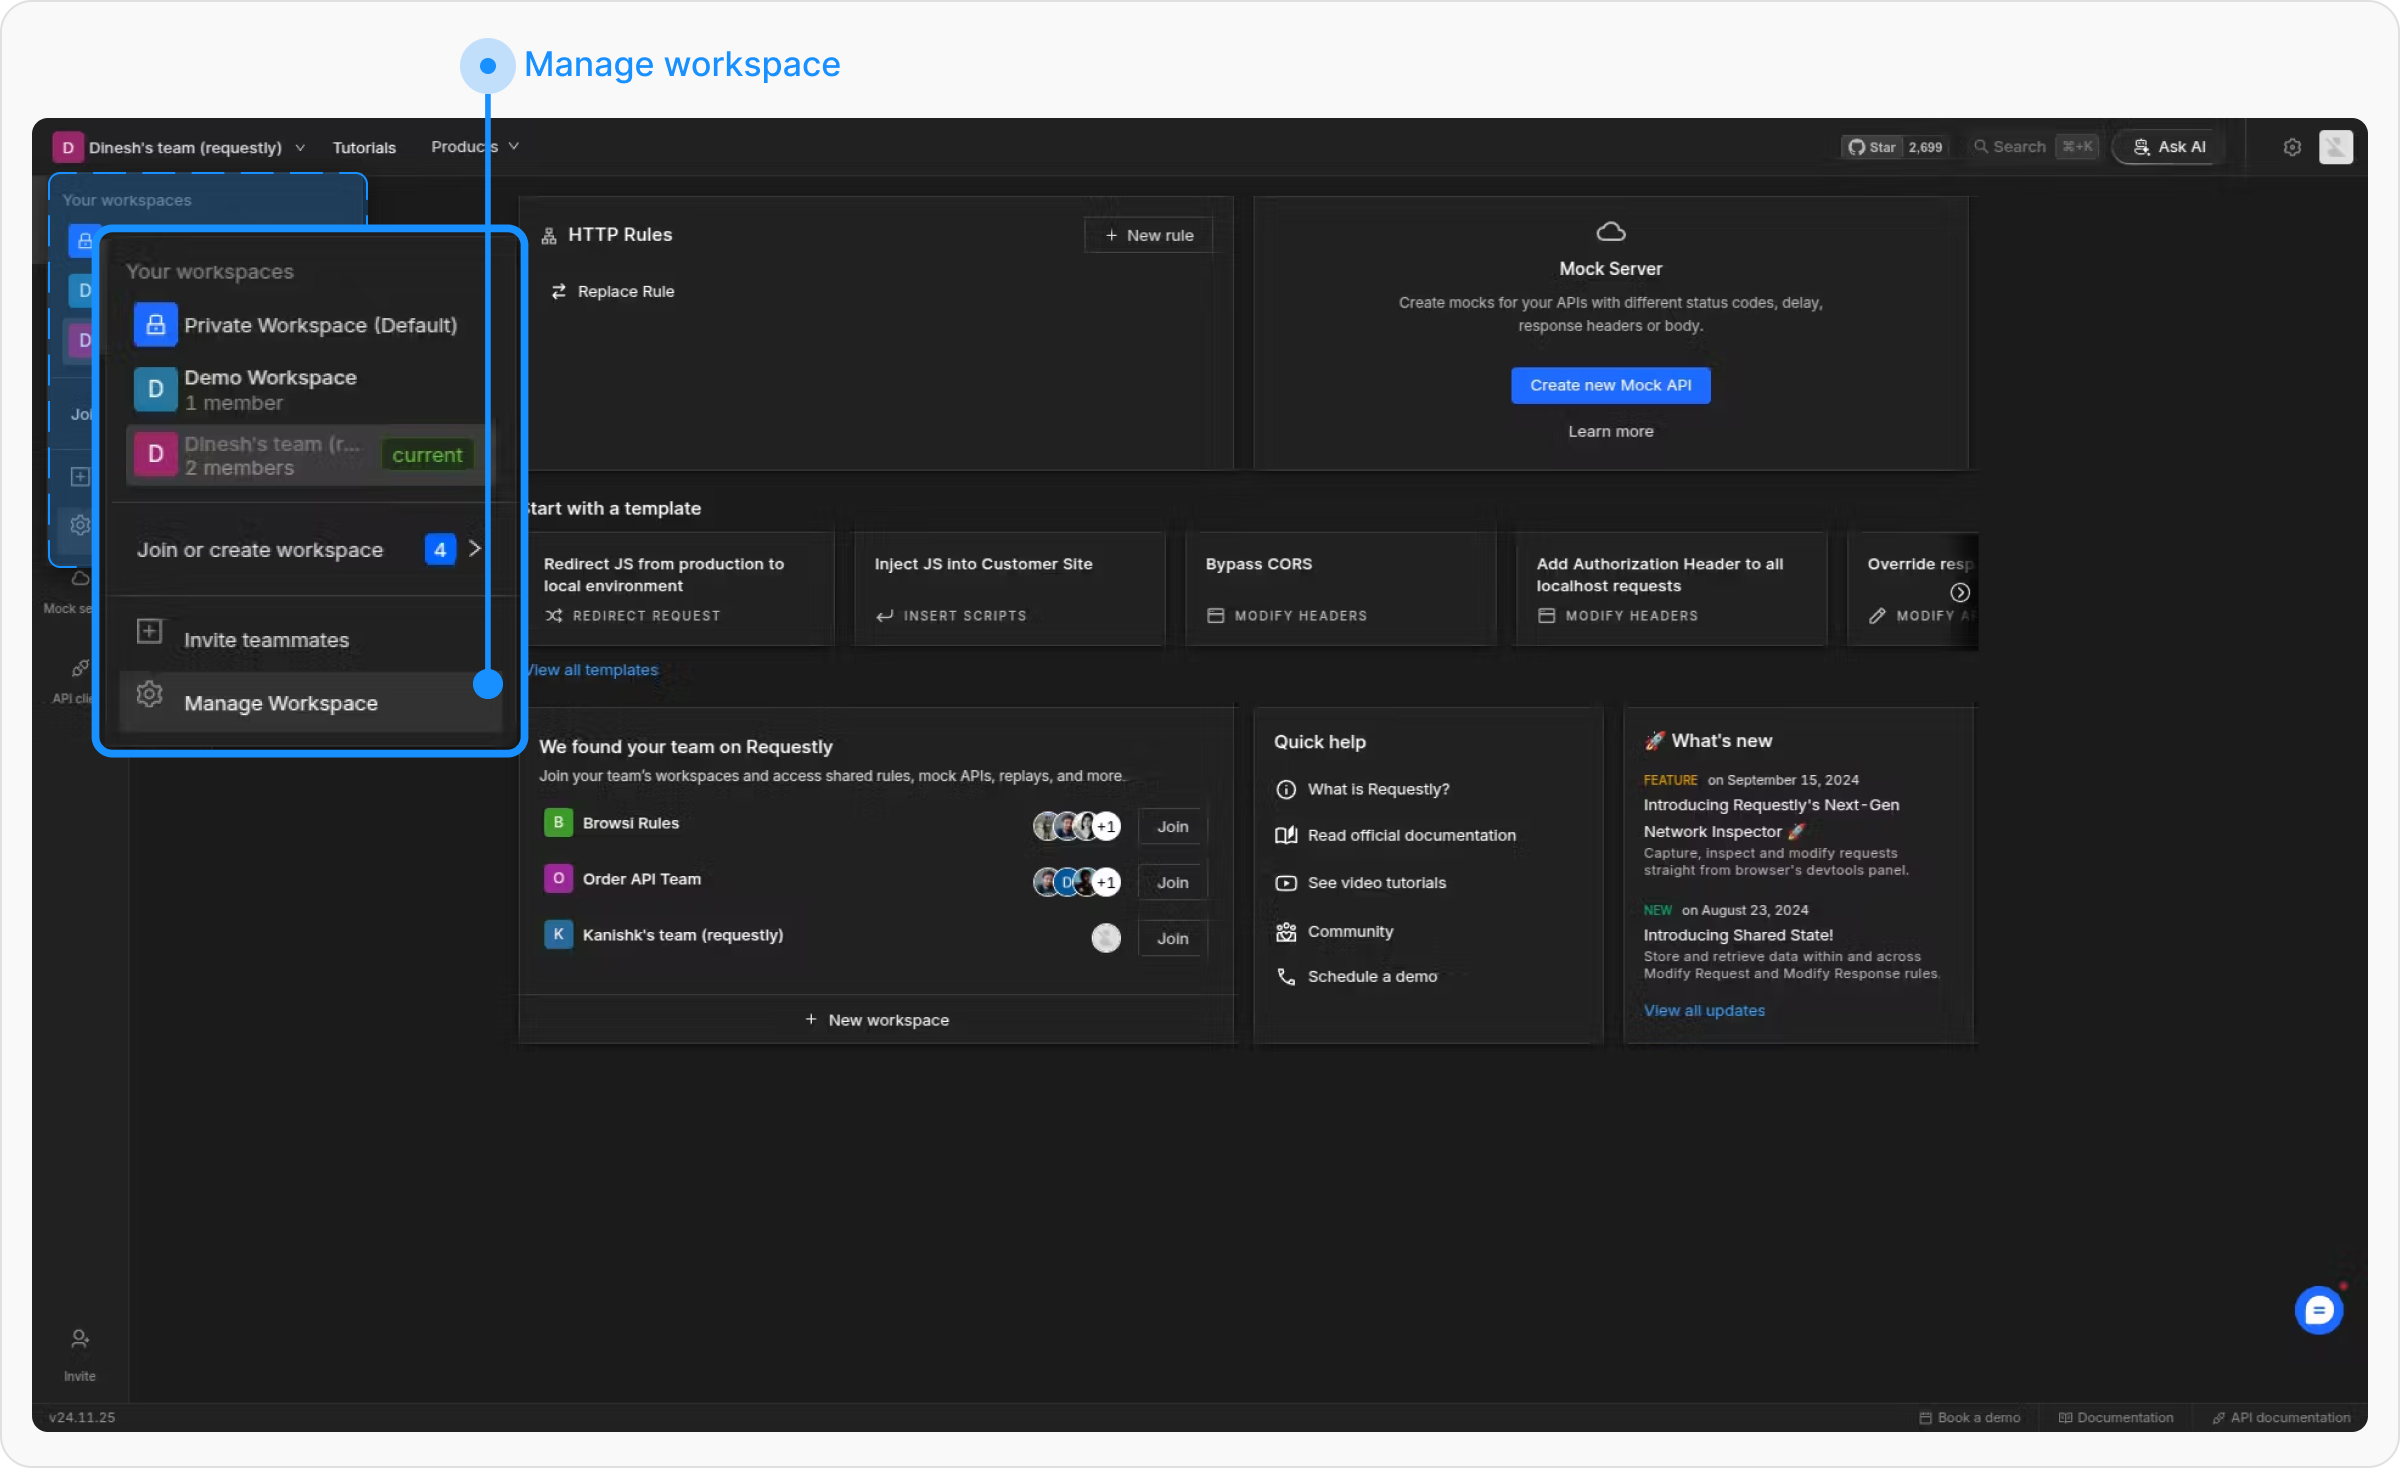
Remove the member
Locate the member you want to remove from the members’ list. Click the 3-dot menu next to their role and select Remove user from project.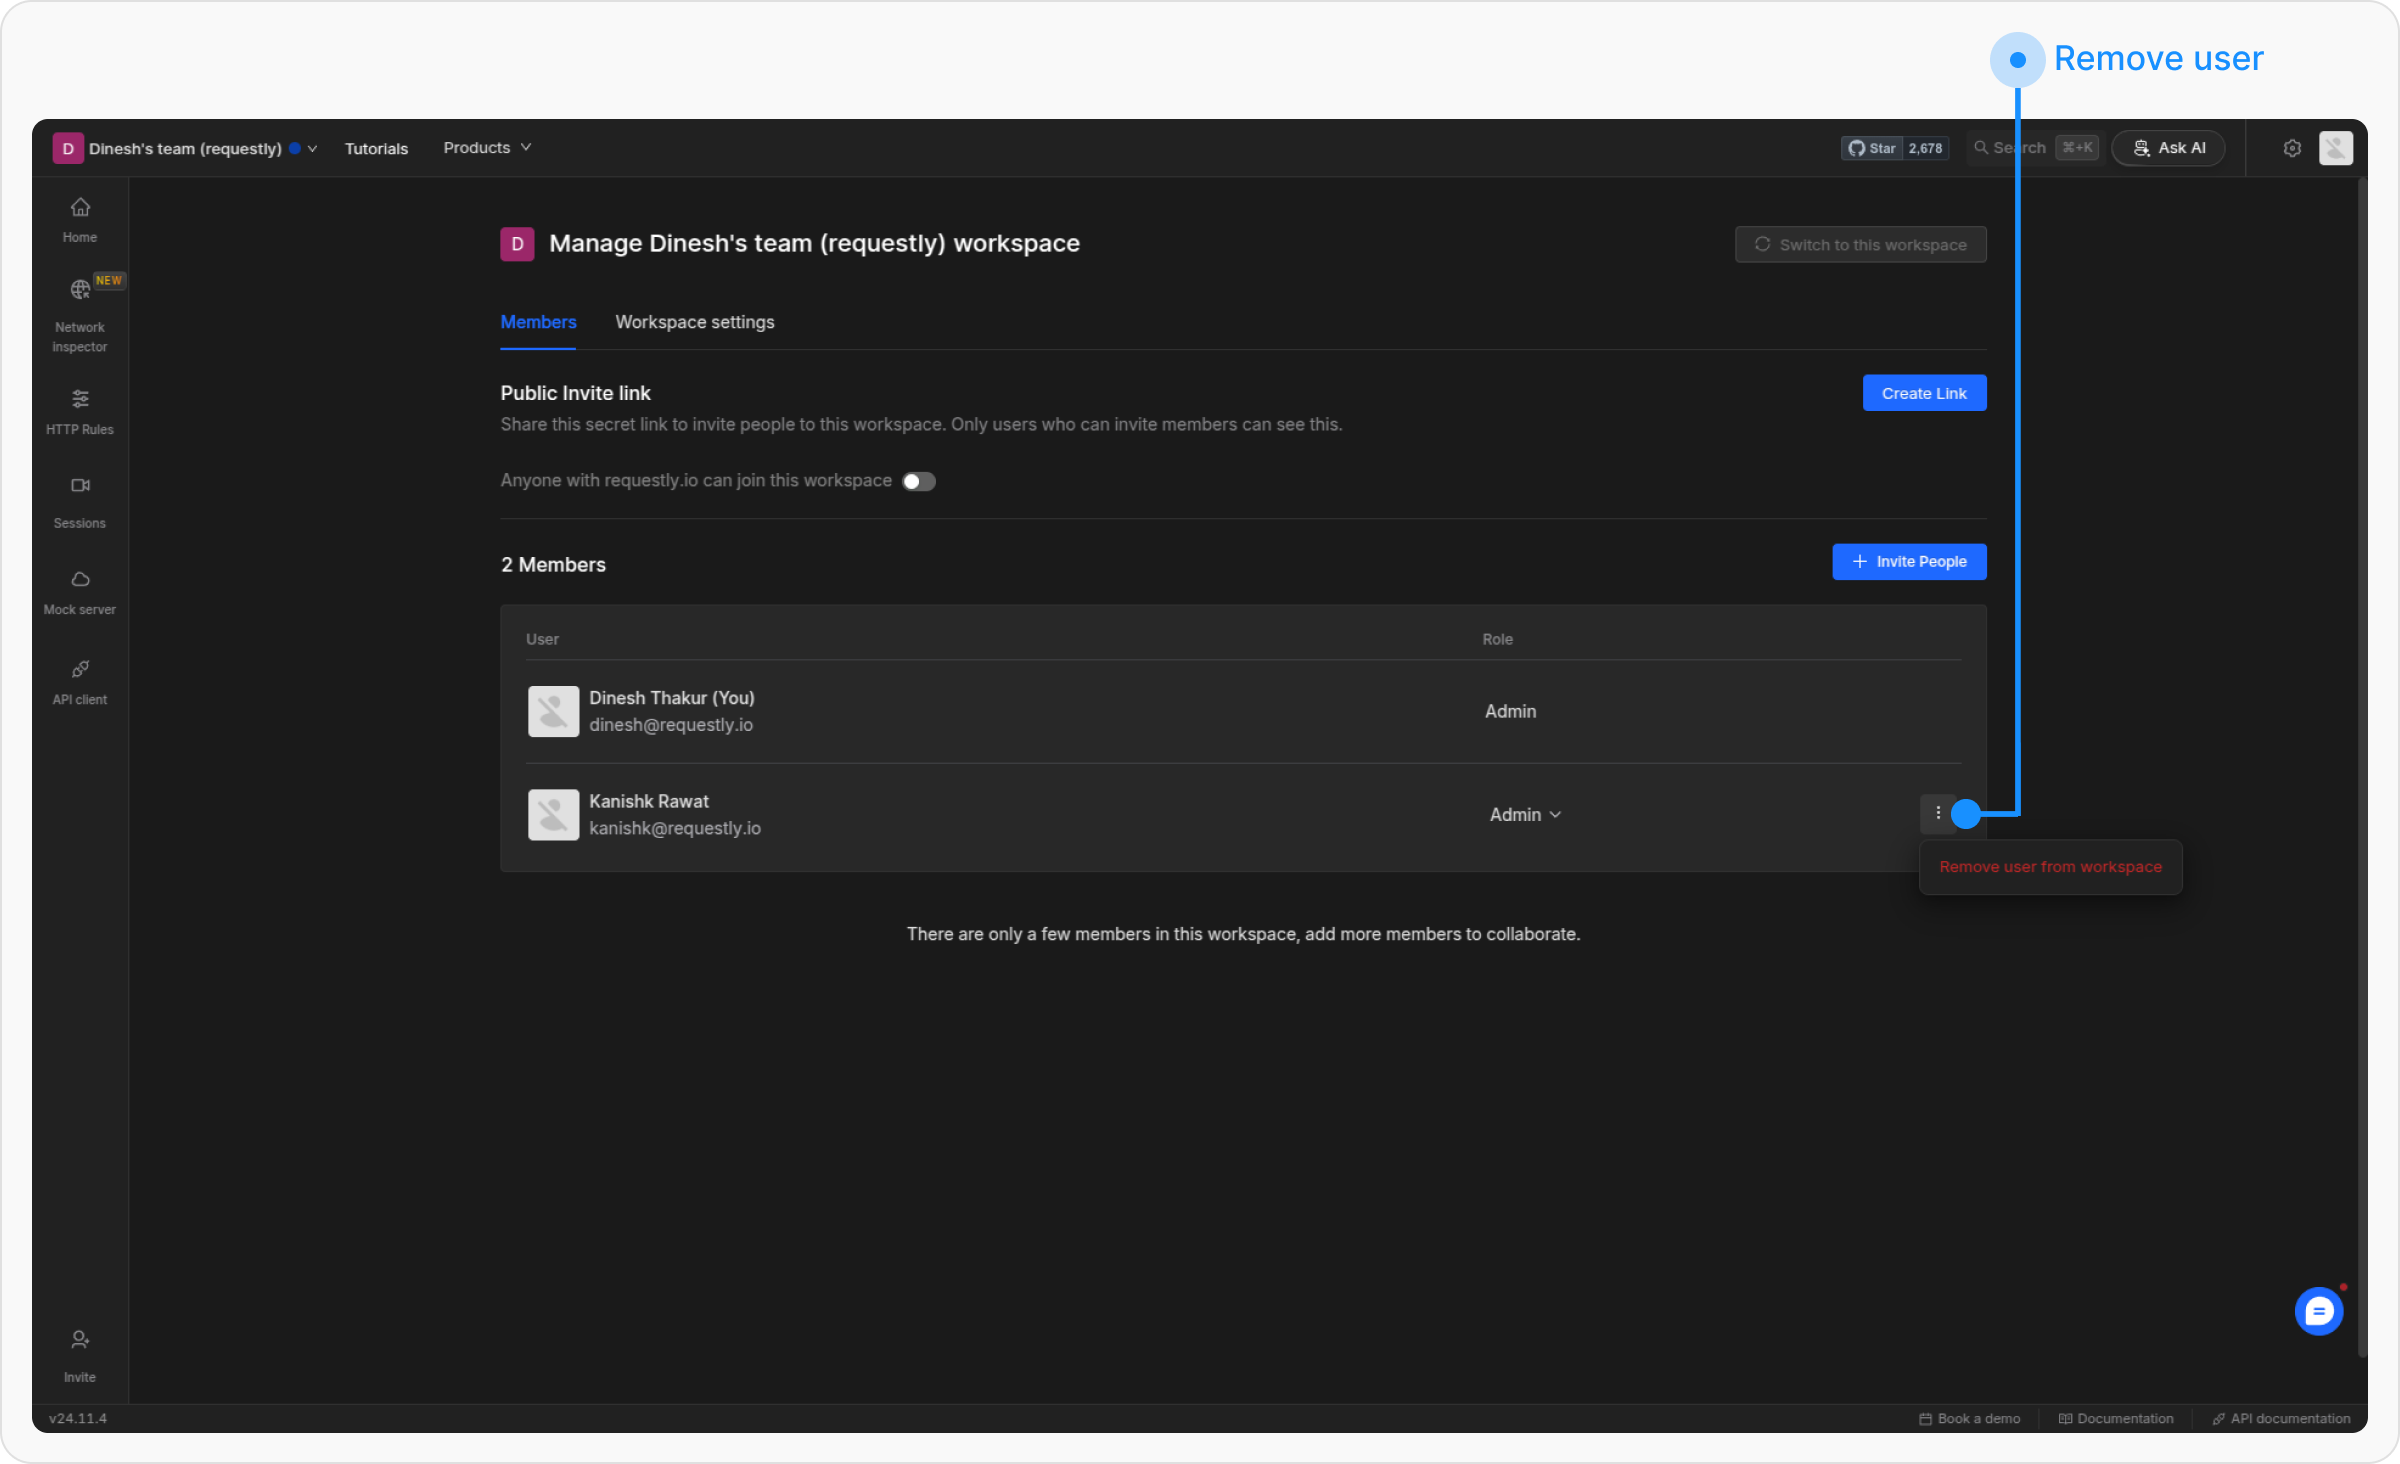
Confirm the removal
A confirmation prompt will appear. Confirm the action to remove the member successfully.