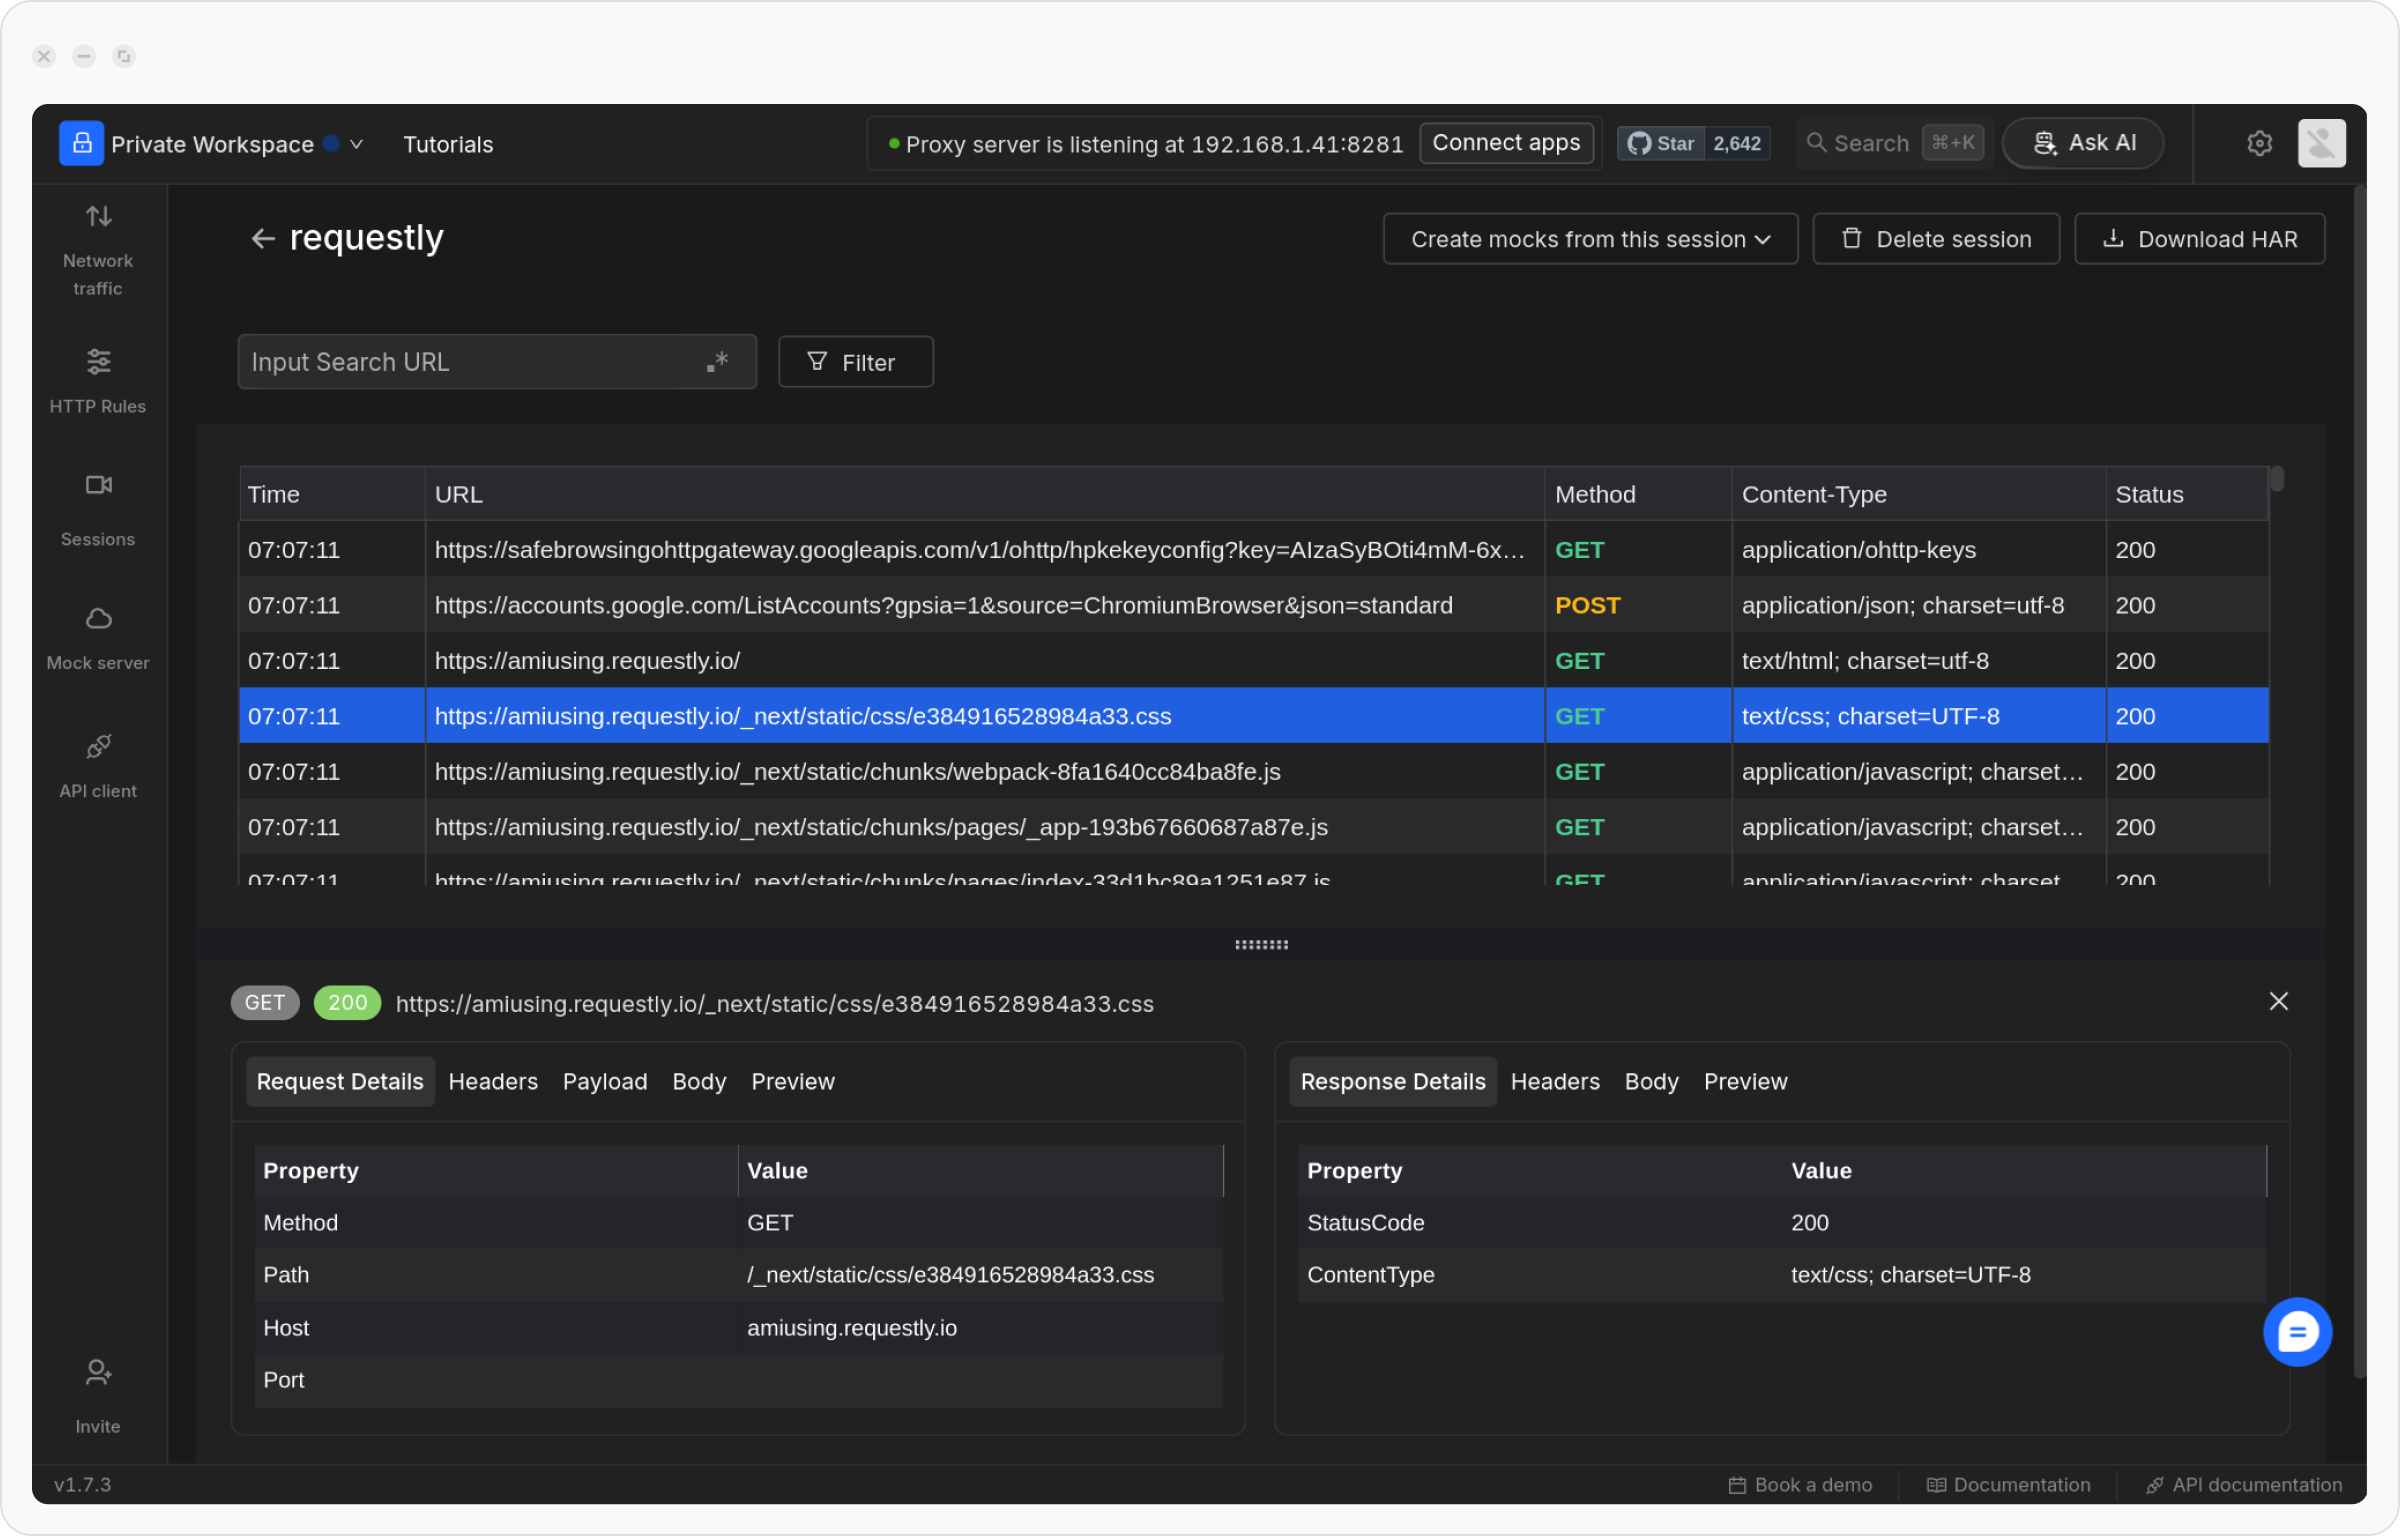
HAR ( HTTP Archive ) files store detailed information about the network requests and responses, including URLs, headers, status codes, and timings. This data is useful for diagnosing issues and analyzing web performance.
How to Generate a HAR File
To capture and analyze network activity, you can generate a HAR (HTTP Archive) file from any browser’s developer tools. Here’s how to create a HAR file using Google Chrome: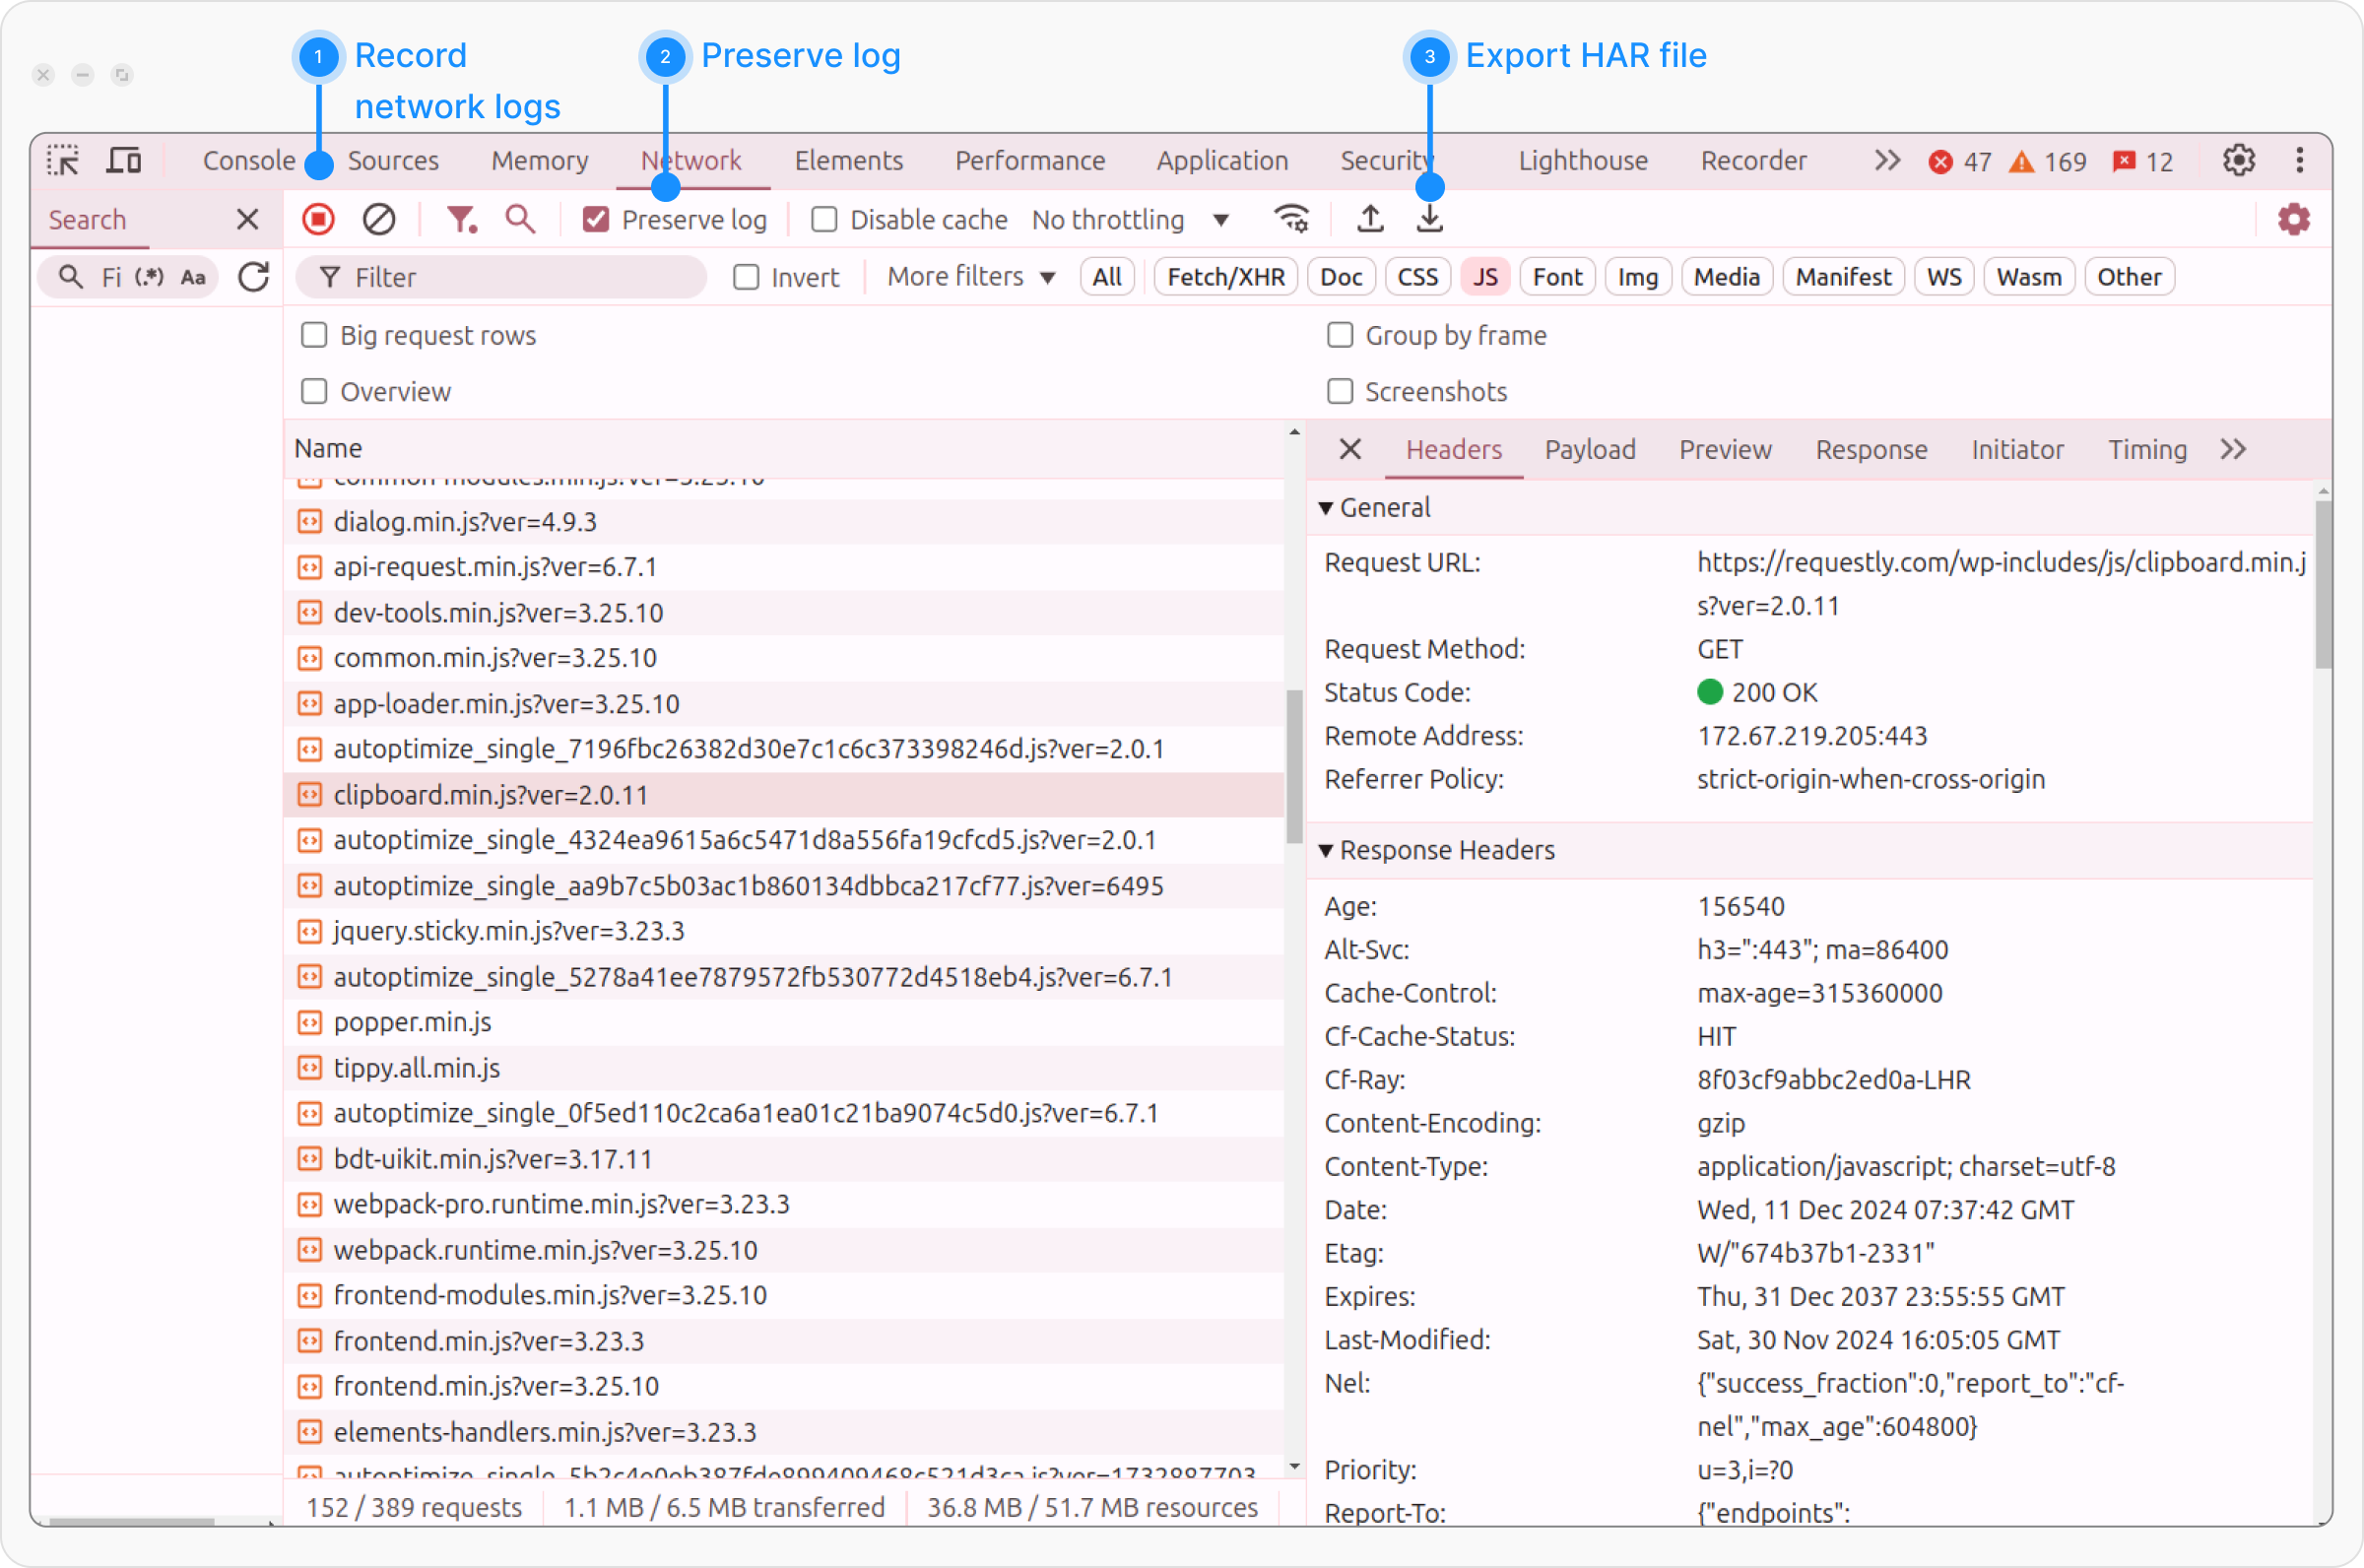
Step 1: Open Google Chrome
Navigate to the webpage you want to analyze.Step 2: Open Developer Tools
Right-click anywhere on the page and select Inspect, or pressCtrl + Shift + I (Windows) or Cmd + Option + I (Mac).
Step 3: Go to the Network Tab
In the Developer Tools panel, switch to the Network tab to begin recording network activity.Step 4: Start Recording Network Activity
Locate the round icon at the top-left of the Network tab:- If the icon is red, recording is active.
- If it’s gray, click the icon to start recording.
Step 5: Perform the Desired Action
Please navigate through the page or reload it to capture the network traffic for the action you’re analyzing.Step 6: Save the HAR File
Once you’ve captured the network traffic, Click the download icon in the Network tab to save the HAR File.Note: If you’re using the Requestly desktop app, you can also export network sessions directly from the traffic table or the Sessions tab.
Export a HAR File from the Requestly Desktop App
You can export aHAR file from captured traffic using the HTTP Interceptor while monitoring browser or app traffic. Follow these steps:
Step 1: Navigate to the Network Table:
Open the Requestly Desktop App and go to the Network Table to begin monitoring traffic.Step 2: Connect an App:
Click the Connect Apps button to establish a connection between Requestly and your app.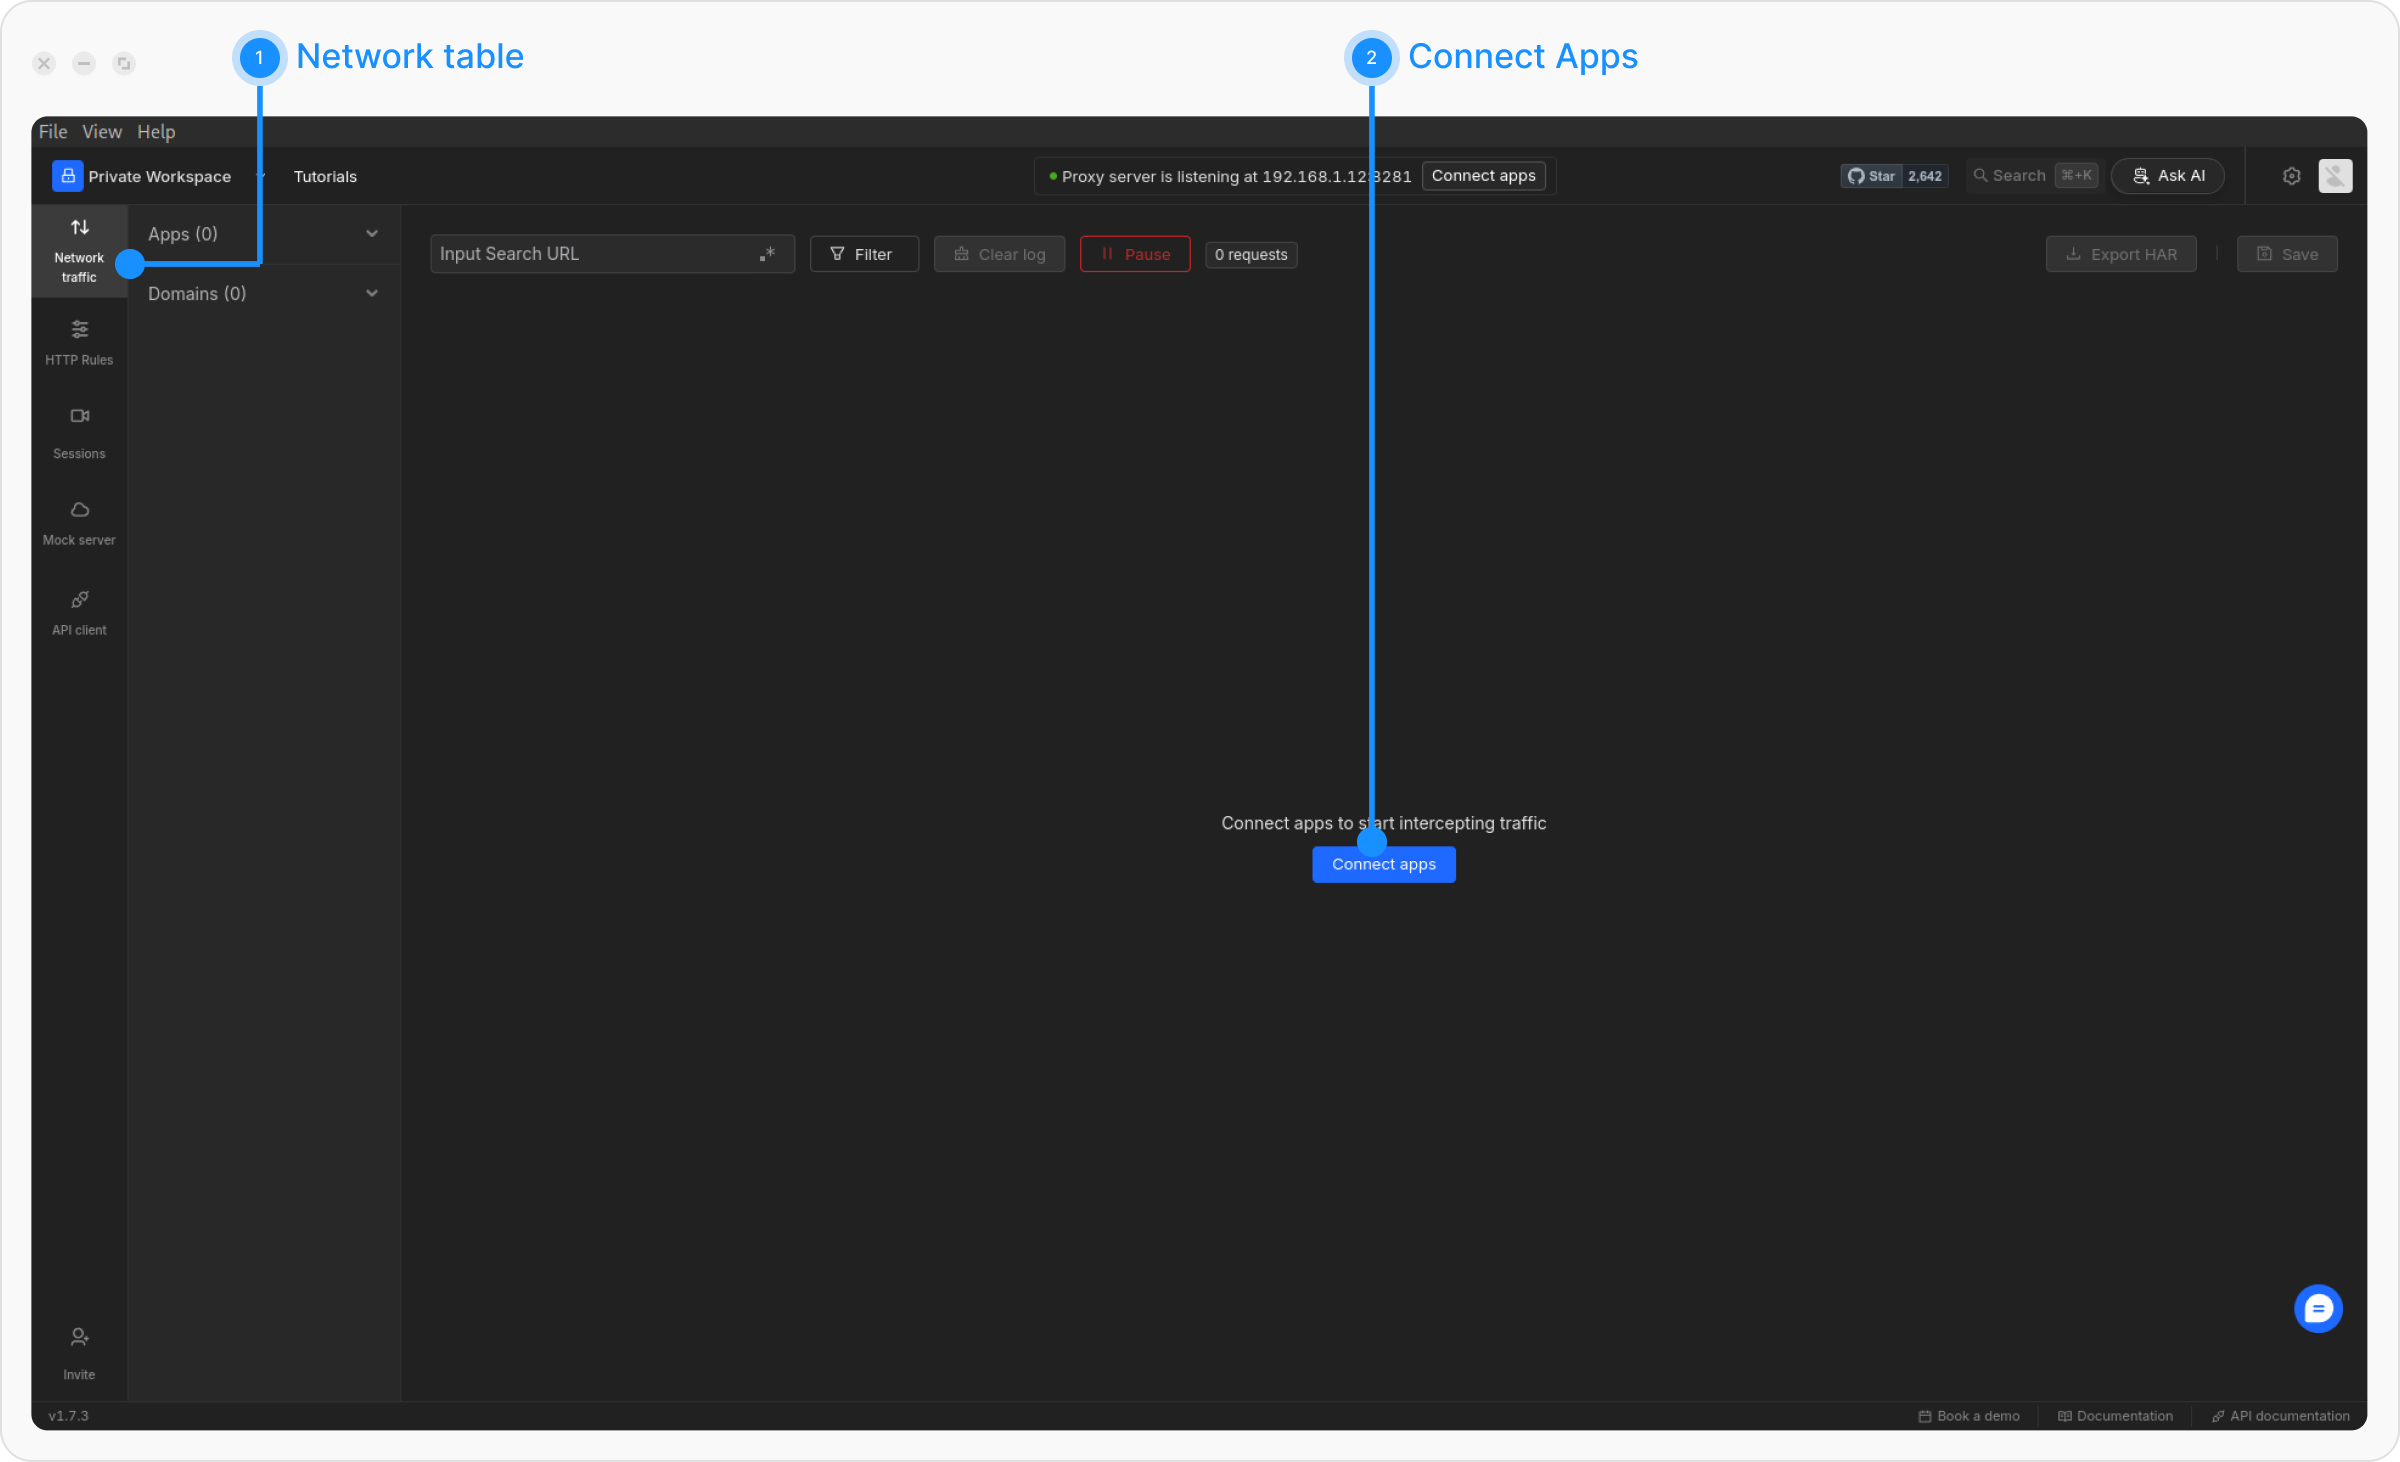
Step 3: Select the Traffic Source:
Choose the source from which you want to intercept traffic (e.g., browser, Android, iOS). For browser traffic, click Open/Launch and follow the on-screen instructions. For mobile traffic, follow the specific instructions for connecting Android or iOS.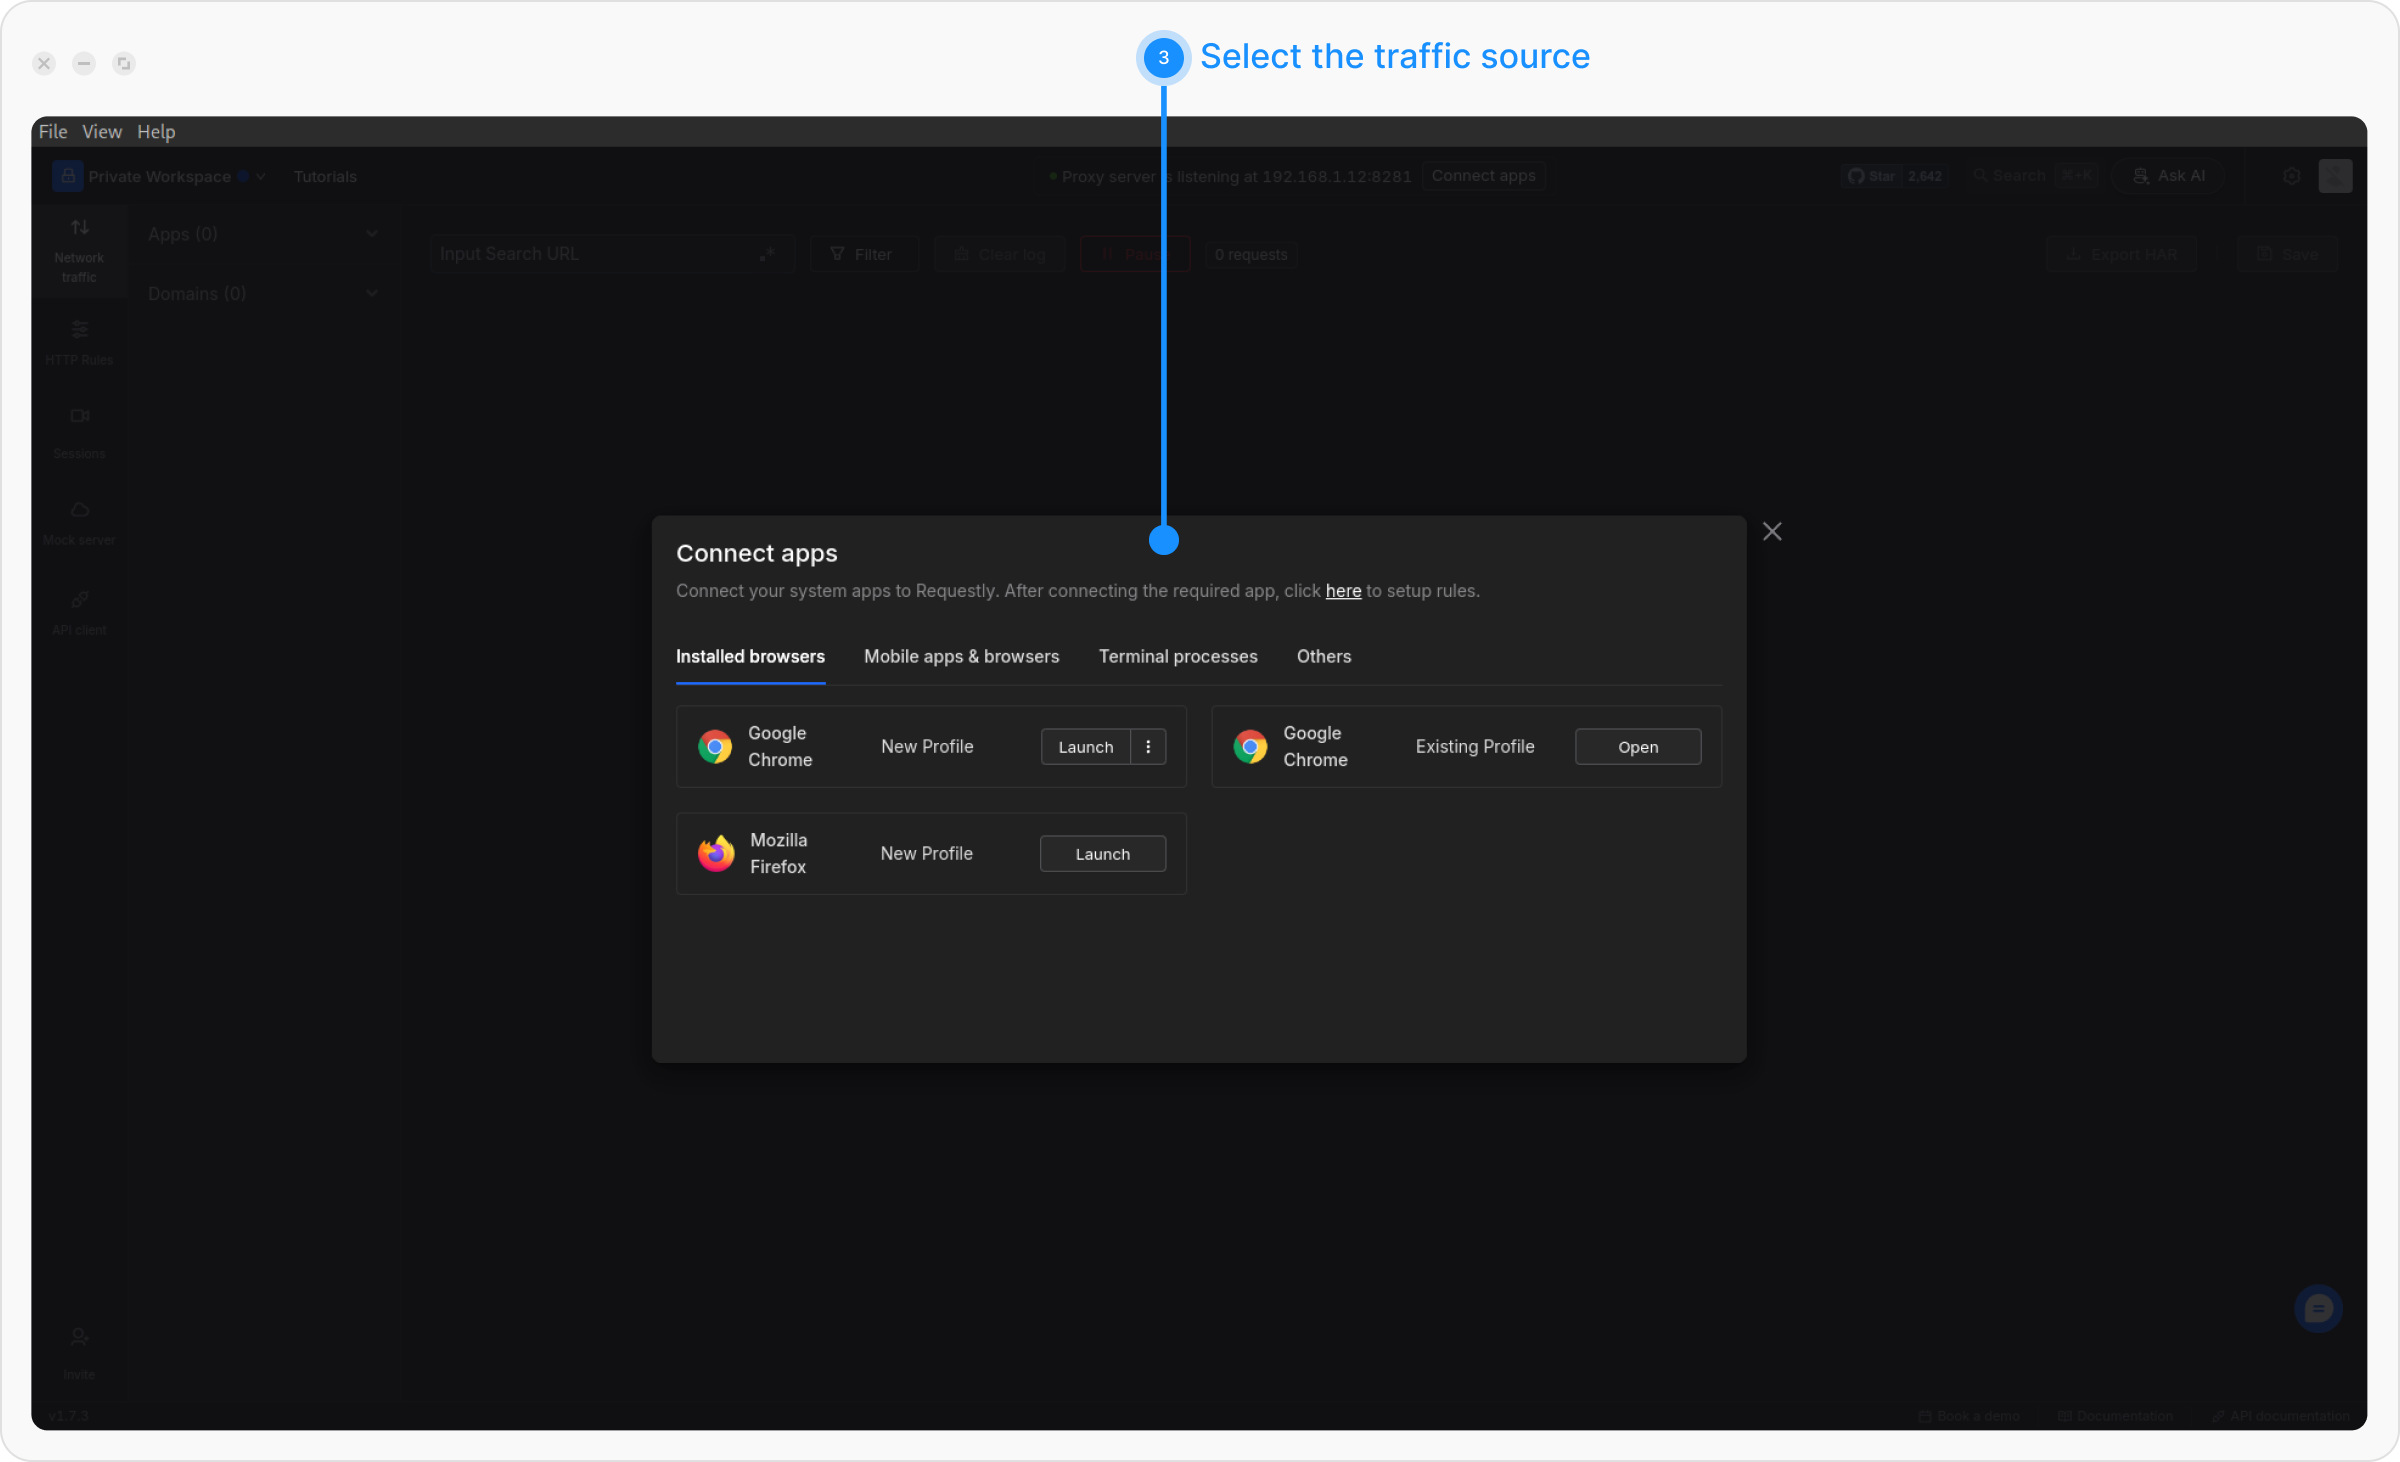
Step 4: Download the HAR File:
Once traffic is captured, you can either directly export the HAR file from the traffic table or save the network session and export it later from the Sessions Tab.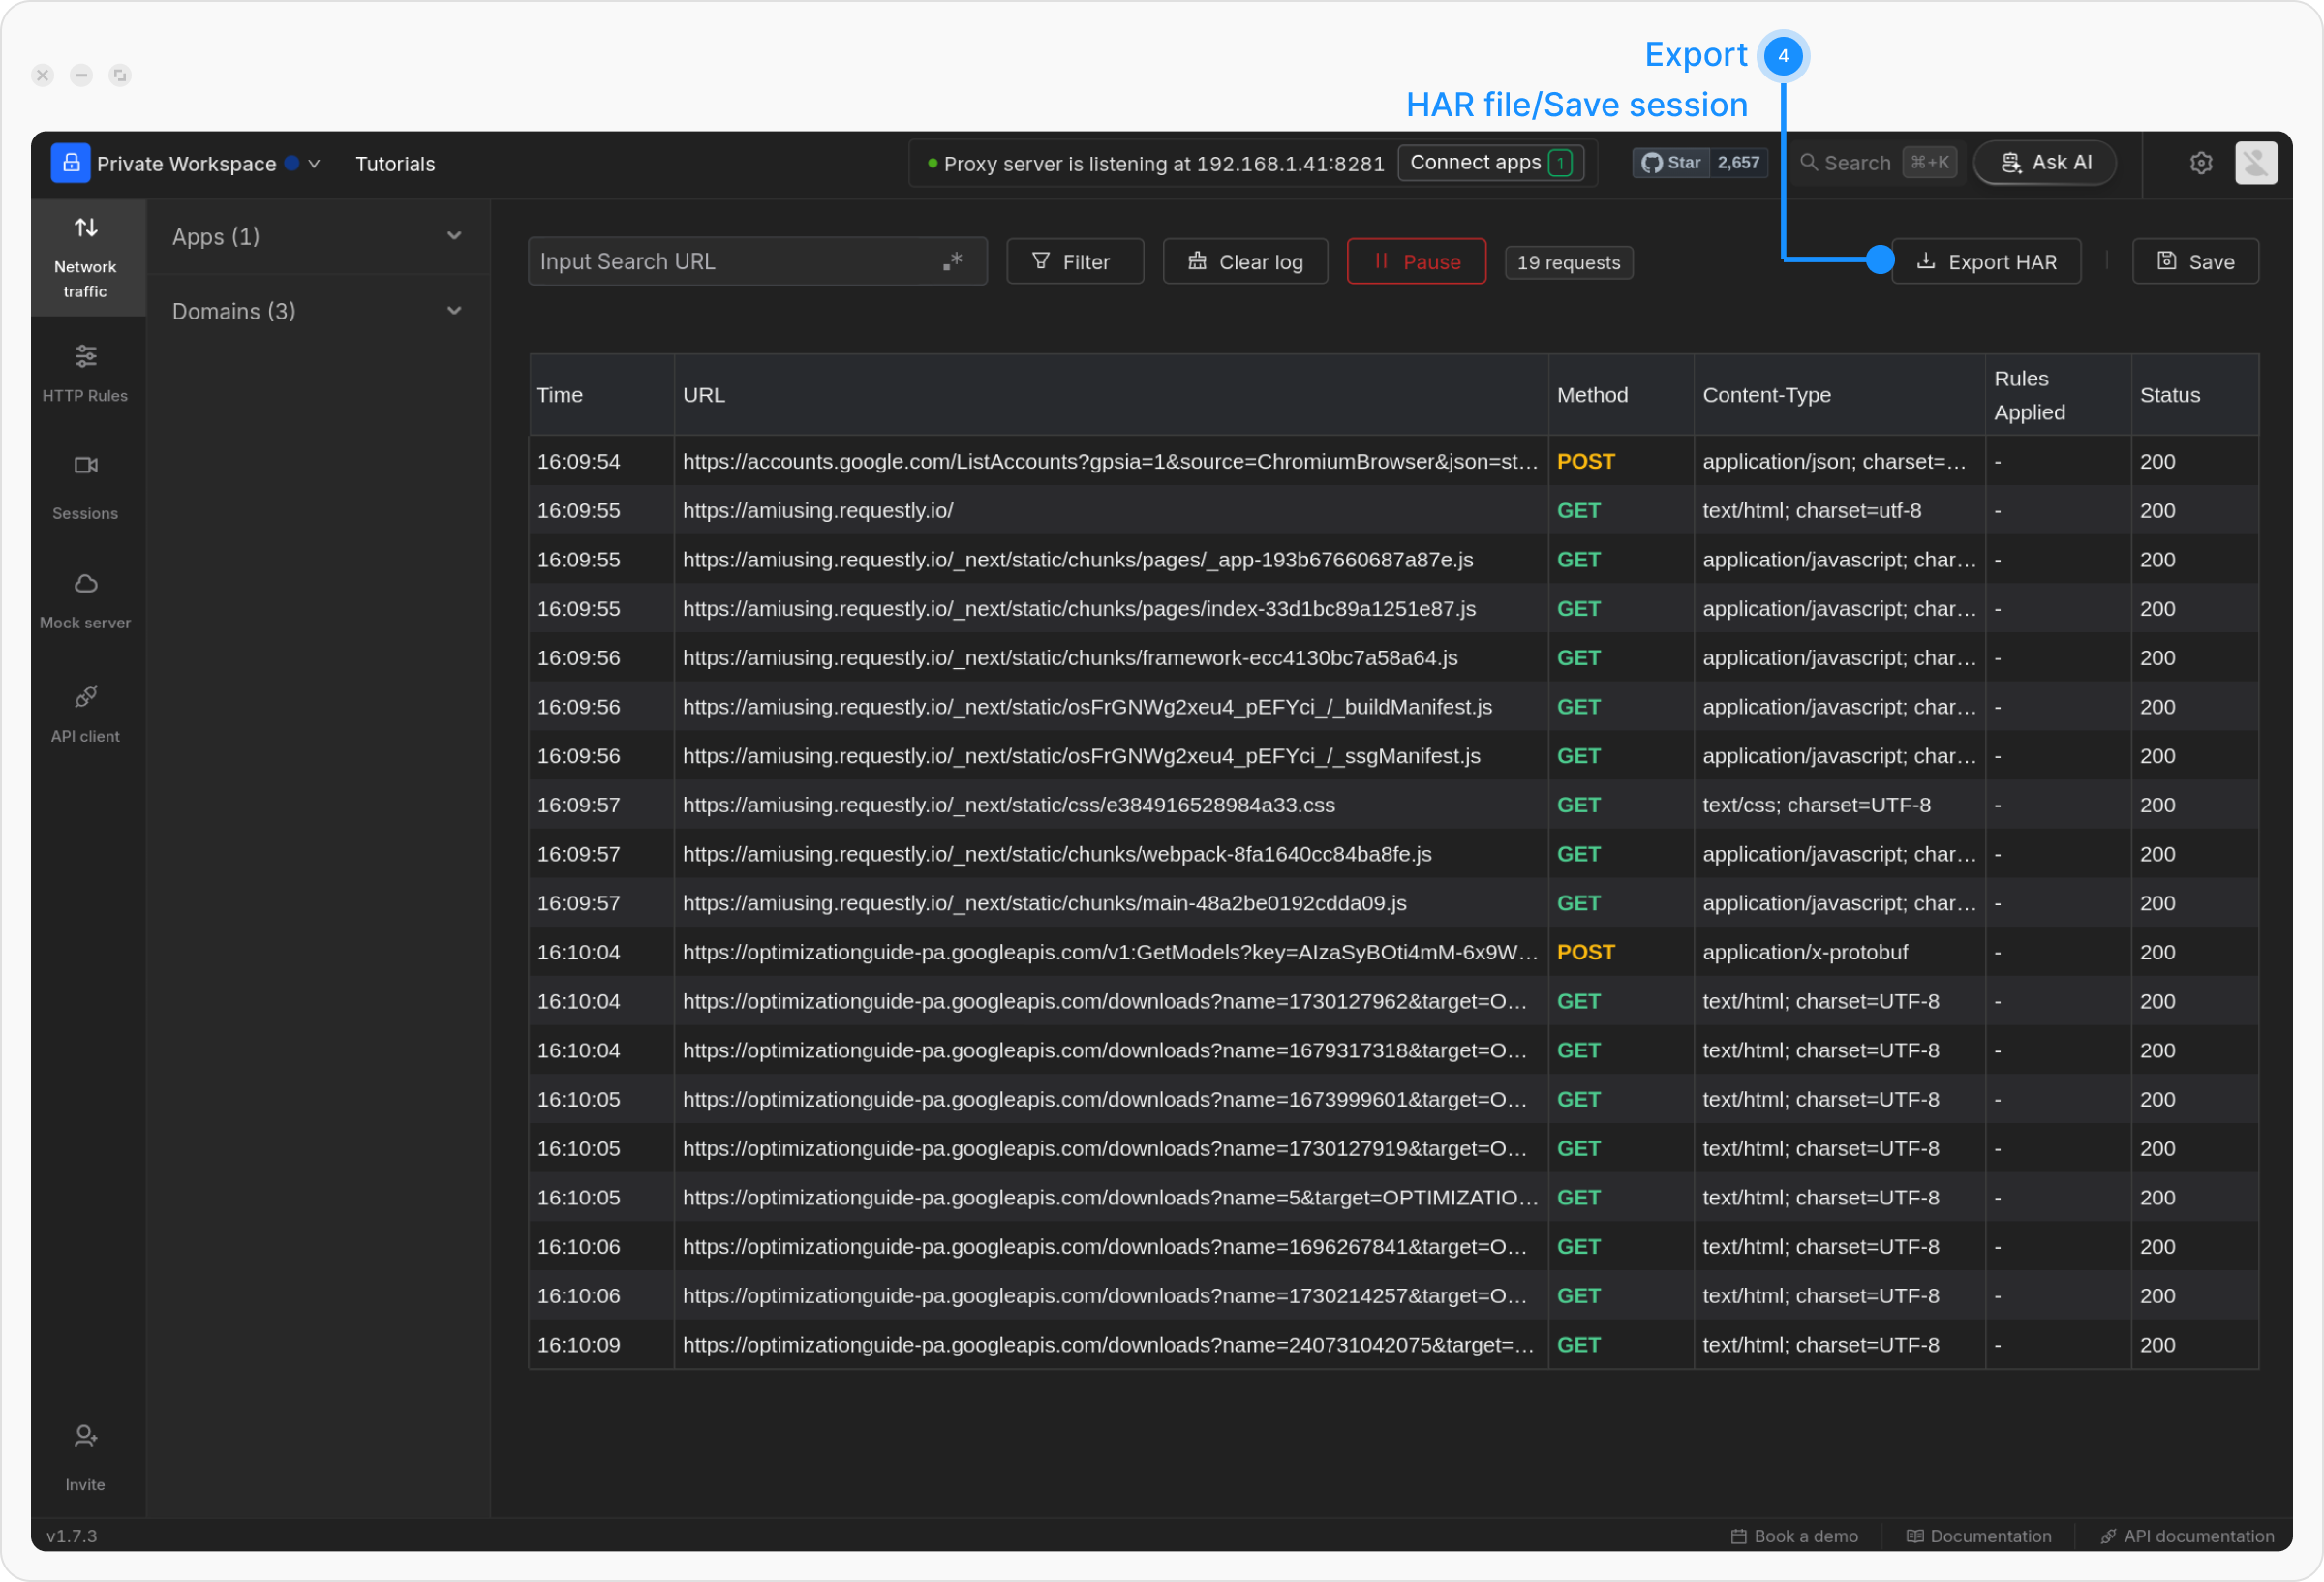
How to Import a HAR File into Requestly
To analyze network activity, you can import a HAR file into the Requestly desktop app: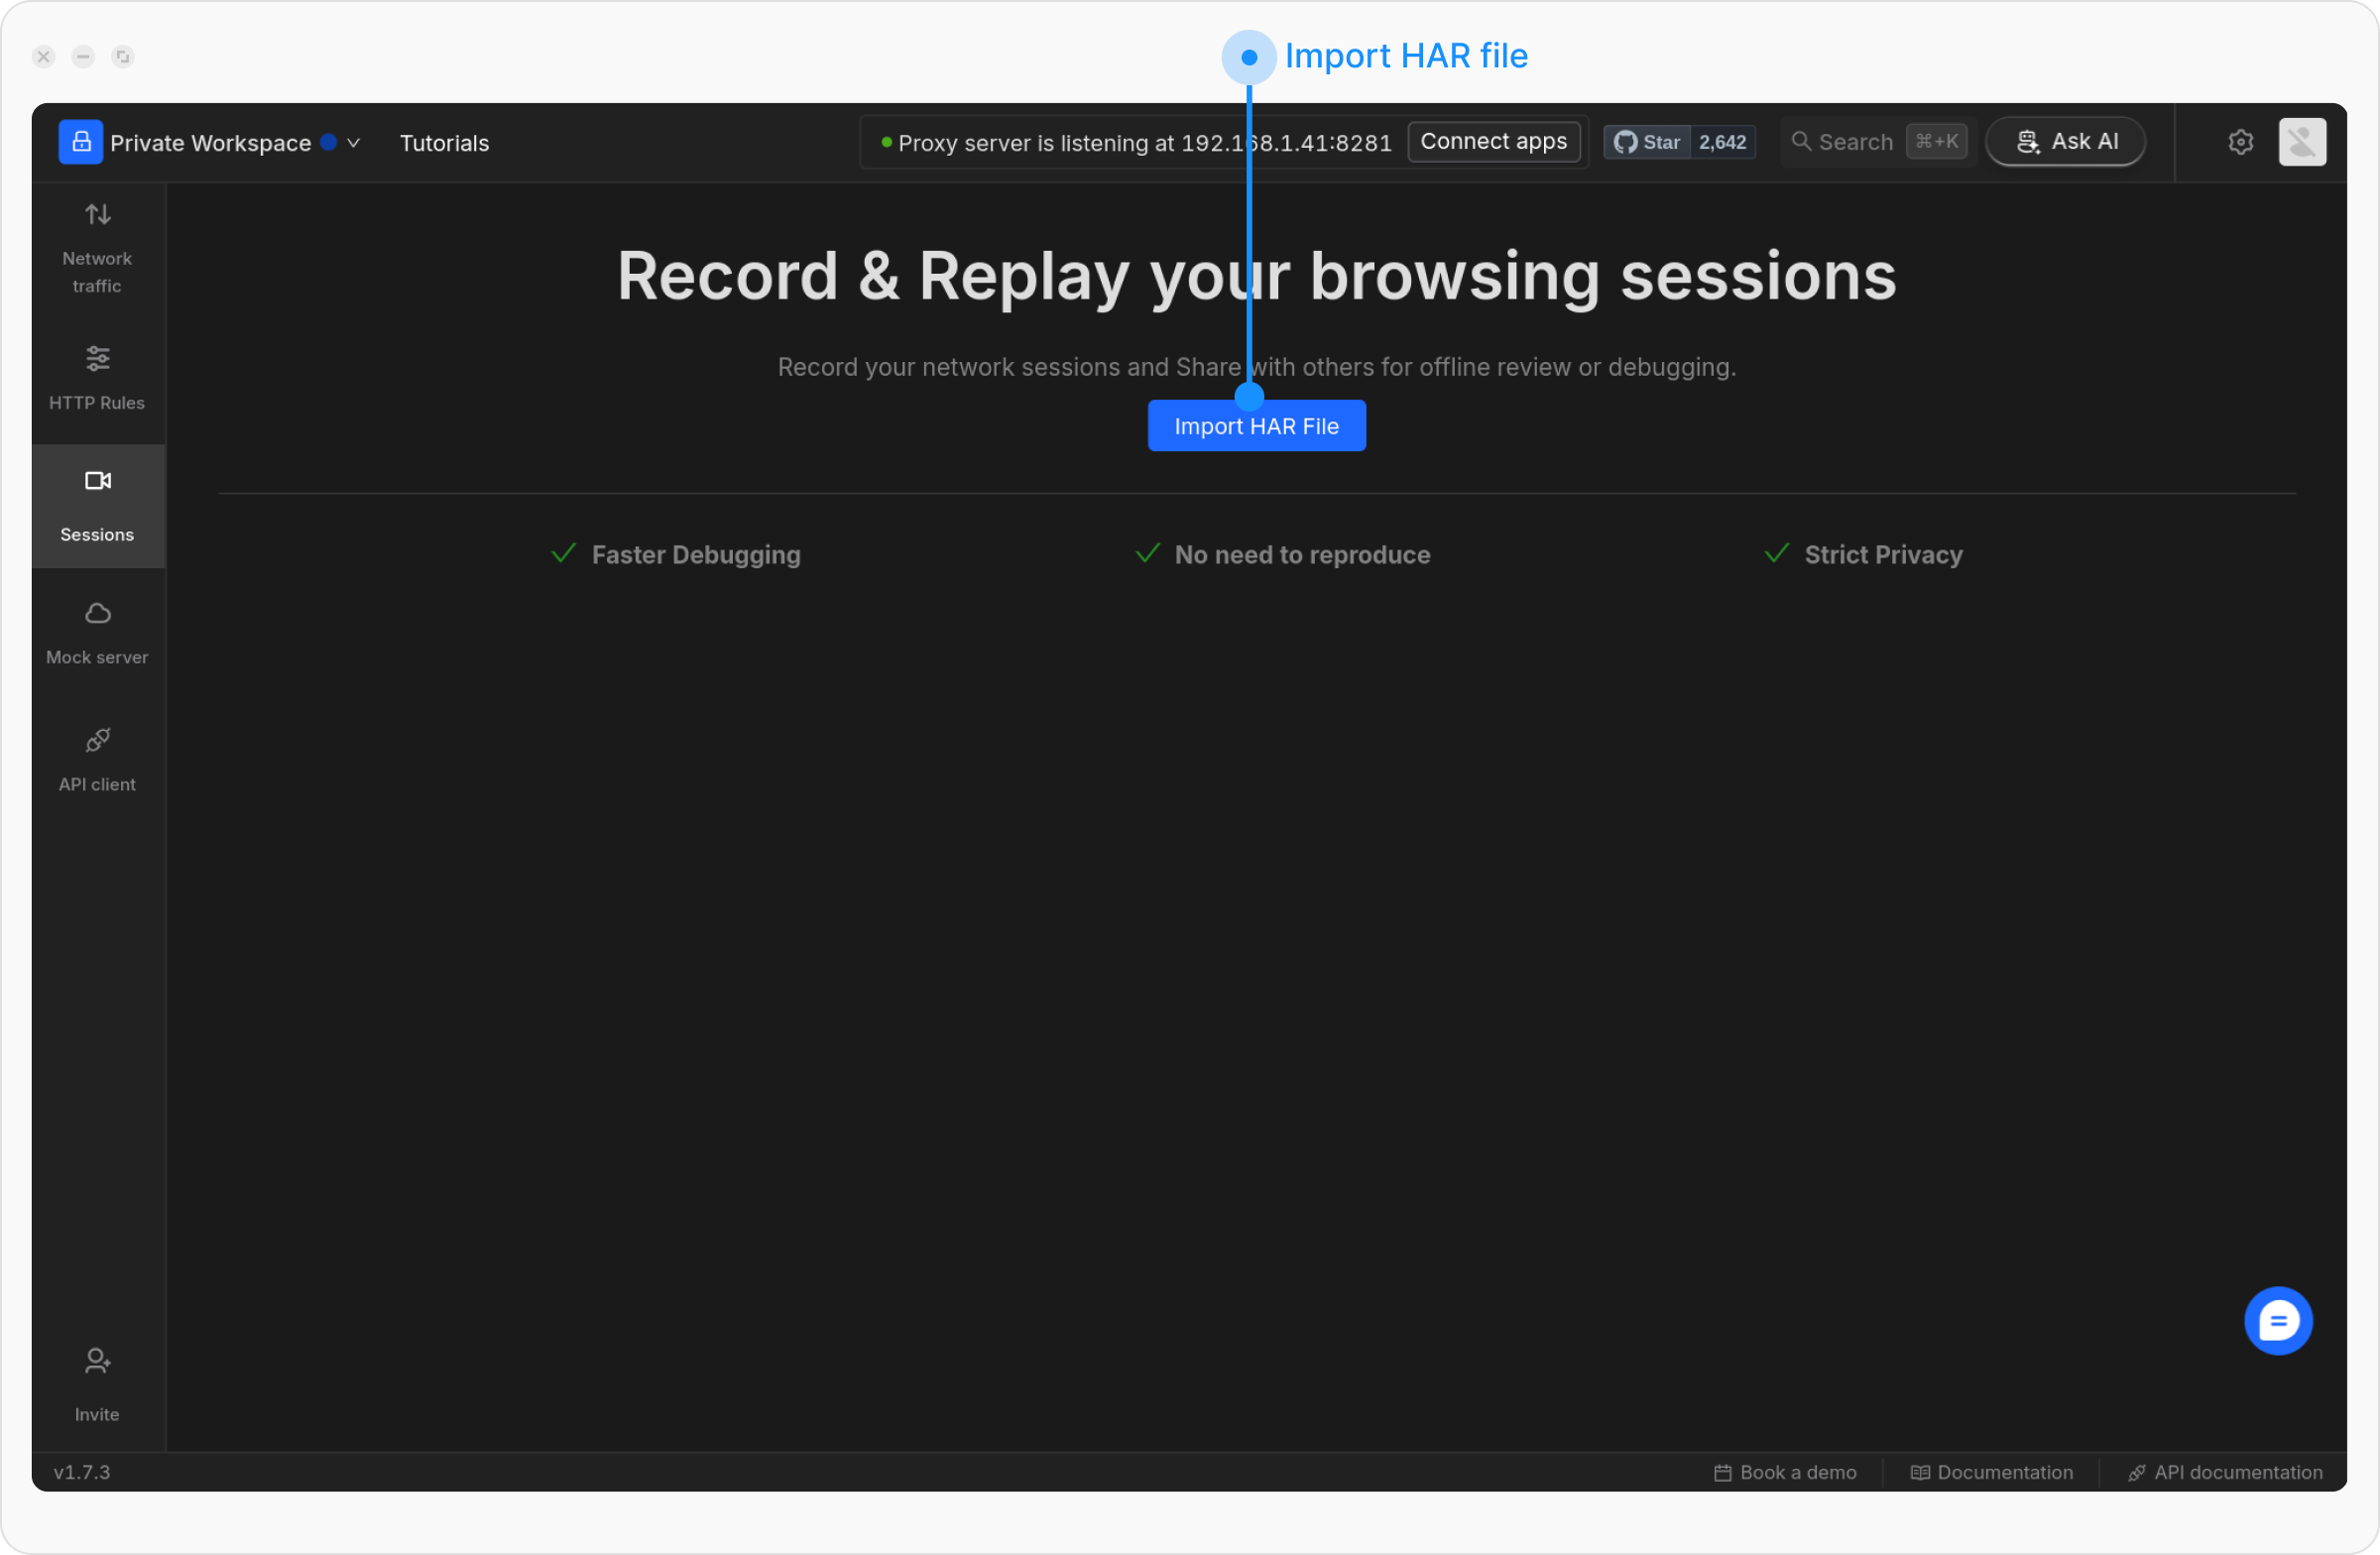
Step 1: Open the Requestly Desktop App
Go to the Sessions tab in the sidebar.Step 2: Click Import HAR File
Click the Import HAR File button to upload your HAR file.Step 3: Select the HAR File
Choose the HAR file from your device to upload. Once you’ve imported the HAR file, you will see an interface like this: