
Availability: Run on CI/CD is rolling out gradually, so if the Run in CLI sub-tab is missing from a collection’s Runner tab, contact support to confirm it is enabled for your account. CLI runs are not available for browser-based projects: open the project in the desktop app, or use a cloud project.
Open the generator
1
Open the collection's Runner tab
In the Collections sidebar, select the collection you want to run in CI, then open its Runner tab.
2
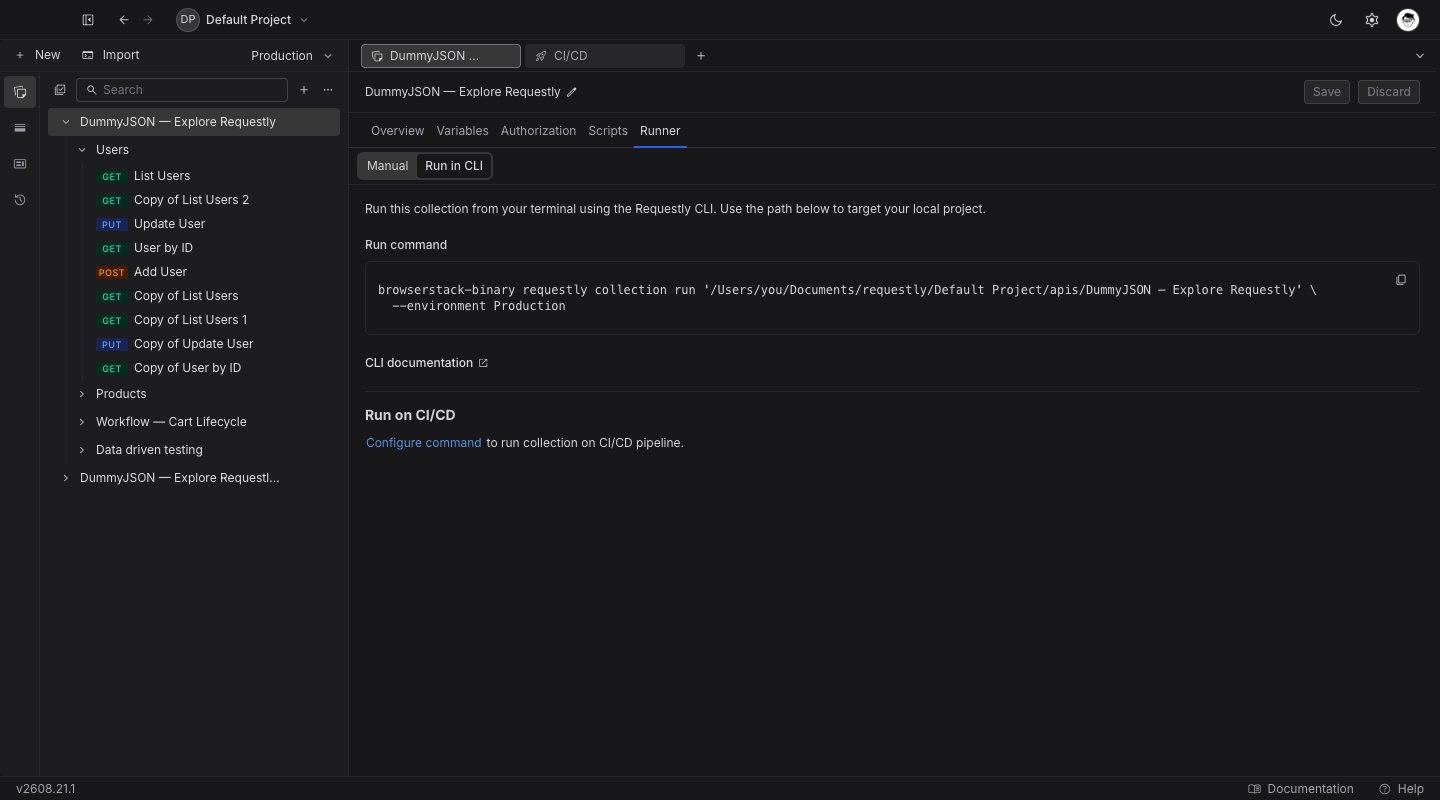
Switch to the Run in CLI sub-tab
The Runner tab has three sub-tabs: Manual, Scheduled, and Run in CLI. Manual is the on-demand Collection Runner and Scheduled holds this collection’s Scheduled Runs. Select Run in CLI.This sub-tab shows the single command that runs this one collection from your terminal. A cloud project also shows the two environment variables the command needs; a local project needs none.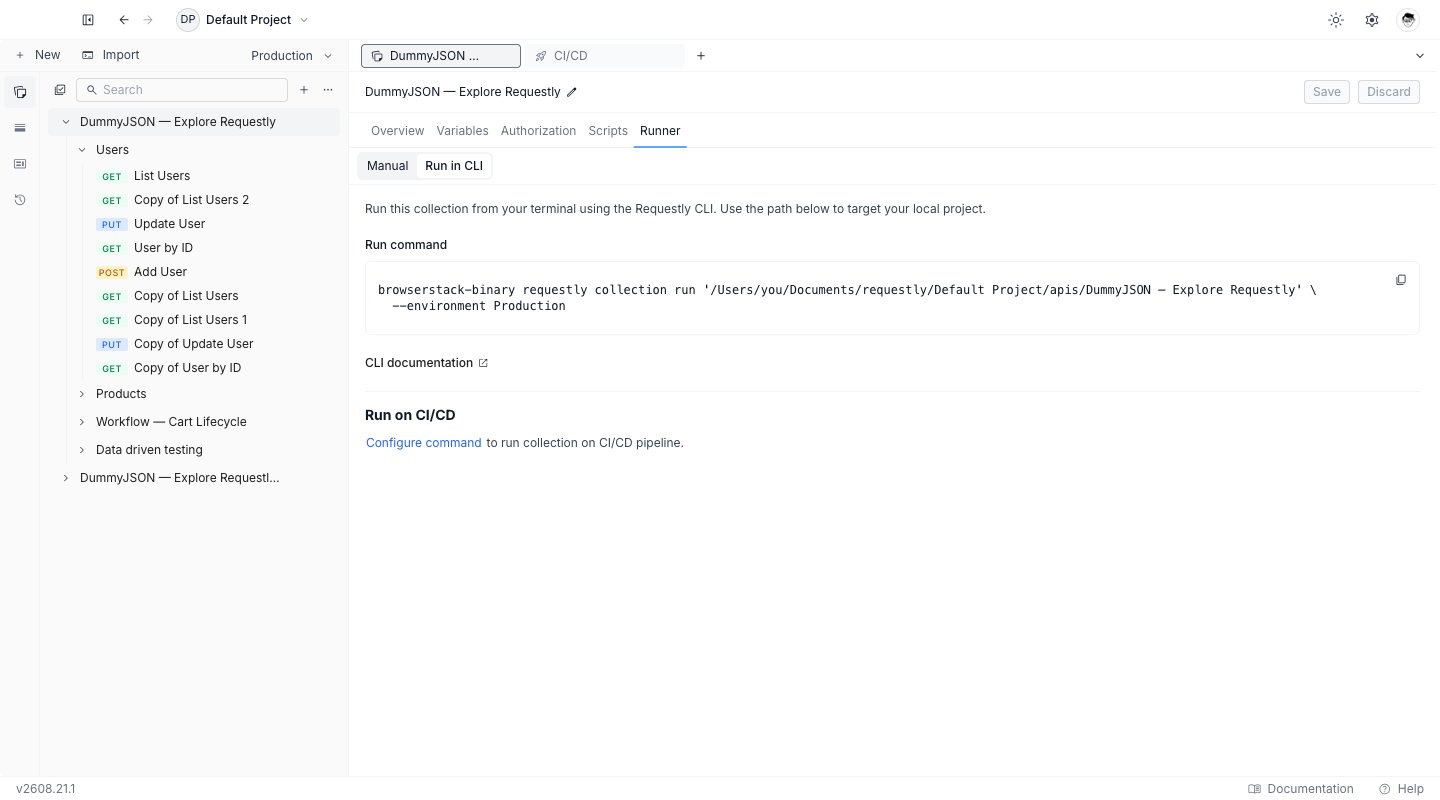
3
Select Configure command
At the bottom of the sub-tab, under Run on CI/CD, select Configure command. The generator opens as its own tab with this collection already filled in as the first row.There is one generator tab per project. Opening it from another collection’s Runner adds that collection to the list rather than opening a second tab.
Configure the file
The generator is a form on the left and a live preview on the right. There is no Generate button: every edit rewrites the file on the right immediately.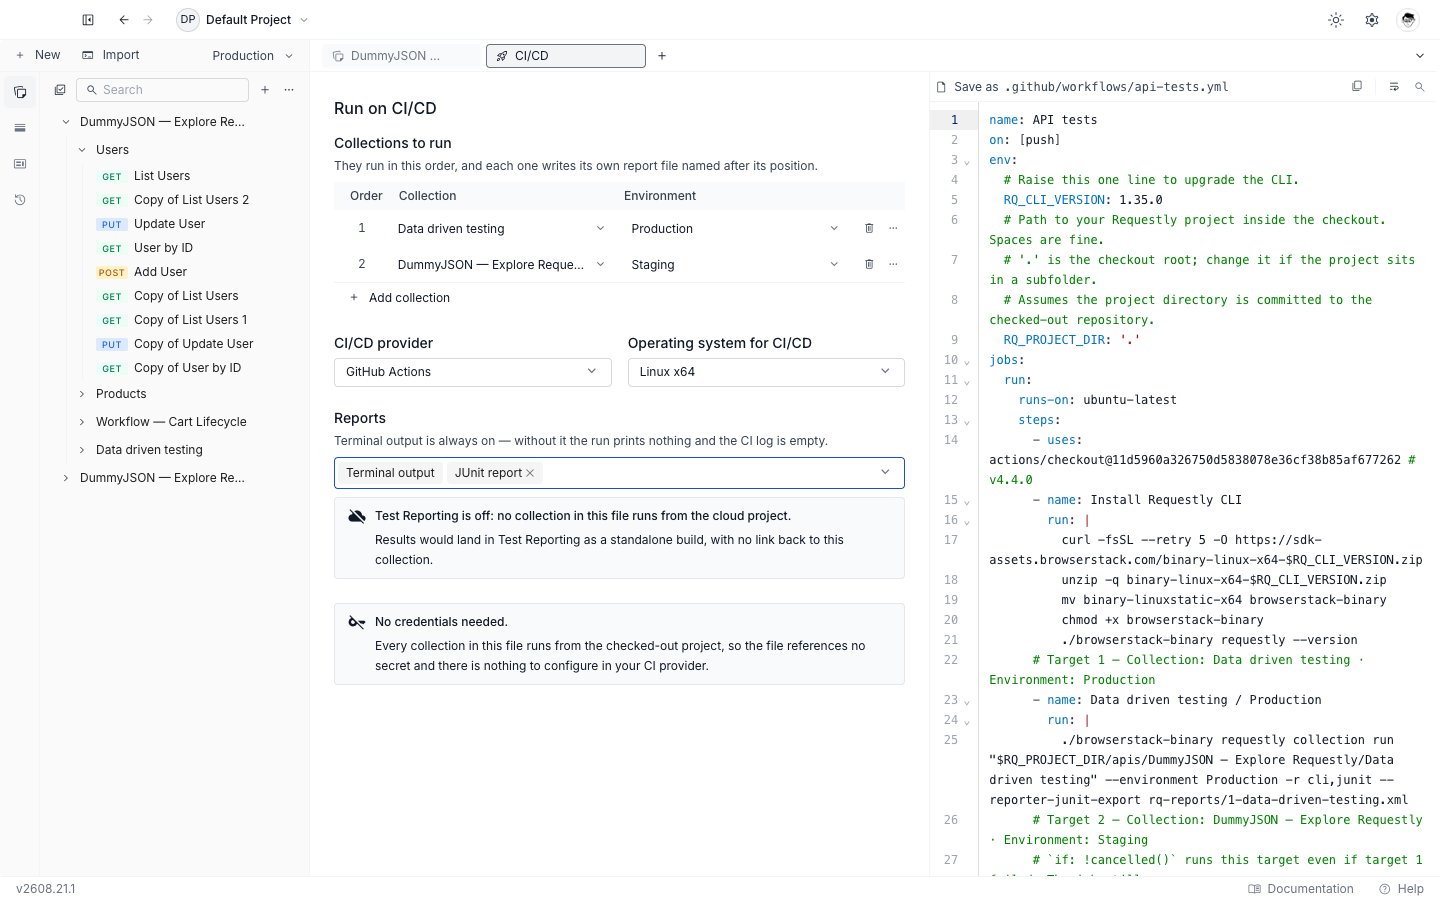
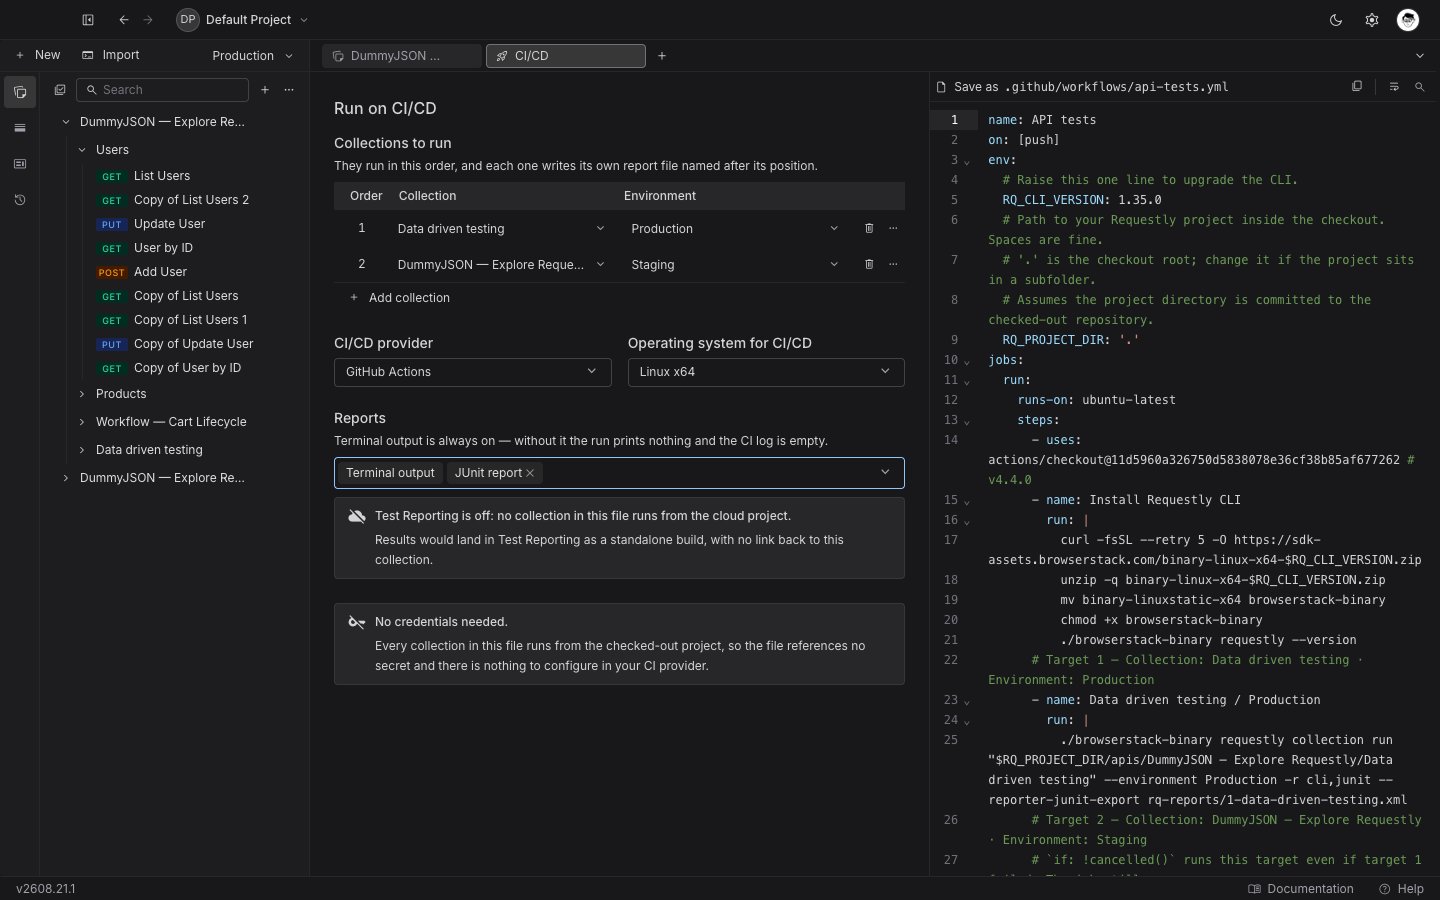
Collections to run
The Collections to run table is the list of targets the pipeline executes, in order. Each row picks one collection and, optionally, one environment.- Add collection appends a row.
- Drag a row by its grip, or use Move up / Move down in the row’s More actions (…) menu, to change the order. The order is the execution order.
- The same collection can appear more than once as long as each row picks a different environment. An exact repeat is refused with “This collection is already in the list with that environment.”
- The list can never be emptied. Removing the last row is refused with “A pipeline needs at least one collection to run.”
$, a backtick, or a backslash. Reopen the project, or rename the folder, then the preview returns.
CI/CD provider
Pick the system that will run the file. Each option also names the path the file belongs at in your repository:
The same path is shown above the preview as Save as, so you can copy the file and know where it goes without switching back to the form.
Operating system for CI/CD
This is the machine your pipeline runs on, not your own laptop. It decides which CLI build the install block downloads, which shell verbs it uses, and which runner the file targets. On GitLab the runner tag is a GitLab.com SaaS tag; on self-managed GitLab, swap it for your own runner’s tag. The options are Linux x64 (the default, and the standard runner image on all four providers), Linux arm64, macOS x64, macOS arm64, and Windows x64.Reports
Reports selects which reporters every target runs with:
Nothing but Terminal output is selected to begin with. Pick at least JUnit if you want results in your provider’s test view; the examples below all have JUnit selected.
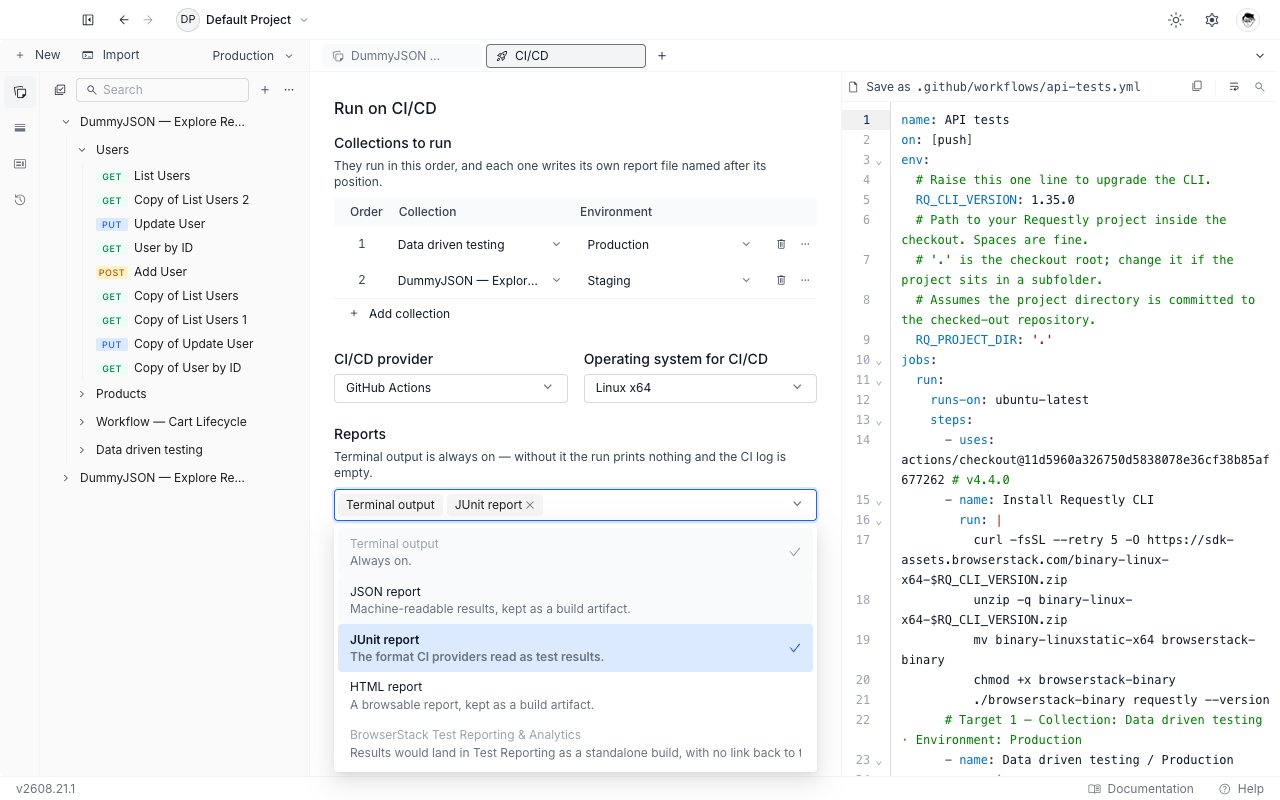
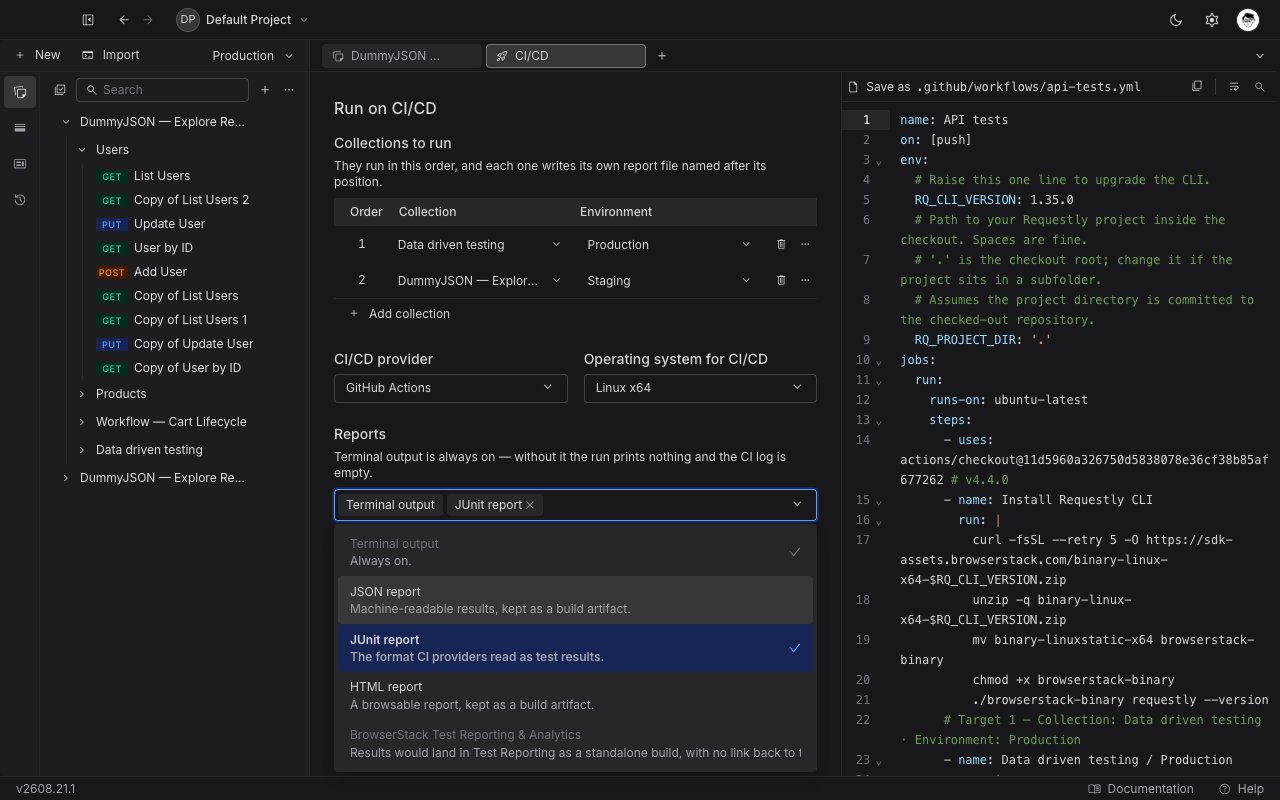
rq-reports/1-checkout.xml, rq-reports/2-payments.xml, and so on. That numbering is what stops two targets overwriting each other’s report.
Credentials
A pipeline that runs cloud collections authenticates with two environment variables,BROWSERSTACK_USERNAME and BROWSERSTACK_ACCESS_KEY. The generated file references them by name and never contains a credential value, so it is safe to commit. You add the values in your CI provider before the first run:
On Jenkins the credential IDs are lowercase and hyphenated, not the variable names.
The access key is your personal BrowserStack credential, so anyone who can run the pipeline runs as you.
In a local project the generator says No credentials needed instead: the collections come off the checked-out repository, so the file references no secret and there is nothing to configure in your provider.
Copy and commit
Use the copy control in the preview toolbar to put the whole file on the clipboard, then save it at the path shown in the Save as label and commit it. The preview is read-only and searchable, so you can review the file before you take it.What the generated file looks like
Every file installs the CLI, runs each target in order, and collects whatever report files you selected. GitHub, Jenkins, and Azure install once and collect once at the end; GitLab makes each target its own job, so it installs the CLI and attaches its reports per job.Every target runs, then the build gates on the aggregate
A failing collection does not stop the ones after it. Each provider reaches that behavior in its own way: GitHub usesif: '!cancelled()', Azure uses condition: succeededOrFailed(), Jenkins wraps each stage in catchError, and GitLab gets it for free because each target is a separate job.
Every target runs even when an earlier one fails, and the build still fails if any target failed. Cancelling the pipeline still stops the targets that have not started.
Where the results show up
How the JUnit report is surfaced depends on the provider:
JSON and HTML reports are kept as build artifacts on every provider. Test Reporting & Analytics uploads instead of writing a file, so it produces no artifact step at all.
With
@requestly/cli 1.1.6 and earlier, a request that fails at the transport layer (an unreachable host, a DNS failure) reddens the build through the run’s exit code but does not appear in the Azure Tests tab. For those, read the build log. Later releases report it as an errored test case, so it appears in the Tests tab.
Local projects
When your project is a local, Git-backed project, the generated file targets collections by path inside your checkout instead of by cloud ID. Three things change:- The file declares an
RQ_PROJECT_DIRvariable, defaulting to.(the checkout root). Change it if the Requestly project lives in a subfolder. - Each target’s positional argument becomes
"$RQ_PROJECT_DIR/<the collection's folder, relative to your project root>", quoted so folder names with spaces still resolve to one path. - Environments are matched by name rather than by ID, because the CLI reads local environments from their filenames.
Local target, GitHub Actions
What’s Next?
Requestly CLI
Every flag the generated file uses, plus the
.requestlyrc file for shared defaults.Collection Runner
Set the iterations and delay each target inherits, and check the run before you commit it.
Write Tests
Add the assertions that decide whether your pipeline passes or fails.