Go to the File Server in Requestly Interceptor Dashboard
From the Requestly Interceptor dashboard, click on “Files” in the left menu bar.
Click on "New file" or upload a JSON file directly.
This allows you to start creating a new JSON or import an existing JSON file.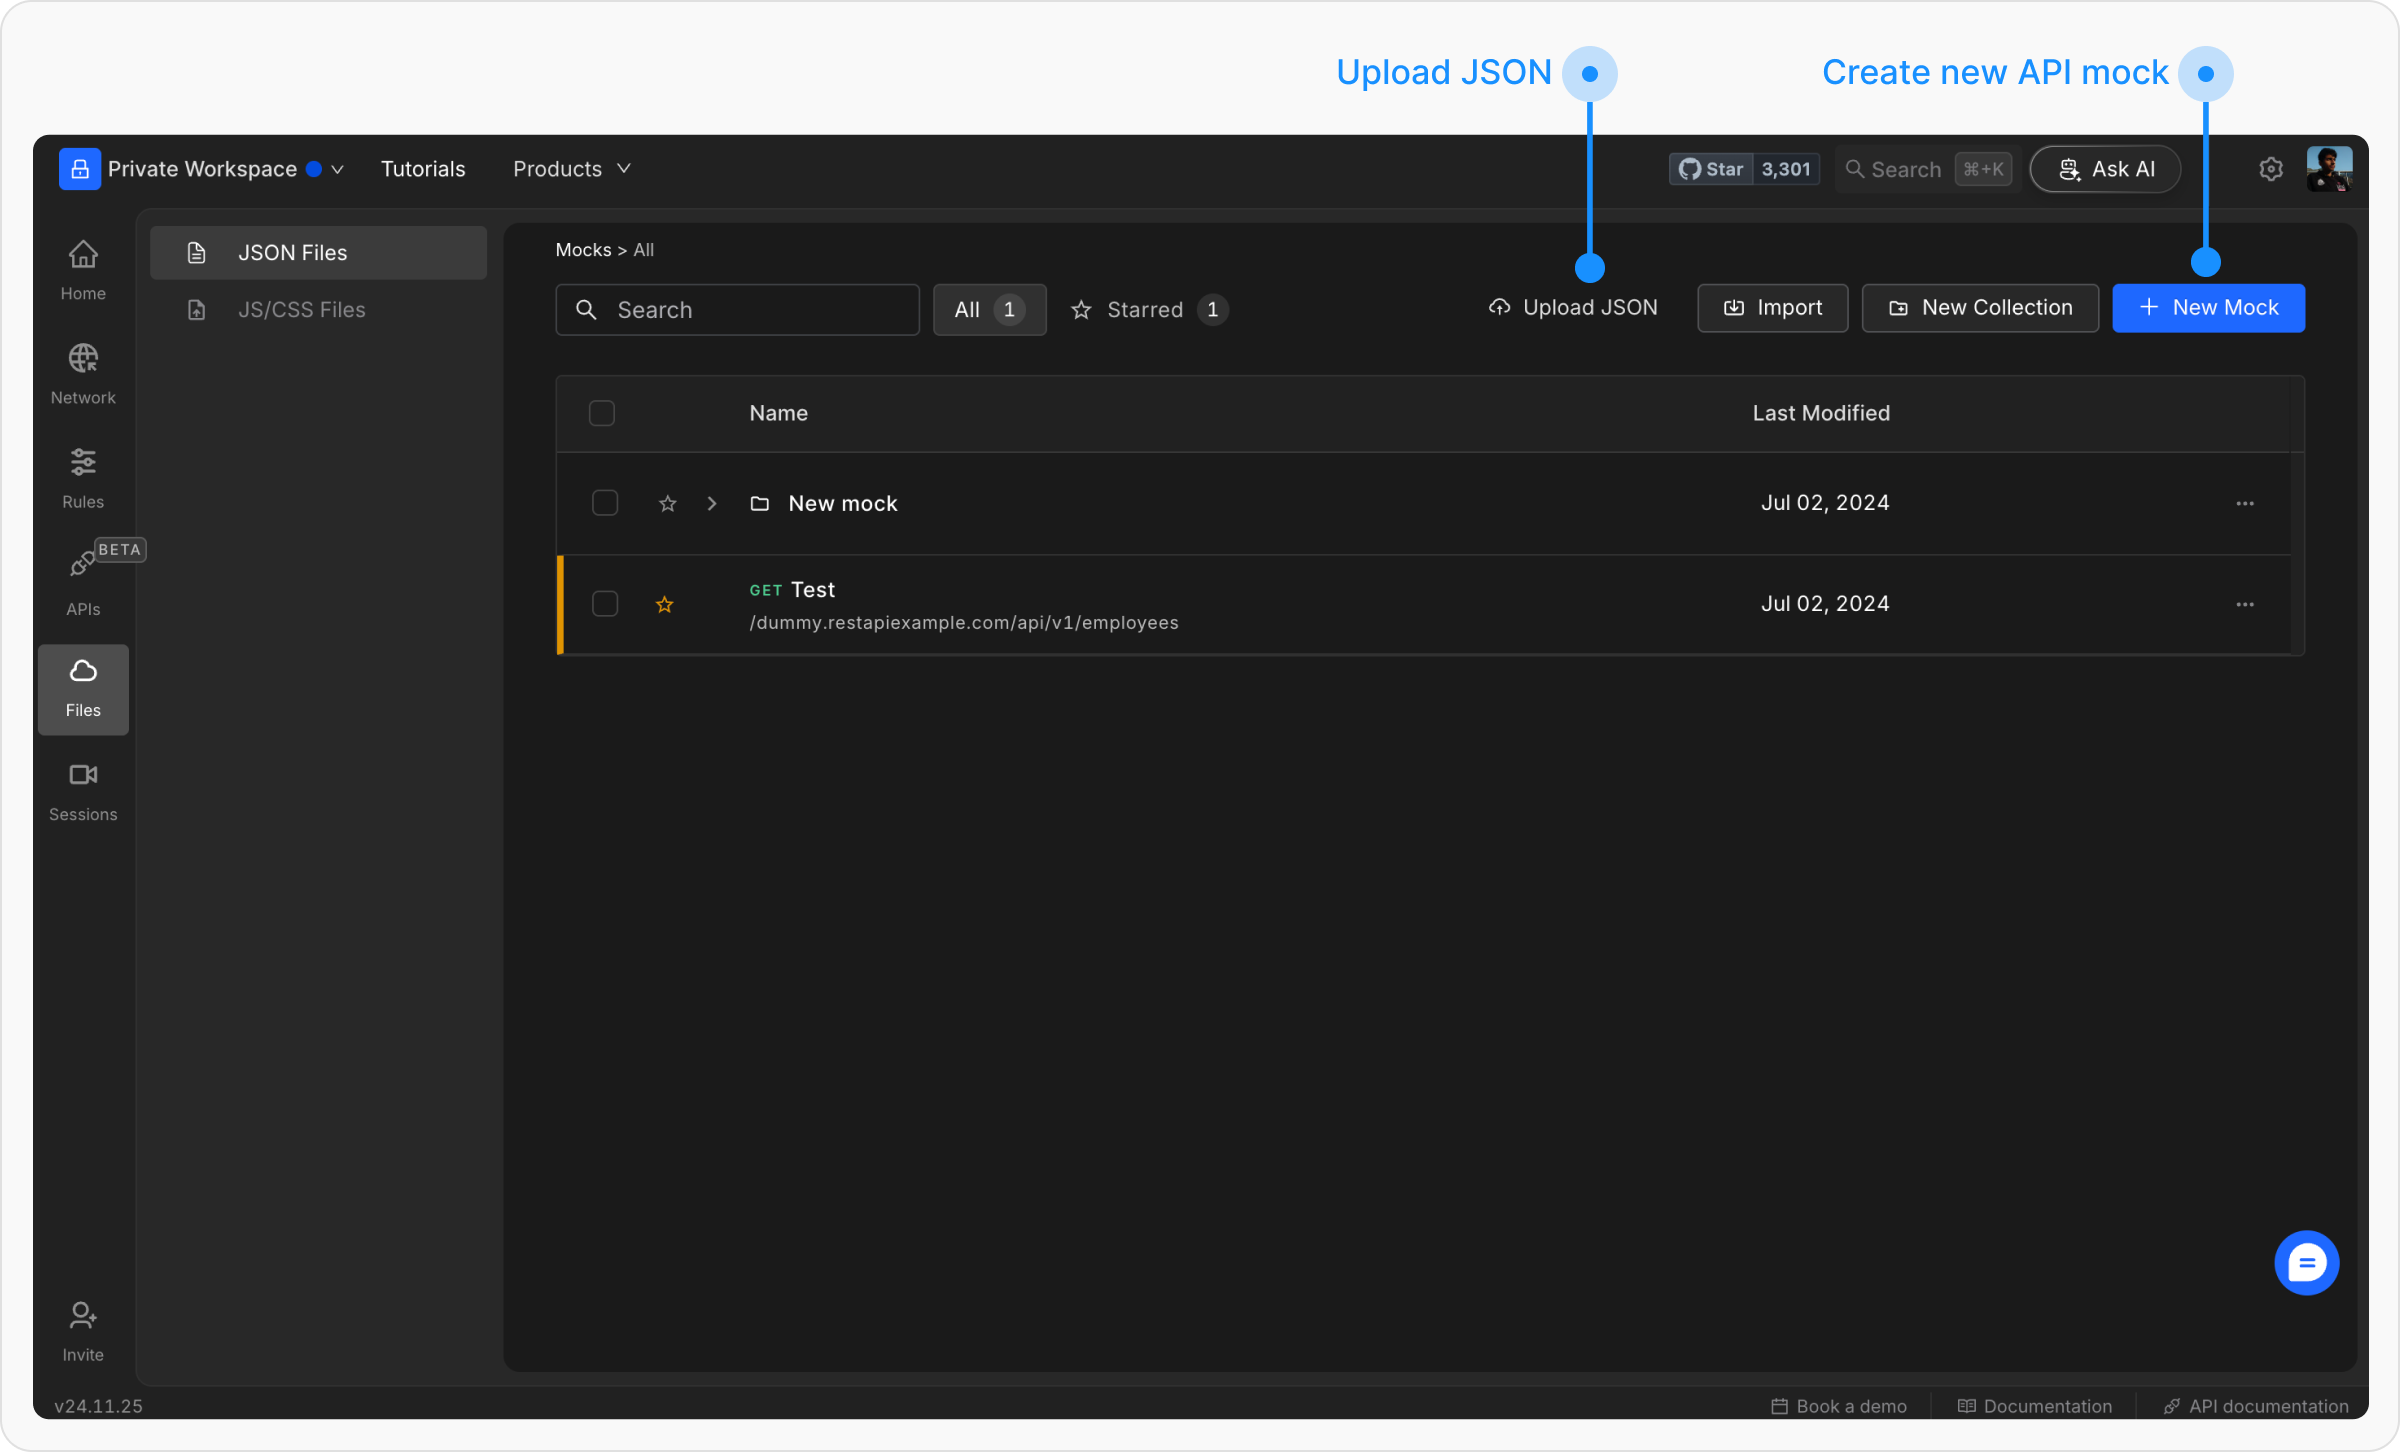
Enter the details for the New File.
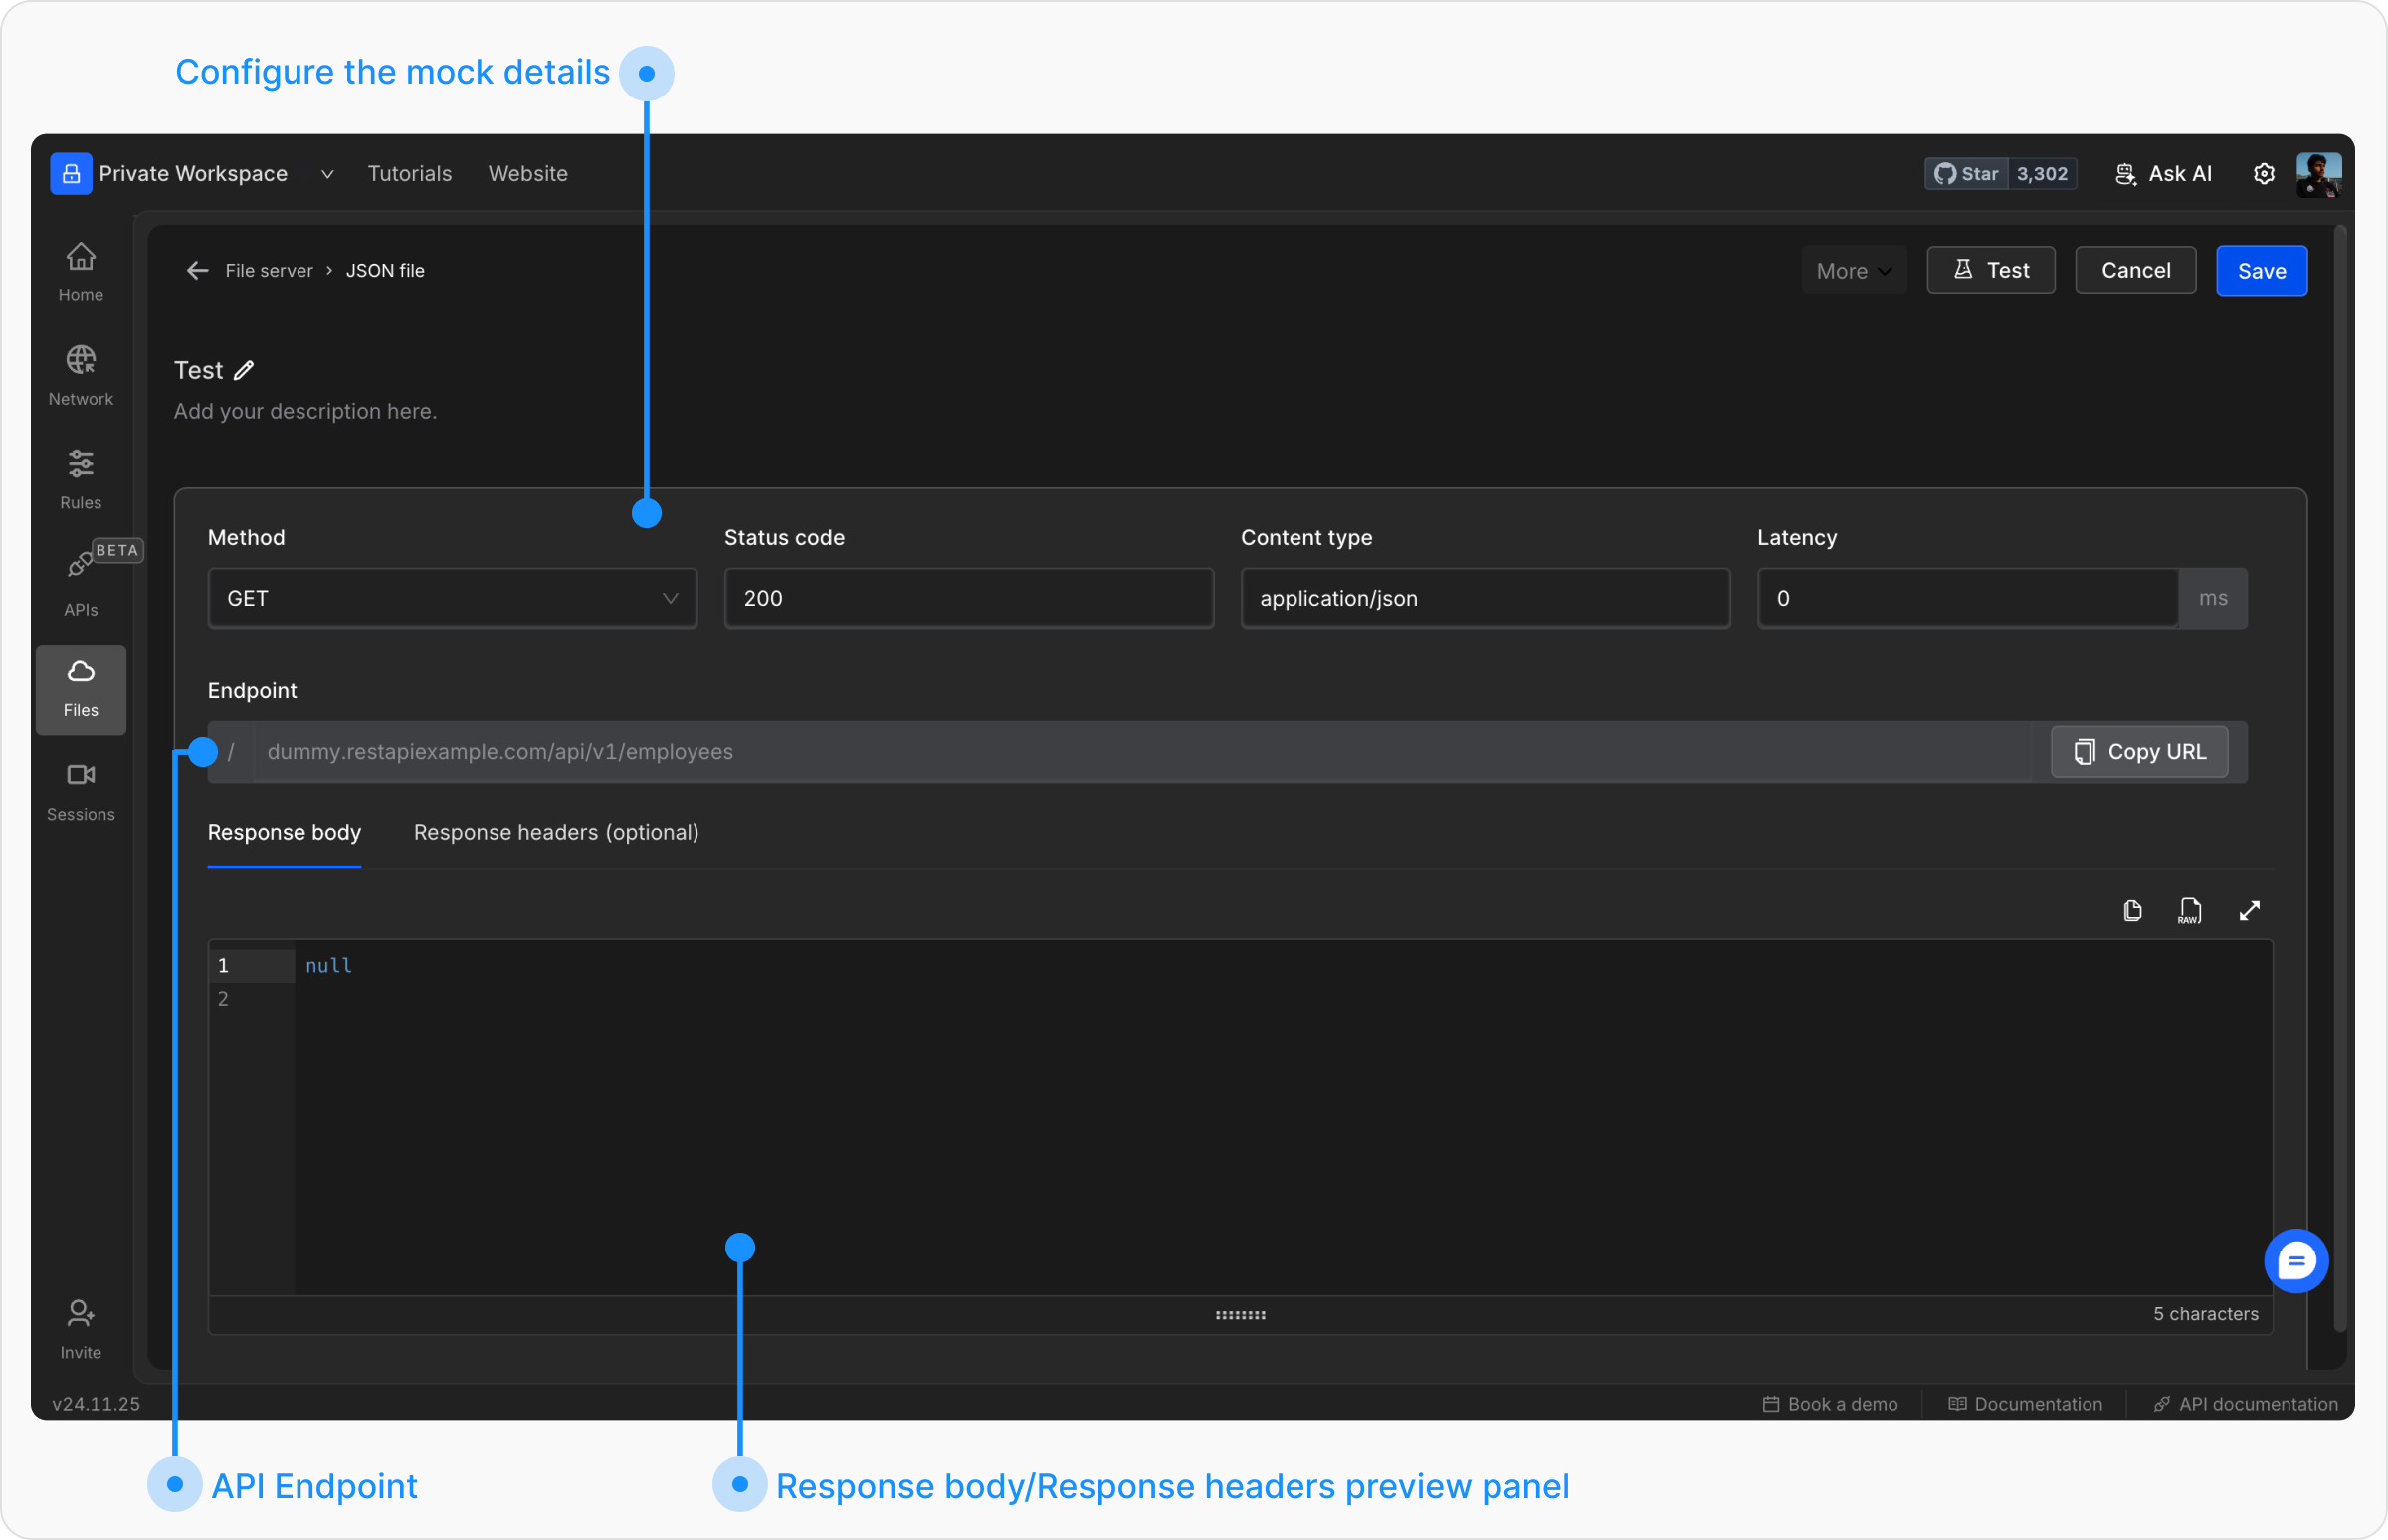
- Method: Select the HTTP method to be used (e.g., GET, POST, etc.).
- Status: Specify the HTTP response status code (e.g., 200, 404, 500).
- Content Type: Define the content type of the response (e.g., application/json).
- Latency: Optionally, add a delay (in milliseconds) to simulate network latency.
- Endpoint: Define the unique path or endpoint for the File.
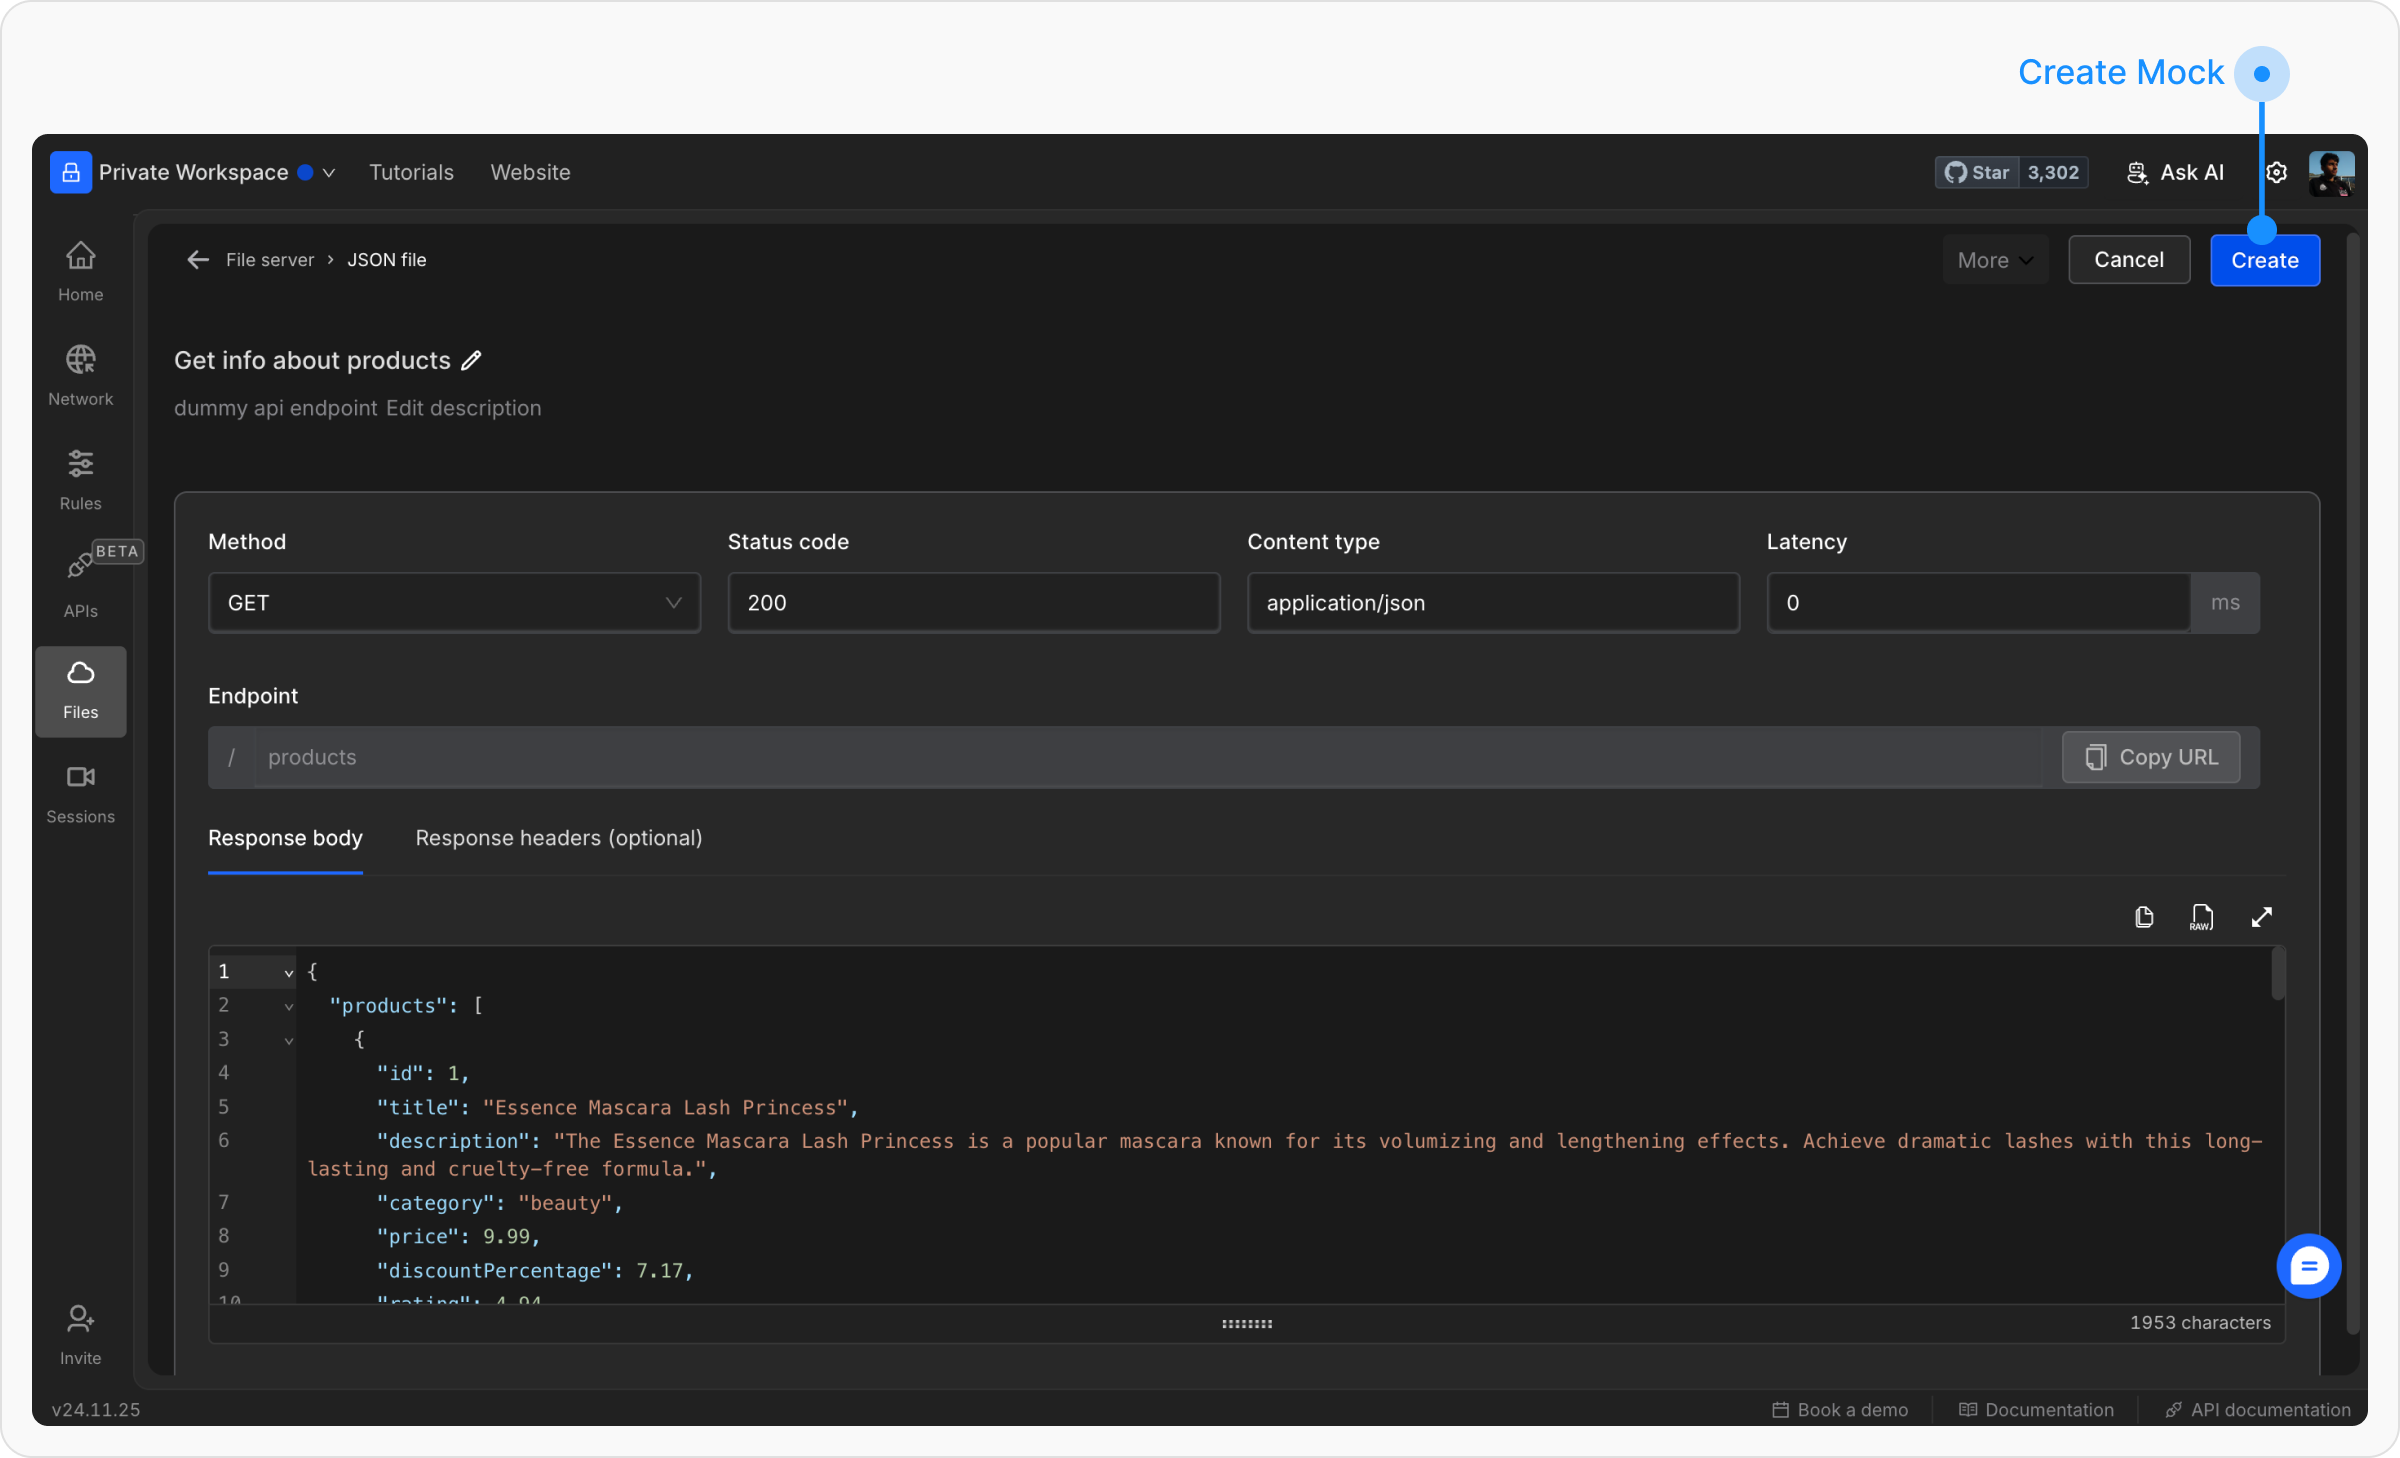
- Response Body: Provide the body of the response in JSON or plain text.
- Response Headers (optional): Add custom headers to the response as needed.
-
Password Protection: In the “More” dropdown, you can set a password for your JSON file. If a password is set, users must include it as a query parameter (e.g.,
rq_password=<password>) to access the file’s contents.
- Integrate the endpoint into your application to replace live API calls during testing.
- Use tools like Postman or cURL to manually test and validate the file responses.