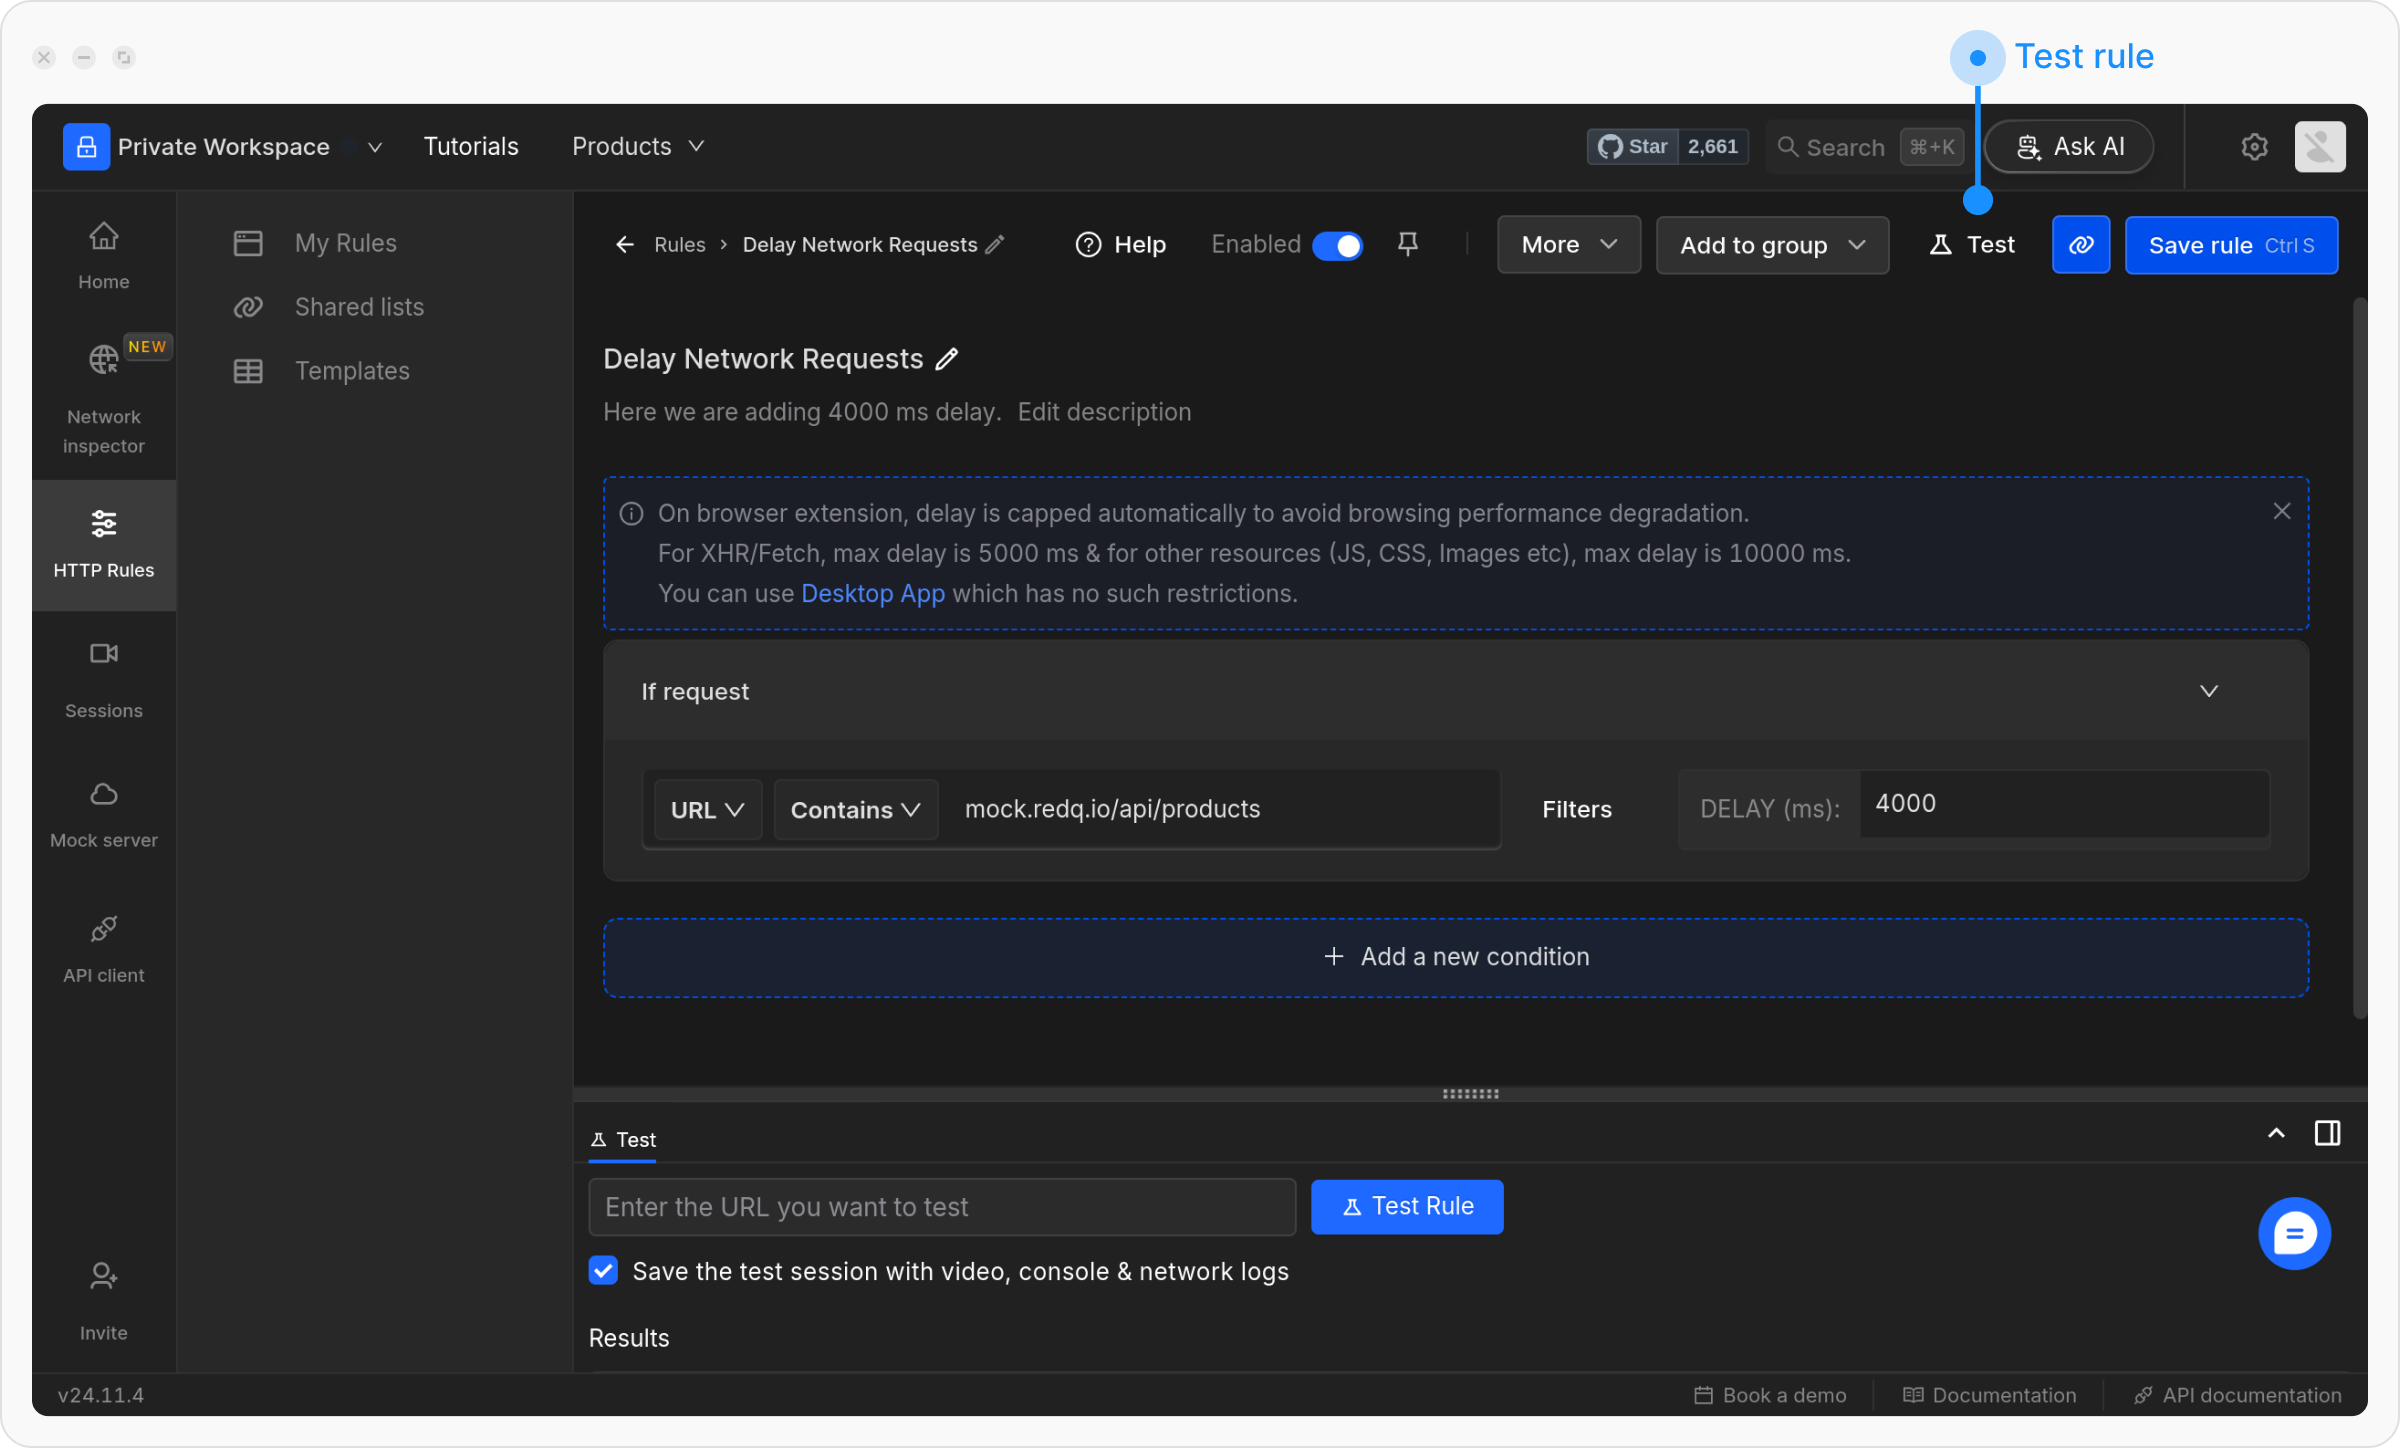
The Delay Network Request rule in Requestly enables you to simulate network latency on HTTP requests for testing and debugging purposes. By adding delays, you can observe how your application behaves under slow network conditions.
Why Use the Delay Network Requests?
- Test Slow Network Scenarios: Understand how your application handles slow connections, especially for users in remote areas.
- Test API Latency: Evaluate how your app behaves when one or more APIs respond slowly, ensuring appropriate error handling and fallback mechanisms.
- Identify Race Conditions: Check if any race conditions exist when resource X gets loaded before or after resource Y.
- UI/UX Testing: Verify if the user interface provides appropriate feedback (like loaders or error messages) during delays.
How to Configure the Rule
Open HTTP Rules and Create a New Rule
Navigate to the HTTP Rules tab in the web or desktop app. Click on 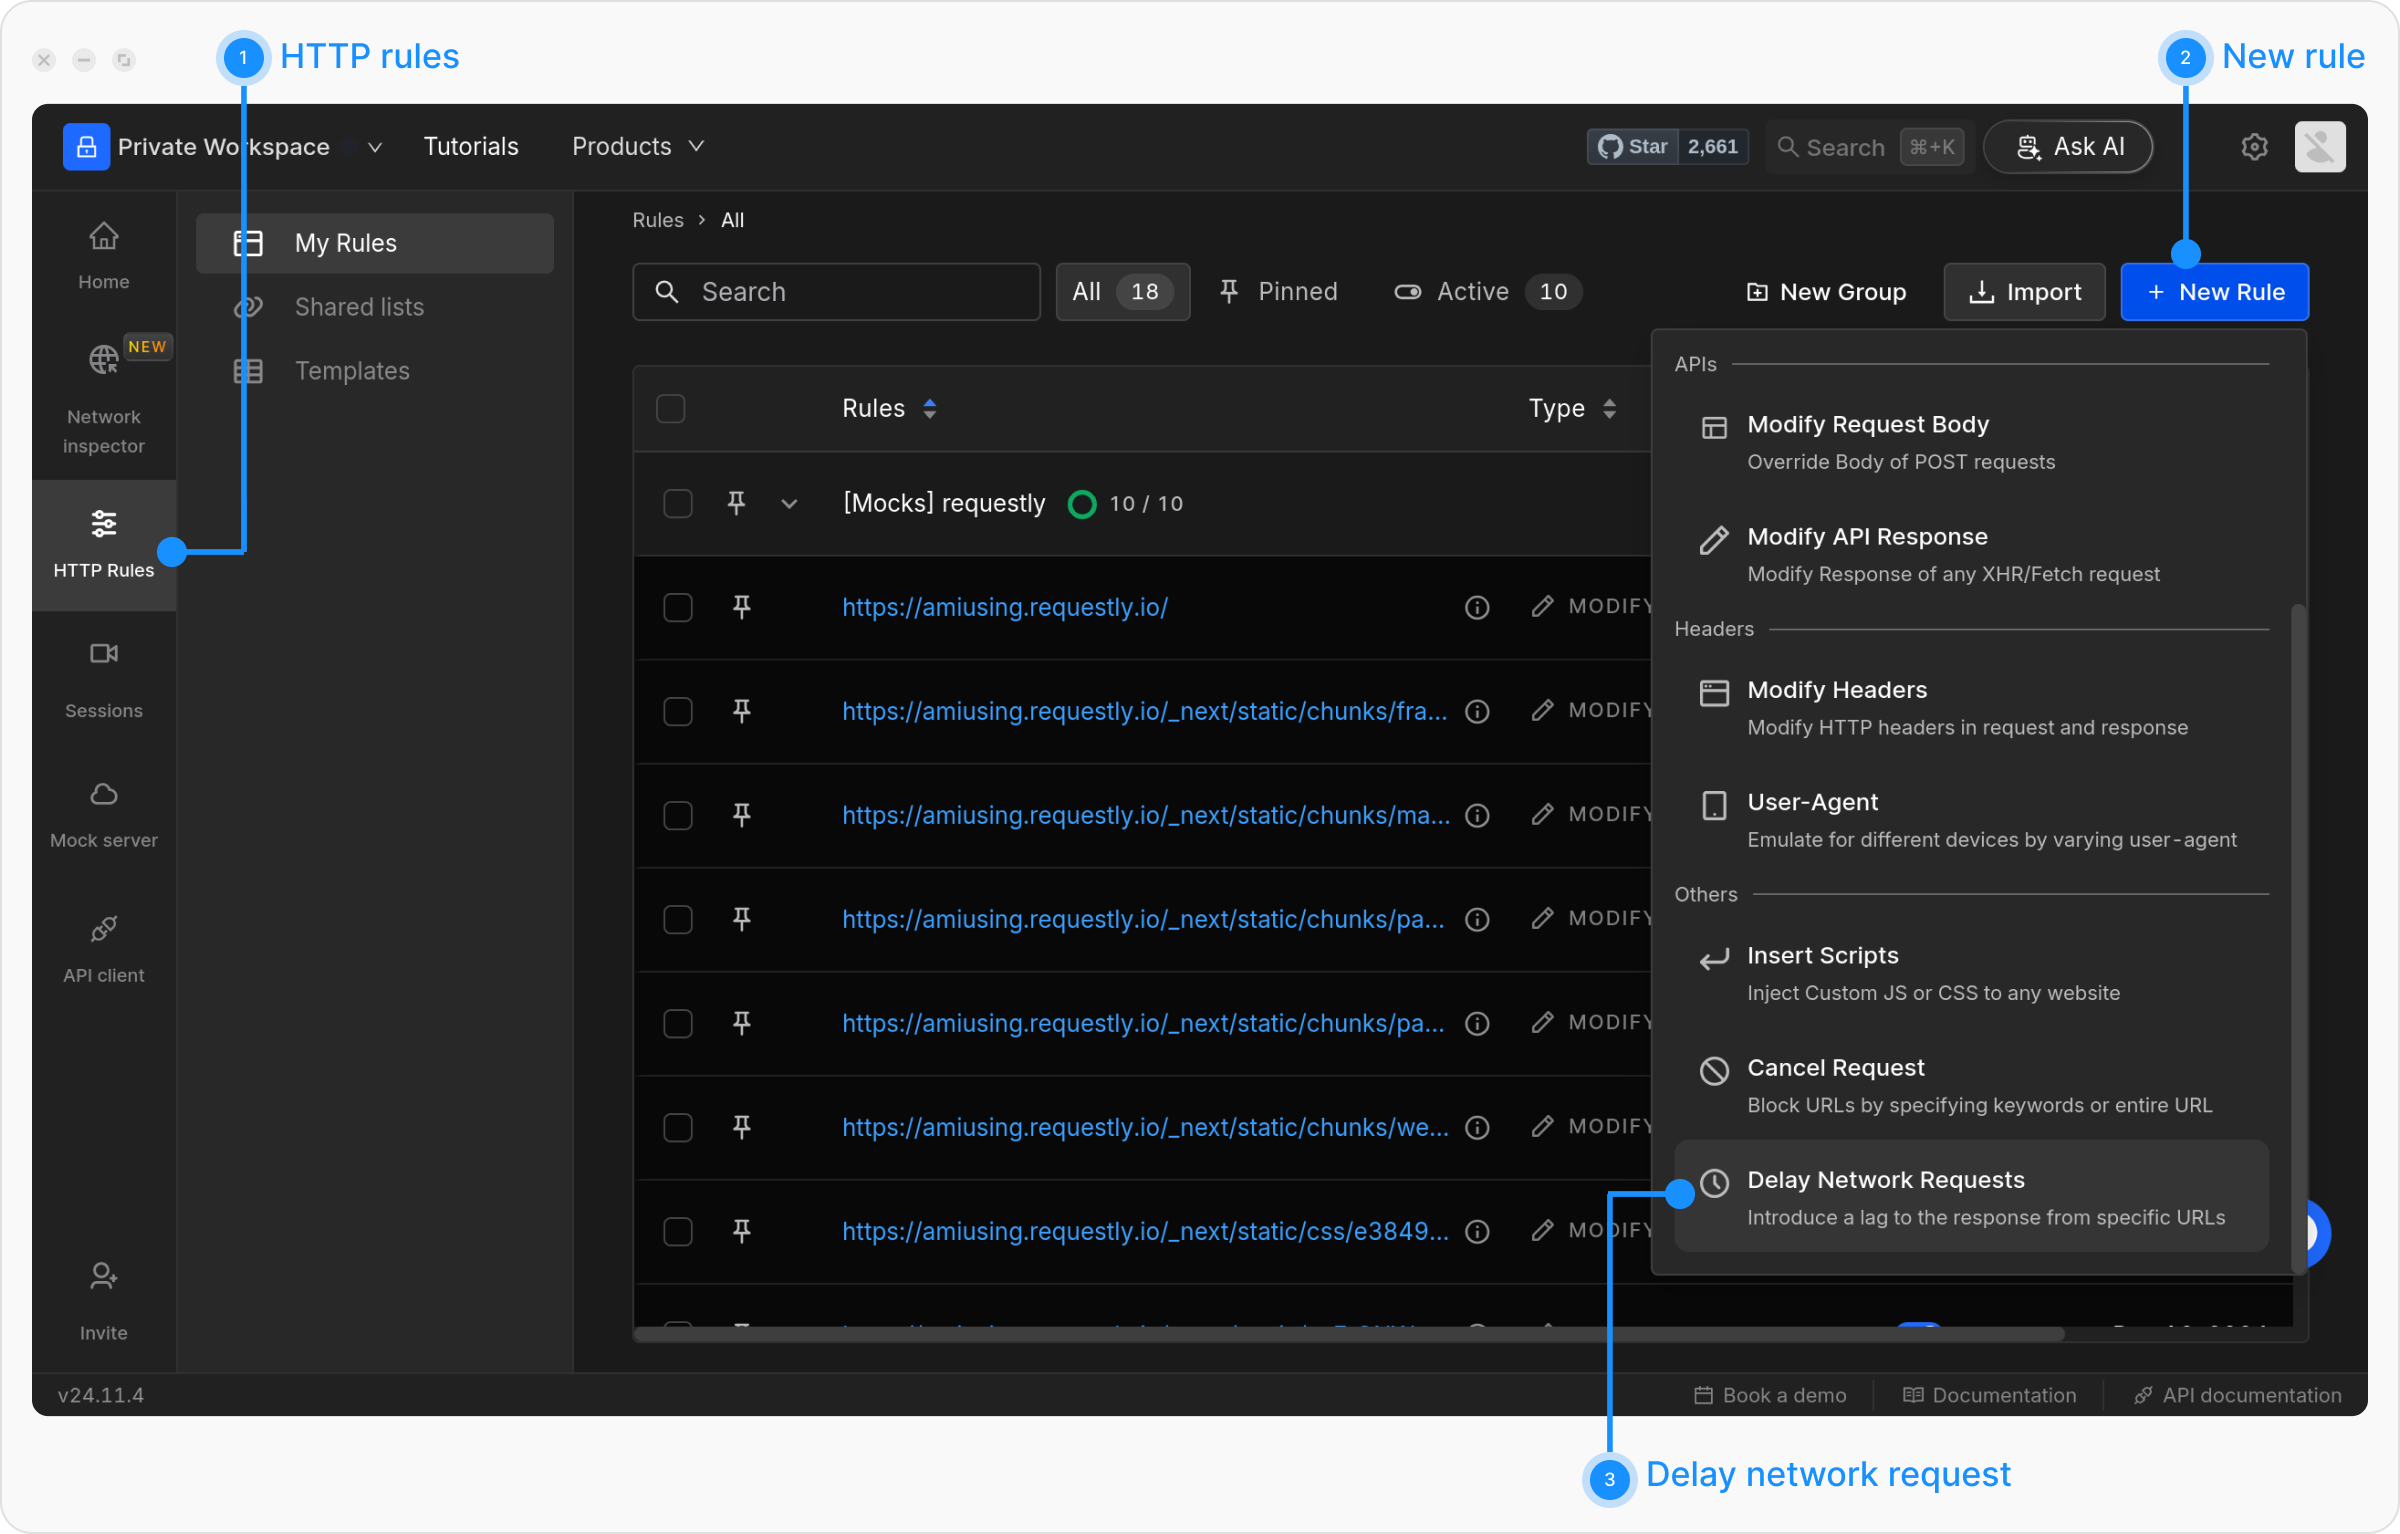
+ New Rule and select Delay Network Requests from the options.
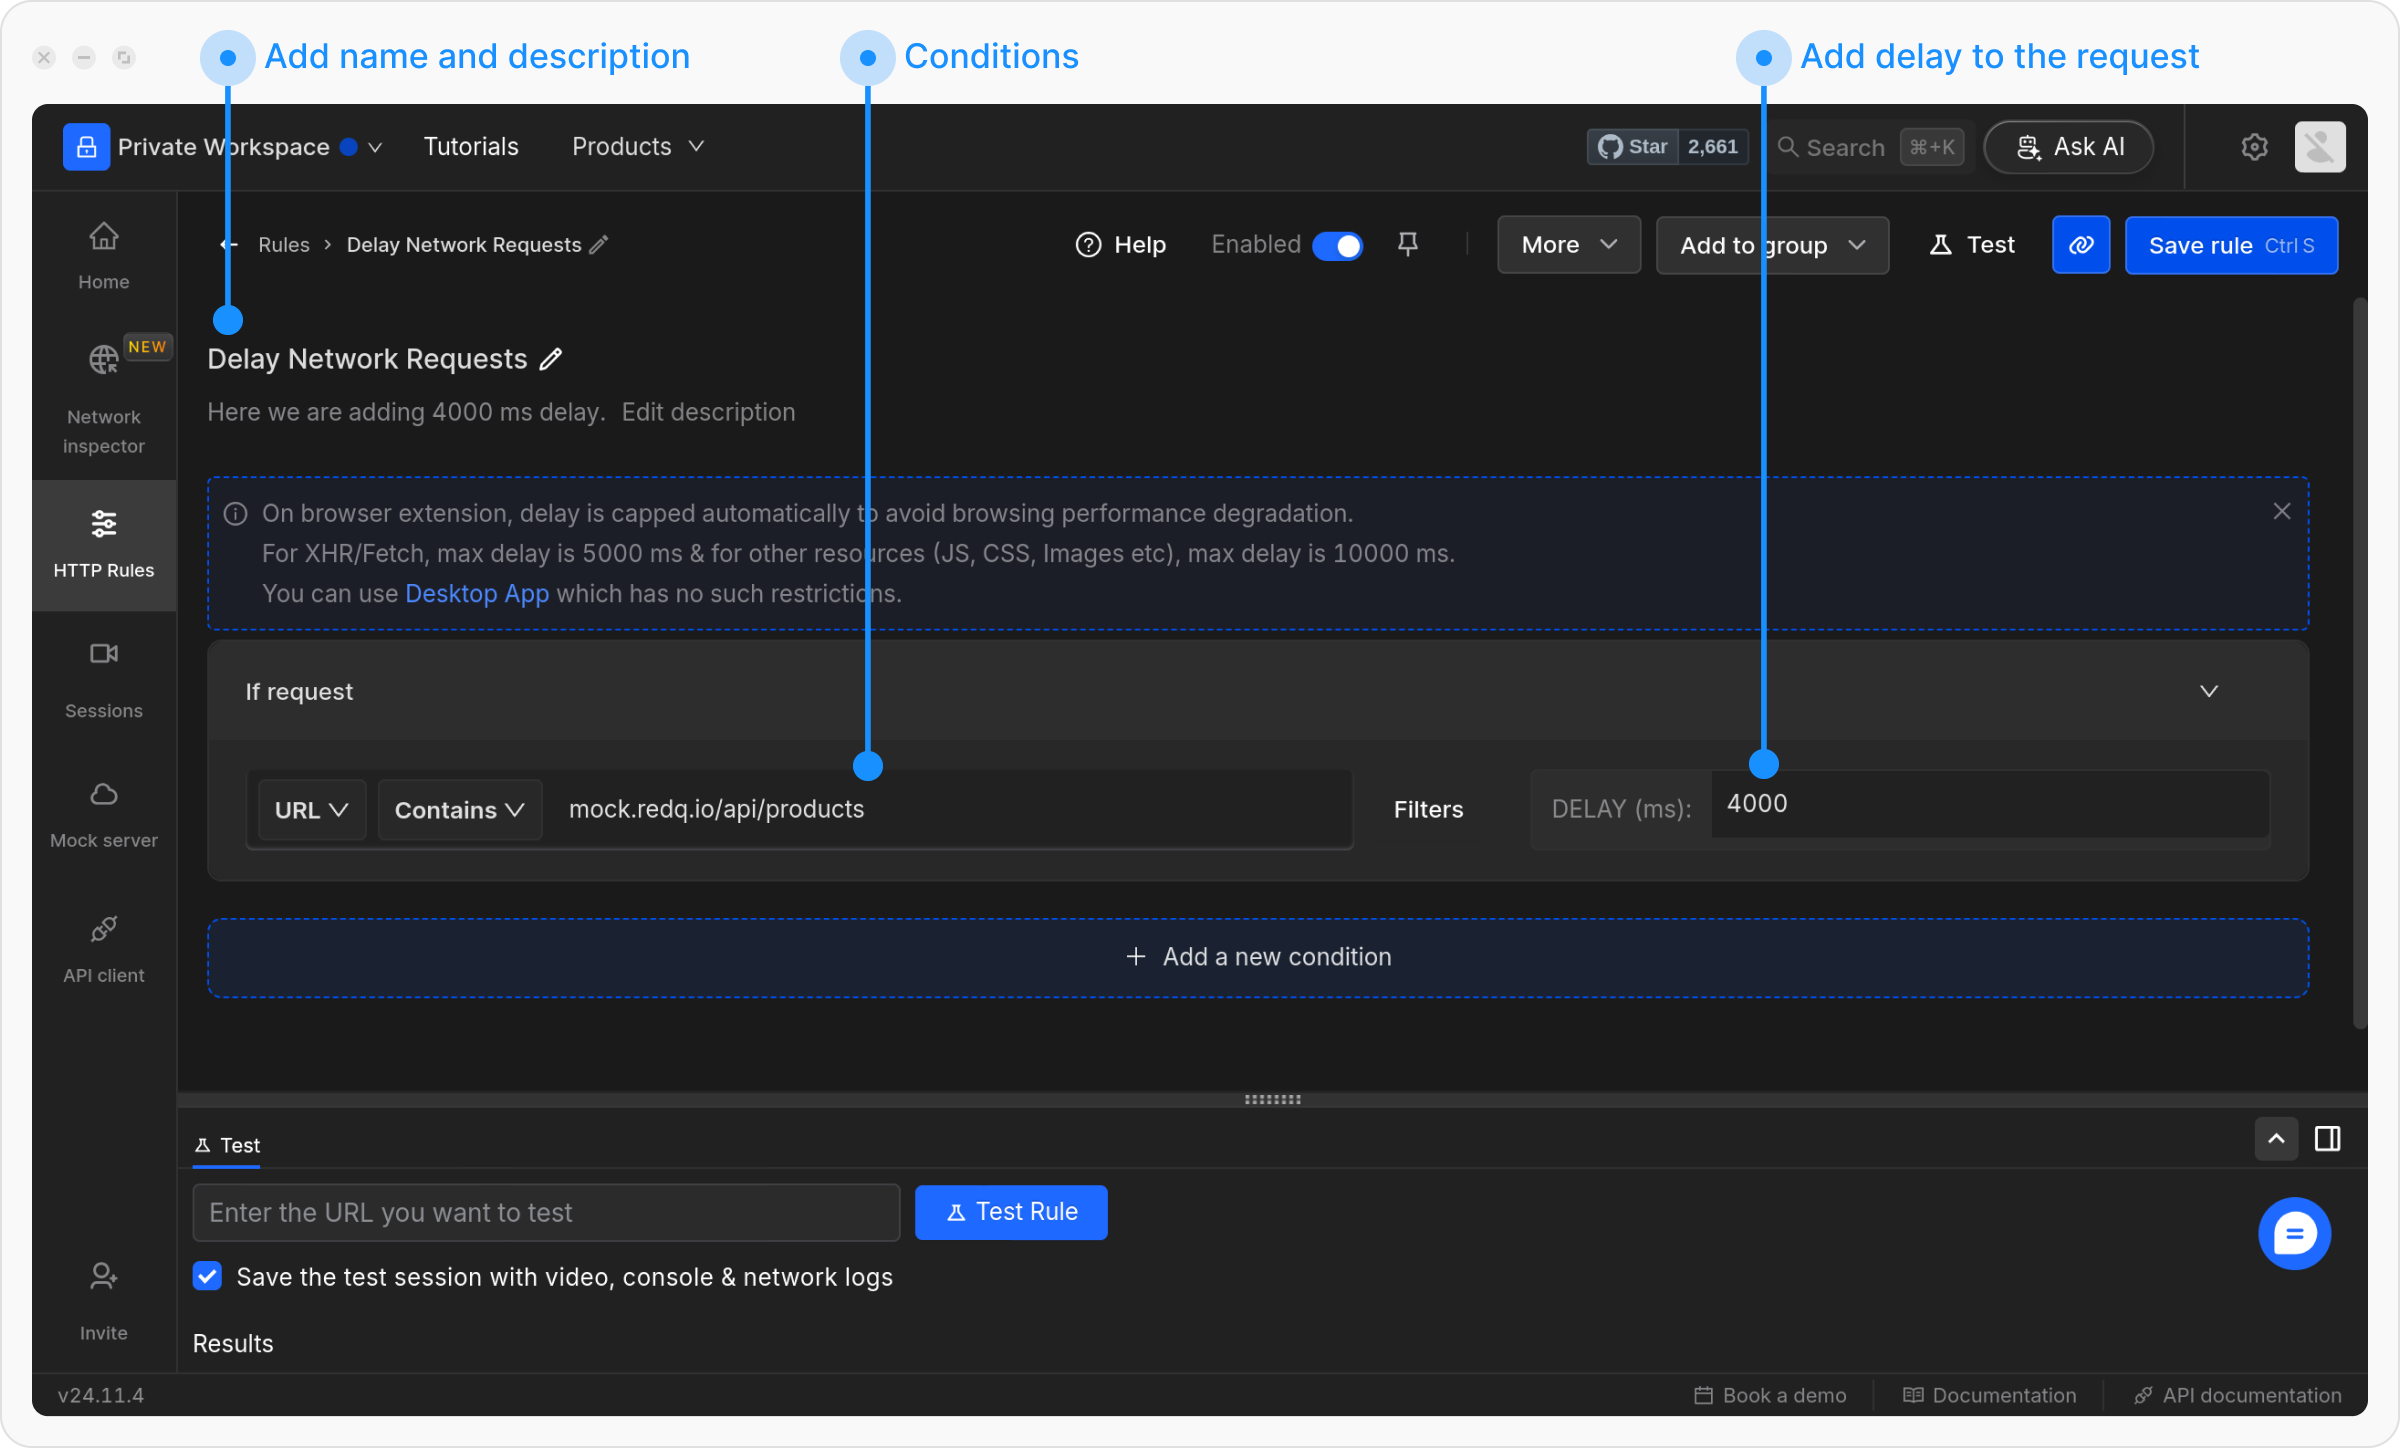
Name and Describe Your Rule
Provide a descriptive name for the rule to keep your setup organized. Optionally, add a brief description explaining its purpose for easier identification later.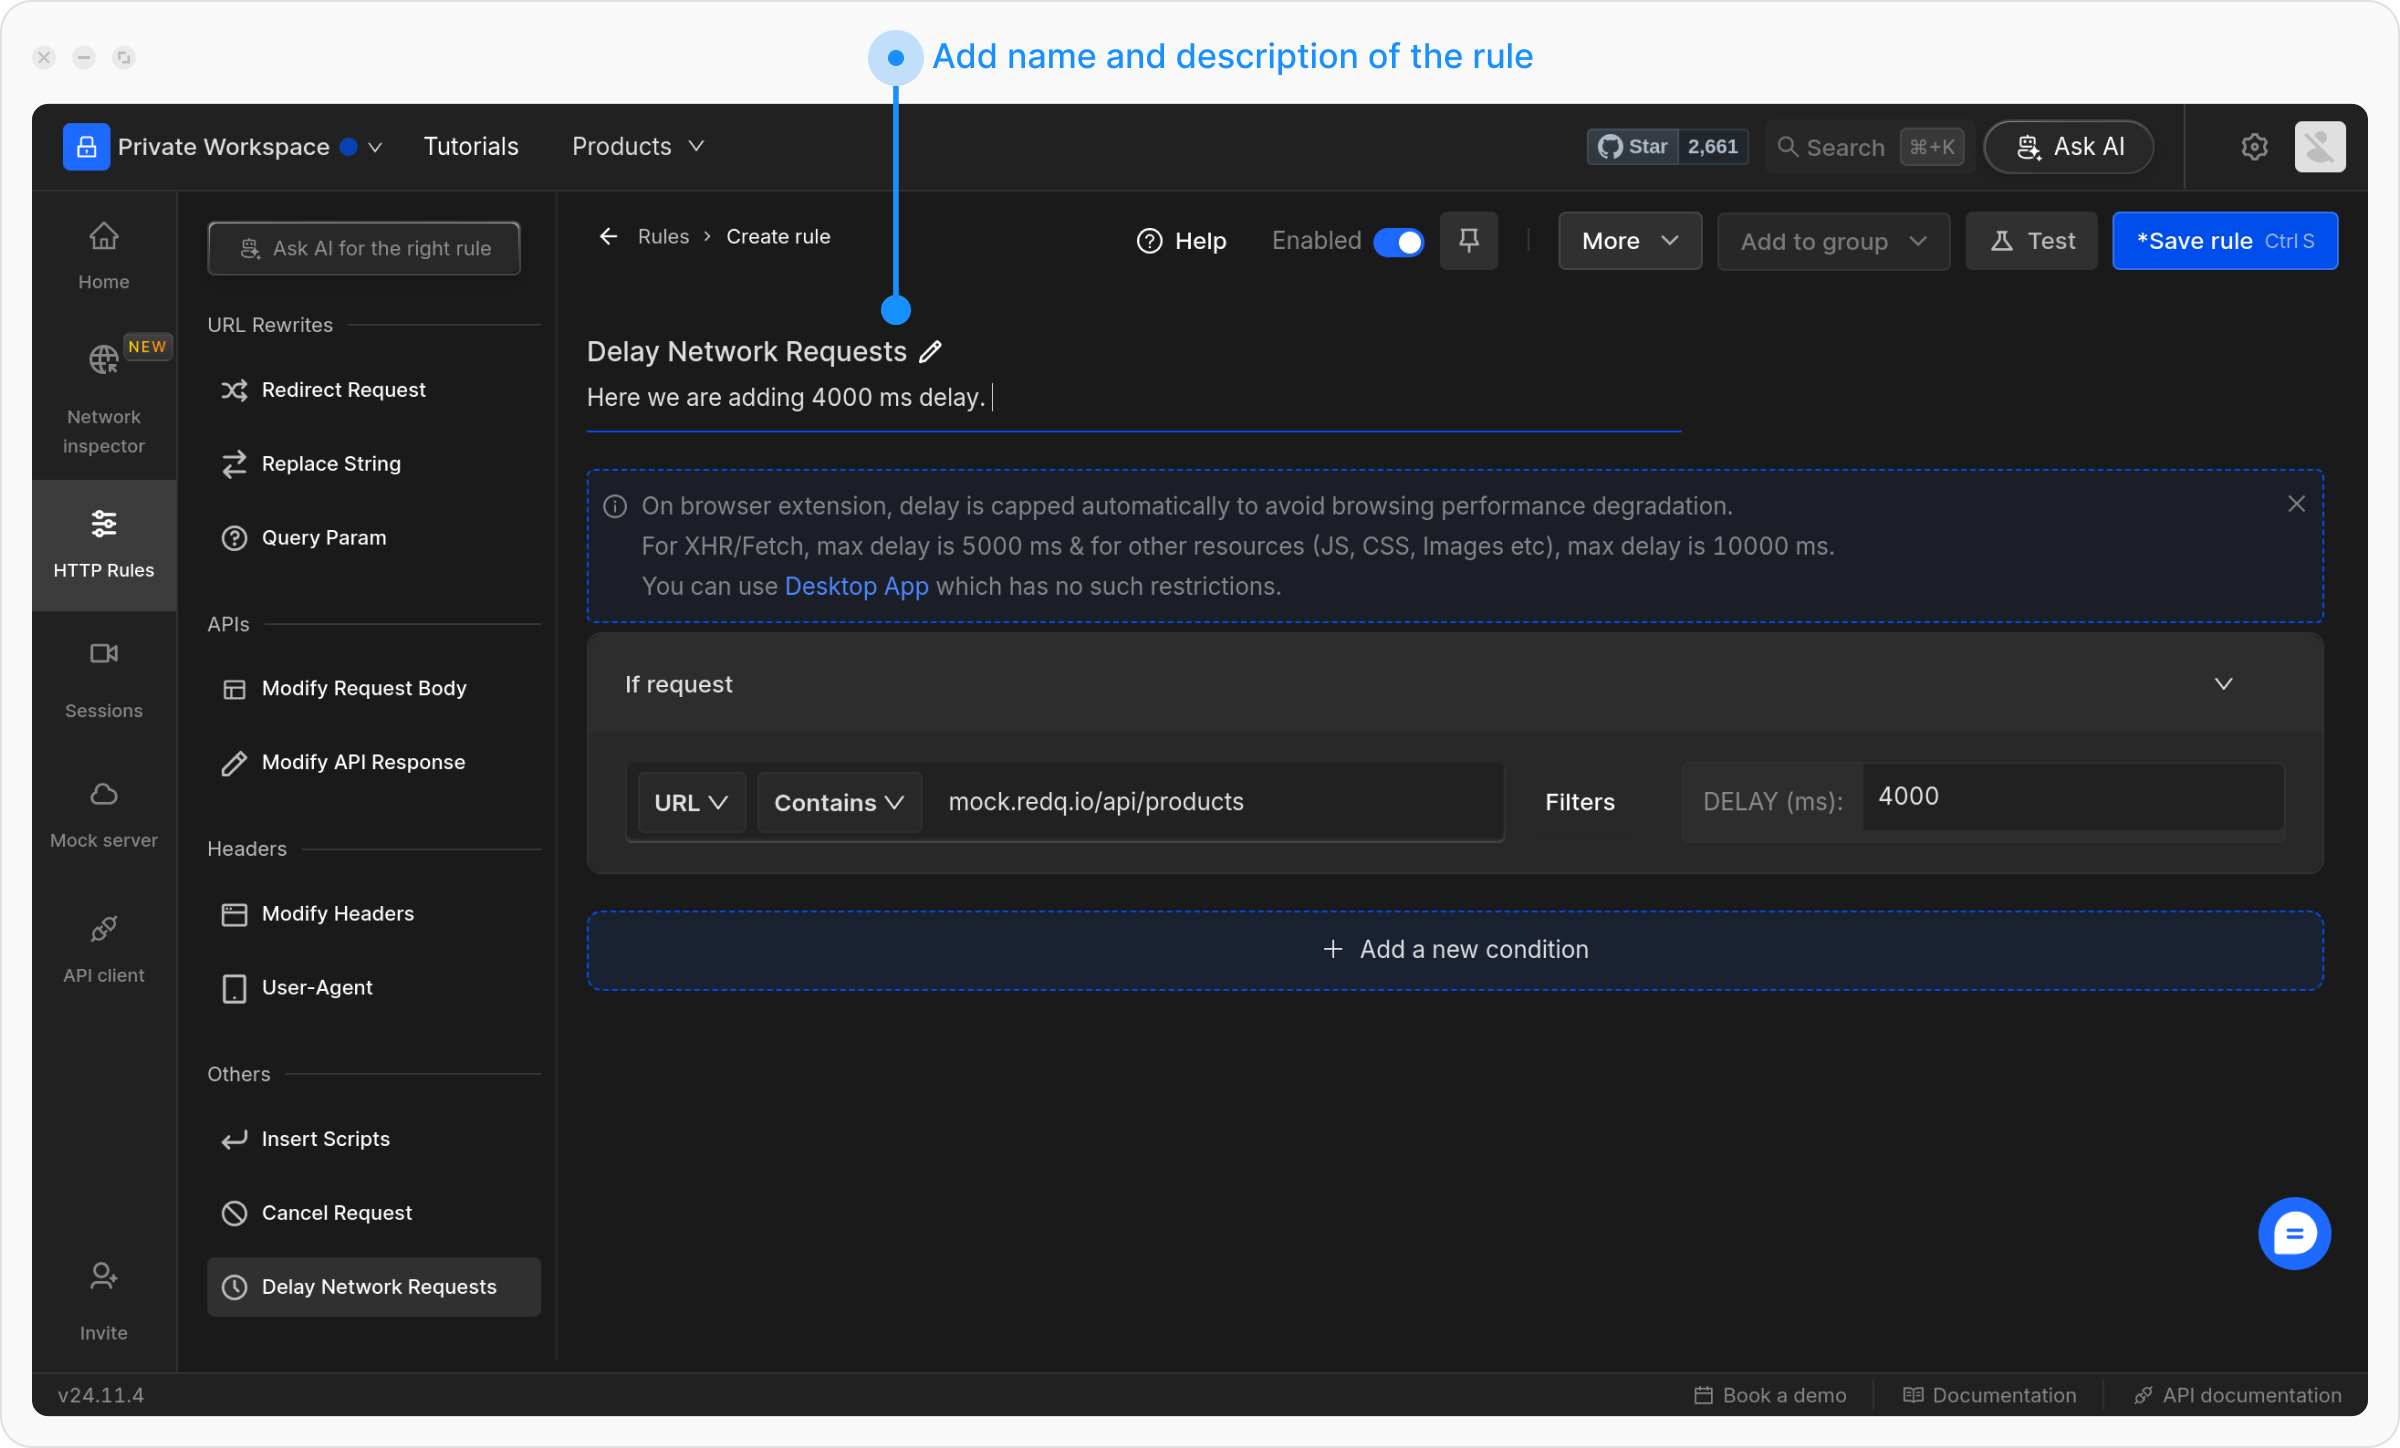

Define the Source Condition
Define where the rule should be applied by specifying criteria such as URL, Host, or Path. You can choose from options like Regex, Contains, Wildcard, or Equals, or use Advance Filters for more precise conditions.For more details on source conditions, read this guide.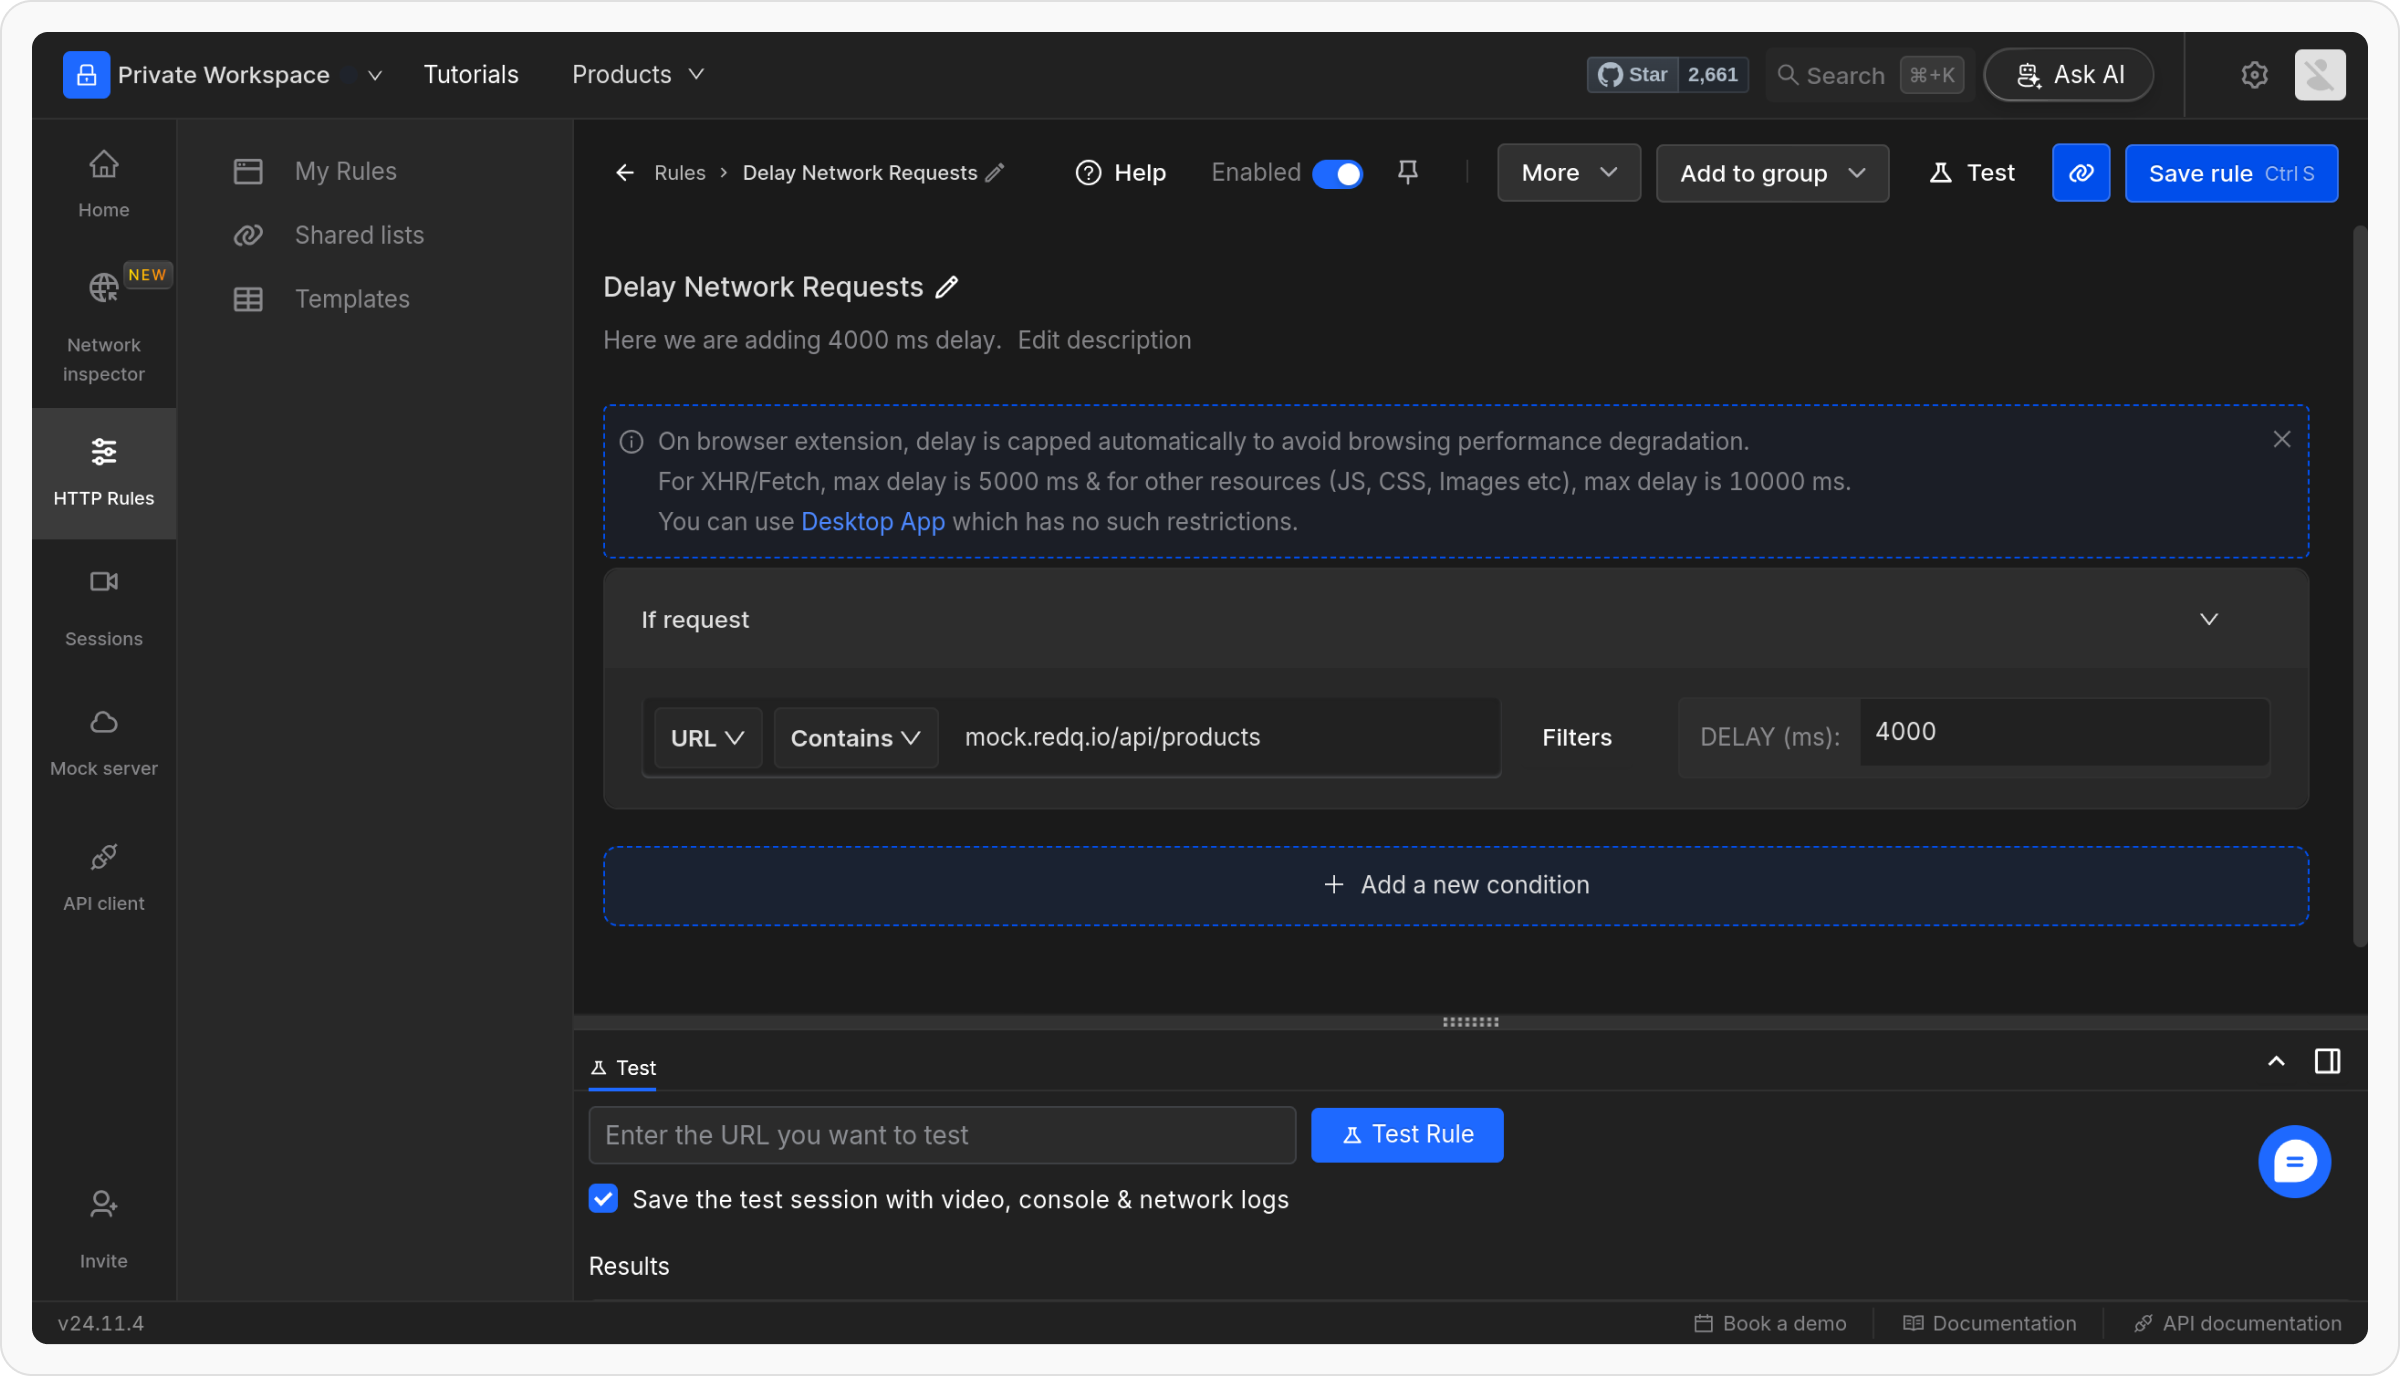
Example :
To apply a rule to an API fetching product data on our playground website, use the following configuration:
- Condition Type: URL
- Operator: Contains
-
Value:
rest.requestly-playground.com/api/products
https://www.requestly-playground.com/.
Set the Request Delay
Specify the delay duration in milliseconds. For example, enter 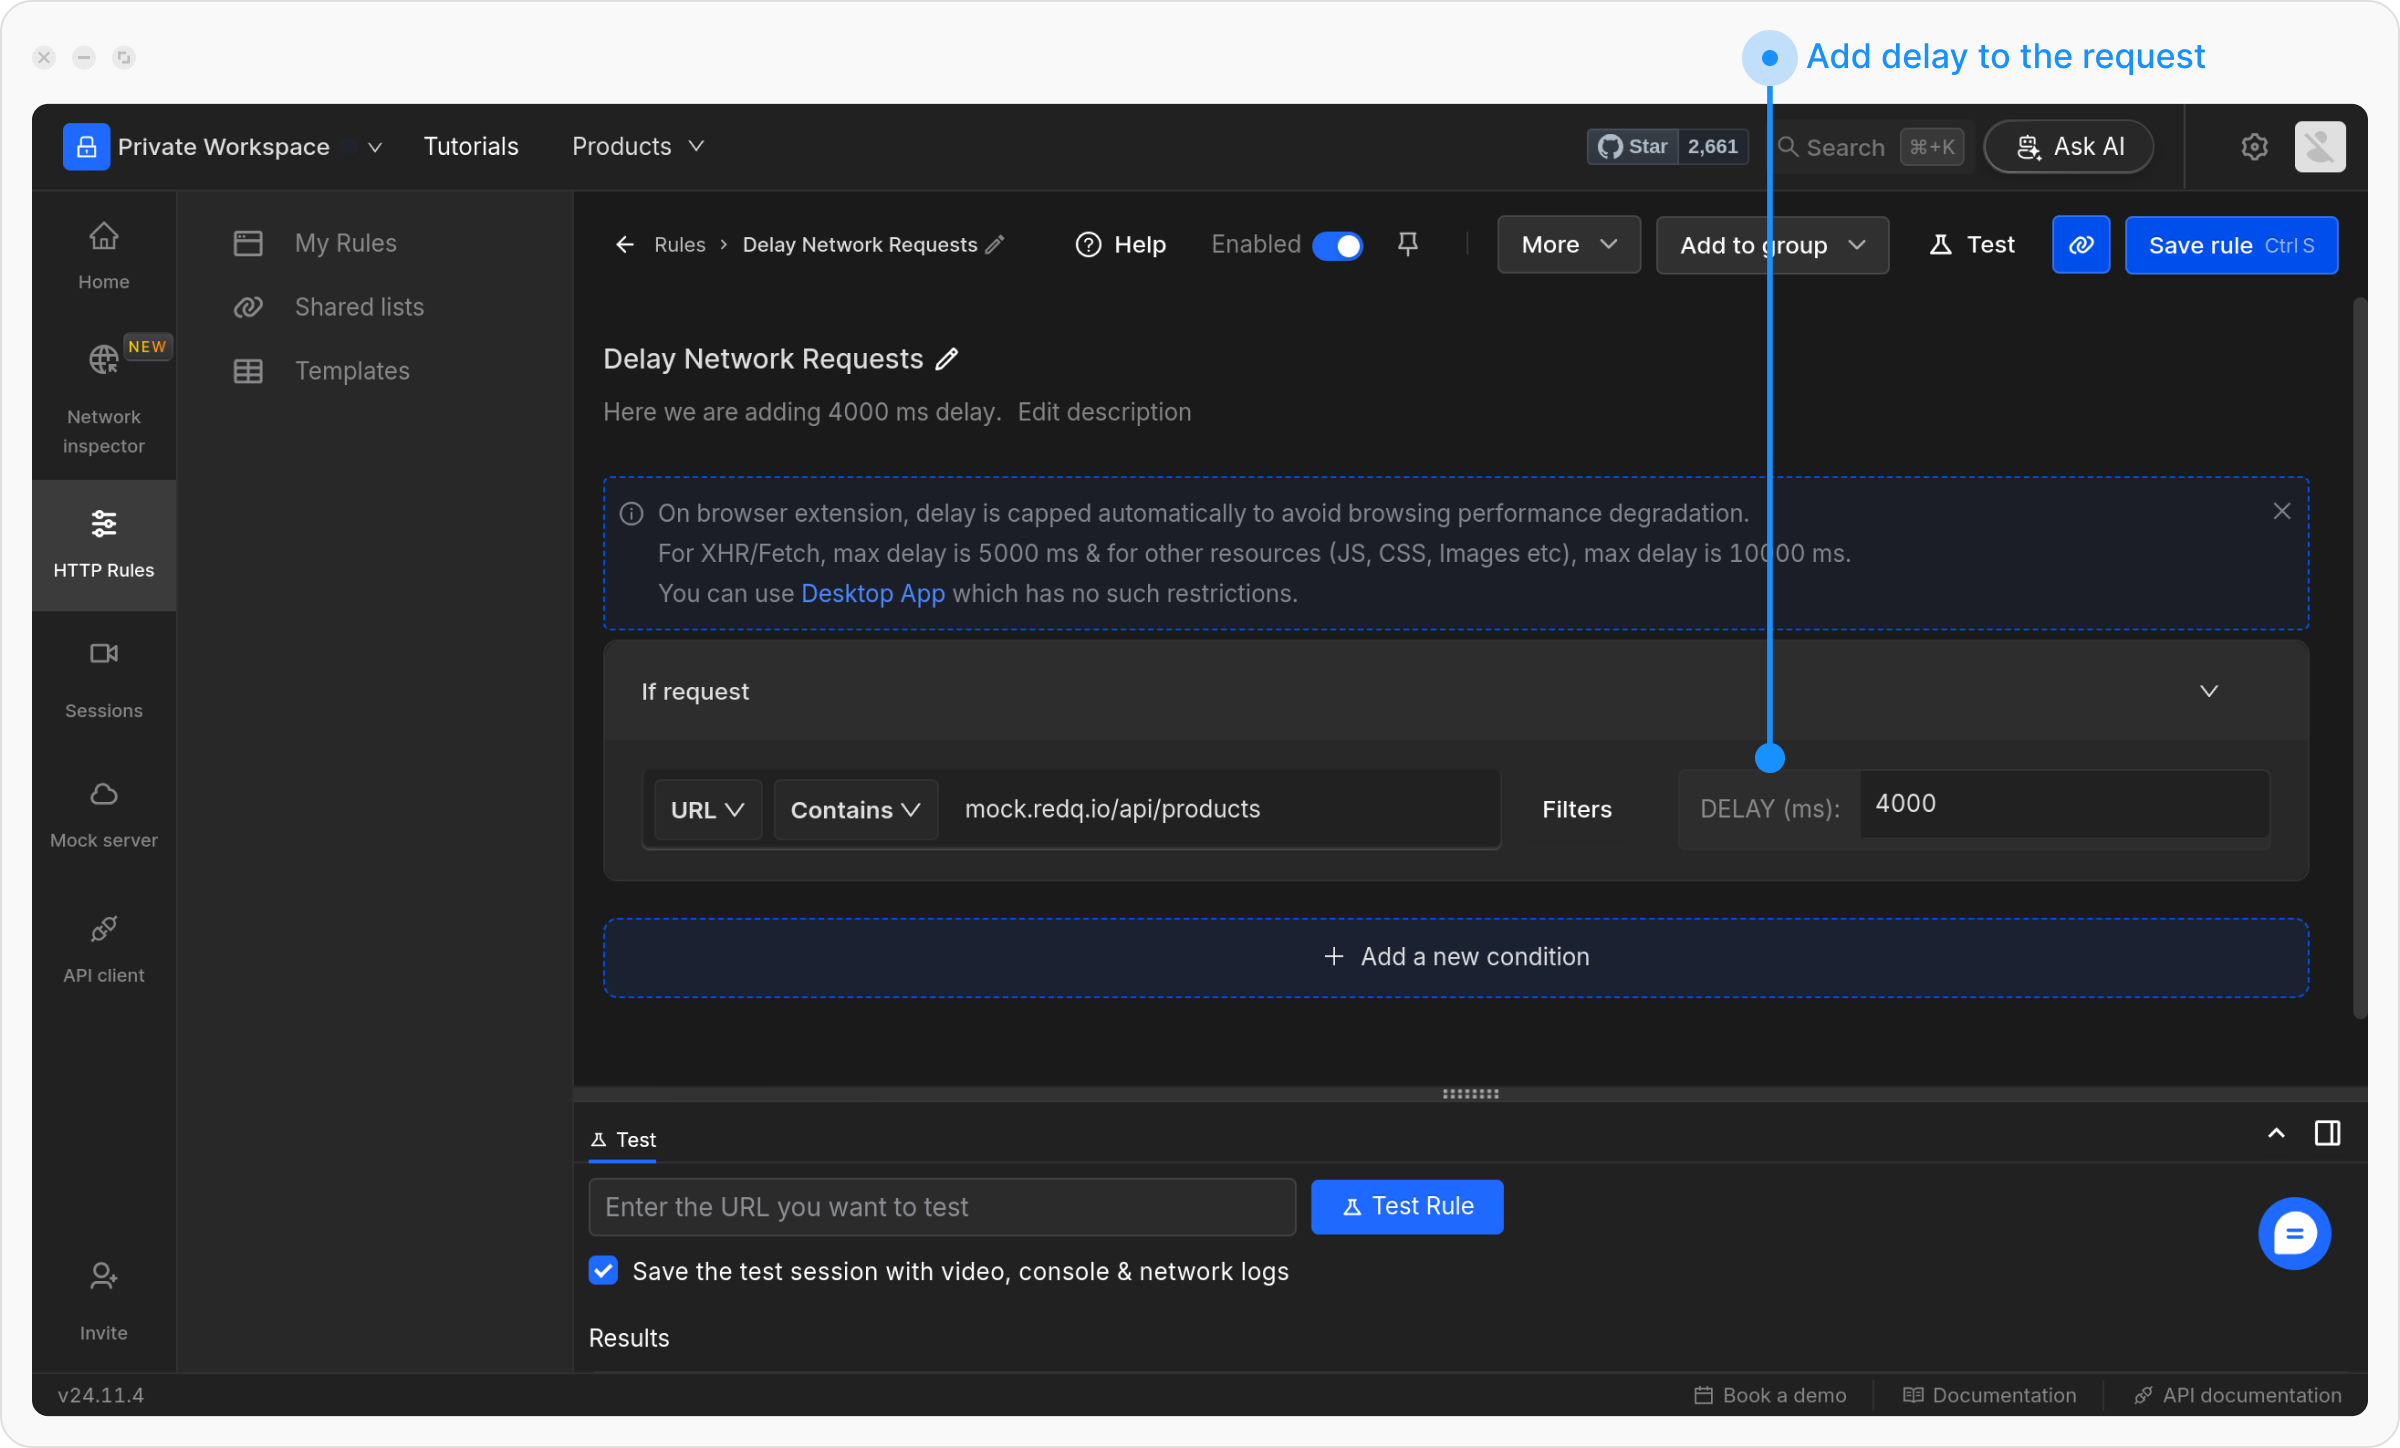
4000 to introduce a 4-second delay.
Save and Activate the Rule
Once you are satisfied with your configuration, click Save to store the rule. After saving, make sure to toggle the rule ON to activate it. This will apply the rule and ensure it works as expected.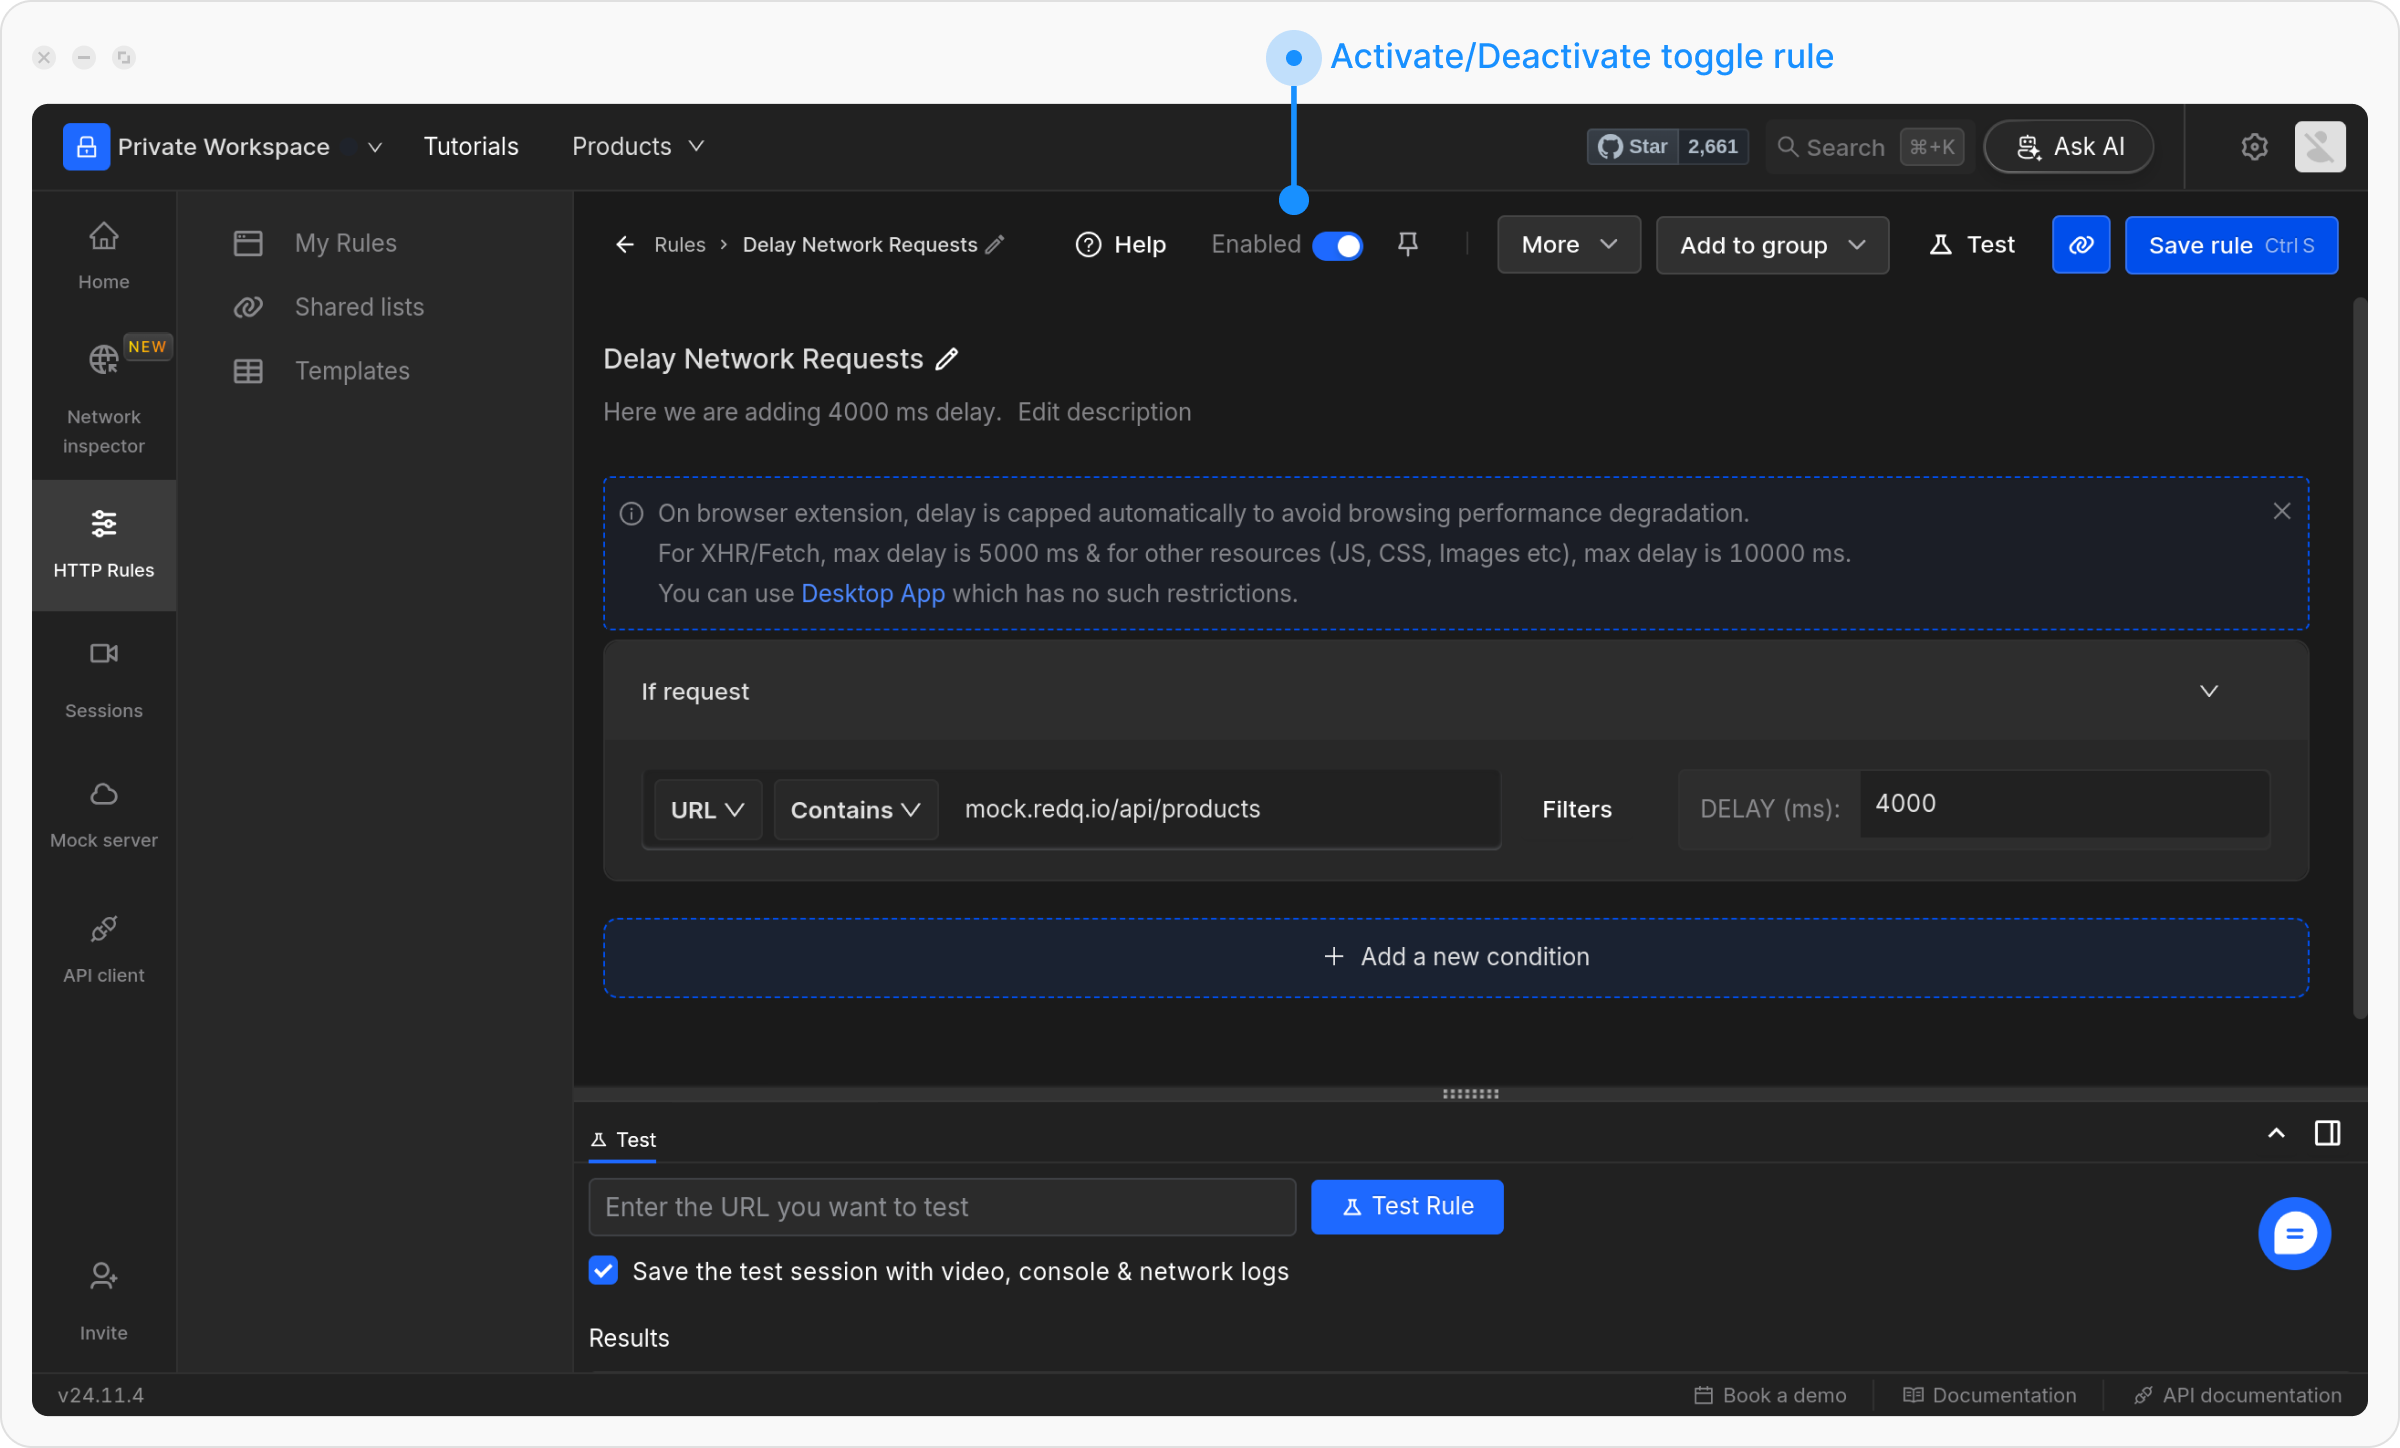

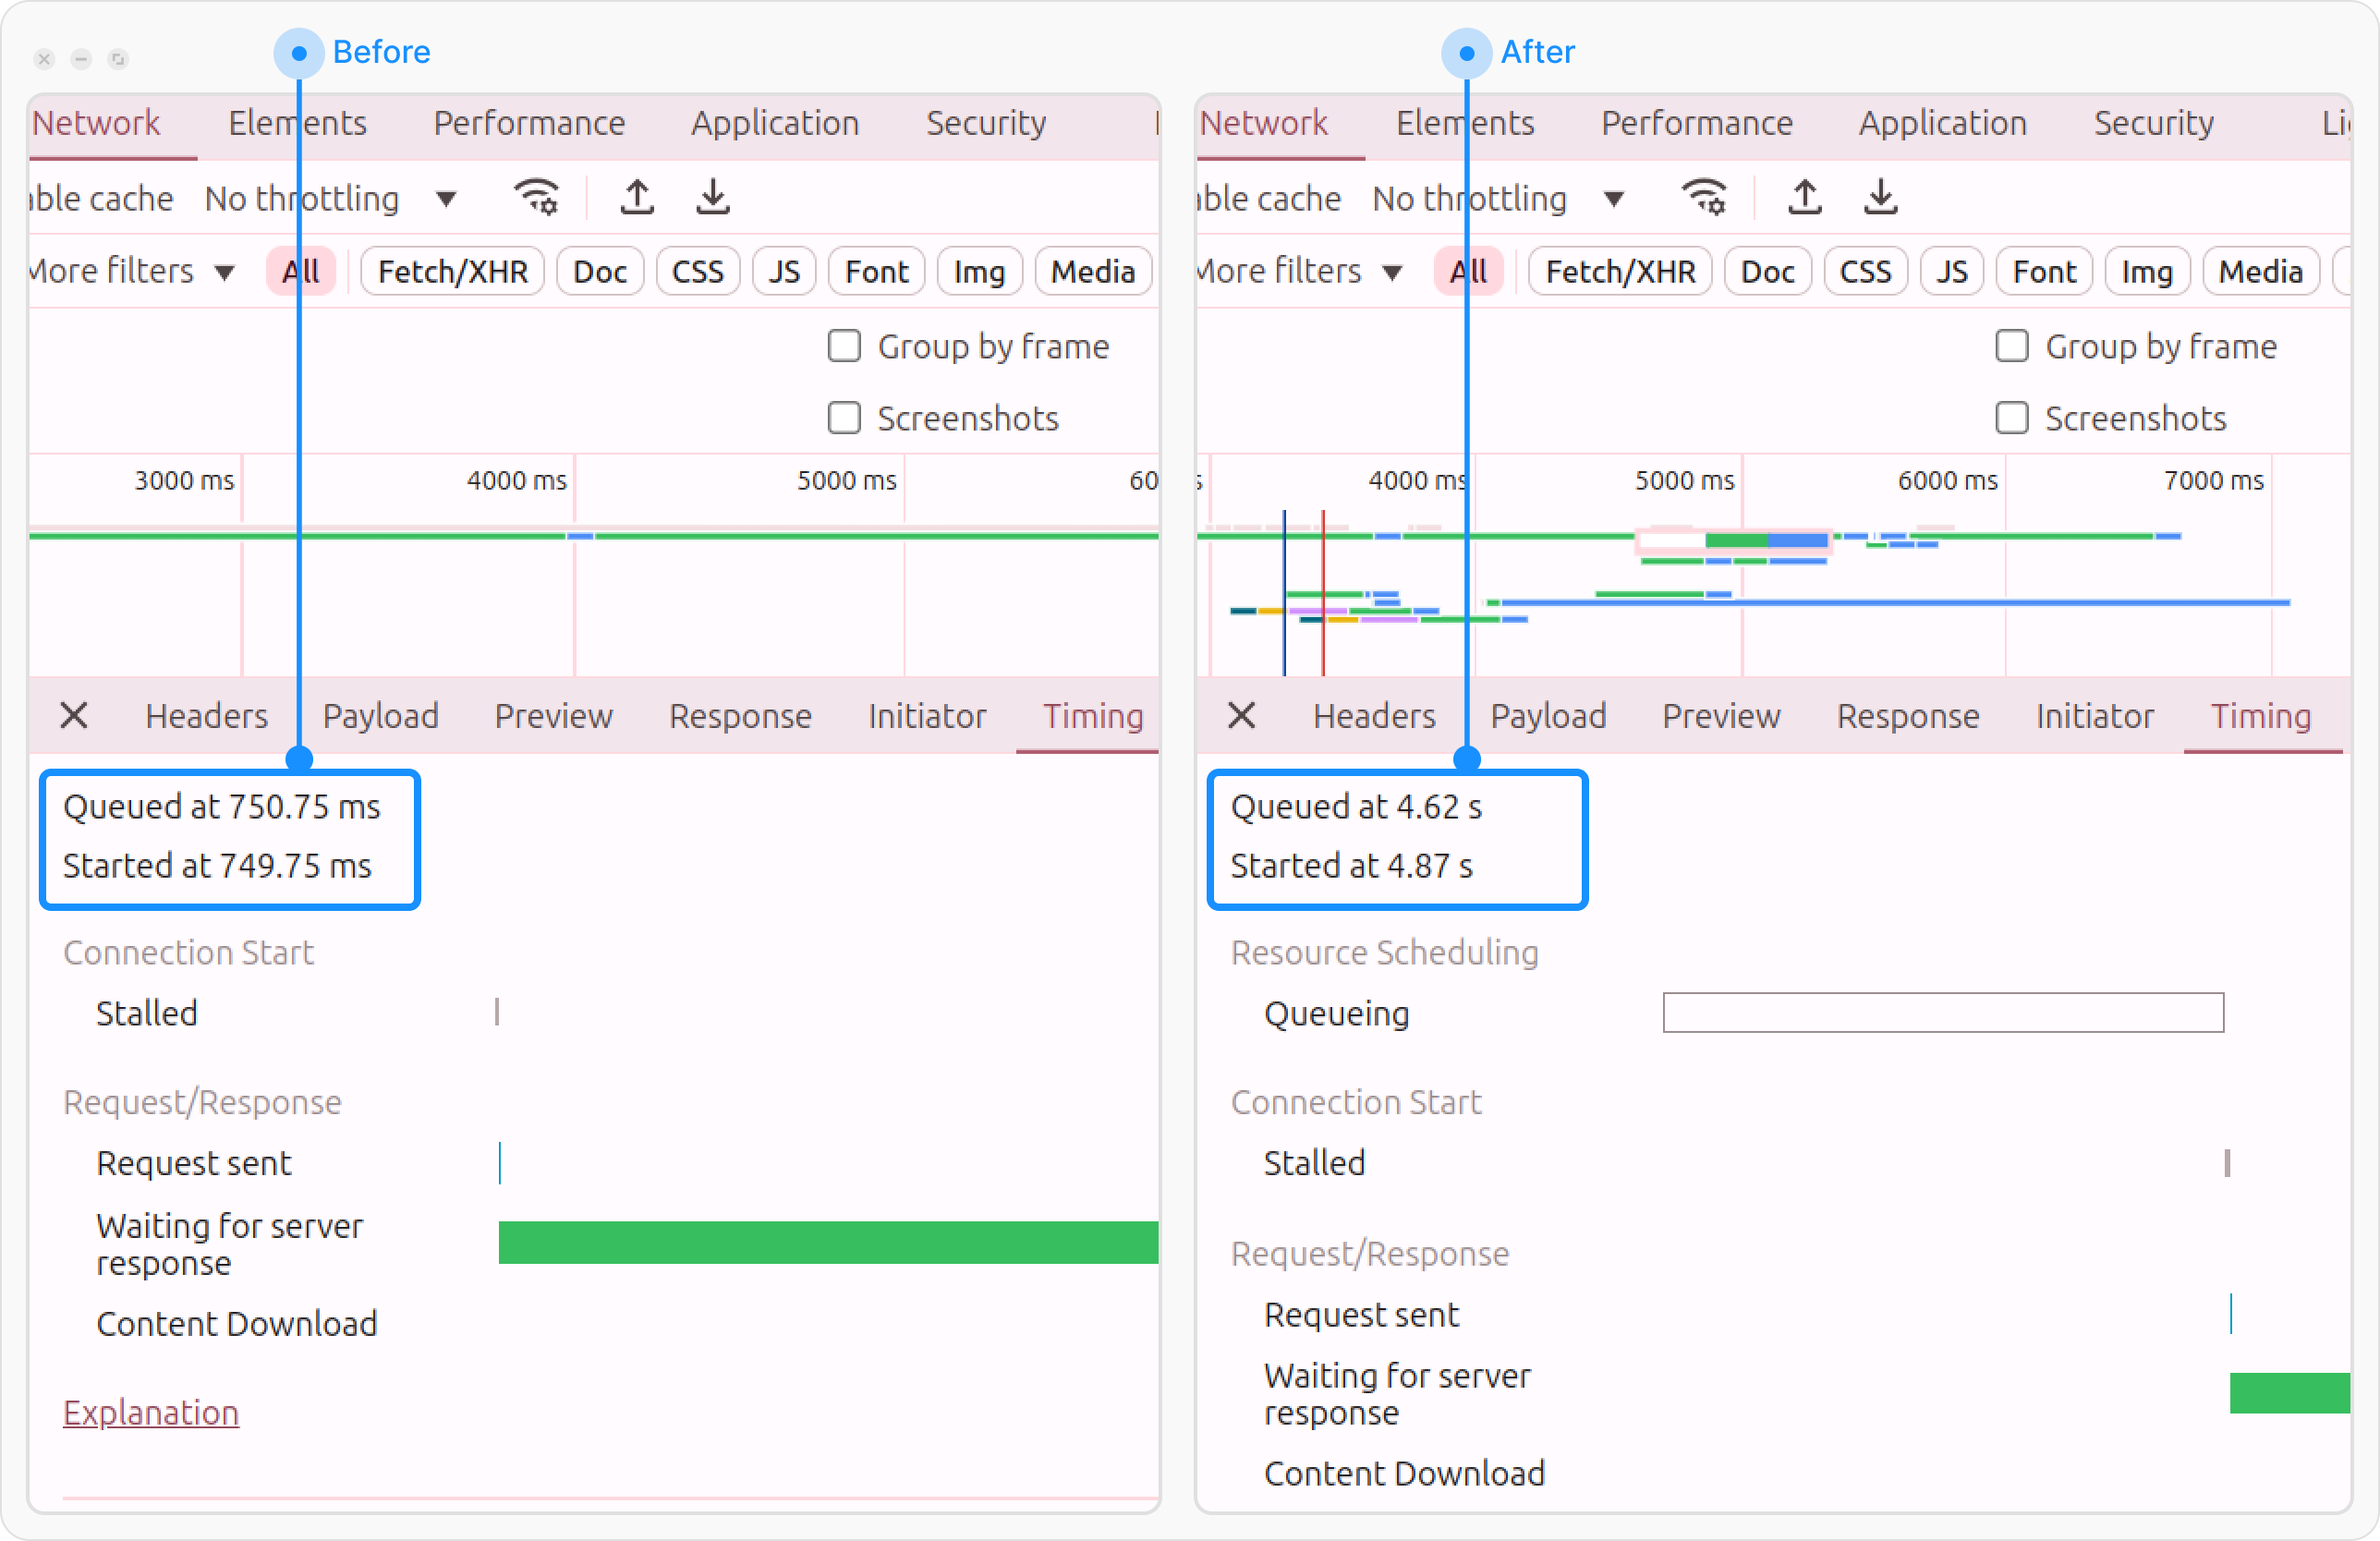
- Before
- After
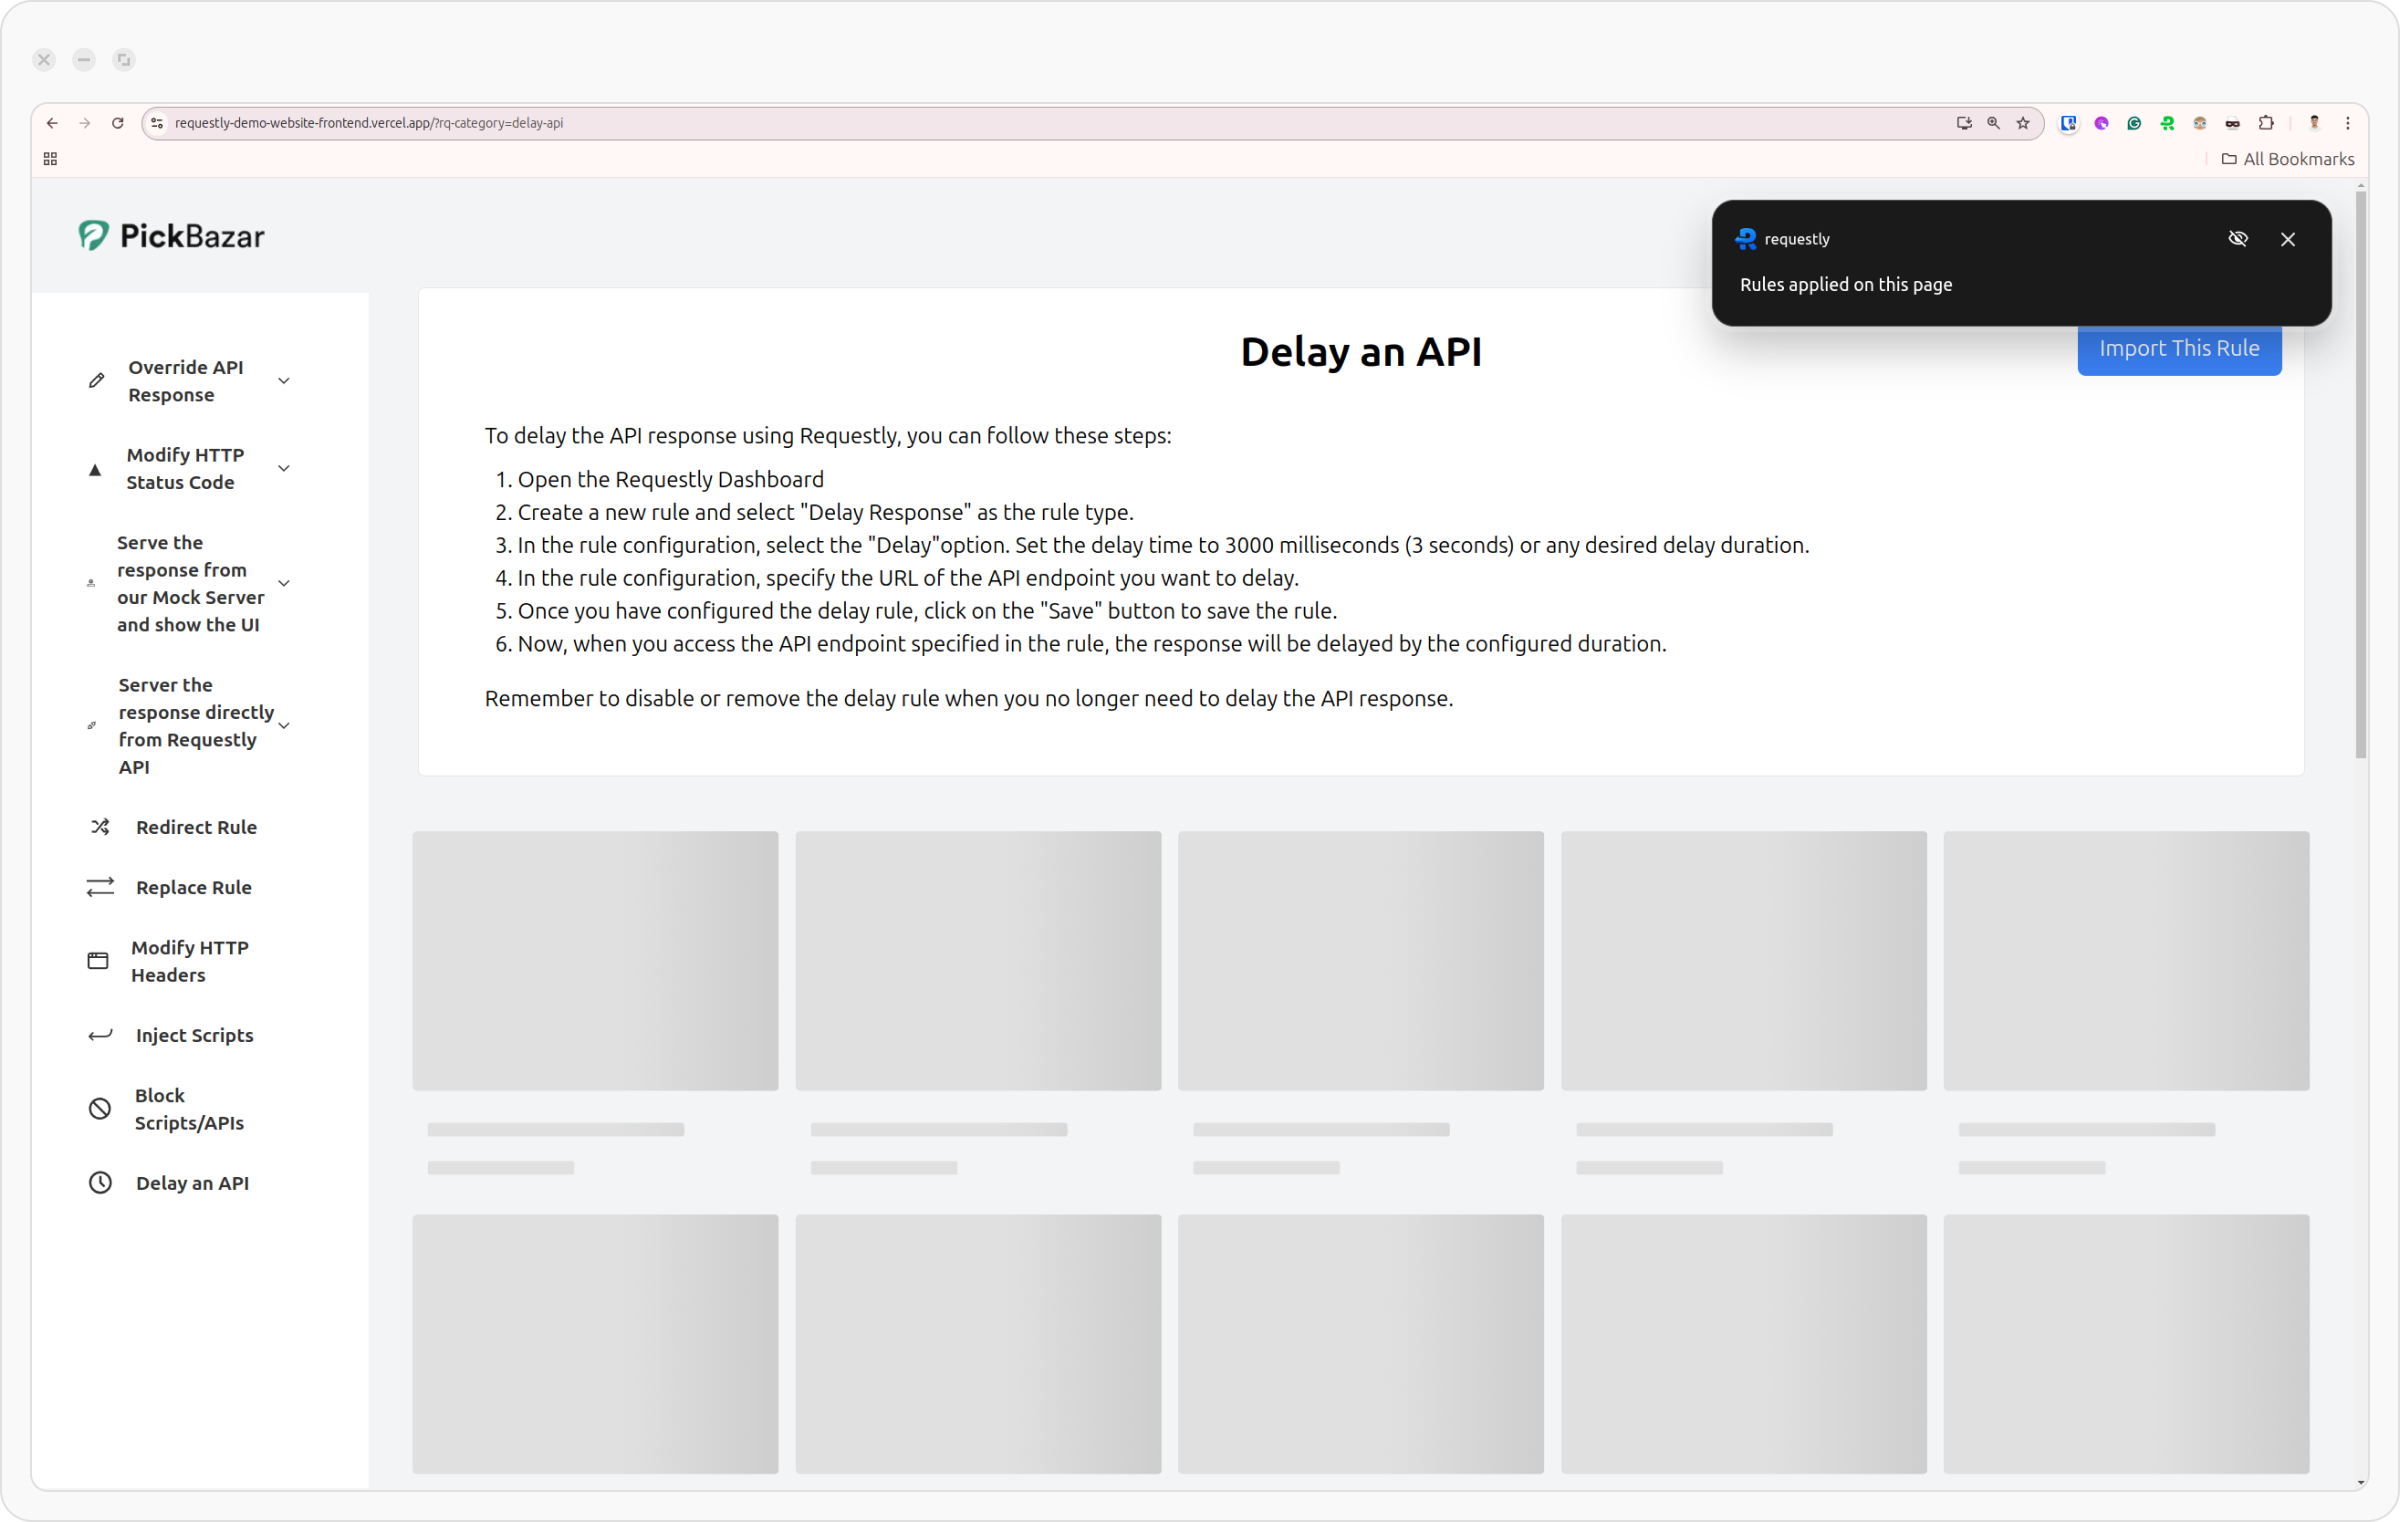
This will open the webpage in a new tab, with a widget showing the status of applier rules.